使用BP拦截POST型请求包
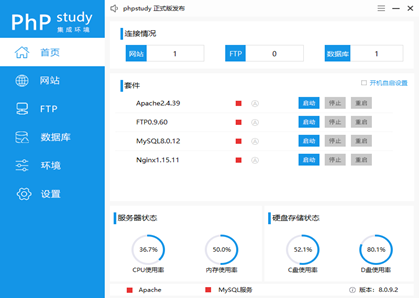
一、安装phpstudy
https://www.xp.cn/download.html

二、安装wordpress
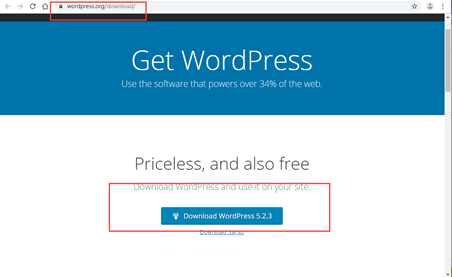
Step1:下载wordpress源码,https://wordpress.org/download/
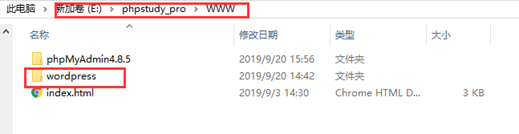
Step2:将源码解压到安装位置phpstudy_proWWW
Step3:启动phpstudy中的apache和MySQL

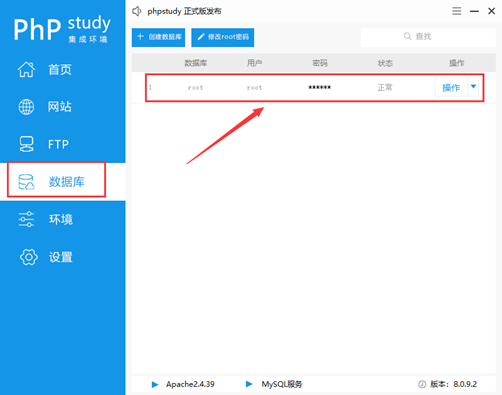
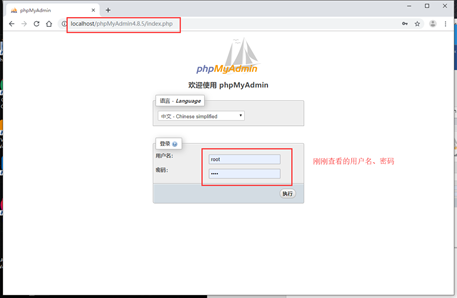
Step4:查看自己MySQL数据库的用户名与密码
Step5:打开浏览器访问localhost/phpMyAdmin,点击执行
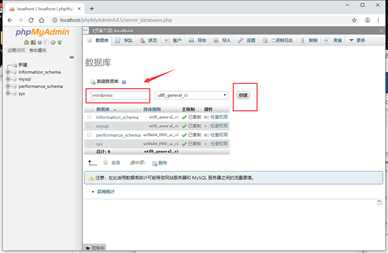
Step6:点击数据库,并新建一个数据库

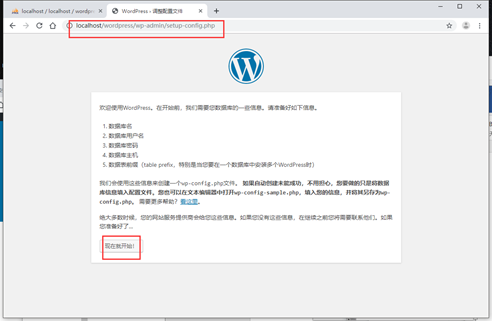
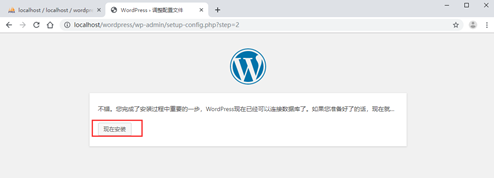
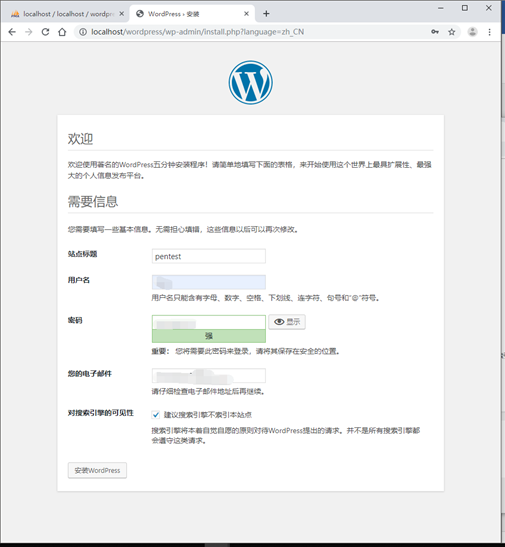
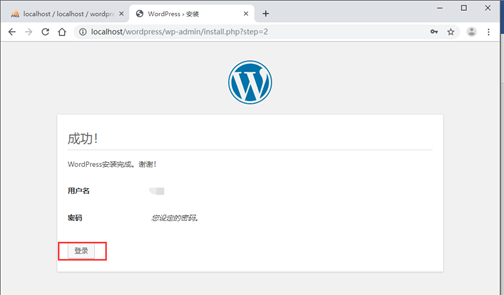
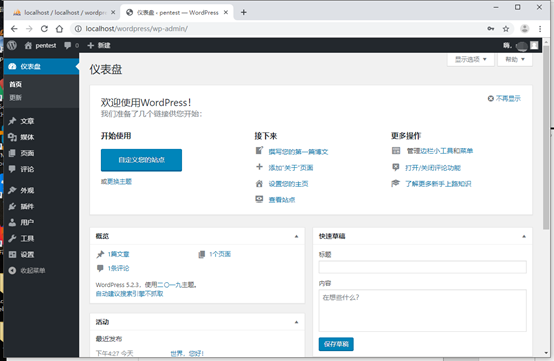
Step7:在浏览器中打开 localhost/wordpress

三、使用BP拦截POST型请求包
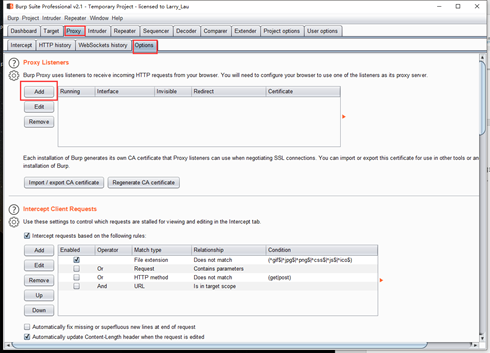
Step1:打开Burp Suite,在Proxy下的Options标签添加代理
Burp suite功能模块
Dashboard:扫描
Proxy:拦截包,代理
drop:放弃
Intruder:爆破
Decoder:编码,解码
repeater:重放
comparer:比较
BP,proxy项目,拦截响应包,BP要勾选intercept responses based on the following rules:
intercept client requests,拦截请求
intercept clent responses,拦截响应

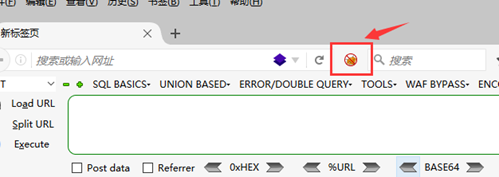
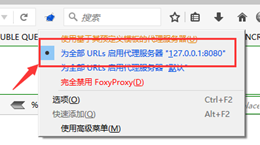
Step2:打开Firefox渗透便携版右击下图按钮
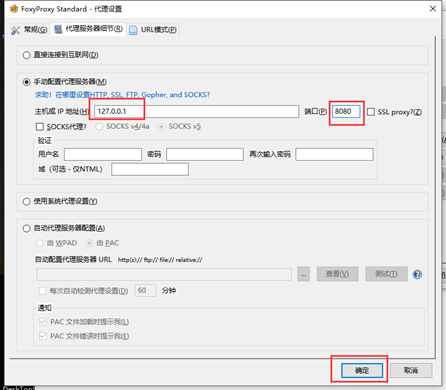
点击选项,新建代理服务器,填写主机和端口,如下图,点击确定
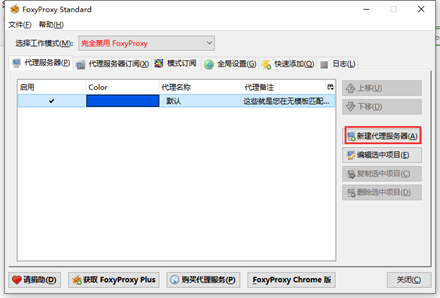
点击选择新建的代理
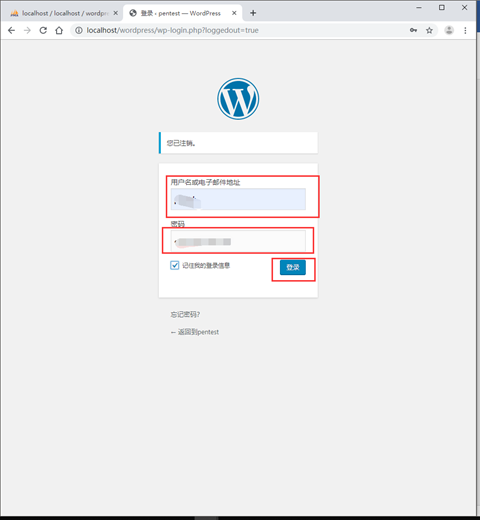
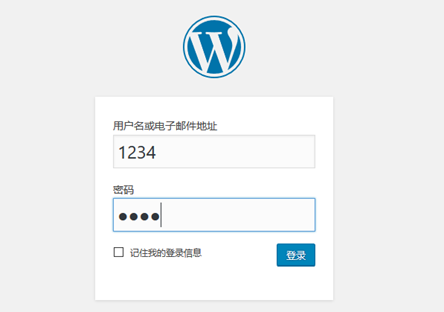
Step3:在浏览器地址栏输入wordpress的地址,localhost/wordpress进入登录界面。

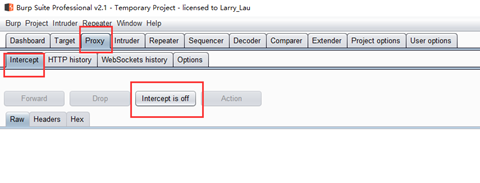
Step3:点击Burp Suite中Proxy下的Intercept的Intercept is off按钮。
Step4:在wordpress登录页中输入数据,点击登录
Step5:查看Burp Suite拦截的数据。
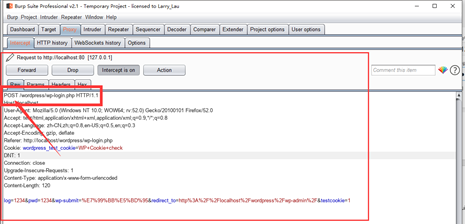
至此,查看到Burp Suite拦截到POST型请求包。