1、SpringBoot和SpringMVC的关系
SpringBoot是SpringMVC的升级版,两者没有必然的联系
2、特点
简化配置
下一代框架
入门级微框架
微服务——SpringCloud——SpringBoot
(添加Spring-Boot使用外部tomcat容器运行)
注意:Spring-Boot运行主要运行main()主函数
如果需要在外部tomcat中运行Spring-Boot项目,只需要执行两步:
1、排除内置容器(在pom.xml中加入下列代码)
        <!-- spring-boot web -->
        <dependency>
            <groupId>org.springframework.boot</groupId>
            <artifactId>spring-boot-starter-web</artifactId>
            <!-- 排除内置容器,排除内置容器导出成war包可以让外部容器运行spring-boot项目-->
            <exclusions>
                <exclusion>
                    <groupId>org.springframework.boot</groupId>
                    <artifactId>spring-boot-starter-tomcat</artifactId>
                </exclusion>
            </exclusions>

        </dependency>
2、在Spring-Boot入口实现SpringBootServletInitializer接口的configure方法
        /**
         * 实现SpringBootServletInitializer可以让spring-boot项目在web容器中运行
         */
        @Override
        protected SpringApplicationBuilder configure(SpringApplicationBuilder builder) {
            builder.sources(this.getClass());
            return super.configure(builder);
        }
此时才可以正式导出成war到其他外部容器运行(注意:<packaging>war</packaging>中的包类型)
3、使用IDEA编写第一个项目
首先确定maven、java版本要能保持一致
①、Create New Project
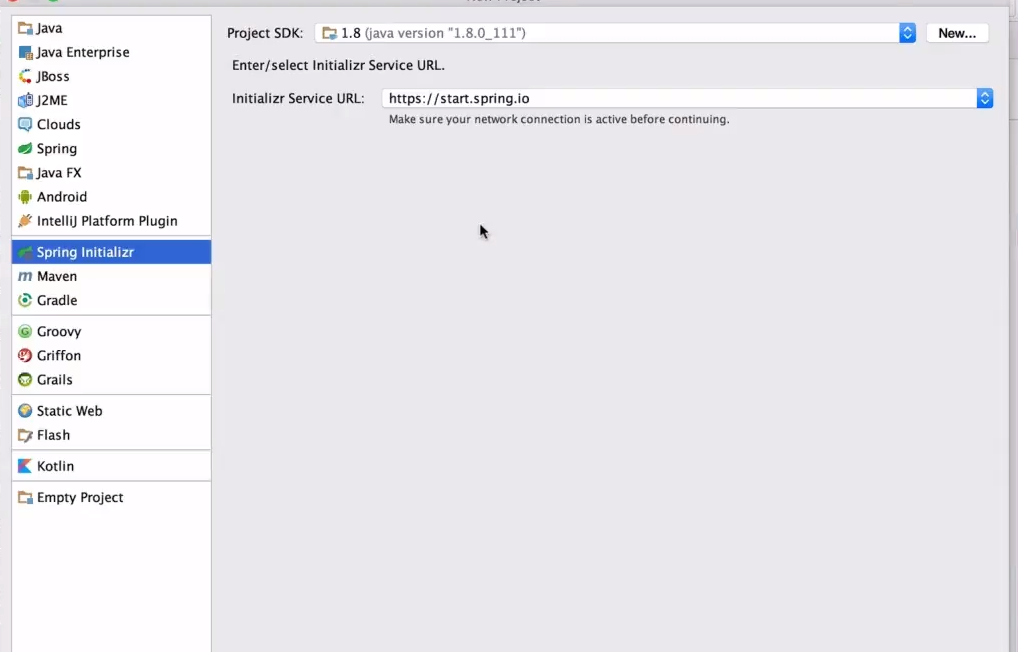
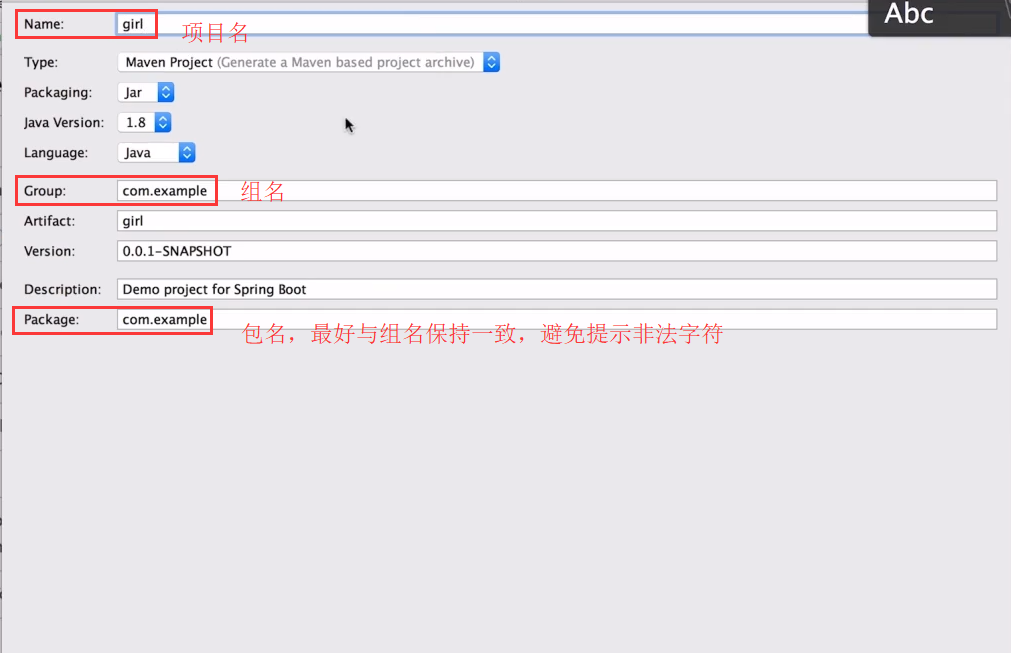
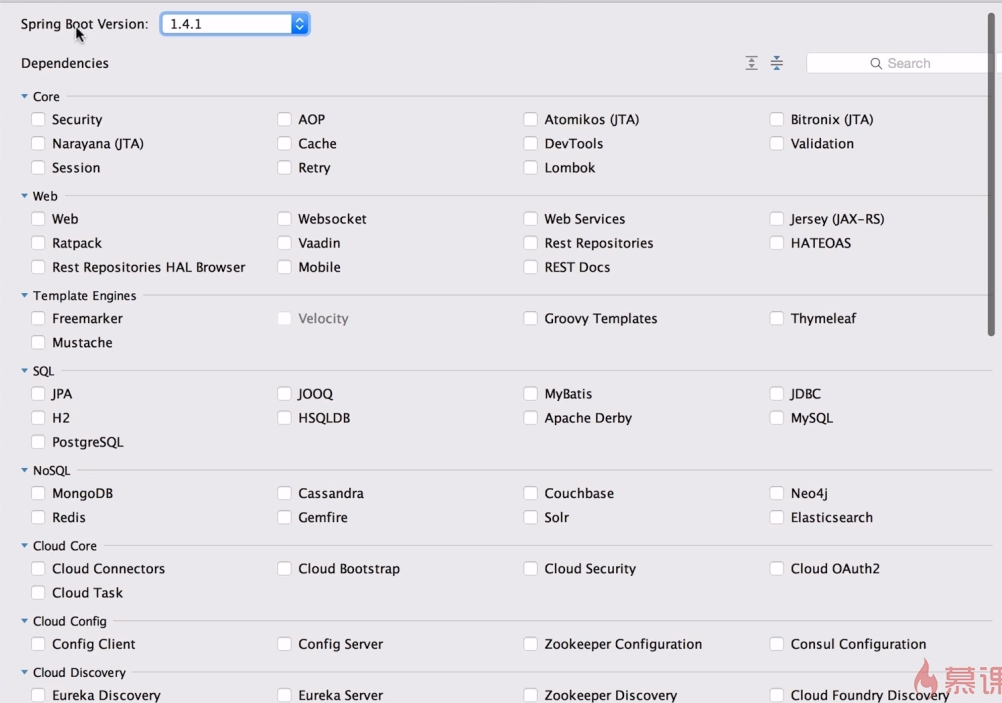
②、SpringBoot的各种组件————保持SpringBoot的version,以及选择其中的各种组件(小项目只需要勾选web--web)
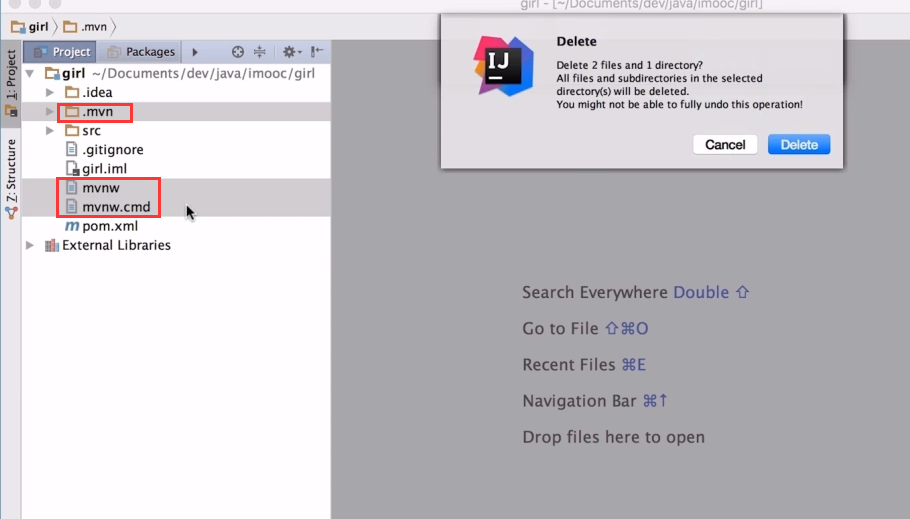
③、填写项目保存路径,删除项目中的三个文件(第一次下载jar会很慢,推荐使用阿里云的maven镜像,去查询本地的setting文件)
④、查看pom.xml文件的配置
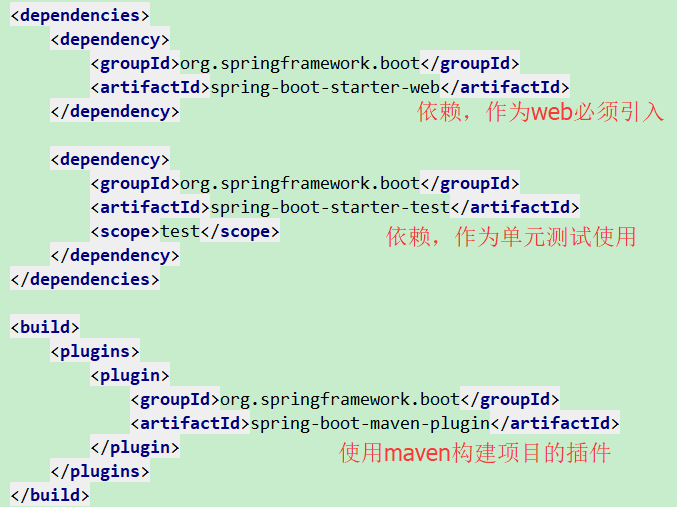
⑤、查看源码

使用@SpringBootApplication注解通过jar包启动
还可以实现configure()方法来使用war包启动项目
public class BaseApplication extends SpringBootServletInitializer {
    //部署到外部tomcat
    // 继承 SpringBootServletInitializer 类并实现 configure 方法,使用 config 的 sources 方法可以通过WAR启动项目
    @Override
    protected SpringApplicationBuilder configure(SpringApplicationBuilder config) {
        return config.sources(BaseApplication.class);
    }

    // 在拥有 @SpringBootApplication 注解的类中,使用 SpringApplication 的 run 方法可以通过JAR启动项目
    public static void main(String[] args) {
        SpringApplication.run(BaseApplication.class, args);
    }
}
⑥、run上面的main方法,发现127.0.0.1:8080没有任何页面,所以需要新建Controller,使用@RestController注解

重启之后,重新访问

当然也可以使用命令行方式启动项目(具体操作去查询)
4、属性配置
打开application.properties文件,配置简单的项目属性
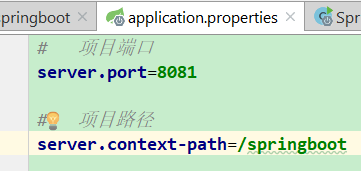
此时访问localhost:8081/springboot/springboot才能访问
最好是使用.yml格式配置(不使用默认的properties文件)

同时也可以把配置写到一个类中分组,避免在.yml文件中写入过多配置
当需要使用配置文件中的属性时,可以使用@ConfigurationProperties注解绑定bean,对应的是配置文件中的"spring.datasource.druid.his"属性组,具体用法可以参考@ConfigurationProperties注解
    //  绑定注解,bena名称为hisDataSource
    @Primary
    @Bean(name = "hisDataSource")
    @ConfigurationProperties("spring.datasource.druid.his")
    public DataSource primaryDataSource() {
        return DataSourceBuilder.create().build();
    }

    //  使用@Qualifier注解调用创建的DataSource
    @Bean(name = "hisJdbcTemplate")
    public JdbcTemplate primaryJdbcTemplate(
            @Qualifier("hisDataSource") DataSource dataSource) {
        return new JdbcTemplate(dataSource);
    }

    //  调用JdbcTemplate使用
    @Autowired
    @Qualifier("hisJdbcTemplate")
    private JdbcTemplate jdbcTemplate;
用@Qualifier来自动装配注入,虽然可以使用@Autowired和@Resource来实现自动注入bean,但是加上@Qualifier描述更精细
@Qualifiel("Asion")
@Component
public  class  Asion{
}

//  调用
public class Controller{
    @Qualifiel("Asion")
    @Autowired
    private  Asion  asion;
}
5、Controller注解使用


重点讲解:
@RestController是一个组合注解,等同于@ResponseBody配合@Controller返回json
如果要从@RestController改为@Controller,则需要Spring官方的模板依赖(在pom.xml中配置)

在Controller中返回页面路径(return "index";)
@RequestMapping(value = {"/hello", "/hi"}, method = RequestMethod.Get) —— 集合路径
@RequestParam(value = "id", required = false, defaultValue = "0") —— 默认值
@GetMapping(value = "/hello")
@PostMapping(value = "/hello")
6、数据库——添加两个组件
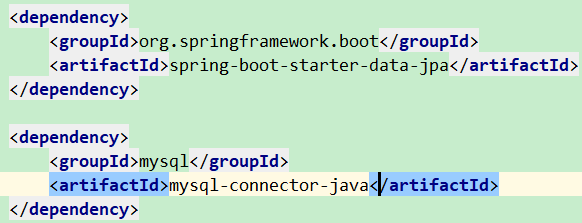
然后在配置文件中配置数据库驱动、数据库url、用户名、密码
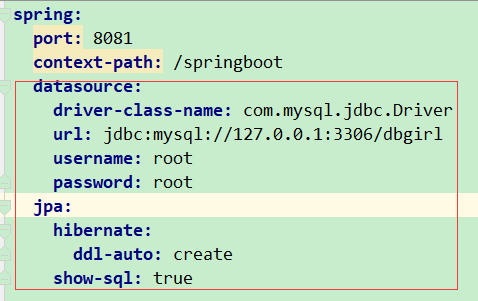
ddl-auto: create 表示每次运行程序都会创建一个空的表(最好是修改成update,第一次运行会创建表结构,但是如果有数据会保留下来)
show-sql:true 表示打印sql语句
创建数据库,最后创建实体类,注解@Entity表示对应数据库中的表
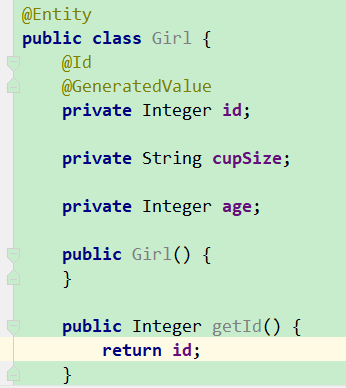
然后运行之后就可以看到数据库中已经新建好表及对应字段了
实现:
SpringBoot-Jpa操作数据库特别简单,不用写一句sql
①、新建一个接口,继承JpaRepository
![]()
②、Controller中@Autowired接口
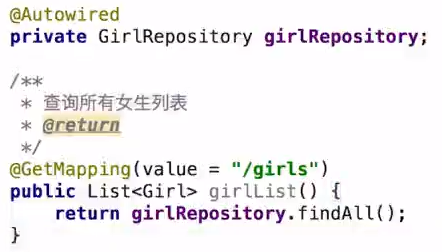
③、使用其中自带的方法查询数据
④、如果自带的方法中没有满足查询条件的方法,可以在GirlRepository接口中扩展,需要注意的是,方法名称必须按照格式来写,才能查询

7、事务管理
在Service中新建方法,同时插入两条数据,因为Spring的事务管理配置在Service层
8、同时启动两个端口不同的相同Spring-Boot微服务项目(以IDEA为例子)
①、打开Edit Config

②、去掉Single instance only(单实例),确定

③、修改application.properties或者application.yml文件中的端口号(不重复)
如果修改application.yml中端口不管用,默认一直使用8080端口启动,请查看自己的.yml文件中配置的格式,是否漏掉空格(":"后是有空格的)
④、启动run入口,即可访问两个地址
—————————————————————————————————————————————————————————————————————————————————
SpringMVC的数据绑定
1、绑定基本类型
比如:int和Integer,最好使用Integer包装类型,可以不传值
2、绑定同属性的多对象
使用@InitBinder注解方法,给对象指定前缀过滤
3、Json、XML数据绑定
。。。。
4、SpringBoot的AOP切面编程
默认SpringBoot的pom.xml中引入了aop依赖包
@Aspect注解 // 定义切面
例子:(自定义注解,SysLog系统日志)
①、创建自定义注解 @interface 参考另一文章
②、创建切面类
@Aspect
@Component
public class SysLogAspect {

    @Pointcut("@annotation(com.gtrj.common.annotation.SysLog)")
    public void logPointCut() {

    }

    @Before("logPointCut()")
    public void beforeAdviceAnnotation(){
        System.out.println("- - - - - 前置通知 annotation - - - - -");
    }

    @Around("annotation(SysLog)")
    public Object around(ProceedingJoinPoint point , SysLog syslog) throws Throwable {
        System.out.println("- - - - - 环绕通知 annotation - - - -");
        //获取注解里的值
        System.out.println("注解的值:" + syslog.value());
        try {//obj之前可以写目标方法执行前的逻辑
            Object obj = proceedingJoinPoint.proceed();//调用执行目标方法
            System.out.println("- - - - - 环绕通知 annotation end - - - -");
            return obj;
        } catch (Throwable throwable) {
            throwable.printStackTrace();
        }
        return null;

    }
}
③、根据自定义注解的范围使用注解,赋值,即可执行此方法(可在执行完成后存储值到数据库)