前言
开心一刻
快过年了,大街上,爷爷在给孙子示范摔炮怎么放,嘴里还不停念叨:要像这样,用劲甩才能响。示范了一个,两个,三个... 孙子终于忍不住了,抱着爷爷的腿哭起来:爷呀,你给我剩个吧!

新的一年祝大家:健健康康,快快乐乐!
github:https://github.com/youzhibing
码云(gitee):https://gitee.com/youzhibing
前情回顾与问题
spring-boot-2.0.3之quartz集成,不是你想的那样哦! 讲到了quartz的基本概念,以及springboot与quartz的集成;集成非常简单,引入相关依赖即可,此时我们job存储方式采用的是jdbc。
spring-boot-2.0.3之quartz集成,数据源问题,源码探究 讲到了quartz的数据源问题,如果我们没有@QuartzDataSource修饰的数据源,那么默认情况下就是我们的工程数据源,springboot会将工程数据源设置给quartz;为什么需要数据源,因为我们的job不会空跑,往往会进行数据库的操作,那么就会用到数据库连接,而获取数据库连接最常用的的方式就是从数据源获取。
后续使用过程中,发现了一些问题:
1、spring注入,job到底能不能注入到spring容器,job中能不能自动注入我们的mapper(spring的autowired);
2、job存储方式,到底用JDBC还是MEMORY,最佳实践是什么
3、调度失准,没有严格按照我们的cron配置进行
spring注入
spring-boot-2.0.3之quartz集成,数据源问题,源码探究中我还分析的井井有条,并很自信的得出结论:job不能注入到spring,也不能享受spring的自动注入

那时候采用的是从quartz数据源中获取connection,然后进行jdbc编程,发现jdbc用起来真的不舒服(不是说有问题,mybatis、spring jdbcTemplate等底层也是jdbc),此时我就有了一个疑问:quartz job真的不能注入到spring、不能享受spring的自动注入吗? 结论可想而知:能!

打的真疼
job能不能注入到spring容器? 答案是可以的(各种注解:@Compoment、@Service、@Repository等),只是我们将job注入到spring容器有意义吗? 我们知道quartz是通过反射来实例化job的(具体实例化过程请往下看),与spring中已存在的job bean没有任何关联,我们将job注入到spring也只是使spring中多了一个没调用者的bean而已,没有任何意义。这个问题应该换个方式来问:job有必要注入到spring容器中吗? 很显然没必要。
job中能不能注入spring中的常规bean了? 答案是可以的。我们先来看下springboot官网是如何描述的:job可以定义setter来注入data map属性,也可以以类似的方式注入常规bean,如下所示


public class SampleJob extends QuartzJobBean {

    private MyService myService;

    private String name;

    // Inject "MyService" bean (注入spring 常规bean)
    public void setMyService(MyService myService) { ... }

    // Inject the "name" job data property (注入job data 属性)
    public void setName(String name) { ... }

    @Override
    protected void executeInternal(JobExecutionContext context)
            throws JobExecutionException {
        ...
    }

}

实现
pom.xml
<?xml version="1.0" encoding="UTF-8"?>
<project xmlns="http://maven.apache.org/POM/4.0.0"
         xmlns:xsi="http://www.w3.org/2001/XMLSchema-instance"
         xsi:schemaLocation="http://maven.apache.org/POM/4.0.0 http://maven.apache.org/xsd/maven-4.0.0.xsd">
    <modelVersion>4.0.0</modelVersion>

    <groupId>com.lee</groupId>
    <artifactId>spring-boot-quartz</artifactId>
    <version>1.0-SNAPSHOT</version>

    <properties>
        <java.version>1.8</java.version>
        <maven.compiler.source>1.8</maven.compiler.source>
        <maven.compiler.target>1.8</maven.compiler.target>
        <druid.version>1.1.10</druid.version>
        <pagehelper.version>1.2.5</pagehelper.version>
        <druid.version>1.1.10</druid.version>
    </properties>

    <parent>
        <groupId>org.springframework.boot</groupId>
        <artifactId>spring-boot-starter-parent</artifactId>
        <version>2.0.3.RELEASE</version>
    </parent>

    <dependencies>
        <dependency>
            <groupId>org.springframework.boot</groupId>
            <artifactId>spring-boot-starter-web</artifactId>
        </dependency>
        <dependency>
            <groupId>org.springframework.boot</groupId>
            <artifactId>spring-boot-starter-thymeleaf</artifactId>
        </dependency>

        <dependency>
            <groupId>org.springframework.boot</groupId>
            <artifactId>spring-boot-starter-quartz</artifactId>
        </dependency>

        <dependency>
            <groupId>com.alibaba</groupId>
            <artifactId>druid-spring-boot-starter</artifactId>
            <version>${druid.version}</version>
        </dependency>
        <dependency>
            <groupId>mysql</groupId>
            <artifactId>mysql-connector-java</artifactId>
        </dependency>
        <dependency>
            <groupId>com.github.pagehelper</groupId>
            <artifactId>pagehelper-spring-boot-starter</artifactId>
            <version>${pagehelper.version}</version>
        </dependency>

        <!-- 日志 -->
        <dependency>
            <groupId>org.springframework.boot</groupId>
            <artifactId>spring-boot-starter-logging</artifactId>
            <exclusions>            <!-- 排除spring-boot-starter-logging中的全部依赖 -->
                <exclusion>
                    <groupId>*</groupId>
                    <artifactId>*</artifactId>
                </exclusion>
            </exclusions>
            <scope>test</scope>     <!-- 打包的时候不打spring-boot-starter-logging.jar -->
        </dependency>
        <dependency>
            <groupId>ch.qos.logback</groupId>
            <artifactId>logback-classic</artifactId>
        </dependency>

        <dependency>
            <groupId>org.projectlombok</groupId>
            <artifactId>lombok</artifactId>
            <optional>true</optional>
        </dependency>
    </dependencies>

    <build>
        <finalName>spring-boot-quartz</finalName>
        <plugins>
            <!-- 打包项目 mvn clean package -->
            <plugin>
                <groupId>org.springframework.boot</groupId>
                <artifactId>spring-boot-maven-plugin</artifactId>
            </plugin>
        </plugins>
    </build>
</project>
application.yml
server:
  port: 9001
  servlet:
    context-path: /quartz
spring:
  thymeleaf:
    mode: HTML
    cache: false
  #连接池配置
  datasource:
    type: com.alibaba.druid.pool.DruidDataSource
    name: ownDataSource
    druid:
      driver-class-name: com.mysql.jdbc.Driver
      url: jdbc:mysql://localhost:3306/spring-boot-quartz?useSSL=false&useUnicode=true
      username: root
      password: 123456
      initial-size: 1                     #连接池初始大小
      max-active: 20                      #连接池中最大的活跃连接数
      min-idle: 1                         #连接池中最小的活跃连接数
      max-wait: 60000                     #配置获取连接等待超时的时间
      pool-prepared-statements: true    #打开PSCache,并且指定每个连接上PSCache的大小
      max-pool-prepared-statement-per-connection-size: 20
      validation-query: SELECT 1 FROM DUAL
      validation-query-timeout: 30000
      test-on-borrow: false             #是否在获得连接后检测其可用性
      test-on-return: false             #是否在连接放回连接池后检测其可用性
      test-while-idle: true             #是否在连接空闲一段时间后检测其可用性
  quartz:
    #相关属性配置
    properties:
      org:
        quartz:
          scheduler:
            instanceName: quartzScheduler
            instanceId: AUTO
          threadPool:
            class: org.quartz.simpl.SimpleThreadPool
            threadCount: 10
            threadPriority: 5
            threadsInheritContextClassLoaderOfInitializingThread: true
#mybatis配置
mybatis:
  type-aliases-package: com.lee.quartz.entity
  mapper-locations: classpath:mybatis/mapper/*.xml
#分页配置, pageHelper是物理分页插件
pagehelper:
  #4.0.0以后版本可以不设置该参数,该示例中是5.1.4
  helper-dialect: mysql
  #启用合理化,如果pageNum<1会查询第一页,如果pageNum>pages会查询最后一页
  reasonable: true
logging:
  level:
    com.lee.quartz.mapper: debug
FetchDataJob.java
package com.lee.quartz.job;

import com.lee.quartz.entity.User;
import com.lee.quartz.mapper.UserMapper;
import org.quartz.JobExecutionContext;
import org.quartz.JobExecutionException;
import org.slf4j.Logger;
import org.slf4j.LoggerFactory;
import org.springframework.beans.factory.annotation.Autowired;
import org.springframework.scheduling.quartz.QuartzJobBean;

import java.util.Random;
import java.util.stream.IntStream;

public class FetchDataJob extends QuartzJobBean {

    private static final Logger LOGGER = LoggerFactory.getLogger(FetchDataJob.class);

    @Autowired
    private UserMapper userMapper;

    @Override
    protected void executeInternal(JobExecutionContext context) throws JobExecutionException {

        // TODO 业务处理

        Random random = new Random();
        IntStream intStream = random.ints(18, 100);
        int first = intStream.limit(1).findFirst().getAsInt();
        int count = userMapper.saveUser(new User("zhangsan" + first, first));
        if (count == 0) {
            LOGGER.error("用户保存失败!");
            return;
        }
        LOGGER.info("用户保存成功");
    }
}
如上,FetchDataJob中是可以注入userMapper的,完整代码请看:spring-boot-quartz-plus
job实例化过程源码解析
还记得SchedulerFactoryBean的创建吗,可以看看这里,我们从SchedulerFactoryBean开始
QuartzSchedulerThread线程的启动
QuartzSchedulerThread声明如下
View Code负责触发QuartzScheduler注册的Triggers,可以理解成quartz的主线程(守护线程)。我们从SchedulerFactoryBean的afterPropertiesSet()开始

QuartzSchedulerThread继承了Thread,通过DefaultThreadExecutor的execute()启动了QuartzSchedulerThread线程
jobFactory的创建与替换

AutowireCapableBeanJobFactory实例后续会赋值给quartz,作为quartz job的工厂,具体在哪赋值给quartz的了,我们往下看
当quartz scheduler创建完成后,将scheduler的jobFactory替换成了AutowireCapableBeanJobFactory。
job的创建与执行
QuartzSchedulerThread在上面已经启动了,AutowireCapableBeanJobFactory也已经赋值给了scheduler;我们来看看QuartzSchedulerThread的run(),里面有job的创建与执行
最终会调用AutowireCapableBeanJobFactory的createJobInstance方法,通过反射创建了job实例,还向job实例中填充了job data map属性和spring常规bean。具体this.beanFactory.autowireBean(jobInstance);是如何向job实例填充spring常规bean的,需要大家自己去跟了。job被封装成了JobRunShell(实现了Runnable),然后从线程池中取第一个线程来执行JobRunShell,最终会执行到FetchDataJob的executeInternal,处理我们的业务;quartz的线程实现与线程机制,有兴趣的小伙伴自行去看。
小结下:先启动QuartzSchedulerThrea线程,然后将quartz的jobFactory替换成AutowireCapableBeanJobFactory;QuartzSchedulerThread是一个守护线程,会按规则处理trigger和job(要成对存在),最终完成我们的定时业务。
job存储方式
JobStore是负责跟踪调度器(scheduler)中所有的工作数据:作业任务、触发器、日历等。我们无需在我们的代码中直接使用JobStore实例,只需要通过配置信息告知Quartz该用哪个JobStore即可。quartz的JobStore有两种:RAMJobStore、JDBCJobStore,通过名字我们也能猜到这两者之间的区别与优缺点

上述两种JobStore对应到springboot就是:MEMORY、JDBC
/*
 * Copyright 2012-2017 the original author or authors.
 *
 * Licensed under the Apache License, Version 2.0 (the "License");
 * you may not use this file except in compliance with the License.
 * You may obtain a copy of the License at
 *
 *      http://www.apache.org/licenses/LICENSE-2.0
 *
 * Unless required by applicable law or agreed to in writing, software
 * distributed under the License is distributed on an "AS IS" BASIS,
 * WITHOUT WARRANTIES OR CONDITIONS OF ANY KIND, either express or implied.
 * See the License for the specific language governing permissions and
 * limitations under the License.
 */

package org.springframework.boot.autoconfigure.quartz;

/**
 * Define the supported Quartz {@code JobStore}.
 *
 * @author Stephane Nicoll
 * @since 2.0.0
 */
public enum JobStoreType {

    /**
     * Store jobs in memory.
     */
    MEMORY,

    /**
     * Store jobs in the database.
     */
    JDBC

}
至于选择哪种方式,就看哪种方式更契合我们的业务需求,没有绝对的选择谁与不选择谁,只看哪种更合适。据我的理解和工作中的应用,内存方式用的更多;实际应用中,我们往往只是持久化我们自定义的基础job(不是quartz的job)到数据库,应用启动的时候加载基础job到quartz中,进行quartz job的初始化,quartz的job相关信息全部存储在RAM中;一旦应用停止,quartz的job信息全部丢失,但这影响不大,可以通过我们的自定义job进行quartz job的恢复,但是恢复的quartz job是原始状态,如果需要实时保存quartz job的状态,那就需要另外设计或者用JDBC方式了。
调度失准
当存储方式是JDBCJobStore时,会出现调度失准的情况,没有严格按照配置的cron表达式执行,例如cron表达式:1 */1 * * * ?,日志输入如下

秒数会有不对,但这影响比较小,我们还能接受,可是时间间隔有时候却由1分钟变成2分钟,甚至3分钟,这个就有点接受不了。具体原因我还没有查明,个人觉得可能和数据库持久化有关。
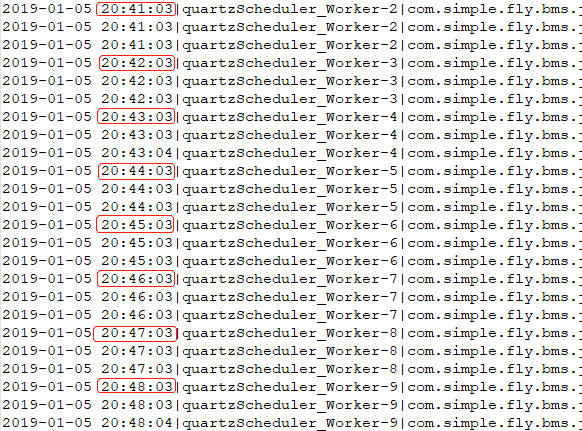
当存储方式是RAMJobStore时,调度很准,还未发现调度失准的情况,cron表达式:3 */1 * * * ?,日志输入如下
总结
1、quartz job无需注入到spring容器中(注入进去了也没用),但quartz job中是可以注入spring容器中的常规bean的,当然还可以注入jab data map中的属性值;
2、 springboot覆写了quartz的jobFactory,使得quartz在调用jobFactory创建job实例的时候,能够将spring容器的bean注入到job中,AutowireCapableBeanJobFactory中createJobInstance方法如下
@Override
protected Object createJobInstance(TriggerFiredBundle bundle) throws Exception {
    Object jobInstance = super.createJobInstance(bundle);    // 通过反射实例化job,并将JobDataMap中属性注入到job实例中
    this.beanFactory.autowireBean(jobInstance);                // 注入job依赖的spring中的bean
    this.beanFactory.initializeBean(jobInstance, null);
    return jobInstance;
}
3、最佳实践
JobStore选择RAMJobStore;持久化我们自定义的job,应用启动的时候将我们自定义的job都加载给quartz,初始化quartz job;quartz job状态改变的时候,分析清楚是否需要同步到我们自定义的job中,有则同步改变自定义job状态。