之前我在这篇文章VsCode插件开发之插件初步通信
通过插件完成通信,这回我还是通过插件,只不过方式主要以在ts文件里面使用webview来进行通信。
另外在此声明,一定要好好看仔细看官方文档,国内关于VsCode相关的开发,少之又少,虽然有一个叫小茗同学写的相对较全面,但是大家可以仔细看,其实他的内容大多也来自官方,同时有部分也加上自己的理解和想法。个人建议,关于VsCode插件相关的,最好是跑一跑VsCode相关官方例子,这样有助于对VsCode插件开发有一个大致的思路和全局认识,换言之有一个感性的认识。
官方文档地址:https://code.visualstudio.com/api
官方插件例子:https://github.com/Microsoft/vscode-extension-samples
引用官方的说明:
webview API允许扩展在Visual Studio Code中创建完全可自定义的视图。例如,内置的Markdown扩展程序使用Web视图来呈现Markdown预览。Web视图还可用于构建复杂的用户界面,超出VsCode的本机API支持。
将webview视为iframe扩展程序控制的Vs代码内部。webview几乎可以呈现此框架中的任何HTML内容,并使用消息传递与扩展进行通信。这种自由使得webview非常强大,并开辟了一系列全新的扩展可能性。
官方对于是否应该使用webview需要考虑这么几个方面?
第一,这个功能真的需要存在于VsCode中吗?作为单独的APP或者网站是否会更好?
第二,webview是实现功能的唯一方法吗?可以使用常规 Vs Code API吗?
第三,webview会增加足够的用户价值来证明其高资源成本吗?
在我看来,如果是在VsCode内部进行增加webview,可能导致某种混乱或者不利的影响,还不如直接通过插件开发来进行分离完成功能,这样既解耦又对VsCode本身影响不会太大。
官方的Demo:https://github.com/Microsoft/vscode-extension-samples/blob/master/webview-sample
官方讲解:https://code.visualstudio.com/api/extension-guides/webview
上面我说过跑官方的例子有助于更好的认识,同时对于学习信心的提升也有很大的帮助,同时你可以在此基础上改,从而让你对其认识更加深刻。
项目结构(以项目结构中的组成来讲解)

目录的作用分别如下:
.vscode 运行所必须,同时也包括一些用户区和工作区设置(注意,用户区设置优于工作区设置)
node_modules node.js的依赖库
out 编译输出目录(ts编译成功会输出对应的js)
src 源文件所在目录(主要是ts文件,当然了也可能是ts,就看你插件开发时,选择的是js还是ts)
.gitignore git提交时排除一些无关紧要的(java maven项目对于一些target文件中.class是没必要提交到git仓库的)
.vscodeignore
如图所示:
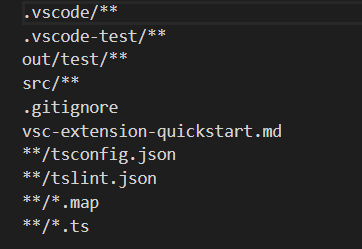
我觉得它的作用和.gitignore是一样的,之所以存在它,是因为要防止.gitignore不生效的缘故吧(以之前项目开发经历来说,有的时候确实存在.gitignore无效问题)。
当然了,这些源于我个人的看法,github上有关于这个的讨论,感兴趣的可以参考:https://github.com/Microsoft/vscode-vsce/issues/12
有不少外国开发者们在这里提自己的看法。
package-lock.json 通过这个是执行npm install 产生的 package-lock.json顾名思义,主要的作用是锁定安装依赖的版本,保持版本一致性。
package.json 从node.js的角度来说它是一个模块描述文件(包含安装模块所需的依赖声明及其版本号、作者名、描述等。
以小茗同学的package.json来讲解,这个文件里面的内容作用分别为如下(大家可以做一个参考,实际情况根据需求而定):
{
    // 插件的名字,应全部小写,不能有空格
    "name": "vscode-plugin-demo",
    // 插件的友好显示名称,用于显示在应用市场,支持中文
    "displayName": "VSCode插件demo",
    // 描述
    "description": "VSCode插件demo集锦",
    // 关键字,用于应用市场搜索
    "keywords": ["vscode", "plugin", "demo"],
    // 版本号
    "version": "1.0.0",
    // 发布者,如果要发布到应用市场的话,这个名字必须与发布者一致
    "publisher": "sxei",
    // 表示插件最低支持的vscode版本
    "engines": {
        "vscode": "^1.27.0"
    },
    // 插件应用市场分类,可选值: [Programming Languages, Snippets, Linters, Themes, Debuggers, Formatters, Keymaps, SCM Providers, Other, Extension Packs, Language Packs]
    "categories": [
        "Other"
    ],
    // 插件图标,至少128x128像素
    "icon": "images/icon.png",
    // 扩展的激活事件数组,可以被哪些事件激活扩展,后文有详细介绍
    "activationEvents": [
        "onCommand:extension.sayHello"
    ],
    // 插件的主入口
    "main": "./src/extension",
    // 贡献点,整个插件最重要最多的配置项
    "contributes": {
        // 插件配置项
        "configuration": {
            "type": "object",
            // 配置项标题,会显示在vscode的设置页
            "title": "vscode-plugin-demo",
            "properties": {
                // 这里我随便写了2个设置,配置你的昵称
                "vscodePluginDemo.yourName": {
                    "type": "string",
                    "default": "guest",
                    "description": "你的名字"
                },
                // 是否在启动时显示提示
                "vscodePluginDemo.showTip": {
                    "type": "boolean",
                    "default": true,
                    "description": "是否在每次启动时显示欢迎提示!"
                }
            }
        },
        // 命令
        "commands": [
            {
                "command": "extension.sayHello",
                "title": "Hello World"
            }
        ],
        // 快捷键绑定
        "keybindings": [
            {
                "command": "extension.sayHello",
                "key": "ctrl+f10",
                "mac": "cmd+f10",
                "when": "editorTextFocus"
            }
        ],
        // 菜单
        "menus": {
            // 编辑器右键菜单
            "editor/context": [
                {
                    // 表示只有编辑器具有焦点时才会在菜单中出现
                    "when": "editorFocus",
                    "command": "extension.sayHello",
                    // navigation是一个永远置顶的分组,后面的@6是人工进行组内排序
                    "group": "navigation@6"
                },
                {
                    "when": "editorFocus",
                    "command": "extension.demo.getCurrentFilePath",
                    "group": "navigation@5"
                },
                {
                    // 只有编辑器具有焦点,并且打开的是JS文件才会出现
                    "when": "editorFocus && resourceLangId == javascript",
                    "command": "extension.demo.testMenuShow",
                    "group": "z_commands"
                },
                {
                    "command": "extension.demo.openWebview",
                    "group": "navigation"
                }
            ],
            // 编辑器右上角图标,不配置图片就显示文字
            "editor/title": [
                {
                    "when": "editorFocus && resourceLangId == javascript",
                    "command": "extension.demo.testMenuShow",
                    "group": "navigation"
                }
            ],
            // 编辑器标题右键菜单
            "editor/title/context": [
                {
                    "when": "resourceLangId == javascript",
                    "command": "extension.demo.testMenuShow",
                    "group": "navigation"
                }
            ],
            // 资源管理器右键菜单
            "explorer/context": [
                {
                    "command": "extension.demo.getCurrentFilePath",
                    "group": "navigation"
                },
                {
                    "command": "extension.demo.openWebview",
                    "group": "navigation"
                }
            ]
        },
        // 代码片段
        "snippets": [
            {
                "language": "javascript",
                "path": "./snippets/javascript.json"
            },
            {
                "language": "html",
                "path": "./snippets/html.json"
            }
        ],
        // 自定义新的activitybar图标,也就是左侧侧边栏大的图标
        "viewsContainers": {
            "activitybar": [
                {
                    "id": "beautifulGirl",
                    "title": "美女",
                    "icon": "images/beautifulGirl.svg"
                }
            ]
        },
        // 自定义侧边栏内view的实现
        "views": {
            // 和 viewsContainers 的id对应
            "beautifulGirl": [
                {
                    "id": "beautifulGirl1",
                    "name": "国内美女"
                },
                {
                    "id": "beautifulGirl2",
                    "name": "国外美女"
                },
                {
                    "id": "beautifulGirl3",
                    "name": "人妖"
                }
            ]
        },
        // 图标主题
        "iconThemes": [
            {
                "id": "testIconTheme",
                "label": "测试图标主题",
                "path": "./theme/icon-theme.json"
            }
        ]
    },
    // 同 npm scripts
    "scripts": {
        "postinstall": "node ./node_modules/vscode/bin/install",
        "test": "node ./node_modules/vscode/bin/test"
    },
    // 开发依赖
    "devDependencies": {
        "typescript": "^2.6.1",
        "vscode": "^1.1.6",
        "eslint": "^4.11.0",
        "@types/node": "^7.0.43",
        "@types/mocha": "^2.2.42"
    },
    // 后面这几个应该不用介绍了
    "license": "SEE LICENSE IN LICENSE.txt",
    "bugs": {
        "url": "https://github.com/sxei/vscode-plugin-demo/issues"
    },
    "repository": {
        "type": "git",
        "url": "https://github.com/sxei/vscode-plugin-demo"
    },
    // 主页
    "homepage": "https://github.com/sxei/vscode-plugin-demo/blob/master/README.md"
}
目前我改写的官方demo的package.json文件为如下:
{
    "name": "helloworld",
    "displayName": "HelloWorld",
    "description": "",
    "version": "0.0.1",
    "engines": {
        "vscode": "^1.30.0"
    },
    "categories": [
        "Other"
    ],
    "activationEvents": [
        "onCommand:extension.helloWorld",
        "onCommand:extension.loginValidate"
    ],
    "main": "./out/loginValidate",
    "contributes": {
        "commands": [
            {
                "command": "extension.helloWorld",
                "title": "登录"
            },
            {
                "command": "extension.loginValidate",
                "title": "登录验证"
            }
        ]
    },
    "scripts": {
        "vscode:prepublish": "npm run compile",
        "compile": "tsc -p ./",
        "watch": "tsc -watch -p ./",
        "postinstall": "node ./node_modules/vscode/bin/install",
        "test": "npm run compile && node ./node_modules/vscode/bin/test"
    },
    "devDependencies": {
        "typescript": "^3.1.4",
        "vscode": "^1.1.25",
        "tslint": "^5.8.0",
        "@types/node": "^8.10.25",
        "@types/mocha": "^2.2.42"
    }
}
两者对比,后者更简单。
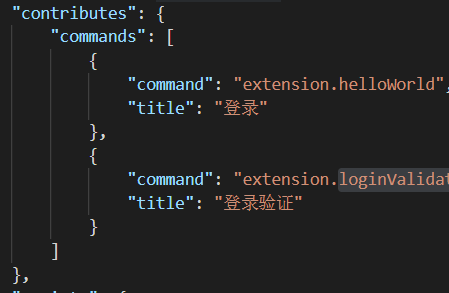
注意:其中我主要改写官方的这一部分
  "activationEvents": [
        "onCommand:extension.helloWorld",
        "onCommand:extension.loginValidate"
    ],
    "main": "./out/loginValidate",
    "contributes": {
        "commands": [
            {
                "command": "extension.helloWorld",
                "title": "登录"
            },
            {
                "command": "extension.loginValidate",
                "title": "登录验证"
            }
        ]
    },
这一部分分别对应extension.ts和loginValidate.ts,如下图所示:
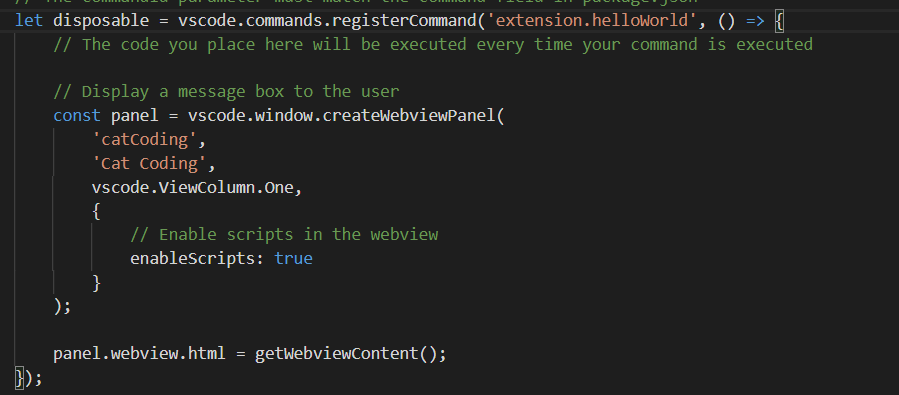
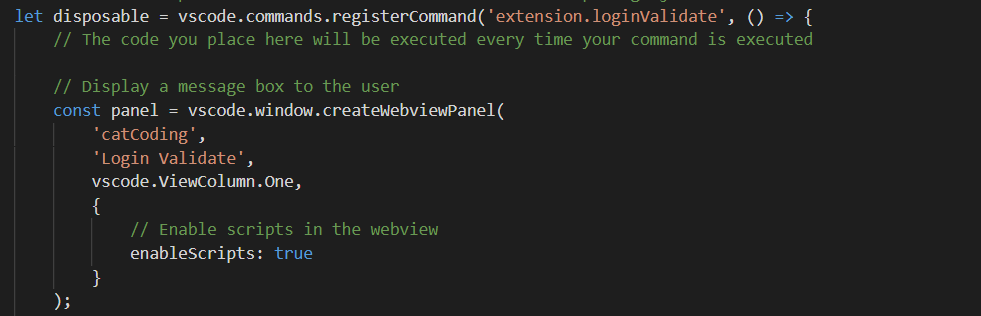
大家可以看到,其实两者区别并不大,主要的差异还是registerCommand括号里面的。
有朋友也行会疑惑这个是什么意思不太明白。
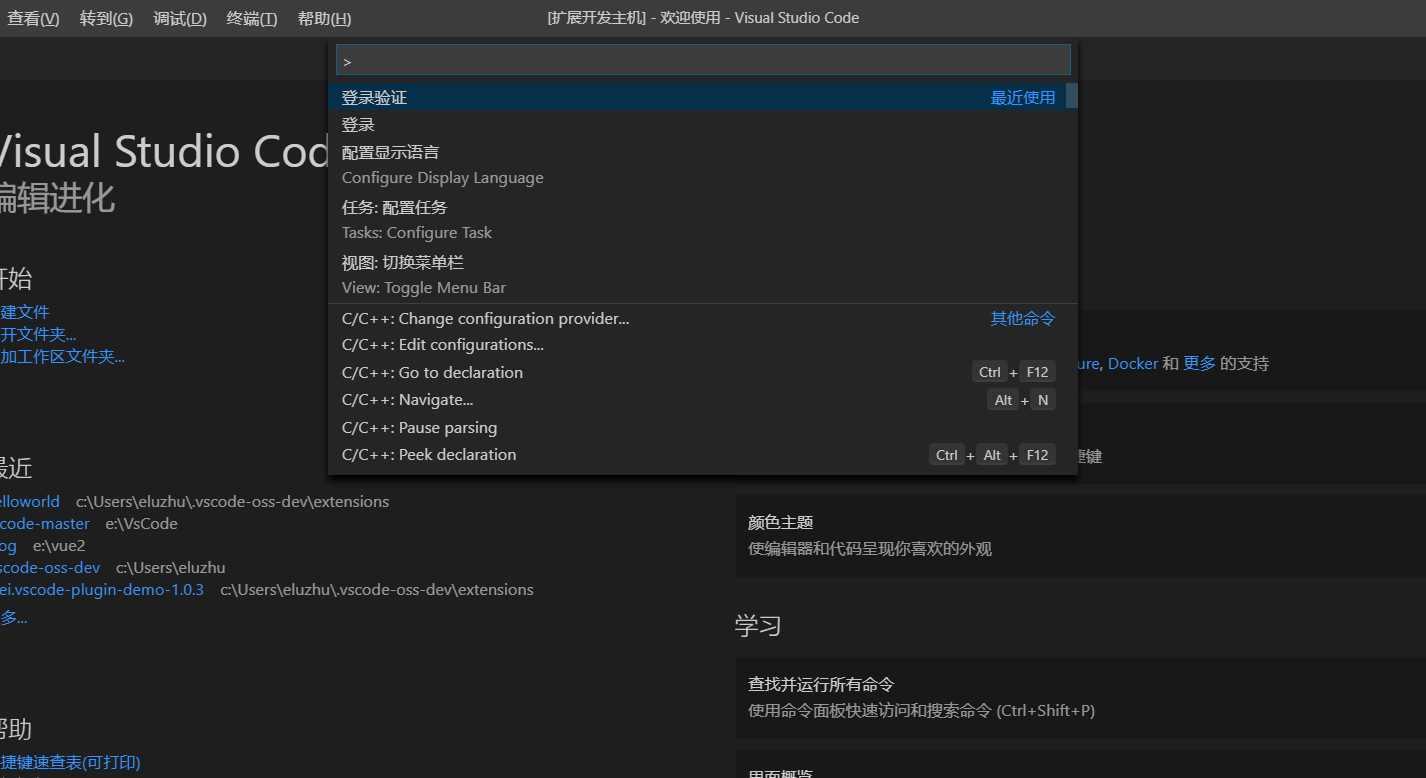
registerCommand主要是注册命令,这个注册命令与图中的一致:
保持一致的话,就能F5运行插件项目打开一个新的窗口(可理解为是插件),通过快捷键ctrl+shift+p就可以看到如图:
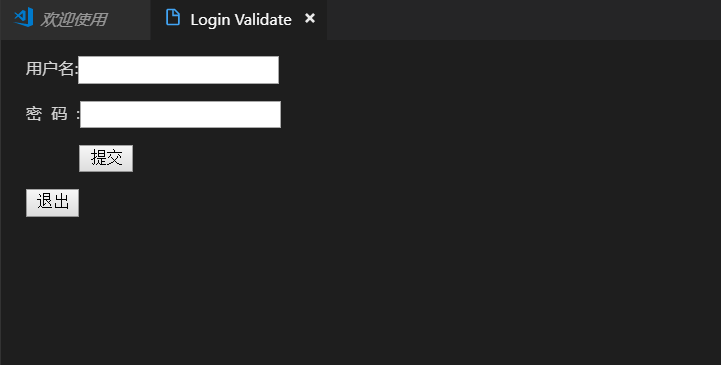
点击这个登录验证回车,即可出现如下webview视图
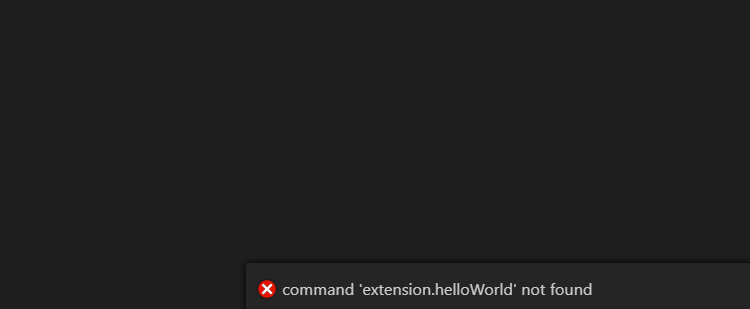
对了还有一点要强调一下,目前有个小局限性就是不能命令有一定的限制,主要是因为这个地方:
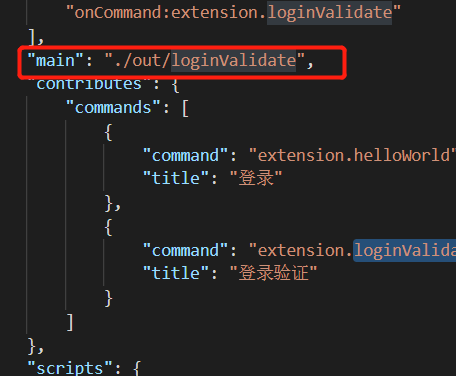
由于指定该主函数,所以只能对应的loginValidate.js起作用,所以extension.js就不能起作用了,如果你要强行点击登录就会出现命令找不到,如图所示:
tsconfig.json(关于它的详解,可以参考这篇文章:https://www.cnblogs.com/faunjoe88/p/7161476.html)
虽然有详解不过我还是要说一下,如果一个目录下存在一个tsconfig.json文件,那么它意味着这个目录是TypeScript项目的根目录。 tsconfig.json文件中指定了用来编译这个项目的根文件和编译选项。
tslint.json 主要用于typescript的语法检查
最后贴一下我的loginValidate.ts代码(extension.ts代码就不贴了,前面说到过它们的区别,基本上是大同小异):
loginValidate.ts
// The module 'vscode' contains the VS Code extensibility API // Import the module and reference it with the alias vscode in your code below import * as vscode from 'vscode'; // this method is called when your extension is activated // your extension is activated the very first time the command is executed export function activate(context: vscode.ExtensionContext) { // Use the console to output diagnostic information (console.log) and errors (console.error) // This line of code will only be executed once when your extension is activated console.log('Congratulations, your extension "loginValidate" is now active!'); // The command has been defined in the package.json file // Now provide the implementation of the command with registerCommand // The commandId parameter must match the command field in package.json let disposable = vscode.commands.registerCommand('extension.loginValidate', () => { // The code you place here will be executed every time your command is executed // Display a message box to the user const panel = vscode.window.createWebviewPanel( 'catCoding', 'Login Validate', vscode.ViewColumn.One, { // Enable scripts in the webview enableScripts: true } ); panel.webview.html = getWebviewContent(); }); context.subscriptions.push(disposable); } // this method is called when your extension is deactivated export function deactivate() {} function getWebviewContent() { return `<!DOCTYPE html> <html lang="en"> <head> <meta charset="UTF-8"> <meta name="viewport" content="width=device-width, initial-scale=1.0"> <title>登录</title> </head> <body> <div id="form"> <form id="login"> <p>用户名:<input type="text" id="userName" style="color:black;"/></p> <p>密 码 :<input type="password" id="password" style="color:black;"/></p> <p> <input type="button" style="color:black;" value="提交" onclick="test()"/> </form> <div id="register"> <input type="button" value="退出" onclick="exits()"/> </div> </div> <script> function test(){ var xhr = new XMLHttpRequest(); xhr.onreadystatechange = function () { if (xhr.readyState == 4) { if ((xhr.status >= 200 && xhr.status < 300) || xhr.status == 304) { console.log(xhr.responseText); $("#login).hide(); } else { console.log(xhr.responseText); } } }; xhr.open("POST", "http://localhost:8080/test-web/sysUser/queryUserCodeByInfo?userCode=2", true); xhr.send(null); } function exits(){ $("#login").show(); } </script> </body> </html>`; }
另外关于通信方面的,目前可以在此使用原生javascript的ajax,这个webview相当于html,那么就可以在里面引用其它的前端组件来借此实现某个功能,但是请注意,可能会有一定的限制,比如不能使用alert这种弹框方式。
另外建议编写webview的时候,特别是编写里面的html,最好在外面编写,直接使用浏览器运行没有问题,然后再嵌入进去,这样有助于排除一些不必要的错误,利于效率的提高。
今天写到这吧,后面笔者会分享有关于vscode二次开发更多的知识。本次分享出来,希望能够给小伙伴们带来帮助。