1.查看现有的 nginx 编译参数
我这里以1.16.0为例升级到1.16.1(编译安装的才可以)
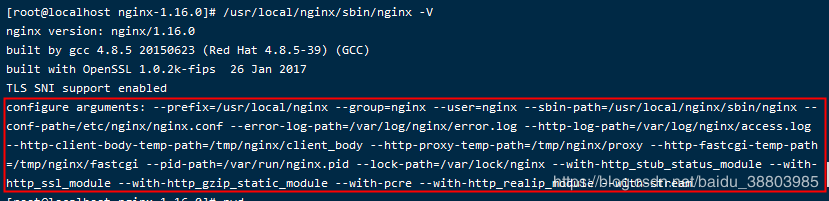
[root@localhost ~]# /usr/local/nginx/sbin/nginx -V
nginx version: nginx/1.16.0
built by gcc 4.8.5 20150623 (Red Hat 4.8.5-39) (GCC)
built with OpenSSL 1.0.2k-fips 26 Jan 2017
TLS SNI support enabled
configure arguments: --prefix=/usr/local/nginx --group=nginx --user=nginx --sbin-path=/usr/local/nginx/sbin/nginx --conf-path=/etc/nginx/nginx.conf --error-log-path=/var/log/nginx/error.log --http-log-path=/var/log/nginx/access.log --http-client-body-temp-path=/tmp/nginx/client_body --http-proxy-temp-path=/tmp/nginx/proxy --http-fastcgi-temp-path=/tmp/nginx/fastcgi --pid-path=/var/run/nginx.pid --lock-path=/var/lock/nginx --with-http_stub_status_module --with-http_ssl_module --with-http_gzip_static_module --with-pcre --with-http_realip_module --with-stream
2.上传新版本的源码包nginx-1.16.1.tar.gz,解压到/usr/local/
(注意:按照原来的编译参数安装 nginx 的方法进行安装,只需要到 make,千万不要 make install 。如果make install 会将原来的配置文件覆盖,你之前的东西就没有了)
[root@localhost ~]# ls     #我这里已经上传了新版本的源码包
nginx-1.16.1.tar.gz
[root@localhost ~]# tar -xf nginx-1.16.1.tar.gz -C /usr/local/    #解压到指定目录
[root@localhost ~]# cd /usr/local/nginx-1.16.1/
#这里面的参数是将第一步中的参数复制过来
[root@localhost nginx-1.16.1]# ./configure --prefix=/usr/local/nginx --group=nginx --user=nginx --sbin-path=/usr/local/nginx/sbin/nginx --conf-path=/etc/nginx/nginx.conf --error-log-path=/var/log/nginx/error.log --http-log-path=/var/log/nginx/access.log --http-client-body-temp-path=/tmp/nginx/client_body --http-proxy-temp-path=/tmp/nginx/proxy --http-fastcgi-temp-path=/tmp/nginx/fastcgi --pid-path=/var/run/nginx.pid --lock-path=/var/lock/nginx --with-http_stub_status_module --with-http_ssl_module --with-http_gzip_static_module --with-pcre --with-http_realip_module --with-stream
[root@localhost nginx-1.16.1]# make
#####千万不要make install
3.平滑升级
#备份原 nginx 二进制文件
[root@localhost nginx-1.16.1]# mv /usr/local/nginx/sbin/nginx /usr/local/nginx/sbin/nginx.1.16.0.bak
#备份二进制文件和 nginx 的配置文件(期间nginx不会停止服务)
[root@localhost nginx-1.16.1]# cp /usr/local/nginx-1.16.1/objs/nginx /usr/local/nginx/sbin/
#复制新的nginx二进制文件,进入新的nginx源码包
#测试新版本的nginx是否正常
[root@localhost nginx-1.16.1]# /usr/local/nginx/sbin/nginx -t
nginx: the configuration file /etc/nginx/nginx.conf syntax is ok
nginx: configuration file /etc/nginx/nginx.conf test is successful
[root@localhost nginx-1.16.1]# ll /var/run/nginx.pid*
-rw-r--r--. 1 root root 6 3月  11 22:12 /var/run/nginx.pid
#查看nginx pid
[root@localhost nginx-1.16.1]# kill -USR2 `cat /var/run/nginx.pid`
#给nginx发送平滑迁移信号(若不清楚pid路径,请查看nginx配置文件)
[root@localhost nginx-1.16.1]# ll /var/run/nginx.pid*
-rw-r--r--. 1 root root 6 3月  11 22:19 /var/run/nginx.pid
-rw-r--r--. 1 root root 6 3月  11 22:12 /var/run/nginx.pid.oldbin
#查看nginx pid,会出现一个nginx.pid.oldbin
[root@localhost nginx-1.16.1]# kill -WINCH `cat /var/run/nginx.pid.oldbin`  #从容关闭旧的Nginx进程
[root@localhost nginx-1.16.1]# kill -HUP `cat /var/run/nginx.pid.oldbin`    #此时不重载配置启动旧的工作进程
[root@localhost nginx-1.16.1]# kill -QUIT `cat /var/run/nginx.pid.oldbin`   #结束工作进程,完成此次升级
[root@localhost nginx-1.16.1]# /usr/local/nginx/sbin/nginx -V      #再次查看版本
nginx version: nginx/1.16.1
built by gcc 4.8.5 20150623 (Red Hat 4.8.5-39) (GCC)
built with OpenSSL 1.0.2k-fips  26 Jan 2017
TLS SNI support enabled
configure arguments: --prefix=/usr/local/nginx --group=nginx --user=nginx --sbin-path=/usr/local/nginx/sbin/nginx --conf-path=/etc/nginx/nginx.conf --error-log-path=/var/log/nginx/error.log --http-log-path=/var/log/nginx/access.log --http-client-body-temp-path=/tmp/nginx/client_body --http-proxy-temp-path=/tmp/nginx/proxy --http-fastcgi-temp-path=/tmp/nginx/fastcgi --pid-path=/var/run/nginx.pid --lock-path=/var/lock/nginx --with-http_stub_status_module --with-http_ssl_module --with-http_gzip_static_module --with-pcre --with-http_realip_module --with-stream
会发现版本升级了,而且老进程也没有关闭,平滑升级成功。
你们的评论和点赞是我写文章的最大动力,蟹蟹。