学习笔记:CentOS7学习之二十三: 跳出循环-shift参数左移-函数的使用
本文用于记录学习体会、心得,兼做笔记使用,方便以后复习总结。内容基本完全参考学神教育教材,图片大多取材自学神教育资料,在此非常感谢MK老师和学神教育的优质教学。希望各位因学习需求而要进行转载时,能申明出处为学神教育,谢谢各位!
23.1 跳出循环
在我们使用循环语句进行循环的过程中,有时候需要在未达到循环结束条件时强制跳出循环,那么Shell给我们提供了两个命令来实现该功能:break和continue
23.1.1 break和continue
Break:跳出整个循环
Continue:跳过本次循环,进行下次循环
-
break概述:跳出当前整个循环或结束当前循环,在for、while等循环语句中,用于跳出当前所在的循环体,执行循环体之后的语句,后面如果什么也不加,表示跳出当前循环等价于break 1,也可以在后面加数字,假设break 3表示跳出第三层循环
-
continue概述:忽略本次循环剩余的代码,直接进行下一次循环;在for、while等循环语句中,用于跳出当前所在的循环体,执行循环体之后的语句,如果后面加的数字是1,表示忽略本次条件循环,如果是2的话,忽略下来2次条件的循环
例1:写一个shell菜单,当按数字键4时退出,否则一直循环显示
[root@centos-7-24 tmp]# vim break-continue.sh
#!/bin/bash

while true
do
        echo "**************************"
        echo "please select your choice:"
        echo "1 copy"
        echo "2 delete"
        echo "3 backup"
        echo "4 quit"
        echo "**************************"
        read op
        case $op in
                1|copy)
                continue # 这里加了continue后,后面的echo语句就不会执行了
                echo "your choice is copy"
                ;;
                2|delete)
                echo "your choice is delete"
                ;;
                3|backup)
                echo "your choice is backup"
                ;;
                4|quit)
                echo "EXIT.."
                exit
                ;;
                *)
                echo "invalid selection, please try again"
        esac
done

[root@centos-7-24 tmp]# bash break-continue.sh
**************************
please select your choice:
1 copy
2 delete
3 backup
4 quit
**************************
1
**************************
please select your choice:
1 copy
2 delete
3 backup
4 quit
**************************
2
your choice is delete
**************************
please select your choice:
1 copy
2 delete
3 backup
4 quit
**************************
3
your choice is backup
**************************
please select your choice:
1 copy
2 delete
3 backup
4 quit
**************************
4
EXIT..
例2:使用交互式方法批量添加用户
[root@centos-7-24 tmp]# vim adduser.sh
#/bin/bash
while true
do
read -p "please input prefix & password & num:" pre pass num
# 读取添加用户的前缀、通用密码、个数
printf "user information:
**********************
user prefix: $pre
user password: $pass
user num: $num
**********************
"
read -p "Are you sure?[y/n]" action # 读取用户互动选择
if [ $action == "y" ]; then
break
else
echo "please input your information again"
fi
done
for i in $(seq $num)
do
user=${pre}${i} # 定义用户名为前缀名加数字
id $user &> /dev/null
if [ $? -ne 0 ]; then # 判断用户是否已经存在,不存在则添加用户
useradd $user
echo "$pass"|passwd --stdin $user &> /dev/null
if [ $? -eq 0 ]; then
echo -e "�33[31m$user�33[0m creat" # 以红色显示用户名
fi
else
echo "user $user was already existed"
fi
done
[root@centos-7-24 tmp]# bash adduser.sh
please input prefix & password & num:yang 112233 4
user information:
**********************
user prefix: yang
user password: 112233
user num: 4
**********************
Are you sure?[y/n]y
yang1 creat
yang2 creat
yang3 creat
yang4 creat
[root@centos-7-24 ~]# grep yang* /etc/passwd # 查看发现用户添加成功
yangjie:x:1000:1000:yangjie:/home/yangjie:/bin/bash
yang1:x:1001:1001::/home/yang1:/bin/bash
yang2:x:1002:1002::/home/yang2:/bin/bash
yang3:x:1003:1003::/home/yang3:/bin/bash
yang4:x:1004:1004::/home/yang4:/bin/bash
扩展: seq命令: seq命令用于产生从某个数到另外一个数之间的所有整数
[root@centos-7-24 tmp]# seq 6
1
2
3
4
5
6
23.2 Shift参数左移指令
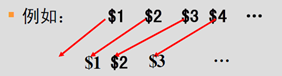
shift命令用于对参数的移动(左移),通常用于在不知道传入参数个数的情况下依次遍历每个参数然后进行相应处理(常见于Linux中各种程序的启动脚本)
在扫描处理脚本程序的参数时,经常要用到的shift命令,如果你的脚本需要10个或10个以上的参数,你就需要用shift命令来访问第10个及其后面的参数
作用:每执行一次,参数序列顺次左移一个位置,$#的值减1,用于分别处理每个参数,移出去的参数,不再可用
例:加法计算器
[root@centos-7-24 tmp]# vim shift.sh

#!/bin/bash

if [ $# -le 0 ]; then
# 判断参数是否大于0,大于0则执行加法程序
        echo "没有足够的参数"
else
        sum=0 # 设置sum初始值为0
        while [ $# -gt 0 ]; do
        # 当参数值大于0时,依次将参数1与sum相加,并且左移参数
                sum=$(($sum+$1))
                shift
        done
        echo "result is $sum"
fi

[root@centos-7-24 tmp]# bash shift.sh 11 22 33 44
result is 110
23.3 函数的使用
函数是一个脚本代码块,你可以对它进行自定义命名,并且可以在脚本中任意位置使用这个函数,要使用这个函数,只要使用这个函数名称就可以了。使用函数的好处:模块化,代码可读性强。
23.3.1 函数创建语法
方法1:
function name {
commands
}
注意:name是函数唯一的名称
方法2:name后面的括号表示你正在定义一个函数
name(){
commands
}
调用函数语法:
函数名 参数1 参数2 …
调用函数时,可以传递参数。在函数中用$1、$2…来引用传递的参数
23.3.2 函数的使用
例1:
[root@centos-7-24 tmp]# vim fun1.sh

#!/bin/bash

function fun_1 { # 定义函数
        echo "this is function1"
        }
fun_2(){
        echo "this is function2"
        }
        fun_1 # 调用函数
        fun_2

[root@centos-7-24 tmp]# bash fun1.sh
this is function1
this is function2
注意:函数名的使用,如果在一个脚本中定义了重复的函数名,那么以最后一个为准
例2:
[root@centos-7-24 tmp]# vim fun2.sh

#!/bin/bash

function fun_1 { # 定义函数
        echo "this is function1"
        }
fun_1(){
        echo "this is function2"
        }
        fun_1 # 调用函数


[root@centos-7-24 tmp]# bash fun2.sh
this is function2
23.3.3 返回值
使用return命令来退出函数并返回特定的退出码
例1:
[root@centos-7-24 tmp]# vim fun3.sh

#!/bin/bash

fun1(){
        echo "this is function"
        ls -al /etc/passwd
        return 3
        }

fun1

[root@centos-7-24 tmp]# bash fun3.sh
this is function
-rw-r--r--. 1 root root 2643 7月   3 23:36 /etc/passwd
[root@centos-7-24 tmp]# echo $? # 查看上个命令的返回码,发现为3
3
注:状态码的确定必需要在函数一结束就运行return返回值;状态码的取值范围(0~255)
exit 数字 和return 数字的区别?
exit整个脚本就直接退出,往回数字 ; return 只是在函数最后添加一行,然后返回数字,只能让函数后面的命令不执行,无法强制退出整个脚本的。
23.3.4 把函数值赋给变量使用
例子: 函数名就相当于一个命令
[root@centos-7-24 tmp]# vim fun4.sh

#!/bin/bash

fun1(){
        read -p "input a value:" a
        echo $[$a*5]
}

num=$(fun1)
echo "current num is $num"

[root@centos-7-24 tmp]# bash fun4.sh
input a value:4
current num is 20
23.3.5 函数的传递
第一种:通过脚本传递参数给函数中的位置参数$1
[root@centos-7-24 tmp]# vim +8 fun5.sh

#/bin/bash

fun1(){
        sum=$[5*$1]
        echo "the result is $sum"
        }

fun1 $1 # 执行fun1带有参数1

[root@centos-7-24 tmp]# bash fun5.sh 10
the result is 50
第二种:调用函数时直接传递参数
[root@centos-7-24 tmp]# vim fun6.sh

#/bin/bash

fun1(){
        sum=$[5*$1]
        echo "the result is $sum"
        }

fun1 5 #直接传参数5

[root@centos-7-24 tmp]# bash fun6.sh
the result is 25
第三种:函数中多参数传递和使用方法
[root@centos-7-24 tmp]# vim fun7.sh

#/bin/bash

fun1(){
        sum1=$[5*$1]
        sum2=$[4*$2]
        echo "the result is $sum1, $sum2"
        }

fun1 $1 $2

[root@centos-7-24 tmp]# bash fun7.sh 6 7
the result is 30, 28
23.3.7 函数中变量的处理
函数使用的变量类型有两种:
- 局部变量
- 全局变量
1、全局变量,默认情况下,你在脚本中定义的变量都是全局变量,你在函数外面定义的变量在函数内也可以使用
[root@centos-7-24 tmp]# vim fun8.sh

#!/bin/bash

fun1(){
        sum=$[$var*2]
        }


fun1
echo "1-$sum"
read -p "input the value:" var
fun1
echo "2-$sum"

[root@centos-7-24 tmp]# bash fun8.sh
fun8.sh:行4: *2: 语法错误: 期待操作数 (错误符号是 "*2")
1-
input the value:4
2-8
# 在var没有赋值之前,调用fun1,会报错,但是在var赋值之后调用fun1,发现var和sum均为脚本内的全局变量
23.4 实战-自动备份mysql数据库脚本和nginx服务启动脚本
23.4.1 自动备份mysql数据库脚本
1、使用mariadb创建实验环境
[root@centos-7-24 tmp]# systemctl start mariadb #启动mariadb
[root@centos-7-24 tmp]# mysqladmin -u root password "123456" #给root用户配置一个密码
[root@centos-7-24 tmp]# mysql -u root -p123456  #登录数据库
Welcome to the MariaDB monitor.  Commands end with ; or g.
Your MariaDB connection id is 5
Server version: 5.5.60-MariaDB MariaDB Server

Copyright (c) 2000, 2018, Oracle, MariaDB Corporation Ab and others.

Type 'help;' or 'h' for help. Type 'c' to clear the current input statement.
MariaDB [(none)]> showd databases;
ERROR 1064 (42000): You have an error in your SQL syntax; check the manual that corresponds to your MariaDB server version for the right syntax t
o use near 'showd databases' at line 1MariaDB [(none)]> show databases;
+--------------------+
| Database           |
+--------------------+
| information_schema |
| mysql              |
| performance_schema |
| test               |
+--------------------+
4 rows in set (0.01 sec)

MariaDB [(none)]> create database yang; #创建数据库yang
Query OK, 1 row affected (0.00 sec)

MariaDB [(none)]> use yang # 切换到数据库yang
Database changed
MariaDB [yang]> create table user (id int); #创建表user,里面只有1列id字段类型为int
Query OK, 0 rows affected (0.10 sec)

MariaDB [yang]> insert into user value(1); # 插入一条记录,id字段值1
Query OK, 1 row affected (0.00 sec)

MariaDB [yang]> insert into user value(2); # 插入一条记录,id字段值2
Query OK, 1 row affected (0.00 sec)

MariaDB [yang]> select * from user; # 查看表中数据
+------+
| id   |
+------+
|    1 |
|    2 |
+------+
2 rows in set (0.00 sec)

MariaDB [yang]> exit;
2、mysql自动化备份脚本:
[root@centos-7-24 tmp]# vim sqlbackup.sh
#!/bin/bash

# auto backup mysql
pre=`date +"%Y%m%d"`
backdir=/data/backup/mysql/$pre
# 定义备份路径
mysqldb=yang
mysqlusr=root
mysqlpw=123456
# 定义备份使用的用户名,密码,数据库名

if [ $UID -ne 0 ]; then
        echo "This script must use the root user!!"
        sleep 2
        exit 10
fi
# 脚本必须由root用户执行,否则自动退出

if [ ! -d $backdir ]; then
        mkdir -p $backdir
else
        echo "the backup file is alright existed!"
        exit 0
fi
# 判断备份文件夹是否存在,不存在则创建,存在则说明已经备份过,退出脚本

/usr/bin/mysqldump -u$mysqlusr -p$mysqlpw $mysqldb > $backdir/${mysqldb}_db.sql

# 备份数据库

[ $? -eq 0 ] && echo "the $pre MYSQL backup is success " || echo "backuo failed"
# 判断备份是否成功

cd /data/backup/mysql/ && tar -czvf ${pre}${mysqldb}.tar.gz $pre
# 压缩归档备份文件

find -mtime +30 -name "*.tar.gz" -exec rm -rf {} ;
find -type d -mtime +30 -exec rm -rf {} ;
# 删除30天前的归档文件和备份文件夹

[root@centos-7-24 tmp]# bash sqlbackup.sh
the 20190704 MYSQL backup is success
20190704/
20190704/yang_db.sql
[root@centos-7-24 tmp]# cd /data/backup/mysql/
[root@centos-7-24 mysql]# ll
总用量 4
drwxr-xr-x. 2 root root  25 7月   4 22:09 20190704
-rw-r--r--. 1 root root 800 7月   4 22:09 20190704yang.tar.gz
[root@centos-7-24 mysql]# cd 20190704/
[root@centos-7-24 20190704]# ll
总用量 4
-rw-r--r--. 1 root root 1795 7月   4 22:09 yang_db.sql
[root@centos-7-24 tmp]# bash sqlbackup.sh
the backup file is alright existed!
23.4.2 nginx服务启动脚本
此nginx脚本中使用了函数功能,让脚本具有更强的可读性
这里没有安装nginx服务,直接使用学神的例子进行注释
[root@xuegod63 ~]# vim /etc/init.d/nginx
#!/bin/bash
#chkconfig: 2345 80 90
#description:nginx run

# nginx启动脚本
# @author	Devil
# @version	0.0.1
# @date		2018-05-29

PATH=/data/soft/nginx
DESC="nginx daemon"
NAME=nginx
DAEMON=$PATH/sbin/$NAME   #/data/soft/nginx/sbin/nginx
CONFIGFILE=$PATH/$NAME.conf
PIDFILE=$PATH/$NAME.pid
SCRIPTNAME=/etc/init.d/$NAME
[ -x "$DAEMON" ] || exit 0 # 判断是否存在可执行的nginx脚本文件,不存在则退出
do_start() # 定义函数
{
	$DAEMON -c $CONFIGFILE || echo -n "nginx already running"
# 启动不成功则打印。。。
}
do_stop()
{
	$DAEMON -s stop || echo -n "nginx not running"
# 停止不成功则打印。。。
}
do_reload()
{
	$DAEMON -s reload || echo -n "nginx can't reload"
# 重启不成功则打印。。。
}
case "$1" in # 根据参数1的值选择不同的分支进行执行
	start)
		echo -n "Starting $DESC: $NAME"
		do_start
		echo "."
	;;
	stop)
		echo -n "Stopping $DESC: $NAME"
		do_stop
		echo "."
	;;
	reload|graceful)
		echo -n "Reloading $DESC configuration..."
		do_reload
		echo "."
	;;
	restart)
		echo -n "Restarting $DESC: $NAME"
		do_stop
		do_start
		echo "."
	;;
	*)
		echo "Usage: $SCRIPTNAME {start|stop|reload|restart}" >&2
		exit 3
	;;
esac
exit 0