开始之前,让我们自己开始再熟练熟练OpenNI 2的基本使用,主要包括以下几个步骤:
1. 初始化OpenNI环境: openni::OpenNI::initialize();
2. 声明并打开Device设备: openni::Device devAnyDevice; devAnyDevice.open( openni::ANY_DEVICE );
3. 创建并打开深度数据流:openni::VideoStream streamDepth; streamDepth.create( devAnyDevice, openni::SENSOR_DEPTH ); streamDepth.start();
4. 读取数据流信息并保存在VideoFrameRef中:openni::VideoFrameRef frameDepth;streamDepth.readFrame( &frameDepth );
5. 获取深度(或颜色等)数据,开始我们自己的开发之旅: const openni::DepthPixel* pDepth = (const openni::DepthPixel*)frameDepth.getData();
6. 当结束使用数据时,首先关闭、销毁数据流:streamDepth.destroy();
7. 接着关闭设备: devAnyDevice.close();
8. 最后关闭OpenNI: openni::OpenNI::shutdown();
具体代码如下(环境配置在之前的博文中提及了,这里省去)
#include <iostream>
#include "OpenNI.h"

int main( int argc, char** argv )
{
    // 初始化OpenNI环境
    openni::OpenNI::initialize();

    // 声明并打开Device设备,我用的是Kinect。
    openni::Device devAnyDevice;
    devAnyDevice.open( openni::ANY_DEVICE );

    // 创建并打开深度数据流
    openni::VideoStream streamDepth;
    streamDepth.create( devAnyDevice, openni::SENSOR_DEPTH );
    streamDepth.start();

    // 同样的创建并打开彩色图像数据流
    openni::VideoStream streamColor;
    streamColor.create( devAnyDevice, openni::SENSOR_COLOR );
    streamColor.start();

    // 循环读取数据流信息并保存在VideoFrameRef中
    openni::VideoFrameRef frameDepth;
    openni::VideoFrameRef frameColor;
    for( int i = 0; i < 1000; ++ i )
    {
        // 读取数据流
        streamDepth.readFrame( &frameDepth );
        streamColor.readFrame( &frameColor );

        // 获取data array
        const openni::DepthPixel* pDepth
            = (const openni::DepthPixel*)frameDepth.getData();
        const openni::RGB888Pixel* pColor
            = (const openni::RGB888Pixel*)frameColor.getData();

        // 显示深度信息和对应的彩色R、G、B数值
        int idx = frameDepth.getWidth() * ( frameDepth.getHeight() + 1 ) / 2;
        std::cout  << pDepth[idx]  << "( "
            << (int)pColor[idx].r << ","
            << (int)pColor[idx].g << ","
            << (int)pColor[idx].b << ")"
            << std::endl;
    }

    // 关闭数据流
    streamDepth.destroy();
    streamColor.destroy();

    // 关闭设备
    devAnyDevice.close();

    // 最后关闭OpenNI
    openni::OpenNI::shutdown();

    return 0;
}
但我们使用OpenNI和Kinect更多的是为了研究开发之用,其中用到最多的是OpenCV(OpenGL、QT也很多,只是本人用的最多的是OpenCV),下面就结合OPenNI 2和OpenCV 2.4.3开始我的第一个程序:利用OpenCV函数显示深度图像和彩色图像。直接上代码:
// YeOpenNI2SimpleUsingOpenCV.cpp : 定义控制台应用程序的入口点。
//

#include "stdafx.h"
#include <iostream>
#include "OpenNI.h"

// 载入OpenCV头文件
#include "opencv2/opencv.hpp"
#include <opencv2/core/core.hpp>
#include <opencv2/highgui/highgui.hpp>
#include <opencv2/imgproc/imgproc.hpp>

using namespace std;
using namespace openni;
using namespace cv;

int main( int argc, char** argv )
{
    // 初始化OpenNI环境
    OpenNI::initialize();

    // 声明并打开Device设备,我用的是Kinect。
    Device devAnyDevice;
    devAnyDevice.open(ANY_DEVICE );

    // 创建深度数据流
    VideoStream streamDepth;
    streamDepth.create( devAnyDevice, SENSOR_DEPTH );

    // 创建彩色图像数据流
    VideoStream streamColor;
    streamColor.create( devAnyDevice, SENSOR_COLOR );

    // 设置深度图像视频模式
    VideoMode mModeDepth;
    // 分辨率大小
    mModeDepth.setResolution( 640, 480 );
    // 每秒30帧
    mModeDepth.setFps( 30 );
    // 像素格式
    mModeDepth.setPixelFormat( PIXEL_FORMAT_DEPTH_1_MM );

    streamDepth.setVideoMode( mModeDepth);

    // 同样的设置彩色图像视频模式
    VideoMode mModeColor;
    mModeColor.setResolution( 640, 480 );
    mModeColor.setFps( 30 );
    mModeColor.setPixelFormat( PIXEL_FORMAT_RGB888 );

    streamColor.setVideoMode( mModeColor);

    // 图像模式注册
    if( devAnyDevice.isImageRegistrationModeSupported(
        IMAGE_REGISTRATION_DEPTH_TO_COLOR ) )
    {
        devAnyDevice.setImageRegistrationMode( IMAGE_REGISTRATION_DEPTH_TO_COLOR );
    }

    // 打开深度和图像数据流
    streamDepth.start();
    streamColor.start();

    // 创建OpenCV图像窗口
    namedWindow( "Depth Image",  CV_WINDOW_AUTOSIZE );
    namedWindow( "Color Image",  CV_WINDOW_AUTOSIZE );

    // 获得最大深度值
    int iMaxDepth = streamDepth.getMaxPixelValue();

    // 循环读取数据流信息并保存在VideoFrameRef中
    VideoFrameRef  frameDepth;
    VideoFrameRef  frameColor;

    while( true )
    {
        // 读取数据流
        streamDepth.readFrame( &frameDepth );
        streamColor.readFrame( &frameColor );


        // 将深度数据转换成OpenCV格式
        const cv::Mat mImageDepth( frameDepth.getHeight(), frameDepth.getWidth(), CV_16UC1, (void*)frameDepth.getData());
        // 为了让深度图像显示的更加明显一些,将CV_16UC1 ==> CV_8U格式
        cv::Mat mScaledDepth;
        mImageDepth.convertTo( mScaledDepth, CV_8U, 255.0 / iMaxDepth );
        // 显示出深度图像
        cv::imshow( "Depth Image", mScaledDepth );

        // 同样的将彩色图像数据转化成OpenCV格式
        const cv::Mat mImageRGB(frameColor.getHeight(), frameColor.getWidth(), CV_8UC3, (void*)frameColor.getData());
        // 首先将RGB格式转换为BGR格式
        cv::Mat cImageBGR;
        cv::cvtColor( mImageRGB, cImageBGR, CV_RGB2BGR );
        // 然后显示彩色图像
        cv::imshow( "Color Image", cImageBGR );

        // 终止快捷键
        if( cv::waitKey(1) == 'q')
            break;
    }

    // 关闭数据流
    streamDepth.destroy();
    streamColor.destroy();

    // 关闭设备
    devAnyDevice.close();

    // 最后关闭OpenNI
    openni::OpenNI::shutdown();

    return 0;
}
显示效果见图:

这个是在原有的程序上做了添加,主要添加了:
1. 深度图像和彩色图像的视频模式的设置:streamDepth.setVideoMode( mModeDepth);和streamColor.setVideoMode( mModeColor);

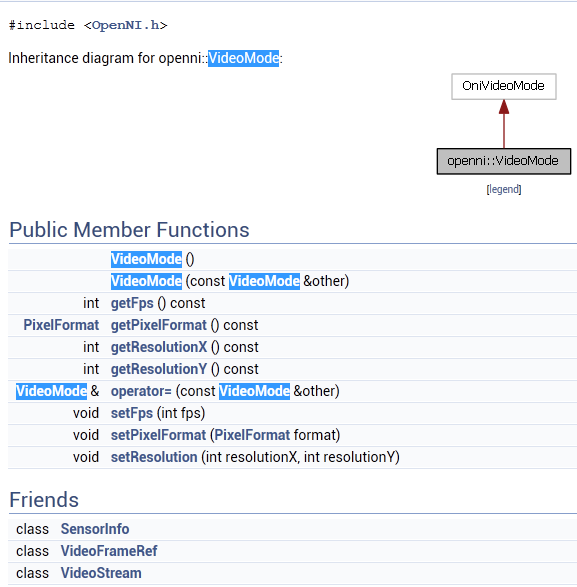
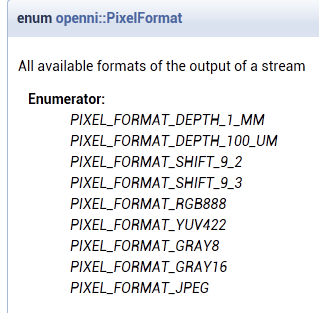
视频模式VideoMode类主要包括了:get/set像素格式、get/set分辨率(坐标x和y值)、以及每秒多少帧图像等。其中像素格式主要包括以下几种:

enum      PixelFormat {
  PIXEL_FORMAT_DEPTH_1_MM = 100, PIXEL_FORMAT_DEPTH_100_UM = 101, PIXEL_FORMAT_SHIFT_9_2 = 102, PIXEL_FORMAT_SHIFT_9_3 = 103,
  PIXEL_FORMAT_RGB888 = 200, PIXEL_FORMAT_YUV422 = 201, PIXEL_FORMAT_GRAY8 = 202, PIXEL_FORMAT_GRAY16 = 203,
  PIXEL_FORMAT_JPEG = 204
}
主要分成两类:深度像素格式和彩色图像格式。具体是什么含义,我想利用OpenCV常用图像格式知识,自己多尝试使用对照,发现它们的不同之处和特别之处。
2. 设置彩色图像视频与深度视频的视觉校正,但我们从上面的彩色图像和深度图像可以看出来,它们通过“校正”之后还是存在着一定的偏差,对于这个问题目前已有人做了修改,但官方还是没有做具体的说明和纠正。在OPenNI 2的架构中,要进行视觉的校正,是直接调用Device提供的setImageRegistrationMode(ImageRegistrationMode mode) 函数来进行视觉校正的设置。但目前的OpenNI 2里,只提供IMAGE_REGISTRATION_OFF = 0(不用校正)和 IMAGE_REGISTRATION_DEPTH_TO_COLOR = 1(把深度映射到彩色图像的位置上)这两种模式可以使用。根据目前的OpenNI 2已经不是只针对Kinect一种感应器了,针对不同的感应器,不一定都要支持视觉校正的功能,所以在设定前,最好先判断使用的感应器是否支持“视觉校正”功能,借用官方的话说:“It is a good practice to first check if the mode is supported by calling isImageRegistrationModeSupported(). ”其中ImageRegistrationMode枚举如下:
enum ImageRegistrationMode { IMAGE_REGISTRATION_OFF = 0, IMAGE_REGISTRATION_DEPTH_TO_COLOR = 1 }
3. 读取深度图像信息和彩色图像信息,然后相应的转换为OpenCV格式,并显示:
// 读取数据流
        streamDepth.readFrame( &frameDepth );
        streamColor.readFrame( &frameColor );


        // 将深度数据转换成OpenCV格式
        const cv::Mat mImageDepth( frameDepth.getHeight(), frameDepth.getWidth(), CV_16UC1, (void*)frameDepth.getData());
        // 为了让深度图像显示的更加明显一些,将CV_16UC1 ==> CV_8U格式
        cv::Mat mScaledDepth;
        mImageDepth.convertTo( mScaledDepth, CV_8U, 255.0 / iMaxDepth );
        // 显示出深度图像
        cv::imshow( "Depth Image", mScaledDepth );

        // 同样的将彩色图像数据转化成OpenCV格式
        const cv::Mat mImageRGB(frameColor.getHeight(), frameColor.getWidth(), CV_8UC3, (void*)frameColor.getData());
        // 首先将RGB格式转换为BGR格式
        cv::Mat cImageBGR;
        cv::cvtColor( mImageRGB, cImageBGR, CV_RGB2BGR );
        // 然后显示彩色图像
        cv::imshow( "Color Image", cImageBGR );
这个主要就是OpenCV的图像格式和显示有关的知识了,此处省去N个字。。。
总结:知道了如何获取深度和彩色图像信息+OpenCV常用图像转换函数和图像格式,我想这个程序就很好写,并且很明了易懂了。