1、初始化项目
npm init
填写基本信息,生成package.json
2、安装依赖包
webpack、babel、react等,webpack、babel工具类 使用npm install --save-dev 安装在"devDependencies"下。
{
  "name": "wmyyq",
  "version": "1.0.0",
  "main": "src/index.html",
  "author": "yq",
  "license": "ISC",
  "description": "666",
  "repository": {
    "type": "git",
    "url": ""
  },
  "scripts": {
    "dev": "",
    "start": "webpack-dev-server --config ./build/webpack.config.js",
    "build": "webpack --config ./build/webpack.config.js"
  },
  "dependencies": {
    "antd": "^4.18.0",
    "react": "^17.0.2",
    "react-dom": "^17.0.2",
    "react-redux": "^7.2.6",
    "react-router": "^6.2.1",
    "redux": "^4.1.2"
  },
  "devDependencies": {
    "babel-core": "^6.26.3",
    "babel-loader": "^7.1.5",
    "babel-preset-es2015": "^6.24.1",
    "babel-preset-react": "^6.24.1",
    "html-webpack-plugin": "^5.5.0",
    "webpack": "^5.65.0",
    "webpack-cli": "^4.9.1",
    "webpack-dev-server": "^4.7.1"
  }
}
知识点:
1.webpack-dev-server 指定目录下的js启动服务
2.webpack 进行打包
3.bable 代码转换器
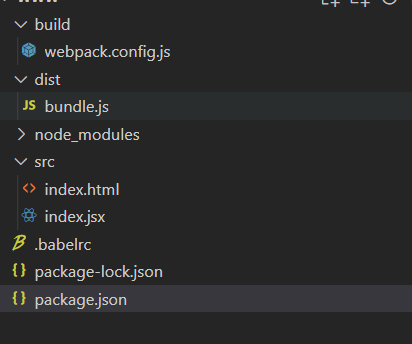
3、新建项目目录

.babelrc
{
    "presets": ["react", "es2015"],
    "env": {
      "dev": {
          "plugins": [["react-transform", {
             "transforms": [{
               "transform": "react-transform-hmr",
               "imports": ["react"],
               "locals": ["module"]
             }]
          }]]
      }
    }
  }
知识点 :
一定要在根目录下配置.babelrc文件,此文件用于配置转码规则和插件。cmd进入根目录,输入 type null>.babelrc 即可创建该文件。
4、配置webpack.config.js
const path = require('path');
const webpack = require("webpack");
const HtmlWebpackPlugin = require('html-webpack-plugin');
module.exports = {
    mode: "development",
    entry: './src/index.jsx', //js入口文件;
    output: {
        path: path.resolve(__dirname, '../dist'), //利用path包获取绝对文件路径
        filename: 'bundle.js' //打包成功后的文件名<br>
    }, //js出口文件;路径加文件名;
    module: {
        rules: [
            {
                test: /\.(jsx)$/,
                exclude: /node_modules/,
                loader: 'babel-loader'
            }
        ]
    },
    plugins: [
        new HtmlWebpackPlugin({
            template: "src/index.html",
            inject: "body",
            filename: "index.html",
        }) //在 body 中使用 script 标签引入你所有 webpack 生成的 bundle。
    ],
    devServer: {
        static: path.resolve(__dirname, '../src'), //启动入口
        port: 9000,
        hot: true,
        proxy: {//代理服务器 api请求
            '/api': {
                target: 'http://your_api_server.com',
                changeOrigin: true,
                pathRewrite: {
                    '^/api': ''
                }
            }
        }
    }
}
知识点:
1、devServer配置
2、HtmlWebpackPlugin
为html文件中引入外部资源如script、link。即index.html引入bundle.js。
5、src/index.html
<!DOCTYPE html>
<html lang="en">
<head>
    <meta name="viewport" content="width=device-width,initial-scale=1.0, minimum-scale=1.0, maximum-scale=1.0, user-scalable=no" charset="utf-8">
    <title></title>

</head>
<body>
<div id="root"></div>
<!-- <script src="./bundle.js"></script> -->
</body>
</html>
6、src/index.jsx
import React from "react";
import ReactDom from "react-dom";

class Main extends React.Component{
    constructor(props){
        super(props);
    }
    render(){
        return (<div>hello!!</div>)
    }
}
ReactDom.render(
    <Main/>,
    document.getElementById('root')
)
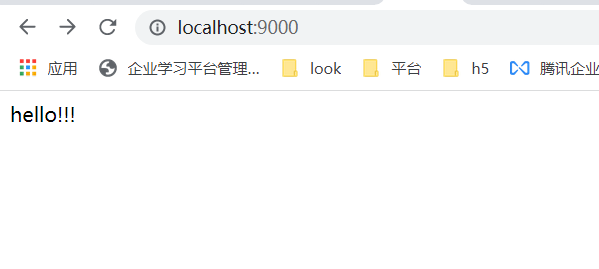
7、运行 npm run start
