1.下载elasticsearch-7.16.0
下载地址https://www.elastic.co/cn/downloads/elasticsearch
选择Linux x86_64

右侧View past releases可以选择以往版本,选择版本后下载:

2.安装elasticsearch-7.16.0
2.1 下载(上传)安装包并解压
# 创建安装目录
mkdir -p /usr/local/elasticsearch

# 下载安装包(如果已经下载到本地,直接上传)
wget https://artifacts.elastic.co/downloads/elasticsearch/elasticsearch-7.16.0-linux-x86_64.tar.gz

# 拷贝安装包到安装目录
cp elasticsearch-7.16.0-linux-x86_64.tar.gz /usr/local/elasticsearch

# 解压安装包
cd /usr/local/elasticsearch
tar -zxvf elasticsearch-7.16.0-linux-x86_64.tar.gz
2.2 修改配置
cd  /config
vim elasticsearch.yml

修改配置:

# ---------------------------------- Cluster -----------------------------------
#
# Use a descriptive name for your cluster:
# 集群名称,按照自己的需求调整
cluster.name: my-application
# 集群中主节点的节点的集合,#node1-1是节点名字,各节点名字默认是所在的主机名,列表中也可以是:ip:port 形式
cluster.initial_master_nodes: ["node-1"]

#
# ------------------------------------ Node ------------------------------------
#
# Use a descriptive name for the node:
# 节点名称
node.name: node-1

# ----------------------------------- Paths ------------------------------------
#
# Path to directory where to store the data (separate multiple locations by comma):
# 设置data存储目录(注意先创建该目录)
path.data: /usr/local/elasticsearch/elasticsearch-7.16.0/data
#
# Path to log files:
# 设置logs日志的目录
path.logs: /usr/local/elasticsearch/elasticsearch-7.16.0/logs

# ---------------------------------- Network -----------------------------------
#
# By default Elasticsearch is only accessible on localhost. Set a different
# address here to expose this node on the network:
# 设置允许该ip可以连接该elasticsearch,根据项目需求自行修改
network.host: 192.168.252.160(服务器ip)
#
# By default Elasticsearch listens for HTTP traffic on the first free port it
# finds starting at 9200. Set a specific HTTP port here:
# 开启监听的端口,默认为9200
http.port: 9200
配置说明:
# 集群名称,按照自己的需求调整
cluster.name: my-application# 集群中主节点的节点的集合,#node1-1是节点名字,各节点名字默认是所在的主机名,列表中也可以是:ip:port 形式
cluster.initial_master_nodes: ["node-1"]# 节点名称
node.name: node-1# 设置data存储目录
path.data: /data/elasticsearch/datadir# 设置logs日志的目录
path.logs: /data/elasticsearch/logdir# 设置内存不使用交换分区
bootstrap.memory_lock: false#设置当前的ip地址,通过指定相同网段的其他节点会加入该集群中
network.host: 0.0.0.0#设置对外服务的http端口
http.port: 9200#设置集群中master节点的初始列表,可以通过这些节点来自动发现新加入集群的节点
discovery.zen.ping.unicast.hosts: ["127.0.0.1","10.10.10.10:9200"]# 集群配置
discovery.seed_hosts:["127.0.0.1"]
2.3 修改 jvm.options 配置文件
因为是在虚拟机进行安装的ES,内存不是很大的情况下建议修改一下(若是生产环境不用修改也可)。
vim jvm.options

2.4 创建ES用户
Elasticsearch5.0之后,不能使用root账户启动ES,需要创建一个用户:
# 创建用户:
useradd user-es

# 授权:
chown -R user-es:user-es /usr/local/elasticsearch/elasticsearch-7.16.0
2.5 启动ES
# 切换到user-es 用户进入bin启动elasticsearch
# 切换用户
su user-es

# 进入bin目录
cd /usr/local/elasticsearch/elasticsearch-7.16.0/bin

# 启动
./elasticsearch
如无报错,打开浏览器输入:http://IP:9200/看到入如下信息表示安装成功:
{
  "name" : "node-1",
  "cluster_name" : "my-application",
  "cluster_uuid" : "HzL4ErHwRQqVB8WA69lW-Q",
  "version" : {
    "number" : "7.16.0",
    "build_flavor" : "default",
    "build_type" : "tar",
    "build_hash" : "6fc81662312141fe7691d7c1c91b8658ac17aa0d",
    "build_date" : "2021-12-02T15:46:35.697268109Z",
    "build_snapshot" : false,
    "lucene_version" : "8.10.1",
    "minimum_wire_compatibility_version" : "6.8.0",
    "minimum_index_compatibility_version" : "6.0.0-beta1"
  },
  "tagline" : "You Know, for Search"
}
3.启动异常及解决方案
启动报错,大致内容如下:
  ERROR: [3] bootstrap checks failed. You must address the points described in the following [3] lines before starting Elasticsearch.
  bootstrap check failure [1] of [3]: max file descriptors [4096] for elasticsearch process is too low, increase to at least [65535]
  bootstrap check failure [2] of [3]: max virtual memory areas vm.max_map_count [65530] is too low, increase to at least [262144]
  bootstrap check failure [3] of [3]: the default discovery settings are unsuitable for production use; at least one of [discovery.seed_hosts, discovery.seed_providers, cluster.initial_master_nodes] must be configured
  ERROR: Elasticsearch did not exit normally - check the logs at /opt/elasticsearch/logs/elasticsearch.log
意思是在启动 Elasticsearch 之前,您必须解决以下 [3] 行中描述的问题。
3.1 报错:java.lang.RuntimeException: can not run elasticsearch as root
原因:不能以root用户启动es,需要创建并切换到es用户:
# 创建用户:
useradd user-es

# 授权:
chown -R user-es:user-es /usr/local/elasticsearch/elasticsearch-7.16.0

# 切换到es用户
su user-es
重新启动即可。
3.2 报错:initial heap size [134217728] not equal to maximum heap size [1073741824]; this can cause resize pauses
原因:JVM最大内存与最小内存不一致,需要修改为一致,推荐配置为系统内存的一半,但是由于索引的特殊性,不应该超过31G。配置一半 是因为剩下的一半索引也会消耗掉 不必担心内存浪费。
vim config/jvm.options

修改jvm:
-Xms1g
-Xmx1g
3.3 报错:max file descriptors [4096] for elasticsearch process is too low, increase to at least [65535]
原因:ElasticSearch进程的最大文件描述大小需要65535,而当前是4096,解决办法是修改 /etc/security/limits.conf 文件,在末尾加上(存在则修改,数值不能比要求的小):
# 切换为root用户才能保存
su root

#添加配置
* soft nofile 65535
* hard nofile 65535
* soft nproc 65535
* hard nproc 65535
3.4 报错:max virtual memory areas vm.max_map_count [65530] is too low, increase to at least [262144]
原因:最大虚拟内存太小(vm.max_map_count配置),至少需要262144,当前为65530,解决办法是修改 /etc/sysctl.conf 文件,在末尾加上(存在则修改,数值不能比要求的小):
# 添加配置
vm.max_map_count=262144
执行/sbin/sysctl -p 立即生效。
3.5 报错:the default discovery settings are unsuitable for production use; at least one of [discovery.seed_hosts, discovery.seed_providers, cluster.initial_master_nodes] must be configured
原因:没有对ElasticSearch发现进行配置,至少需要配置discovery.seed_hosts, discovery.seed_providers, cluster.initial_master_nodes中的一个:
discovery.seed_hosts:集群节点列表,每个值应采用host:port或host的形式(其中port默认为设置transport.profiles.default.port,如果未设置则返回transport.port)

discovery.seed_providers:集群节点列表的提供者,作用就是获取discovery.seed_hosts,比如使用文件指定节点列表

cluster.initial_master_nodes:初始化时master节点的选举列表,一般使用node.name(节点名称)配置指定,配置旨在第一次启动有效,启动之后会保存,下次启动会读取保存的数据
更多配置参考官网:https://www.elastic.co/guide/en/elasticsearch/reference/current/settings.html
3.6 设置账号密码
如果想要添加账户密码,只需要在config/elasticsearch.yml中添加下面两个配置:
xpack.security.enabled: true
xpack.security.transport.ssl.enabled: true
上面两个配置表示启用x-pack验证插件
然后重启ElasticSearch,执行下面的命令即可设置与ElasticSearch关联的一些账号的密码:
bin/elasticsearch-setup-passwords interactive
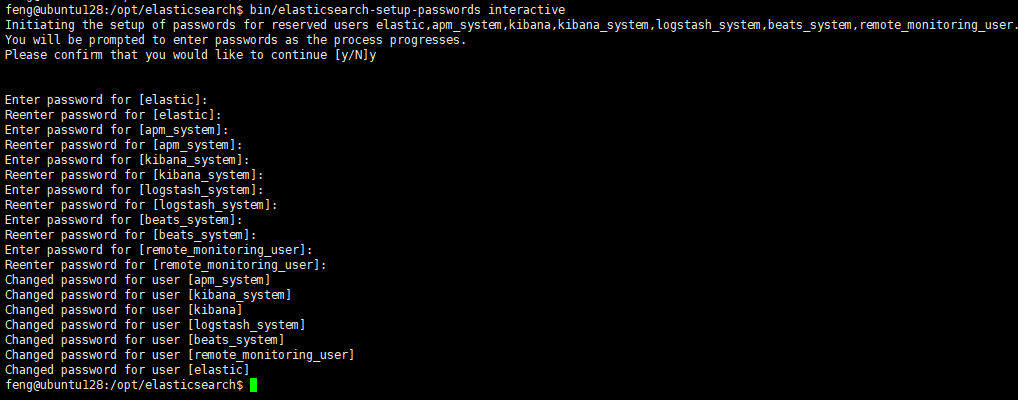
设置完成之后就需要使用账号密码访问了,账号就是上图的第一个设置elastic:
# 不带认证访问会报认证异常
curl http://localhost:9200/_cat/indices
# -u参数指定账号,执行后会提示输入密码
curl -u elastic http://localhost:9200/_cat/indices
# -u参数指定账号和密码,格式:user:password
curl -u elastic:123456 http://localhost:9200/_cat/indices
设置了密码,还可以修改密码:
# 需要使用api来操作修改密码
curl -XPOST -u elastic http://localhost:9200/_security/user/elastic/_password -H "Content-Type:application/json" -d "{\"password\":\"abcdefg\"}"
如果忘记密码,可以先取消认证,即注释掉上面config/elasticsearch.yml中添加的两个配置,然后重启ElasticSearch,然后找到一个类型.security-X的index,删除掉就可以回到最初无密码认证的状态了:
# 查看.security-X存在与否
curl http://localhost:9200/_cat/indices | grep ".security"
# 删除index,我这里是.security-7
curl -XDELETE http://localhost:9200/.security-7
