一、环境准备
1、安装nginx时,需要将--with-http_ssl_module 模块开启。
2、关闭selinux和防火墙
3、在 /usr/local/nginx/html/ 目录下添加bbs目录,并且在里面添加index.html,里面内容随便加。
二、修改nginx.conf 配置文件
添加server,由于https加密之后的访问端口是443,所以server服务器要改成443.
server {
        listen 443;
        server_name bbs.com;
        index index.html index.htm index.php;
        root html/blog;
        access_log logs/bbs-access.log main;
        location ~ .php$ {
            root           html/bbs;
            fastcgi_pass   127.0.0.1:9000;
            fastcgi_index  index.php;
            fastcgi_param  SCRIPT_FILENAME  /scripts$fastcgi_script_name;
            include        fastcgi.conf;
        }
ssl on;
ssl_certificate /usr/local/nginx/conf/ssl/testnginx.crt; #证书路径
ssl_certificate_key /usr/local/nginx/conf/ssl/testnginx.key; #秘钥路径
ssl_session_timeout 5m;
ssl_protocols TLSv1 TLSv1.1 TLSv1.2;
ssl_prefer_server_ciphers on;
ssl_ciphers "EECDH+CHACHA20:EECDH+CHACHA20-draft:EECDH+AES128:RSA+AES128:EECDH+AES256:RSA+AES256:EECDH+3DES:RSA+3DES:!MD5";
}
但是,浏览器一般支持的80端口,所以要再添加一个server,将请求强制转换为80端口
rewrite 的作用是 将请求重定向到https://下
server {
        listen 80;
        server_name bbs.com;
        rewrite ^(.*)$ https://bbs.com permanent;
        root html/bbs;
        index index.html index.htm;
}
三、生成加密证书和秘钥
1、生成秘钥
openssl genrsa -out testnginx.key 1024
2、生成证书申请
openssl req -new -key testnginx.key -out testnginx.csr
3、生成证书
openssl x509 -req -days 365 -sha256 -in testnginx.csr -signkey testnginx.key -out testnginx.crt
然后将证书和秘钥放到 /usr/local/nginx/conf/ssl/ 目录下
测试
windows下
编辑 C:WindowsSystem32driversetc 下的hosts文件
在最下面添加
192.168.88.10 bbs.com
意思是将bbs.com 解析
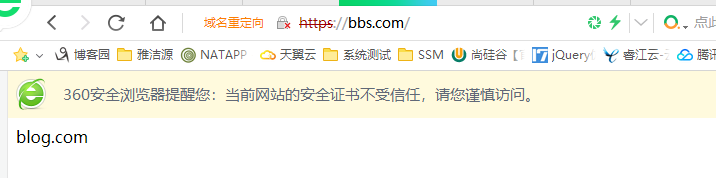
实验效果: