首先我们要知道微信分为订阅号,服务号和企业号,其中只有企业号可以主动向关注的人推送消息,而订阅号和服务号只有关注人主动发送消息后的48小时才能向关注人发送消息
我们在业务中要实现微信推送功能一般是使用企业号
和支付宝支付一样,我们同样需要微信给我们提供的接口api,这里我们也使用沙箱环境进行测试https://mp.weixin.qq.com/debug/cgi-bin/sandbox?t=sandbox/login
登录完成后会给我们提供appid和appsecret,后面会用到

然后我们还会得到我们的公众号的二维码,已经关注人的名单

每个人关注后都会在这里显示,并且每个人都有一个单独的微信号,我们可以通过这个微信号给别人发消息,但是别人关注后微信能拿到他的微信号,而我们只能到网页上查看而不能及时获得微信号,所以我们需要通过一些操作来让微信端把微信号发给我们
我们先创建一个django项目,生成以下路由
from django.conf.urls import url
from django.contrib import admin
from app01 import views

urlpatterns = [
    url(r'^admin/', admin.site.urls),
    url(r'^login/$', views.login),
    url(r'^bind/$', views.bind),
    url(r'^bind_qcode/$', views.bind_qcode),
    url(r'^callback/$', views.callback),
    url(r'^sendmsg/$', views.sendmsg),
]
访问时要先登录
import json
import functools
import requests
from django.conf import settings
from django.shortcuts import render, redirect, HttpResponse
from django.http import JsonResponse
from app01 import models
# 沙箱环境地质:https://mp.weixin.qq.com/debug/cgi-bin/sandbox?t=sandbox/login

def auth(func):
    @functools.wraps(func)
    def inner(request, *args, **kwargs):
        user_info = request.session.get('user_info')
        if not user_info:
            return redirect('/login/')
        return func(request, *args, **kwargs)
    return inner


def login(request):
    """
    用户登录
    :param request:
    :return:
    """
    # models.UserInfo.objects.create(username='luffy',password=123)

    if request.method == "POST":
        user = request.POST.get('user')
        pwd = request.POST.get('pwd')
        obj = models.UserInfo.objects.filter(username=user, password=pwd).first()
        if obj:
            request.session['user_info'] = {'id': obj.id, 'name': obj.username, 'uid': obj.uid}
            return redirect('/bind/')
    else:
        return render(request, 'login.html')
登录完成后我们给每个用户生成一个独有的uid号,并将用户id,name和uid存入session中
用户表
import hashlib
from django.db import models

class UserInfo(models.Model):
    username = models.CharField("用户名", max_length=64, unique=True)
    password = models.CharField("用户名", max_length=64)
    uid = models.CharField(verbose_name='个人唯一ID',max_length=64, unique=True)
    wx_id = models.CharField(verbose_name="微信ID", max_length=128, blank=True, null=True, db_index=True)

    def save(self, *args, **kwargs):
        # 创建用户时,为用户自动生成个人唯一ID
        if not self.pk:
            m = hashlib.md5()
            m.update(self.username.encode(encoding="utf-8"))
            self.uid = m.hexdigest()
        super(UserInfo, self).save(*args, **kwargs)
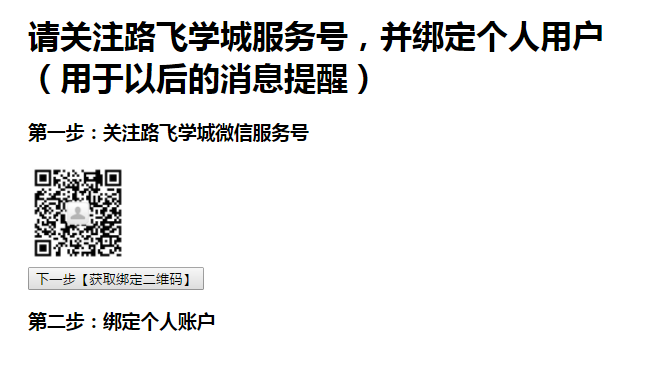
登录完成后我们提供了一个页面,用来给用户关注我们的微信号
@auth
def bind(request):
    """
    用户登录后,关注公众号,并绑定个人微信(用于以后消息推送)
    :param request:
    :return:
    """
    return render(request, 'bind.html')
页面
{% load staticfiles %}

<!DOCTYPE html>
<html lang="en">
<head>
    <meta charset="UTF-8">
    <title>Title</title>
</head>
<body>
<div style=" 600px;margin: 0 auto">
    <h1>请关注路飞学城服务号,并绑定个人用户(用于以后的消息提醒)</h1>
    <div>
        <h3>第一步:关注路飞学城微信服务号</h3>
        <img style="height: 100px; 100px" src="{% static "img/luffy.jpeg" %}">
    </div>
    <input type="button" value="下一步【获取绑定二维码】" onclick="getBindUserQcode()">
    <div>
        <h3>第二步:绑定个人账户</h3>
        <div id="qrcode" style=" 250px;height: 250px;margin: 100px auto;"></div>
    </div>
</div>
<script src="{% static "js/jquery.min.js" %}"></script>
<script src="{% static "js/jquery.qrcode.min.js" %}"></script>
<script src="{% static "js/qrcode.js" %}"></script>
<script>
    function getBindUserQcode() {
        $.ajax({
            url: '/bind_qcode/',
            type: 'GET',
            success: function (result) {
                console.log(result);
                $('#qrcode').empty().qrcode({text: result.data});
            }
        });
    }
</script>

</body>
</html>
在页面上我们放了我们的微信号的二维码

用户扫码关注后其实就已经完成了,但是我们为了能直接拿到用户的微信号,要诱导用户进行下面的操作,首先要点击下一步,一旦点击了就会触发我们的点击事件,这个事件会向后端发送一个ajax请求
<script>
    function getBindUserQcode() {
        $.ajax({
            url: '/bind_qcode/',
            type: 'GET',
            success: function (result) {
                console.log(result);
                $('#qrcode').empty().qrcode({text: result.data});
            }
        });
    }
</script>
后端收到后会给前端返回一个url
@auth
def bind_qcode(request):
    """
    生成二维码
    :param request:
    :return:
    """
    ret = {'code': 1000}
    try:
        access_url = "https://open.weixin.qq.com/connect/oauth2/authorize?appid={appid}&redirect_uri={redirect_uri}&response_type=code&scope=snsapi_userinfo&state={state}#wechat_redirect"
        access_url = access_url.format(
            appid=settings.WECHAT_CONFIG["app_id"],
            redirect_uri=settings.WECHAT_CONFIG["redirect_uri"],
            state=request.session['user_info']['uid']
        )
        ret['data'] = access_url
    except Exception as e:
        ret['code'] = 1001
        ret['msg'] = str(e)

    return JsonResponse(ret)
这个url中需要有appid,我们生成的用户uid信息state和微信收到请求处理完成后跳转的urlredirect_uri
这里的settings中的参数为
# ############# 微信 ##############
WECHAT_CONFIG = {
    'app_id': 'wx89085e915d351cae',
    'appsecret': '64f87abfc664f1d4f11d0ac98b24c42d',
    'redirect_uri': 'http://47.93.4.198/callback/',
}
前端收到这个url后会利用jquery.qrcode.min.js和qrcode.js将url变成一个二维码放到页面上,用户扫这个二维码就相当于访问这个url
<div>
        <h3>第二步:绑定个人账户</h3>
        <div id="qrcode" style=" 250px;height: 250px;margin: 100px auto;"></div>
    </div>
</div>
<script src="{% static "js/jquery.min.js" %}"></script>
<script src="{% static "js/jquery.qrcode.min.js" %}"></script>
<script src="{% static "js/qrcode.js" %}"></script>
<script>
    function getBindUserQcode() {
        $.ajax({
            url: '/bind_qcode/',
            type: 'GET',
            success: function (result) {
                console.log(result);
                $('#qrcode').empty().qrcode({text: result.data});
            }
        });
    }
</script>

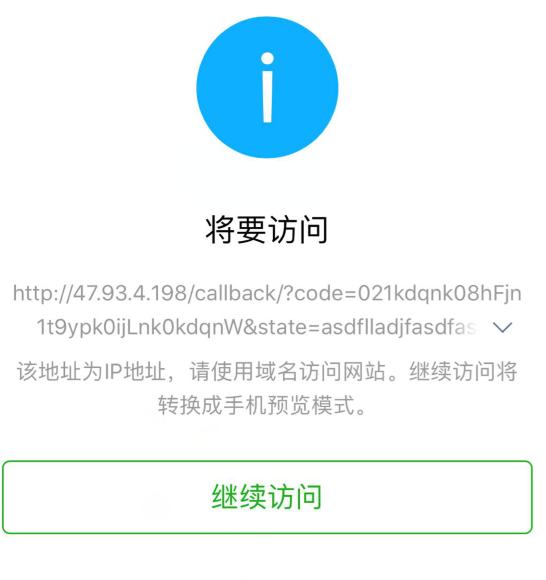
这个url其实就是微信的一个接口,微信收到消息后会向用户确认是否授权相关信息,如果同意了则会跳转到我们传的跳转地址
用户扫码后的操作界面

点击允许后

这时就会访问的设置的跳转地址
def callback(request):
    """
    用户在手机微信上扫码后,微信自动调用该方法。
    用于获取扫码用户的唯一ID,以后用于给他推送消息。
    :param request:
    :return:
    """
    code = request.GET.get("code")

    # 用户UID
    state = request.GET.get("state")

    # 获取该用户openId(用户唯一,用于给用户发送消息)
    res = requests.get(
        url="https://api.weixin.qq.com/sns/oauth2/access_token",
        params={
            "appid": 'wx89085e915d351cae',
            "secret": '64f87abfc664f1d4f11d0ac98b24c42d',
            "code": code,
            "grant_type": 'authorization_code',
        }
    ).json()
    # 获取的到openid表示用户授权成功
    openid = res.get("openid")
    if openid:
        models.UserInfo.objects.filter(uid=state).update(wx_id=openid)
        response = "<h1>授权成功 %s </h1>" % openid
    else:
        response = "<h1>用户扫码之后,手机上的提示</h1>"
    return HttpResponse(response)
在跳转的页面中我们可以获取到用户的state信息(也就是我们之前生成的uid),然后我们还需要利用requests模块再次向微信发送一个请求去获取用户的微信号,也就是上面代码中的openid,这个请求中需要传appid,secret,code以及grant_type,获取到
openid后我们要进行判断,如果它存在则要在数据库中为用户添加这一id,以便以后向用户发送微信,如果没有则返回相应的信息
完成上面的步骤后我们的数据库中就有了不同用户对应的微信号,我们就可以发送消息了
def sendmsg(request):
    def get_access_token():
        """
        获取微信全局接口的凭证(默认有效期俩个小时)
        如果不每天请求次数过多, 通过设置缓存即可
        """
        result = requests.get(
            url="https://api.weixin.qq.com/cgi-bin/token",
            params={
                "grant_type": "client_credential",
                "appid": settings.WECHAT_CONFIG['app_id'],
                "secret": settings.WECHAT_CONFIG['appsecret'],
            }
        ).json()
        if result.get("access_token"):
            access_token = result.get('access_token')
        else:
            access_token = None
        return access_token

    def send_custom_msg(to_user,token,content):
        body = {
            "touser": to_user,
            "msgtype": "text",
            "text": {
                "content": content
            }
        }
        response = requests.post(
            url="https://api.weixin.qq.com/cgi-bin/message/custom/send",
            params={
                'access_token': token
            },
            data=bytes(json.dumps(body, ensure_ascii=False), encoding='utf-8')
        )
        # 这里可根据回执code进行判定是否发送成功(也可以根据code根据错误信息)
        result = response.json()
        return result

    def send_template_msg(to_user,token):
        """
        发送模版消息
        """
        res = requests.post(
            url="https://api.weixin.qq.com/cgi-bin/message/template/send",
            params={
                'access_token': token
            },
            json={
                "touser": to_user,
                "template_id": '0XbLbuNkn3wPPAYRVXM-MZ0gU0tPvVbsjfc1qoSH6CM',
                "data": {
                    "first": {
                        "value": "李向龙",
                        "color": "#173177"
                    },
                    "keyword1": {
                        "value": "帅比",
                        "color": "#173177"
                    },
                }
            }
        )
        result = res.json()
        return result


    access_token = get_access_token()
    openid = models.UserInfo.objects.get(id=1).wx_id
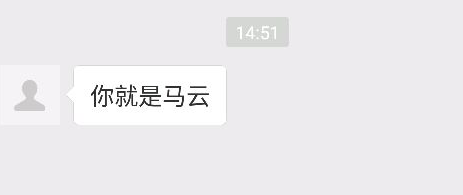
    # result = send_custom_msg(openid,access_token,'你就是马云')
    result = send_template_msg(openid,access_token)

    print(result)
    if result.get('errcode') == 0:
        return HttpResponse('发送成功')
    return HttpResponse('发送失败')
在发送前我们需要执行get_access_token(),向微信端获取授权,并拿到access_token,然后我们就可以调用发信息的函数send_custom_msg来发信息了
在发信息时我们先要取到用户的微信号openid,然后在发送时要,将微信号,发送内容以及access_token都传进去,然后用户就能收到消息了

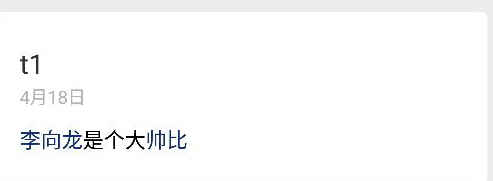
当然我们还可以设置信息的模板

然后使用send_template_msg发送信息,这样用户就能收到以上图为模板的信息了

注意点:
我们还需要修改下面的内容

在里面填写我们的跳转地址
