1: 集成cxf 做服务端
前提 springboot项目已经做好了,可以正常启动,现在要在项目上做个webservice服务端.
大概的做法 : 引入jar包------
创建com.moudel.webservice.test 文件夹,-------
在这个文件夹下创建 两个类和一个接口,具体写法看下面--------
启动项目,输入地址测试
1: 需要的引入的jar
<dependency>
  <groupId>org.apache.cxf</groupId>
  <artifactId>cxf-spring-boot-starter-jaxws</artifactId>
  <version>3.1.11</version>
</dependency>
2: 创建创建com.moudel.webservice.test 文件夹,在这个文件夹下创建 两个类和一个接口,具体写法看下面
============TestWebservice 接口==========
package com.moudel.webservice;
import java.util.Map;
import javax.jws.WebMethod;
import javax.jws.WebParam;
import javax.jws.WebResult;
import javax.jws.WebService;
/***
*
* @author cheng
*
* http://localhost:8082/services/TestWebservice?wsdl
*
*/
@WebService(name = "TestWebservice", // cxf生成的webservice服务端服务名称,和接口名称一致
targetNamespace = "http://webservice.moudel.com/"// 命名空间,一般是接口的包名倒序
)
public interface TestWebservice {
//webservice 发布的方法 , 客户端调用就调用这个方法 , 可以写多个方法实现不同的需求任务
@WebMethod
@WebResult(name = "String", targetNamespace = "")
public String testCxf(@WebParam(name = "txt") String txt);
//webservice 发布的方法 , 客户端调用就调用这个方法 , 可以写多个方法实现不同的需求任务
@WebMethod
@WebResult(name = "String", targetNamespace = "")
public String testCxf1(@WebParam(name = "tmap") String tmap);
}
=======================
============TestWebServiceImpl 实现类===========
package com.moudel.webservice;
import java.util.Map;
import javax.jws.WebService;
import org.springframework.stereotype.Component;
import com.alibaba.fastjson.JSON;
@WebService(serviceName = "TestWebservice", // 与接口中指定的name一致
targetNamespace = "http://webservice.moudel.com/", // 与接口中的命名空间一致,一般是接口的包名倒
endpointInterface = "com.moudel.webservice.TestWebservice"// 接口地址
)
@Component
public class TestWebServiceImpl implements TestWebservice{
@Override
public String testCxf(String txt) {
System.out.println("客户端传入的参数 : "+txt);
return "客户端传入的参数 : "+txt;
}
@Override
public String testCxf1(String tmap) {
System.out.println(tmap);
return tmap;
}
}
=======================
============CxfConfig 注册发布类============
package com.moudel.webservice;
import javax.xml.ws.Endpoint;
import org.apache.cxf.Bus;
import org.apache.cxf.jaxws.EndpointImpl;
import org.springframework.beans.factory.annotation.Autowired;
import org.springframework.context.annotation.Bean;
import org.springframework.context.annotation.Configuration;
import com.moudel.webservice.TestWebservice;
@Configuration
public class CxfConfig {
@Autowired
private Bus bus;
@Autowired
TestWebservice testWebservice;
// @Bean("cxfServletRegistration")
// public ServletRegistrationBean dispatcherServlet() {
// //注册servlet 拦截/ws 开头的请求 不设置 默认为:/services/*
// return new ServletRegistrationBean(new CXFServlet(), "/ws/*");
// }
@Bean
public Endpoint endpoint() {
EndpointImpl endpoint = new EndpointImpl(bus, testWebservice);
endpoint.publish("/TestWebservice");//接口的名称
return endpoint;
}
}
========================
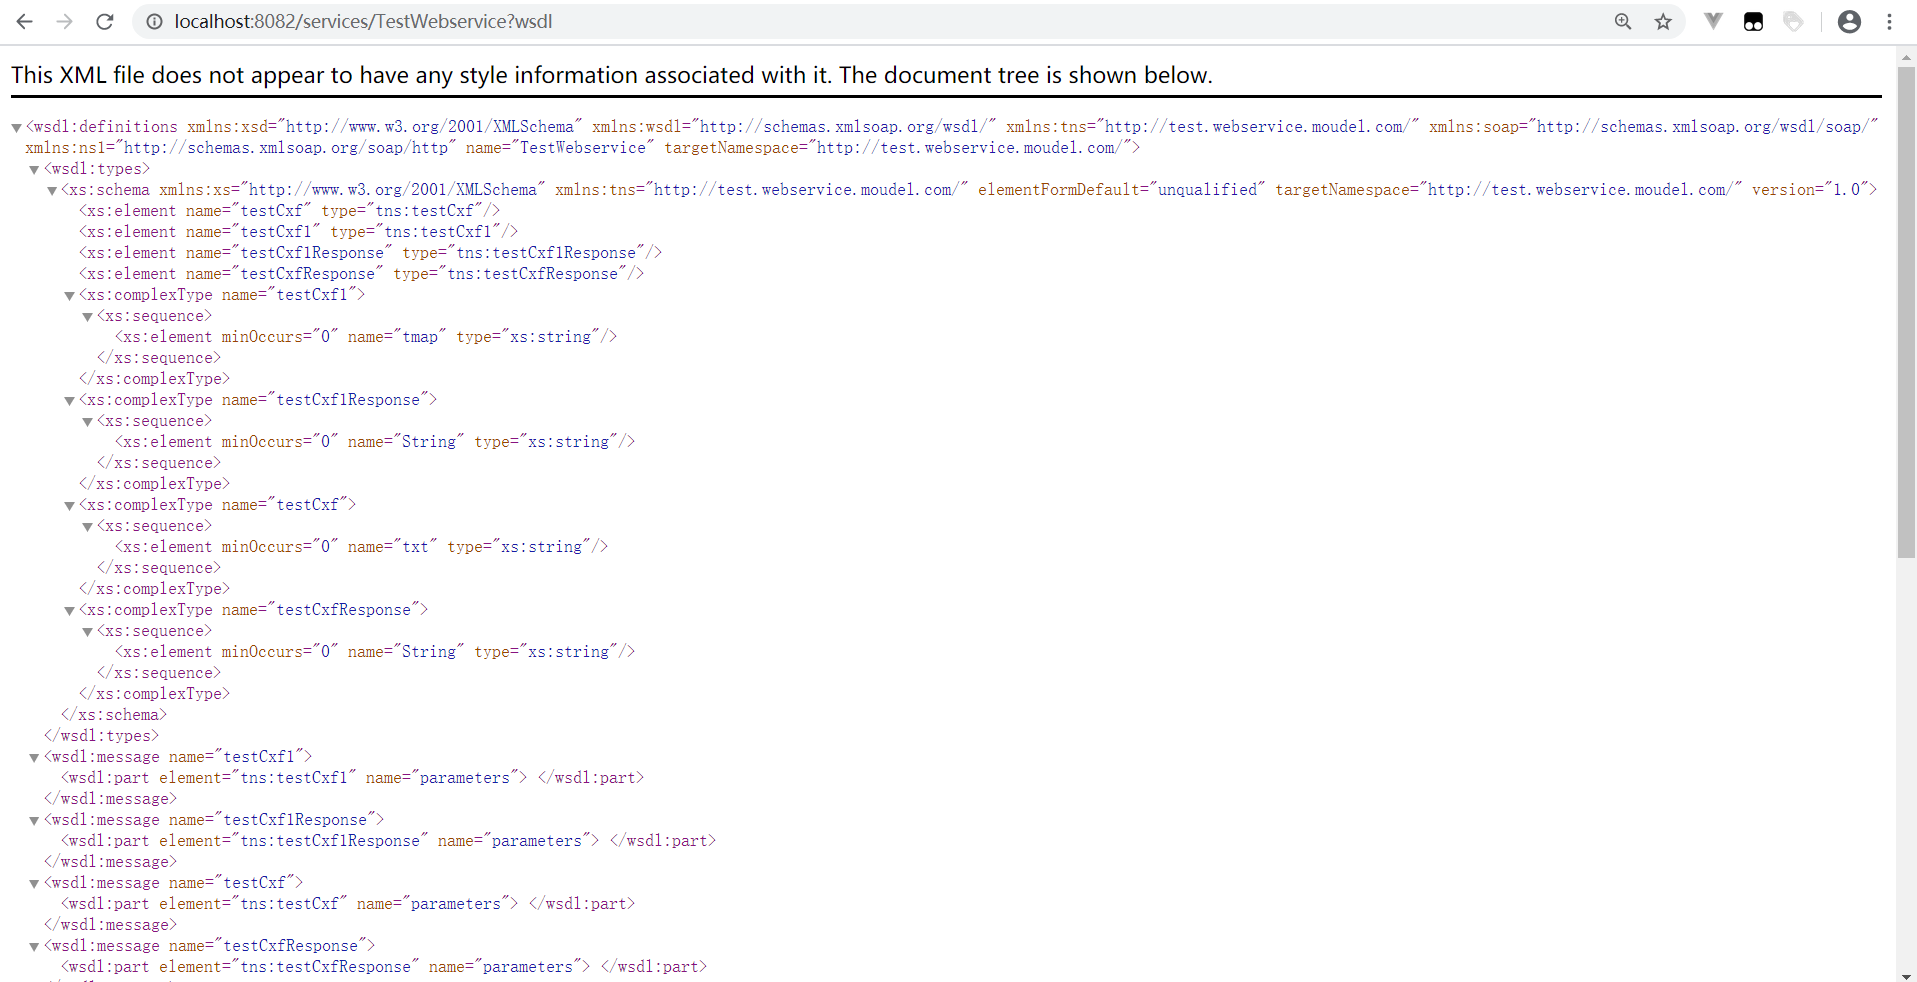
3: 启动项目 输入地址试试
http://localhost:8082/services/TestWebservice?wsdl -----services如果配置了就使用配置的,不配置就会使用默认的,在上面CxfConfig类里配置,TestWebservice是定义的接口的名称
http:// ip:端口/默认的/接口名称?wsdl"

2: 客户端调用
引入jar包------写个方法调用测试
<dependency>
<groupId>org.apache.cxf</groupId>
<artifactId>cxf-spring-boot-starter-jaxws</artifactId>
<version>3.1.11</version>
</dependency>
//调用webservice服务端
public static String  invoking(){
    // 创建动态客户端
    //  需要知道 wsdl路径   ,  方法名  ,  入参格式
    JaxWsDynamicClientFactory dcf = JaxWsDynamicClientFactory.newInstance();
    Client client = dcf.createClient("http://localhost:8082/services/TestWebservice?wsdl");
    // 需要密码的情况需要加上用户名和密码
    // client.getOutInterceptors().add(new ClientLoginInterceptor(USER_NAME,
    // PASS_WORD));
    Object[] objects = new Object[0];
    try {
        // invoke("方法名",参数1,参数2,参数3....);
        objects = client.invoke("testCxf", "Leftso");
        System.out.println("返回数据:" + objects[0]);
    } catch (java.lang.Exception e) {
        e.printStackTrace();
    }
    return "";
}