-
编译安装nginx
- 下载
- 解压
tar -xzvf nginx-1.14.0.tar.gz
- 配置安装目录
./configure --prefix=/usr/local/nginx
- 编译安装
make && make insatll
注:在 configure 过程中可能遇到的问题
    checking for PCRE library ... not found
    checking for PCRE library in /usr/local/ ... not found
    checking for PCRE library in /usr/include/pcre/ ... not found
    checking for PCRE library in /usr/pkg/ ... not found
    checking for PCRE library in /opt/local/ ... not found

    ./configure: error: the HTTP rewrite module requires the PCRE library.
    You can either disable the module by using --without-http_rewrite_module
    option, or install the PCRE library into the system, or build the PCRE library
    statically from the source with nginx by using --with-pcre=<path> option.
出错的原因是 Nginx 模块需要依赖一些 lib 库,解决办法如下
yum -y install pcre-devel zlib-devel
-
配置nginx环境变量
- 添加环境变量
vi /etc/profile
在末尾添加
export PATH=$PATH:/usr/local/nginx/sbin
最后,执行命令
source /etc/profile使其修改生效,执行完可通过echo $PATH命令查看是否添加成功。-
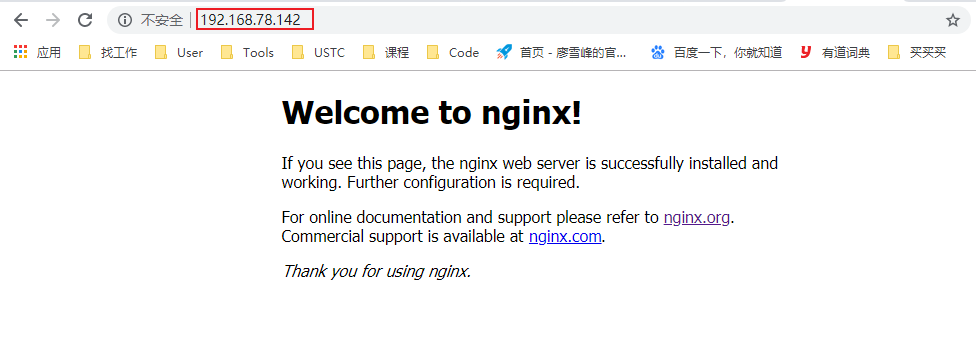
访问80端口,查看是否安装成功
-
Linux常用命令
启动服务:nginx 退出服务:nginx -s quit 强制关闭服务:nginx -s stop 重载服务:nginx -s reload (重载服务配置文件,类似于重启,但服务不会中止) 验证配置文件:nginx -t 使用配置文件:nginx -c "配置文件路径" 使用帮助:nginx -h -
nginx 配置文件说明
在项目使用中,使用最多的三个核心功能是静态服务器、反向代理和负载均衡。
这三个不同的功能的使用,都跟Nginx的配置密切相关,Nginx服务器的配置信息主要集中在"nginx.conf"这个配置文件中,并且所有的可配置选项大致分为以下几个部分.main # 全局配置 events { # 工作模式配置 } http { # http设置 .... server { # 服务器主机配置(虚拟主机、反向代理 等) .... location { # 路由配置(虚拟目录等) .... } location path { .... } location otherpath { .... } } server { .... location { .... } } upstream name { # 负载均衡配置 .... } }- main模块
- user 用来指定nginx worker进程运行用户以及用户组,默认nobody账号运行
- worker_processes 指定nginx要开启的子进程数量,运行过程中监控每个进程消耗内存(一般几M~几十M不等)根据实际情况进行调整,通常数量是CPU内核数量的整数倍
- error_log 定义错误日志文件的位置及输出级别【debug / info / notice / warn / error / crit】
- pid 用来指定进程id的存储文件的位置
- worker_rlimit_nofile 用于指定一个进程可以打开最多文件数量的描述
...
- event模块
- worker_connections 指定最大可以同时接收的连接数量,这里一定要注意,最大连接数量是和worker processes共同决定的。
- multi_accept 配置指定nginx在收到一个新连接通知后尽可能多的接受更多的连接
- use epoll 配置指定了线程轮询的方法,如果是linux2.6+,使用epoll,如果是BSD如Mac请使用Kqueue
...
- http模块
- 作为web服务器,http模块是nginx最核心的一个模块,配置项也是比较多的,项目中会设置到很多的实际业务场景,需要根据硬件信息进行适当的配置。
- main模块
#main 模块

#user  nobody;      用来指定nginx worker进程运行用户以及用户组,默认nobody账号运行

worker_processes  1;     指定nginx要开启的子进程数量,通常数量是CPU内核数量的整数倍

#error_log  logs/error.log;               定义错误日志文件的位置及输出级别 【debug / info / notice / warn / error / crit】
#error_log  logs/error.log  notice;
#error_log  logs/error.log  info;

#pid        logs/nginx.pid;             用来指定进程id的存储文件的位置


events {
    worker_connections  1024;           指定最大可以同时接收的连接数量
}


http {
    include       mime.types;           指定在当前文件中包含另一个文件的指令
    default_type  application/octet-stream;

    #log_format  main  '$remote_addr - $remote_user [$time_local] "$request" '
    #                  '$status $body_bytes_sent "$http_referer" '
    #                  '"$http_user_agent" "$http_x_forwarded_for"';

    #access_log  logs/access.log  main;设置存储访问记录的日志

    sendfile        on;                配置on让sendfile发挥作用,将文件的回写过程交给数据缓冲去去完成,而不是放在应用中完成,这样的话在性能提升有有好处
    #tcp_nopush     on;                让nginx在一个数据包中发送所有的头文件,而不是一个一个单独发
    #tcp_nodelay on                    让nginx不要缓存数据,而是一段一段发送,如果数据的传输有实时性的要求的话可以配置它,发送完一小段数据就立刻能得到返回值,但是不要滥用哦

    #keepalive_timeout  0;             给客户端分配连接超时时间,服务器会在这个时间过后关闭连接。一般设置时间较短,可以让nginx工作持续性更好
    keepalive_timeout  65;

    # client_header_timeout            设置请求头的超时时间
	# client_body_timeout              设置请求体的超时时间

	# send_timeout                     指定客户端响应超时时间,如果客户端两次操作间隔超过这个时间,服务器就会关闭这个链接


	# limit_conn_zone $binary_remote_addr zone=addr:5m           设置用于保存各种key的共享内存的参数,
	# limit_conn addr 100                                        给定的key设置最大连接数


	# server_tokens                    虽然不会让nginx执行速度更快,但是可以在错误页面关闭nginx版本提示,对于网站安全性的提升有好处哦


	# default_type application/octet-stream                      指定默认处理的文件类型可以是二进制

	# type_hash_max_size 2048          混淆数据,影响三列冲突率,值越大消耗内存越多,散列key冲突率会降低,检索速度更快;值越小key,占用内存较少,冲突率越高,检索速度变慢


	# ssl_protocols                    指令用于启动特定的加密协议,nginx在1.1.13和1.0.12版本后默认是ssl_protocols SSLv3 TLSv1 TLSv1.1 TLSv1.2,TLSv1.1与TLSv1.2要确保OpenSSL >= 1.0.1 ,SSLv3 													   现在还有很多地方在用但有不少被攻击的漏洞。

	# ssl prefer server ciphers        设置协商加密算法时,优先使用我们服务端的加密套件,而不是客户端浏览器的加密套件

    #gzip  on;                         是告诉nginx采用gzip压缩的形式发送数据。这将会减少我们发送的数据量

    server {                           一个虚拟主机的配置,一个http中可以配置多个server
        listen       80;
        server_name  localhost;        用来指定ip地址或者域名,多个配置之间用空格分隔

        #charset koi8-r;               用于设置www/路径中配置的网页的默认编码格式

        #access_log  logs/host.access.log  main;                 用于指定该虚拟主机服务器中的访问记录日志存放路径

        location / {                   location模块是Nginx配置中出现最多的一个配置,主要用于配置路由访问信息    / 表示匹配访问根目录
            root   html;               用于指定访问根目录时,访问虚拟主机的web目录
            index  index.html index.htm;                         在不指定访问具体资源时,默认展示的资源文件列表
        }


        location / {                   通过反向代理代理服务器访问模式,通过proxy_set配置让客户端访问透明化
    		proxy_pass http://localhost:8888;
    		proxy_set_header X-real-ip $remote_addr;
    		proxy_set_header Host $http_host;
		}


		location / {                   uwsgi配置
    		include uwsgi_params;
    		uwsgi_pass localhost:8888;
		}


        #error_page  404              /404.html;

        # redirect server error pages to the static page /50x.html
        #
        error_page   500 502 503 504  /50x.html;
        location = /50x.html {
            root   html;
        }

        # proxy the PHP scripts to Apache listening on 127.0.0.1:80
        #
        #location ~ .php$ {
        #    proxy_pass   http://127.0.0.1;
        #}

        # pass the PHP scripts to FastCGI server listening on 127.0.0.1:9000
        #
        #location ~ .php$ {
        #    root           html;
        #    fastcgi_pass   127.0.0.1:9000;
        #    fastcgi_index  index.php;
        #    fastcgi_param  SCRIPT_FILENAME  /scripts$fastcgi_script_name;
        #    include        fastcgi_params;
        #}

        # deny access to .htaccess files, if Apache's document root
        # concurs with nginx's one
        #
        #location ~ /.ht {
        #    deny  all;
        #}
    }


    # another virtual host using mix of IP-, name-, and port-based configuration
    #
    #server {
    #    listen       8000;
    #    listen       somename:8080;
    #    server_name  somename  alias  another.alias;

    #    location / {
    #        root   html;
    #        index  index.html index.htm;
    #    }
    #}


    # HTTPS server
    #
    #server {
    #    listen       443 ssl;
    #    server_name  localhost;

    #    ssl_certificate      cert.pem;
    #    ssl_certificate_key  cert.key;

    #    ssl_session_cache    shared:SSL:1m;
    #    ssl_session_timeout  5m;

    #    ssl_ciphers  HIGH:!aNULL:!MD5;
    #    ssl_prefer_server_ciphers  on;

    #    location / {
    #        root   html;
    #        index  index.html index.htm;
    #    }
    #}

}