今天来讲下android UI设计中常要用到的可延伸图像。除了最基本的png,jpg与gif三种格式外,android还有一种叫做Nine-Patch的可延伸图 像.9.png。和png格式不同的是,他会随着属性物的大小变化而改变自己的大小,从而来适应属性物的大小。这个特点,在我们平常的UI设计中是非常实 用的。最常见的一个图片做按钮背景,来适配字体大小,这时候,你会发现,这种可延伸图像非常的好用。
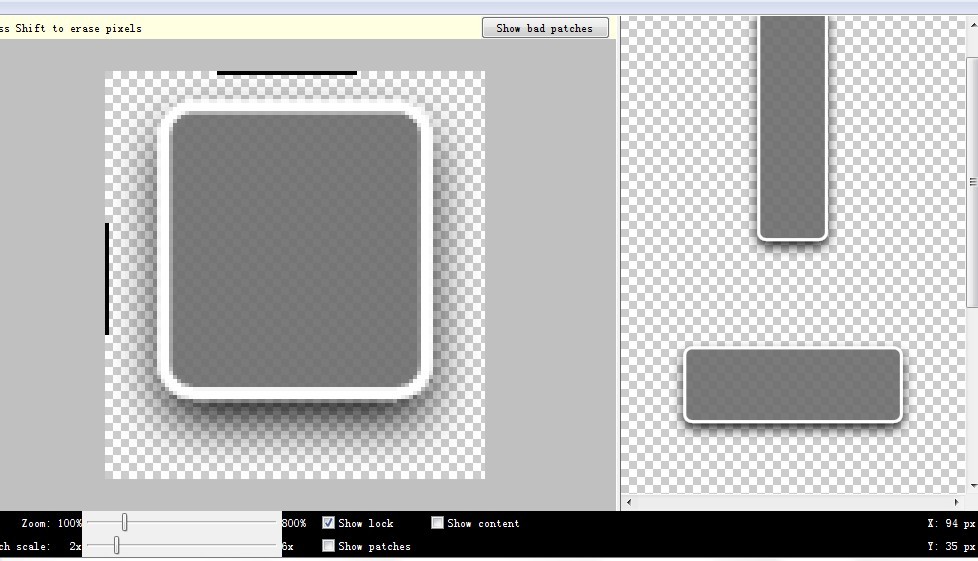
下面就来讲讲如何使用吧。Android SDK提供了一个工具来制造这种图像。在android sdk的tools目录下,有个draw9patch.bat的文件,就是他啦。运行它,将我们的图片拖进去,就会得到如下的样子。

左边窗口的是原始图形,你可以通过画面下的Zoom来调整大小,Pathc scale调整png图像最大可以延伸的倍率,延伸后的结果就显示在右边的窗口。在一个像素里点击,在图形边缘绘制线条来定义可延伸的部分。在这边需要注 意的是,你必须至少在图形的上边缘和左边缘画线,否则将图片导入后工程会报错。调整好以后,点击File -save,注意需要保存为*.9.png格式。在程序中的使用和普通图片完全一样,这就不讲了。
来看下例子
给出xml中的代码,其中popup为9.png格式,popup1为普通png格式
- <?xml version="1.0" encoding="utf-8"?>
- <LinearLayout xmlns:android="http://schemas.android.com/apk/res/android"
- android:orientation="vertical"
- android:layout_width="fill_parent"
- android:layout_height="fill_parent"
- android:background="#C5CCD4FF"
- >
- <Button
- android:id="@+id/small"
- android:layout_width="wrap_content"
- android:layout_height="wrap_content"
- android:text="Small"
- android:textSize="10sp"
- android:textColor="#ffffffff"
- android:background="@drawable/popup1"
- />
- <Button
- android:id="@+id/large"
- android:layout_width="wrap_content"
- android:layout_height="wrap_content"
- android:text="LargeNotFit"
- android:textSize="40sp"
- android:textColor="#ffffffff"
- android:background="@drawable/popup1"
- />
- <Button
- android:id="@+id/largefit"
- android:layout_width="wrap_content"
- android:layout_height="wrap_content"
- android:text="LargeFit"
- android:textSize="40sp"
- android:textColor="#ffffffff"
- android:background="@drawable/popup"
- />
- </LinearLayout>
看下运行的效果

合理的使用Nine—Patch图像,在UI设计中是非常重要的。