一、全局异常
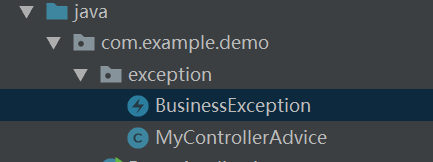
1、首先创建异常处理包和类

2、使用@ControllerAdvice注解,全局捕获异常类,只要作用在@RequestMapping上,所有的异常都会被捕获

package com.example.demo.exception;

import org.springframework.web.bind.annotation.ControllerAdvice;
import org.springframework.web.bind.annotation.ExceptionHandler;
import org.springframework.web.bind.annotation.ResponseBody;

import java.util.HashMap;
import java.util.Map;

/**
 * 全局捕获异常类,只要作用在@RequestMapping上,所有的异常都会被捕获
 */
@ResponseBody
@ControllerAdvice
public class MyControllerAdvice {
    @ExceptionHandler(value = Exception.class)
    public Map<String,Object> errorHandle(Exception e){
        Map<String,Object> map = new HashMap<String,Object>();
        map.put("code",-1);
        map.put("msg",e.getMessage());
        return map;
    }
}
这上面有个需要注意的是要加上@ResponseBody注解,如果不加会怎么样呢,我们试下,报错:
javax.servlet.ServletException: Circular view path [hello]: would dispatch back to the current handler URL [/hello] again.
Check your ViewResolver setup! (Hint: This may be the result of an unspecified view, due to default view name generation.)
    at org.springframework.web.servlet.view.InternalResourceView.prepareForRendering(InternalResourceView.java:209) ~[spring-webmvc-5.0.6.RELEASE.jar:5.0.6.RELEASE]
    at org.springframework.web.servlet.view.InternalResourceView.renderMergedOutputModel(InternalResourceView.java:147) ~[spring-webmvc-5.0.6.RELEASE.jar:5.0.6.RELEASE]
    at org.springframework.web.servlet.view.AbstractView.render(AbstractView.java:314) ~[spring-webmvc-5.0.6.RELEASE.jar:5.0.6.RELEASE]
    at org.springframework.web.servlet.DispatcherServlet.render(DispatcherServlet.java:1325) ~[spring-webmvc-5.0.6.RELEASE.jar:5.0.6.RELEASE]
    at org.springframework.web.servlet.DispatcherServlet.processDispatchResult(DispatcherServlet.java:1069) ~[spring-webmvc-5.0.6.RELEASE.jar:5.0.6.RELEASE]
    at org.springframework.web.servlet.DispatcherServlet.doDispatch(DispatcherServlet.java:1008) ~[spring-webmvc-5.0.6.RELEASE.jar:5.0.6.RELEASE]
    at org.springframework.web.servlet.DispatcherServlet.doService(DispatcherServlet.java:925) ~[spring-webmvc-5.0.6.RELEASE.jar:5.0.6.RELEASE]
    at org.springframework.web.servlet.FrameworkServlet.processRequest(FrameworkServlet.java:974) ~[spring-webmvc-5.0.6.RELEASE.jar:5.0.6.RELEASE]
    at org.springframework.web.servlet.FrameworkServlet.doGet(FrameworkServlet.java:866) ~[spring-webmvc-5.0.6.RELEASE.jar:5.0.6.RELEASE]
    at javax.servlet.http.HttpServlet.service(HttpServlet.java:635) ~[tomcat-embed-core-8.5.31.jar:8.5.31]
    at org.springframework.web.servlet.FrameworkServlet.service(FrameworkServlet.java:851) ~[spring-webmvc-5.0.6.RELEASE.jar:5.0.6.RELEASE]
    at javax.servlet.http.HttpServlet.service(HttpServlet.java:742) ~[tomcat-embed-core-8.5.31.jar:8.5.31]
    at org.apache.catalina.core.ApplicationFilterChain.internalDoFilter(ApplicationFilterChain.java:231) ~[tomcat-embed-core-8.5.31.jar:8.5.31]
因为是个json的格式,所以必须要有@ResponseBody
3、测试:在hello里面造个异常
package com.example.demo;

import org.springframework.beans.factory.annotation.Value;
import org.springframework.web.bind.annotation.RequestMapping;
import org.springframework.web.bind.annotation.RestController;

@RestController
public class HelloController {
    @Value("${gwf.name}")
    private String msg;
    @RequestMapping("/hello")
    public String hello() {
        int num = 1/0;
        return this.msg;
    }
}
结果: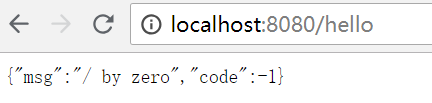
二、自定义异常
1、首先创建自定义异常类:注意需要继承extends RuntimeException
package com.example.demo.exception;

public class BusinessException extends RuntimeException{
    private String code;
    private String msg;

    public BusinessException(String code, String msg) {
        super();
        this.code = code;
        this.msg = msg;
    }

    public String getCode() {
        return code;
    }

    public void setCode(String code) {
        this.code = code;
    }

    public String getMsg() {
        return msg;
    }

    public void setMsg(String msg) {
        this.msg = msg;
    }
}
这里介绍下idea自动生成get/set和构造函数的快捷键:alt + insert,然后选择getter和setter,constructor,自动生成get、set方法和构造函数
2、然后就是自定义异常捕获
package com.example.demo.exception;

import org.springframework.web.bind.annotation.ControllerAdvice;
import org.springframework.web.bind.annotation.ExceptionHandler;
import org.springframework.web.bind.annotation.ResponseBody;

import java.util.HashMap;
import java.util.Map;

/**
 * 全局捕获异常类,只要作用在@RequestMapping上,所有的异常都会被捕获
 */
@ResponseBody
@ControllerAdvice
public class MyControllerAdvice {
    @ExceptionHandler(value = Exception.class)
    public Map<String,Object> errorHandle(Exception e){
        Map<String,Object> map = new HashMap<String,Object>();
        map.put("code",-1);
        map.put("msg",e.getMessage());
        return map;
    }

    @ExceptionHandler(value = BusinessException.class)
    public Map<String,Object> errorHandle(BusinessException e){
        Map<String,Object> map = new HashMap<String,Object>();
        map.put("code",e.getCode());
        map.put("msg",e.getMsg());
        return map;
    }
}
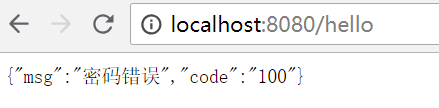
3、最后我们测试下:抛出自定义异常
package com.example.demo;

import com.example.demo.exception.BusinessException;
import org.springframework.beans.factory.annotation.Value;
import org.springframework.web.bind.annotation.RequestMapping;
import org.springframework.web.bind.annotation.RestController;

@RestController
public class HelloController {
    @Value("${gwf.name}")
    private String msg;
    @RequestMapping("/hello")
    public String hello() {
        //int num = 1/0;
        throw new BusinessException("100","密码错误");
        //return this.msg;
    }
}
结果: