Winform跨窗体操作控件是winform开发中很常见的形式,最常见且简单有效的方式便是使用委托的方式来进行操作,下面我将通过一个小实例来说明如何使用委托跨窗体实现控件操作。
实例介绍:两个窗体,Form1按钮打开Form2,然后在Form2的TextBox输入值在Form1的TextBox中显示出来。
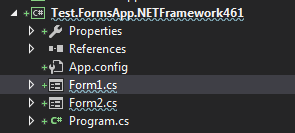
一、项目结构
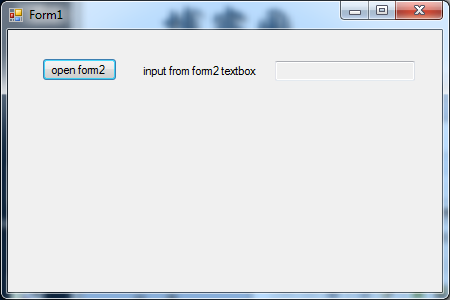
Form1窗体设计:

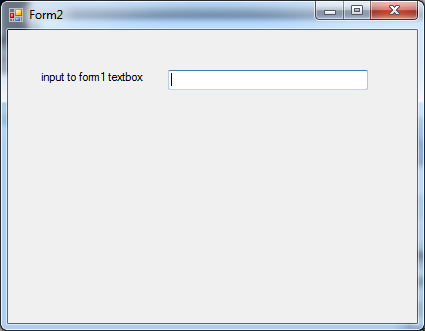
Form2窗体设计:

二、代码实现
在Form2的代码中声明一个委托(写在Form2类外)->
public delegate void ChangeForm1TextBoxValue(string txt);
然后在Form2类内写一个委托事件->
public event ChangeForm1TextBoxValue ChangeTextBoxValue;
双击Form2的textbox给Form2的textbox添加值变化出发事件,并在此事件中调用委托事件->
private void textBox1_TextChanged(object sender, EventArgs e)
{
          ChangeTextBoxValue(this.textBox1.Text);//执行委托实例
}
Form2的完整代码如下:

using System;
using System.Windows.Forms;

namespace Test.FormsApp
{
    public delegate void ChangeForm1TextBoxValue(string txt);
    public partial class Form2 : Form
    {
        public event ChangeForm1TextBoxValue ChangeTextBoxValue;
        public Form2()
        {
            InitializeComponent();
        }

        private void textBox1_TextChanged(object sender, EventArgs e)
        {
            ChangeTextBoxValue(this.textBox1.Text);//执行委托实例
        }
    }
}
然后我们切换到Form1的代码
button点击事件实例化Form2并调用Form2的委托事件->
        private void button1_Click(object sender, EventArgs e)
        {
            Form2 f2 = new Form2();
            f2.ChangeTextBoxValue += F2_ChangeTextBoxValue;
            f2.Show();
        }
在下面声明委托事件的操作方法->
        private void F2_ChangeTextBoxValue(string txt)
        {
            this.textBox1.Text = txt;
        }
上述步骤在输入+=号时可以双击两下Tab键,IDE(编译器)会自动将事件补全~
Form1的完整代码如下:
using System;
using System.Windows.Forms;

namespace Test.FormsApp.NETFramework461
{
    public partial class Form1 : Form
    {
        public Form1()
        {
            InitializeComponent();
        }

        private void button1_Click(object sender, EventArgs e)
        {
            Form2 f2 = new Form2();
            f2.ChangeTextBoxValue += F2_ChangeTextBoxValue;
            f2.Show();
        }

        private void F2_ChangeTextBoxValue(string txt)
        {
            this.textBox1.Text = txt;
        }
    }
}
到这里,我们的实现基本完成,下面进入测试!
三、效果测试
然后在Form2的textbox中输入值

可以看到值已经实时显示到Form1的textbox中。
测试结果达到预期效果,项目实现成功!
一起成长,共同学习~