How to get started using Boost threads
By AndyUk06 | 7 Nov 2011 | Unedited contribution
A non-nonsense guide to setting up boost threads in Visual Studio environments
Sponsored Links
Introduction
This post aims to be an accessible step-by-step introduction to helping beginners get set up with the Boost threads in Visual Studio environments for the first time. Like with many technical subjects, there seems to be a great deal of information out there that tells you a lot but does not actually show you much! This article contains no in-depth discussions on how to use Boost threads in all their different guises. That's for another time or place. What this article (hopefully) does is help you get up and running with Boost threads minus any compiler whinges, which for me at least is often the hardest part.
A simple boost::thread example
A nice introduction to boost thread programming exists over at Gavin Baker’s “antonymn” page which I will take the liberty of reproducing here:
![]() Collapse | Copy Code
Collapse | Copy Code
#include <iostream>
#include <boost/thread.hpp>
#include <boost/date_time.hpp>

void workerFunc()
{
    boost::posix_time::seconds workTime(3);
    std::cout << "Worker: running" << std::endl;

    // Pretend to do something useful...
    boost::this_thread::sleep(workTime);
    std::cout << "Worker: finished" << std::endl;
}

int main(int argc, char* argv[])
{
    std::cout << "main: startup" << std::endl;
    boost::thread workerThread(workerFunc);

    std::cout << "main: waiting for thread" << std::endl;
    workerThread.join();

    std::cout << "main: done" << std::endl;
    return 0;
}
This example code creates a boost thread object, passes it an example worker function and exits the thread when complete. This simple example I use as a means of validating the successful setup of the Boost thread library. The following sections describe the preliminary steps that will be necessary to run this simple example.
1. Download and install Boost
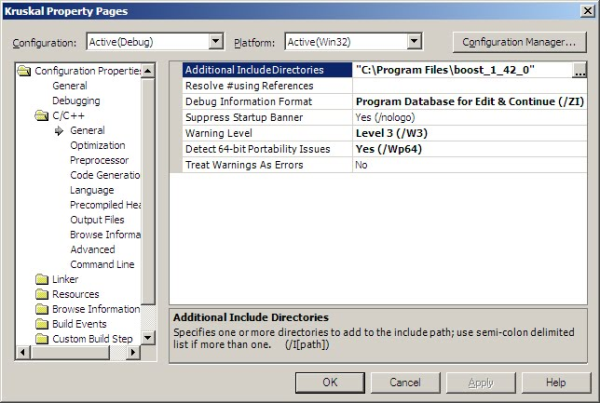
If you have not already done so, download and install the Boost libraries from here or from here. In your Visual Studio project, select the Configuration Properties -> Additional Include Directories and enter the path to wherever you have installed the the Boost root directory. At the time of obtaining the following screenshot, the version of Boost being used was 1.42.0 - just modify the directory path according to whichever version you are using:
Assuming you have downloaded, unzipped and installed the boost libraries in your Visual Studio environment, and told the Visual Studio project where the Boost libraries live, you are not quite finished yet. It is likely that you will encounter a linker error similar to this when compiling the above code for the first time:
LINK : fatal error LNK1104: cannot open file 'libboost_thread-vc100-mt-gd-1_46_1.lib'
It’s telling you that it does not know anything about this library file. In Boost there exist a number of libraries that you are required to build yourself and this is one of them.
2. Obtain bjam
The next stage will be to build the bjam.exe program. I have found that the simplest way is to use the installersprovided by BoostPro. In my example this was the boostpro 1.46.1 installer. Download and run this program.
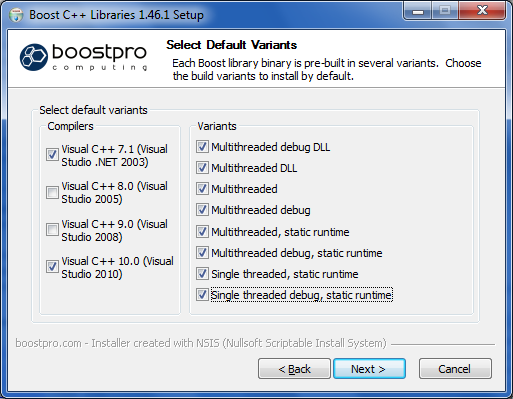
For me it was the VS 2003 .NET and VS 2010 versions I was interested in:
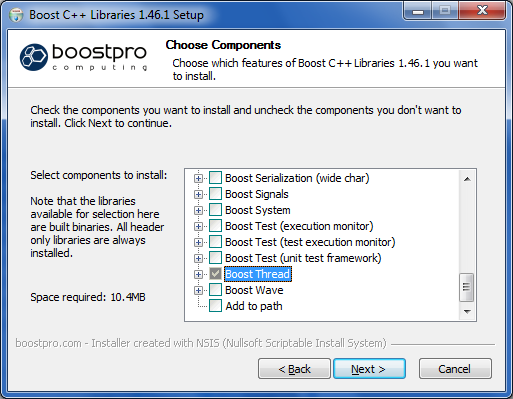
During installation select which of the libraries you wish to install – it does not have to be all of them, just the thread libraries if you wish:
3. Create bjam.exe executable
When bjam has been installed, open up a command prompt and go to the src directory, for example:
C:\Program Files\boost_1_46_1\tools\build\v2\engine\src
Run build.bat from the command prompt. Notice that running this script will create the bjam.exe executable inside the bin.ntx86 subdirectory:
C:\Program Files\boost_1_46_1\tools\build\v2\engine\src\bin.ntx86
4. Update PATH environment variables
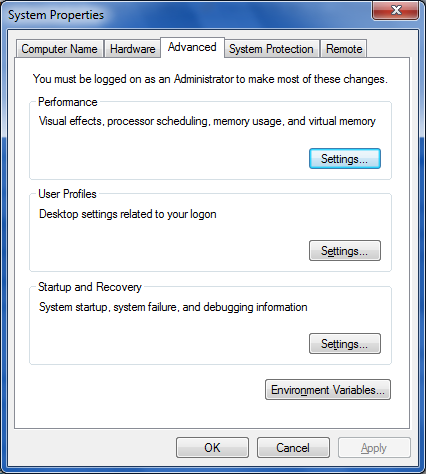
Now select bjam.exe into in your PATH environment variables. In Windows 7 for example, right-click Computer, select Properties and Advanced System Settings:
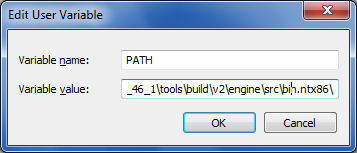
Click on the Environment Variables… button and select the Edit button:
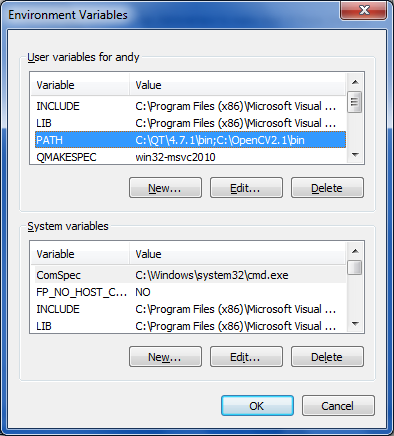
Include the directory:
C:\Program Files\boost_1_46_1\tools\build\v2\engine\src\bin.ntx86
as another environment variable, making sure each variable is separated by a colon (;):
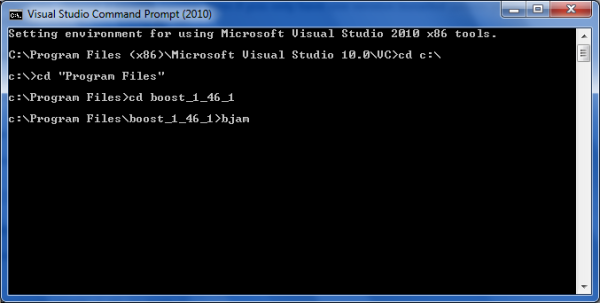
5. Run the bjam executable
At the command prompt, go to the C:\Program Files\boost_1_46_1 directory and enter “bjam”, waiting approximately 5-15 minutes during which the program gets created:
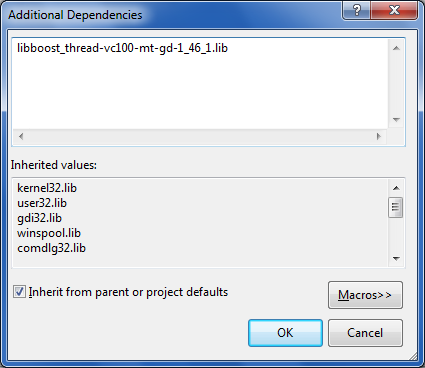
6. Set Visual Studio project properties
In your Visual Studio project select Configuration Properties -> Linker -> Input -> Additional Dependencies and enterlibboost_thread-vc100-mt-gd-1_46_1.lib:
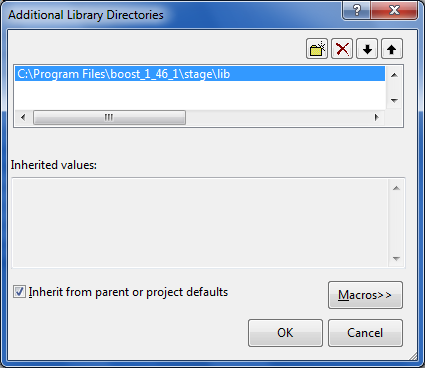
In your Visual Studio project set the project configuration properties -> Linker -> General -> Additional Include Directories, telling it the location of the stage/lib folder:
And that’s it! This example boost thread program should now compile and run giving the following output:
main: startup
main: waiting for thread
Worker: running
Worker: finished
main: done