一、虚拟机快照
1、确认你的物理机上的vg还有足够的剩余空间
[root@hacker ~]# vgs
VG #PV #LV #SN Attr VSize VFree
vg_hacker 1 6 4 wz--n- 95.80g 57.80g
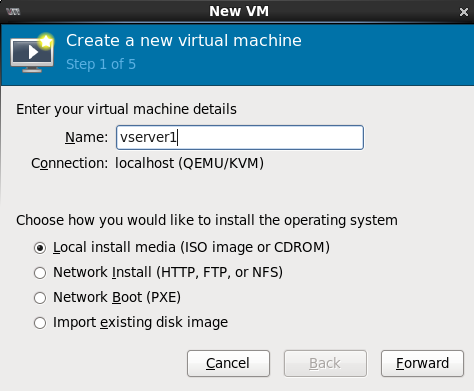
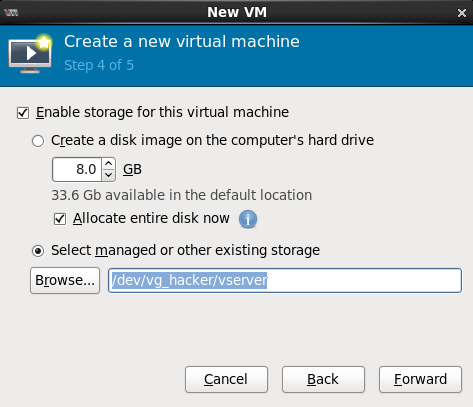
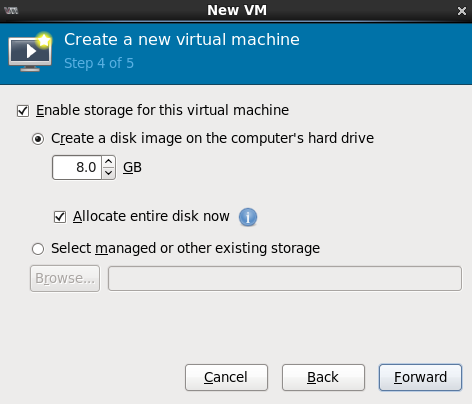
2、建立一个至少4G(此处以8G为例)的lv逻辑卷,将虚拟机装在此逻辑卷中
[root@hacker ~]# lvcreate -L 8G -n vserver vg_hacker
[root@hacker ~]# ll /dev/vg_hacker/vserver
3、对虚拟机进行封装
[root@server93 ~]# vim /etc/yum.repos.d/rhel-source.repo
[rhel-source]
name=Red Hat Enterprise Linux $releasever - $basearch - Source
baseurl=ftp://192.168.122.1/pub/yum
enabled=1
gpgcheck=1
gpgkey=file:///etc/pki/rpm-gpg/RPM-GPG-KEY-redhat-release
[HighAvailability]
name=Instructor Server Repository
baseurl=ftp://192.168.122.1/pub/yum/HighAvailability
gpgcheck=1
gpgkey=file:///etc/pki/rpm-gpg/RPM-GPG-KEY-redhat-release
enabled=1
[LoadBalancer]
name=Instructor Server Repository
baseurl=ftp://192.168.122.1/pub/yum/LoadBalancer
gpgcheck=1
gpgkey=file:///etc/pki/rpm-gpg/RPM-GPG-KEY-redhat-release
enabled=1
[ResilientStorage]
name=Instructor Server Repository
baseurl=ftp://192.168.122.1/pub/yum/ResilientStorage
gpgcheck=1
gpgkey=file:///etc/pki/rpm-gpg/RPM-GPG-KEY-redhat-release
enabled=1
[ScalableFileSystem]
name=Instructor Server Repository
baseurl=ftp://192.168.122.1/pub/yum/ScalableFileSystem
gpgcheck=1
gpgkey=file:///etc/pki/rpm-gpg/RPM-GPG-KEY-redhat-release
enabled=1
[extra]
name=localextra
baseurl=ftp://192.168.122.1/pub/extra
gpgcheck=0
enabled=1
[root@server93 ~]# yum install lftp vim openssh-clients -y
[root@server93 ~]# vim /etc/udev/rules.d/70-persistent-net.rules
# This file was automatically generated by the /lib/udev/write_net_rules
# program, run by the persistent-net-generator.rules rules file.
#
# You can modify it, as long as you keep each rule on a single
# line, and change only the value of the NAME= key.
# PCI device 0x10ec:0x8139 (8139cp)
# PCI device 0x10ec:0x8139 (8139cp)
SUBSYSTEM=="net", ACTION=="add", DRIVERS=="?*", ATTR{address}=="52:54:00:31:46:e8", ATTR{type}=="1", KERNEL=="eth*", NAME="eth0" (将次行删除,保存退出)
[root@server93 ~]# /etc/init.d/iptables stop
[root@server93 ~]# chkconfig iptables off
[root@server93 ~]# vim /etc/sysconfig/selinux
# This file controls the state of SELinux on the system.
# SELINUX= can take one of these three values:
# enforcing - SELinux security policy is enforced.
# permissive - SELinux prints warnings instead of enforcing.
# disabled - No SELinux policy is loaded.
SELINUX=disabled
# SELINUXTYPE= can take one of these two values:
# targeted - Targeted processes are protected,
# mls - Multi Level Security protection.
SELINUXTYPE=targeted
[root@server93 ~]# rm -rf /etc/ssh/ssh_host_*
[root@server93 ~]# vim /etc/sysconfig/network-scripts/ifcfg-eth0
DEVICE=eth0
ONBOOT=yes
BOOTPROTO=dhcp
[root@server93 ~]# halt 封装完成,关闭虚拟机
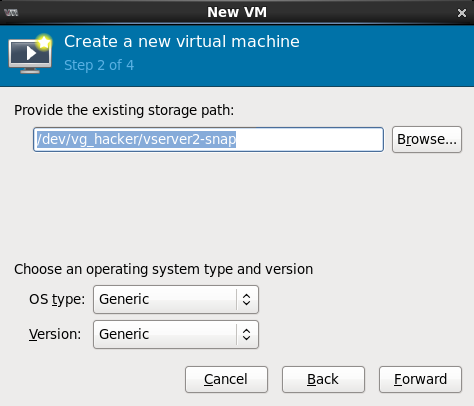
4、建立快照,并删除虚拟机原本的磁盘,将此快照添加到虚拟机中,每台虚拟机对应一个快照
[root@hacker ~]# lvcreate -L 5G -n vserver1-snap /dev/vg_hacker/vserver -s

5、其他虚拟机直接在原本的逻辑卷上依次建立快照即可,无需多次重复安装虚拟机!
[root@hacker ~]# lvcreate -L 5G -n vserver2-snap /dev/vg_hacker/vserver -s

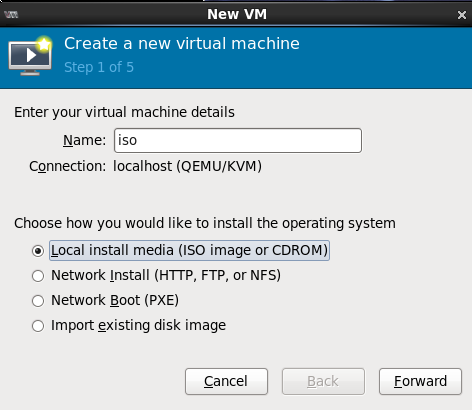
二、镜像封装
当你系统vg没有剩余空间的时,可以使用另一种快捷的办法来快速安装多台虚拟机
1、无需建议逻辑卷,只需按正常流程安装好一台虚拟机
2、按照制作虚拟机快照的步骤3对虚拟机进行封装
3、进入虚拟机默认存放路径,找到你刚安装的虚拟机对应的img文件(此处为iso.img),然后执行以下命令
[root@hacker ~]# cd /var/lib/libvirt/images/
[root@hacker images]# ls
iso.img
[root@hacker images]# qemu-img create -f qcow2 -o backing_file=iso.img iso.voll1
4.将生成的iso.voll1文件添加到虚拟机中即可,需要多台虚拟机时以此类推

-------end---------