浏览器扩展允许我们编写程序来实现对浏览器元素(书签、导航等)以及对网页元素的交互,
甚至从 web 服务器获取数据,以 Chrome 浏览器扩展为例,扩展文件包括:
- 一个manifest文件(主文件,json格式)
- 至少一个HTML文件(主题可以没有HTML文件)
- JavaScript文件 (可选,非必须)
- 任何其他你需要的文件(比如图片)
将这些文件放在一个文件夹内,并通过浏览器提供的打包程序进行打包,就可以发布使用了。
这里以一个简单的例子,说明 Chrome 扩展的创建和运行过程。
首先创建一个文件夹 extensionDemo,在文件夹中分别创建以下文件:

首先看 manifest.json 文件:
{
  "name": "My Extension",
  "manifest_version": 2,
  "version": "1.0",
  "description": "A Simple Browser Extension",
  "browser_action": {
    "default_icon": "cat.png"
  },
  "content_scripts": [
    {
      "matches": ["file:///Users/wangxi/Desktop/extensionDemo/index.html/*"],
      "js": ["script.js"]
    }
  ]
}
对应字段解析:
{
  // 扩展名称
  "name": "My Extension",
  // manifest 版本,只能为 2,int 类型
  "manifest_version": 2,
  // 扩展 版本
  "version": "1.0",
  // 扩展描述
  "description": "A Simple Browser Extension",
  // 控制提示文字、图标标记、弹出窗口等
  "browser_action": {
    // 设置地址栏右侧的扩展图标
    "default_icon": "cat.png",
    // 鼠标移到扩展图标上显示的文字,可选
    "default_title": "I am a Cat",
  },
  // 内容脚本,在页面带入完成后调用,在脚本中可以获取页面的 DOM 元素
  "content_scripts": [
    {
      // 扩展脚本生效的页面地址(*如果是本地测试的页面,则需要填写的是浏览器中url的地址,而不是本地的文件地址)
      "matches": ["file:///Users/wangxi/Desktop/extensionDemo/index.html/*"],
      // 指定扩展脚本文件
      "js": ["script.js"]
    }
  ]
}
为了模拟目标网页,这里编写 index.html 文件作为演示:
<!DOCTYPE html>
<html lang="en">
<head>
  <meta charset="UTF-8">
  <title>Moon Cakes</title>
  <meta name="viewport" content="width=device-width, initial-scale=1.0, user-scalable=no">
  <style>
    html, body, div, header, footer {padding:0;margin:0;background:#FFE;font-family:'Arial';}
    footer {box-sizing:border-box;position:absolute;bottom:0;width:100%;padding:10px;background:#FFF;text-align:center;}
    button {width:100%;padding:10px 20px;font-size:14px;background:#00A854;color:#FFF;border:none;border-radius:5px;outline:none;}
    button:isabled {background:#EEE;color:#CCC;}
    a {display:block;text-decoration:none;color:#FFF;}
    section {padding:60px 0;text-align:center;}
    #count {color:#108EE9;font-size:20px;}
    .banner {width:100%;}
    .cat {width:30%;}
  </style>
</head>
<body>
  <div>
    <header><img class="banner" src="./IU.png"></header>
    <section>
      <img class="cat" src="./cat.png">
      <p>U click the button <span id="count">0</span> Times...</p>
    </section>
    <footer>
      <button id="btn" disabled='disabled'>
        <a id='link' href="https://image.baidu.com/search/index?tn=baiduimage&ct=201326592&lm=-1&cl=2&ie=gbk&word=iu&fr=ala&ala=1&alatpl=star&pos=0&hs=2&xthttps=111111" target="_blank">Click to get the Girl</a>
      </button>
    </footer>
  </div>
  <script>
    window.onload = function () {
      let $btn = document.getElementById('btn')
      let $count = document.getElementById('count')
      let num = $count.textContent
      let timer = setTimeout(() => {
        $btn.removeAttribute('disabled')
      }, 3000)
      $btn.onclick = function () {
        console.log('click btn...')
        $count.textContent = num++
      }
    }
  </script>
</body>
</html>
页面比较简单,页面按钮不可用,设置定时器,三秒后移除按钮的 disabled 属性。(模拟商城的秒杀活动)
继续看脚本文件 script.js:
let $btn = document.getElementById('btn')
let $count = document.getElementById('count')
let timer = setInterval(() => {
  let ifBtnDisabled = $btn.getAttribute('disabled')
  if (ifBtnDisabled !== 'disabled') {
    document.getElementById('link').click()
    clearInterval(timer)
  } else {
    console.log('button disabled...')
  }
}, 500)
简单分析一下:首先获取页面的对应按钮元素,启用定时器判断按钮是否可用,若不可用则继续定时循环进行判断,直到按钮可用,触发按钮的点击事件,同时清除计时器。
添加扩展的方法:
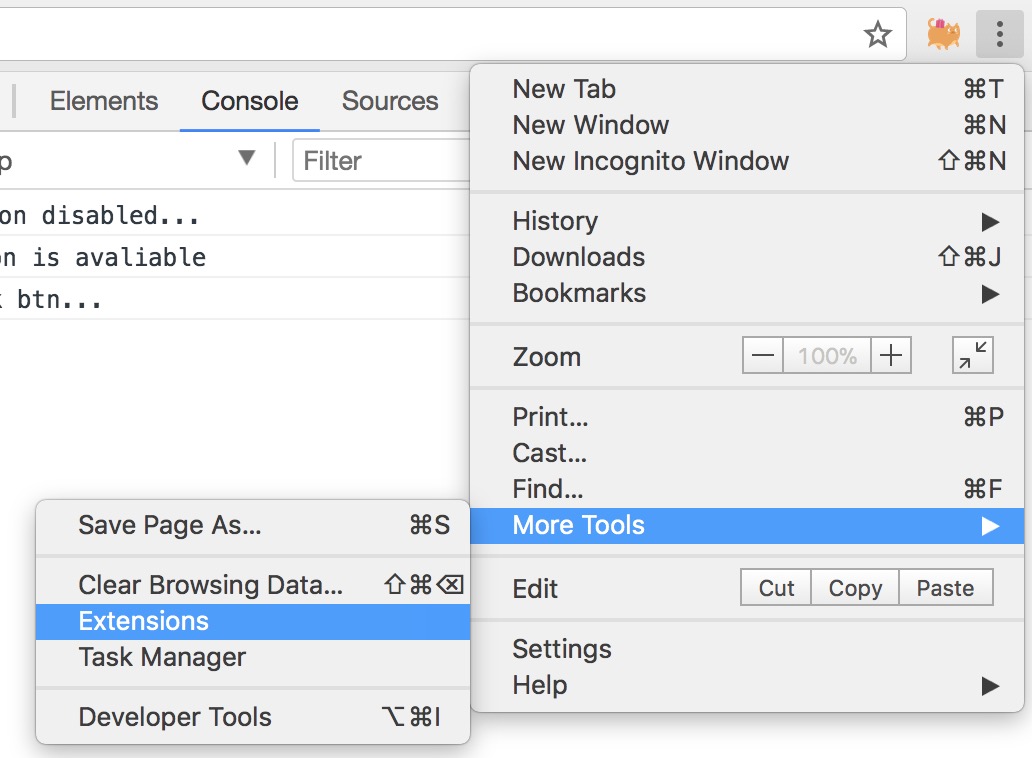
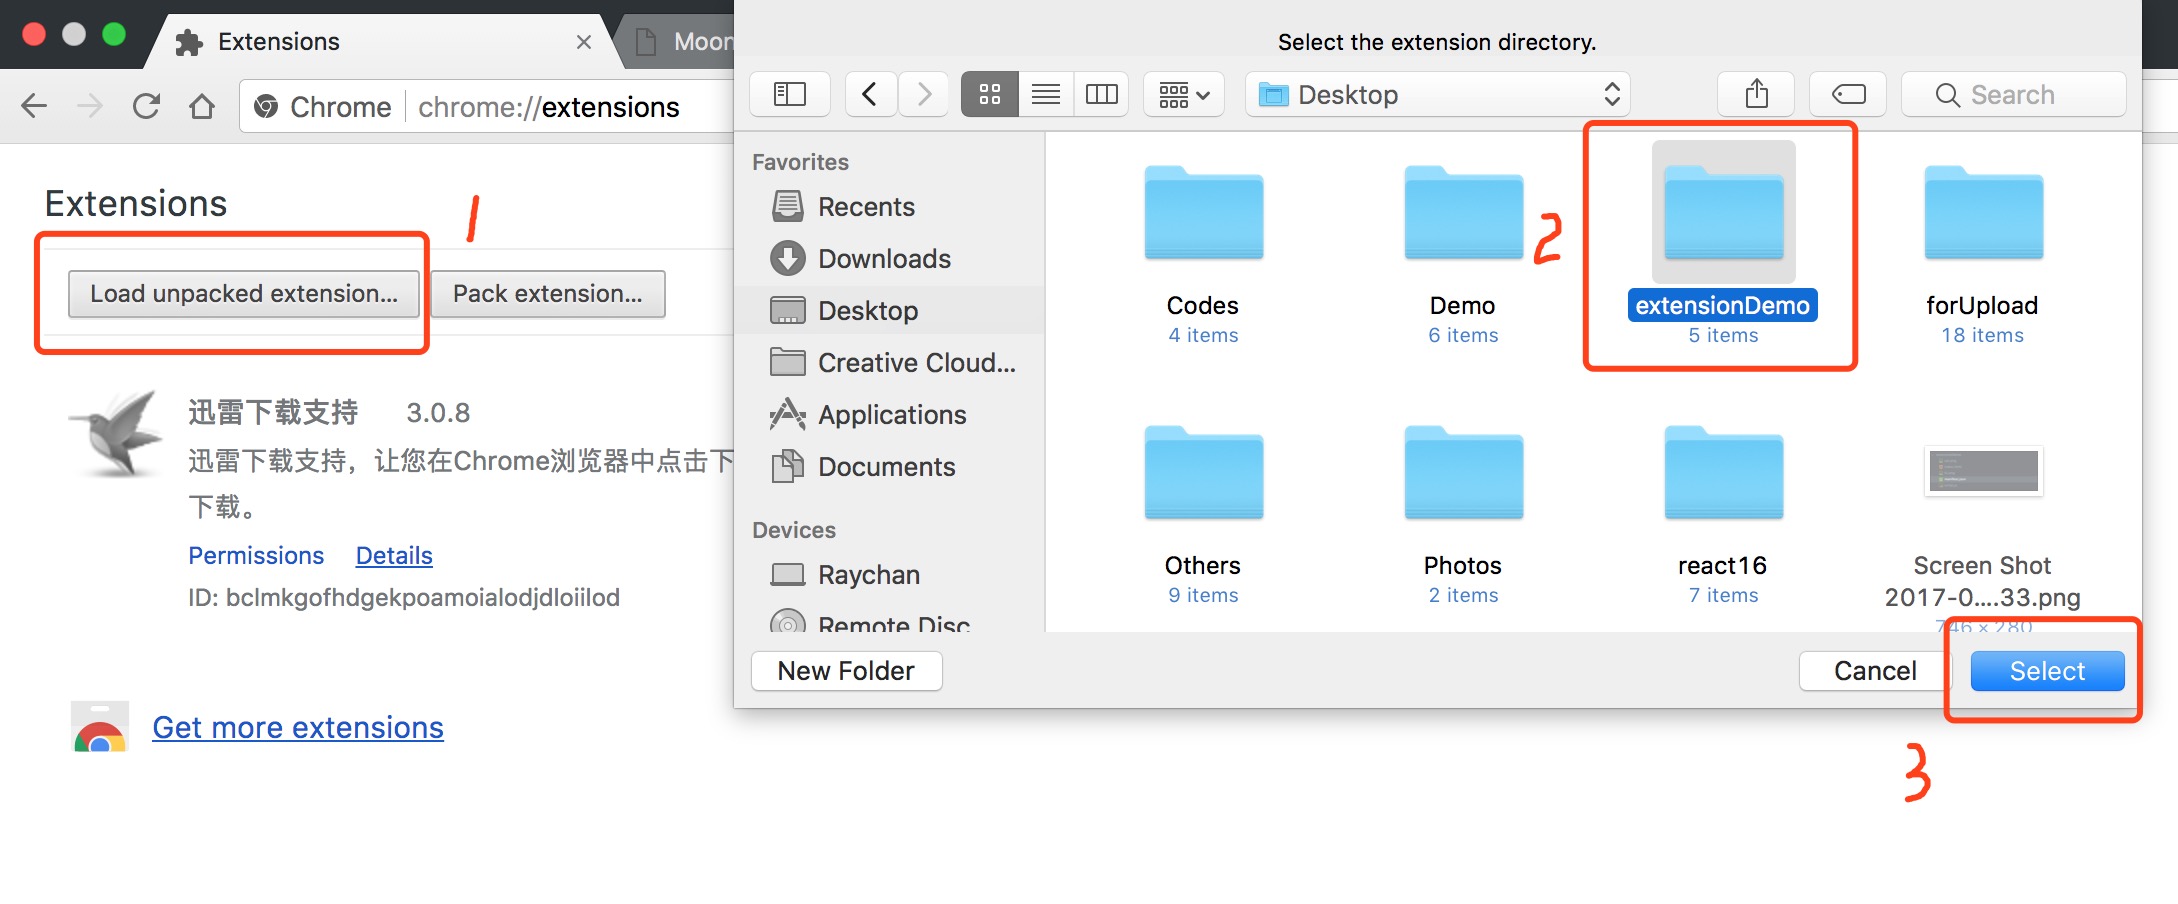
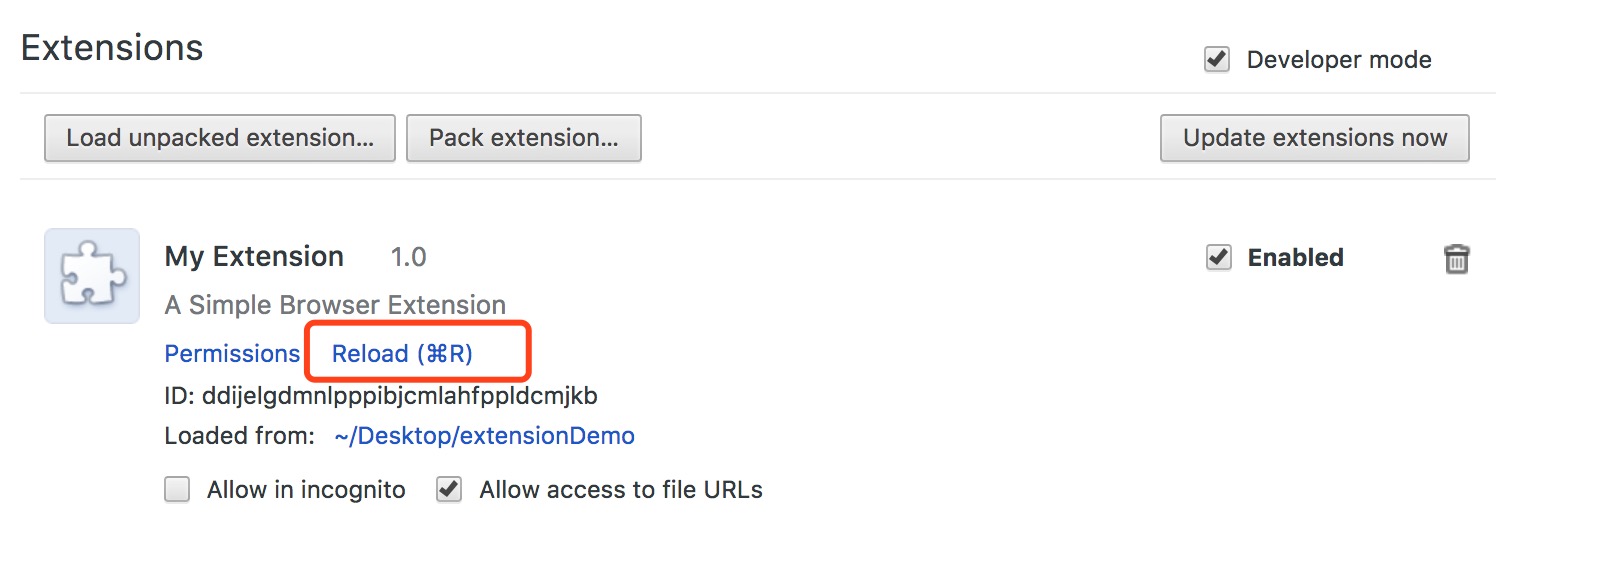
选择扩展文件夹后,扩展文件就会被自动添加到浏览器扩展中,如果修改了扩展文件,直接点击 Relaod(cmd + R 刷新)即可:
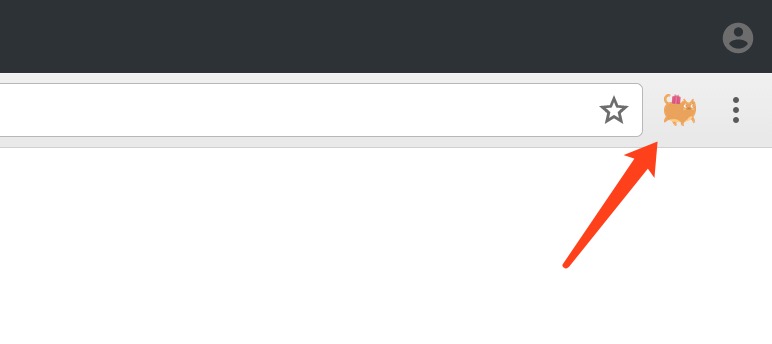
启用扩展后,在地址栏右边会出现前面添加的 icon,如下:
然后打开对应的网页,看一下效果:
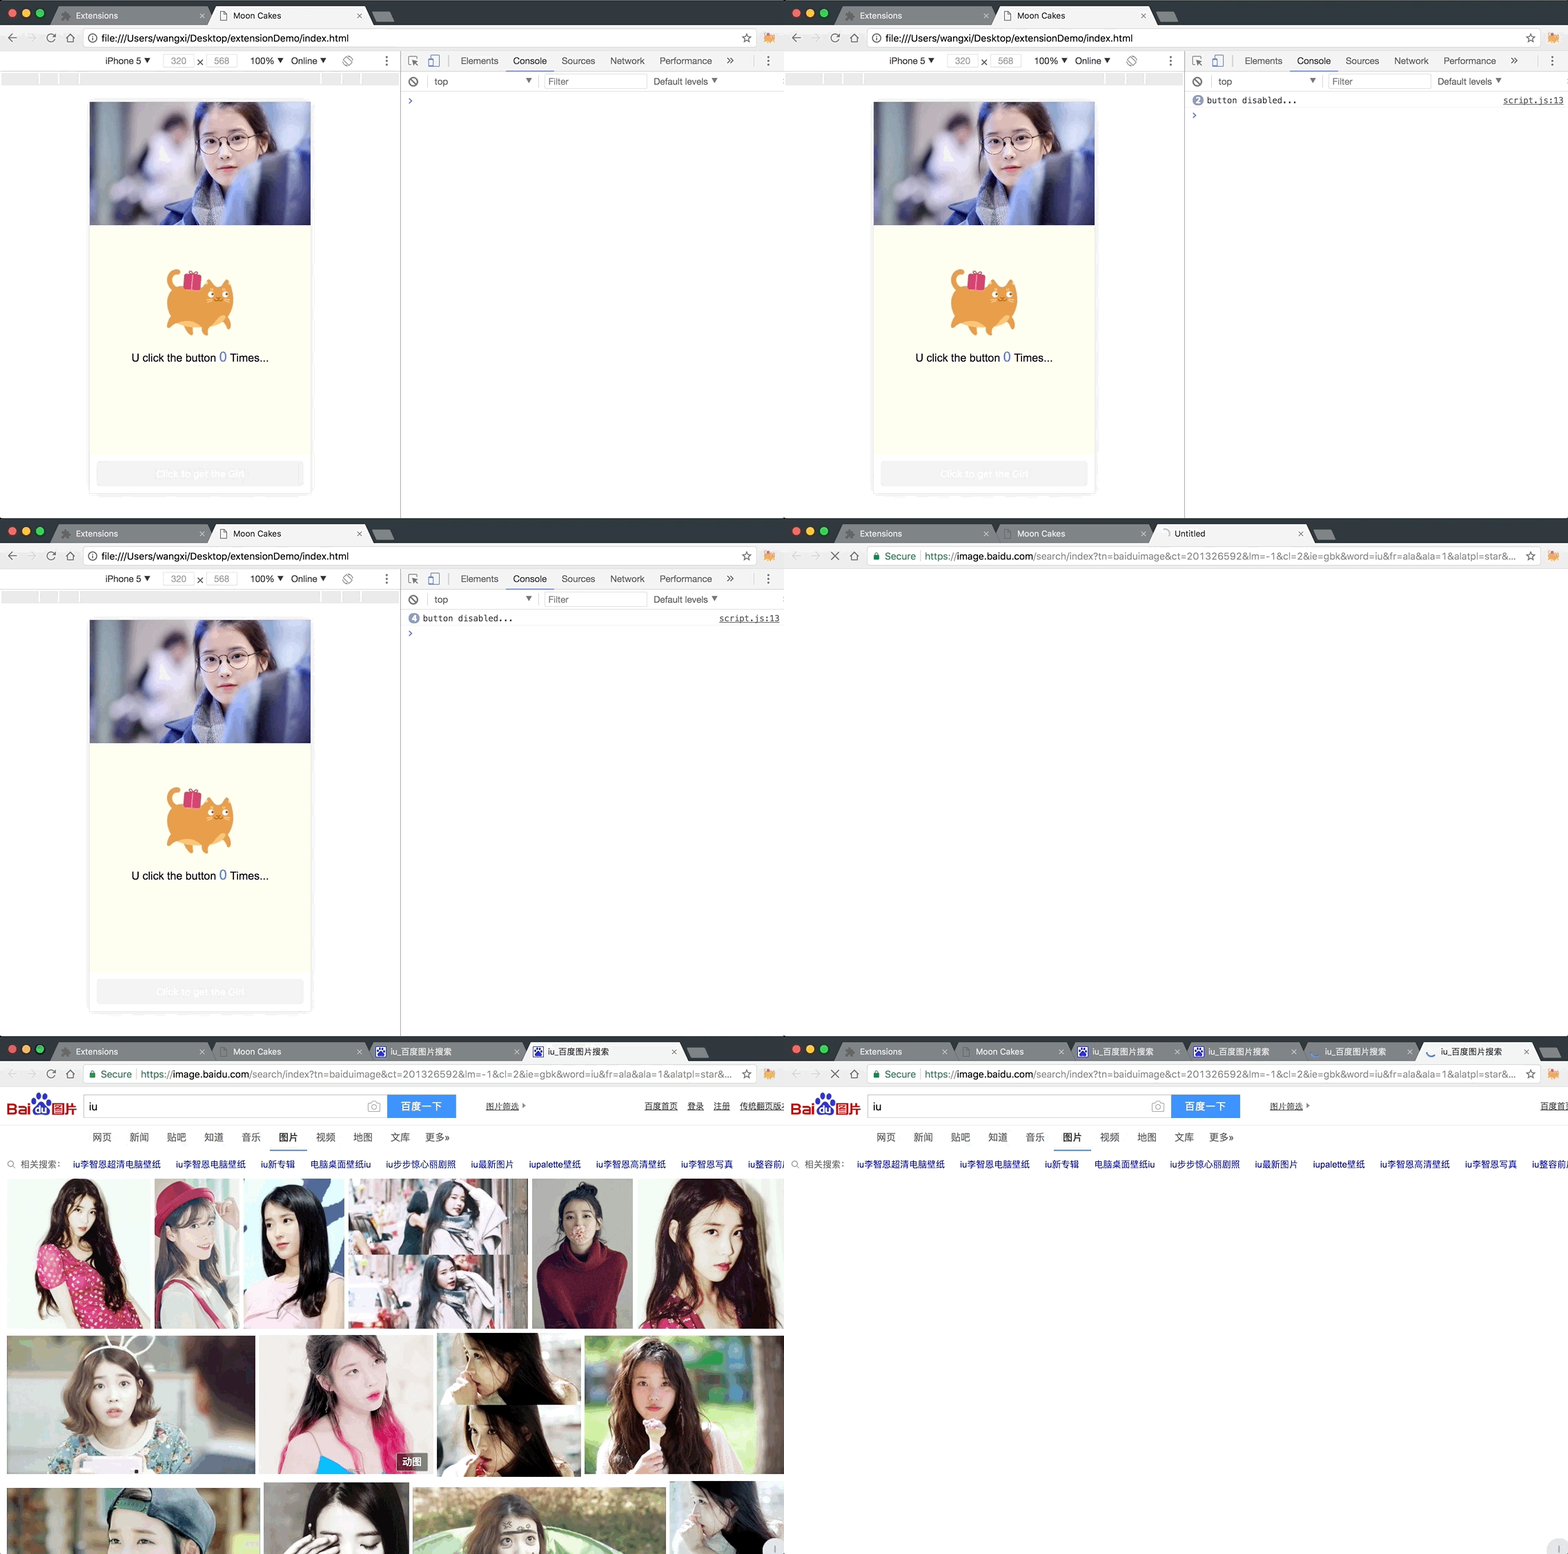
Click to get the Girl...真有这等好事就好了...