0. 前言
最近基本都是学一些环境配置,和一些中间件的安装与配置。没有实际编写代码。可能看起来有点水,我对自己的学习方式是,先要了解各个中间件的安装配置以及简单使用,理论应用场景,然后我在小项目中,逐步引入这些高大上的中间件,看实际效果怎样,合不合适我自己用。一开始绝对不会花太多时间去了解技术系统,我觉得,我的工作是做应用开发,不是底层研发。开发就是以满足实际需求为前提,怎么做到适合自己使用,怎么方便怎么来。
也有和一些人聊过,一般开发人员太爱自己造轮子了,实际项目,还是要用市场上普遍使用的开源软件。只有自己平时学习与提高时,造一些轮子。但是造轮子对于我来说,目前还是太难了。能合理用好各个组件,快速实现业务需求,才是我应该注重的点。每个人对自己的要求是不一样的。
1. 下载Image
如果不清楚最新版本的,可以到https://hub.docker.com/r/library/elasticsearch/ 这里查询
docker pull elasticsearch:6.4.2
运行es
docker run -d --name es -p 9200:9200 -e http.port=9200 -e http.cors.allow-origin="*" -e http.cors.enabled=true -e http.cors.allow-headers=X-Requested-With,X-Auth-Token,Content-Type,Content-Length,Authorization -e http.cors.allow-credentials=true elasticsearch:6.4.2
运行elastichd
docker run -p 9800:9800 -d --link es:demo containerize/elastichd
这里的集群监控状态为:Yellow,表示当前只有一个节点,没有配置集群

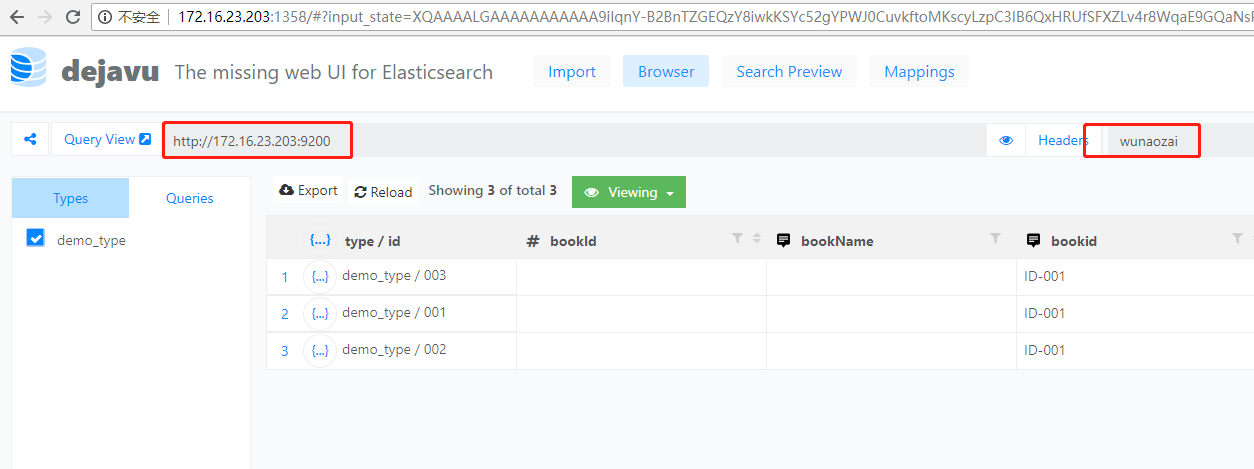
运行dejavu
docker run -d -p 1358:1358 appbaseio/dejavu
这个要注意,如果要成功连接到ES的话,要先创建好索引(Index) 参考下面第3点,curl -X PUT -H "Content-Type: application/json" http://172.16.23.203:2101/wunaozai, 创建后,才能进行连接
2. 配置集群及测试
创建一个虚拟网络
docker network create --driver bridge --subnet 172.22.17.0/24 --gateway 172.22.17.254 es_net
创建3个elasticsearch节点
 1 # node1
 2 docker run -d --name es_1 --net es_net --ip 172.22.17.1
 3     -p 2101:9200 -p 3101:9300 -v /etc/localtime:/etc/localtime
 4     -e "cluster.name=wunaozai"
 5     -e "node.name=node1"
 6     -e "network.host=172.22.17.1"
 7     -e "network.bind_host=0.0.0.0"
 8     -e "discovery.zen.ping.unicast.hosts=172.22.17.1,172.22.17.2,172.22.17.3"
 9     -e "discovery.zen.minimum_master_nodes=1"
10     -e "http.port=9200"
11     -e "http.cors.allow-origin=*"
12     -e "http.cors.enabled=true"
13     -e "http.cors.allow-headers=X-Requested-With,X-Auth-Token,Content-Type,Content-Length,Authorization"
14     -e "http.cors.allow-credentials=true"
15     elasticsearch:6.4.2
16 # node2
17 docker run -d --name es_2 --net es_net --ip 172.22.17.2
18     -p 2102:9200 -p 3102:9300 -v /etc/localtime:/etc/localtime
19     -e "cluster.name=wunaozai"
20     -e "node.name=node2"
21     -e "network.host=172.22.17.2"
22     -e "network.bind_host=0.0.0.0"
23     -e "discovery.zen.ping.unicast.hosts=172.22.17.1,172.22.17.2,172.22.17.3"
24     -e "discovery.zen.minimum_master_nodes=1"
25     -e "http.port=9200"
26     -e "http.cors.allow-origin=*"
27     -e "http.cors.enabled=true"
28     -e "http.cors.allow-headers=X-Requested-With,X-Auth-Token,Content-Type,Content-Length,Authorization"
29     -e "http.cors.allow-credentials=true"
30     elasticsearch:6.4.2
31 # node3
32 docker run -d --name es_3 --net es_net --ip 172.22.17.3
33     -p 2103:9200 -p 3103:9300 -v /etc/localtime:/etc/localtime
34     -e "cluster.name=wunaozai"
35     -e "node.name=node3"
36     -e "network.host=172.22.17.3"
37     -e "network.bind_host=0.0.0.0"
38     -e "discovery.zen.ping.unicast.hosts=172.22.17.1,172.22.17.2,172.22.17.3"
39     -e "discovery.zen.minimum_master_nodes=1"
40     -e "http.port=9200"
41     -e "http.cors.allow-origin=*"
42     -e "http.cors.enabled=true"
43     -e "http.cors.allow-headers=X-Requested-With,X-Auth-Token,Content-Type,Content-Length,Authorization"
44     -e "http.cors.allow-credentials=true"
45     elasticsearch:6.4.2
运行,上面es_1,es_2,es_3是集群的3个几点。下面那个es是上面运行的单节点。

访问 ElisticHD http://172.16.23.203:9800/ 从下图,可以看到集群的一些信息

集群节点如下,访问任意一个节点,效果都是一样的,都是操作同一份数据。
1 http://172.16.23.203:2101/
2 http://172.16.23.203:2102/
3 http://172.16.23.203:2103/
3. 数据测试
创建index
 1 curl -X PUT -H "Content-Type: application/json" http://172.16.23.203:2101/wunaozai -d '
 2 {
 3     "mappings":{
 4         "it": {
 5             "properties": {
 6                 "bookId": {"type": "long"},
 7                 "bookName": {"type": "text"},
 8                 "publishDate": {"type": "date"}
 9             }
10         }
11     }
12 }
13 '
查看index
curl -X GET http://172.16.23.203:2101/wunaozai
删除index
curl -X DELETE http://172.16.23.203:2101/wunaozai
查询type
curl -X GET -H "Content-Type: application/json" http://172.16.23.203:2101/wunaozai/_mapping
插入数据
1 curl -H "Content-Type: application/json" -X POST http://172.16.23.203:2101/wunaozai/it/001 -d '{"bookId": 1, "bookName":"<aa>", "publishDate":"2018-01-01"}'
2 curl -H "Content-Type: application/json" -X POST http://172.16.23.203:2102/wunaozai/it/002 -d '{"bookId": 2, "bookName":"<bb>", "publishDate":"2018-01-02"}'
3 curl -H "Content-Type: application/json" -X POST http://172.16.23.203:2103/wunaozai/it/003 -d '{"bookId": 3, "bookName":"<cc>", "publishDate":"2018-01-03"}'
更多操作就要参考官方文档
4. 数据持久化
一开始无论是通过 -v 还是通过 --volumes-from 进行挂载,都会提示以下错误
后来查询资料发现,es是不能在root权限下运行的,同理,在elasticsearch:6.4.2容器里,是以elasticsearch用户运行的,因此只要把需要进行挂载的Volumn用户组改为elasticsearch即可,这里需要用1000:1000 ,要用用户ID和组ID,因为host里的用户ID与Container里的用户ID是不一样的。
1 chown 1000:1000 -R data
2
3 docker run -it --name es -p 9200:9200 -v /etc/localtime:/etc/localtime -v /root/workspace/docker/es/data:/usr/share/elasticsearch/data -e http.port=9200 -e http.cors.allow-origin="*" -e http.cors.enabled=true -e http.cors.allow-headers=X-Requested-With,X-Auth-Token,Content-Type,Content-Length,Authorization -e http.cors.allow-credentials=true elasticsearch:6.4.2
通过上面命令运行后,插入数据,然后停止容器,删除容器,再重新创建容器,上次创建的数据还是存在的,自此就实现了ES数据的host持久化。
参考资料:
https://github.com/appbaseio/dejavu/
https://hub.docker.com/_/elasticsearch/
http://www.codesheep.cn/2018/10/30/es-visualization/
http://www.codesheep.cn/2018/11/06/es-2-node-cluster/
https://github.com/elastic/elasticsearch-docker/issues/111
https://www.elastic.co/guide/en/elasticsearch/reference/5.5/docker.html#_b_bind_mounted_configuration