前言:
在实际开发中,我们常常需要对单张或多张表进行备份,以下博主就从这两个方面进行总结。如需转载,请标明来处,谢谢!
在备份前我们先创建表盒相关测试的数据
-- Create table
create table TBLUSER
(
  id             NUMBER(8) not null,
  username       VARCHAR2(100) not null,
  sex            VARCHAR2(2) default '男',
  age            NUMBER(3),
  companyaddress VARCHAR2(1000),
  homeaddress    VARCHAR2(1000),
  phone          VARCHAR2(40),
  tel            VARCHAR2(40),
  remark         VARCHAR2(4000),
  usercode       VARCHAR2(40)
)
tablespace USERS
  pctfree 10
  initrans 1
  maxtrans 255
  storage
  (
    initial 64K
    next 1M
    minextents 1
    maxextents unlimited
  );
-- Add comments to the table
comment on table TBLUSER
  is '用户表';
-- Add comments to the columns
comment on column TBLUSER.id
  is '自动增长列';
comment on column TBLUSER.username
  is '用户名';
comment on column TBLUSER.sex
  is '性别';
comment on column TBLUSER.age
  is '年龄';
comment on column TBLUSER.companyaddress
  is '公司地址';
comment on column TBLUSER.homeaddress
  is '家庭地址';
comment on column TBLUSER.phone
  is '电话';
comment on column TBLUSER.tel
  is '座机';
comment on column TBLUSER.remark
  is '备注';
comment on column TBLUSER.usercode
  is '用户代码';
-- Create/Recreate primary, unique and foreign key constraints
alter table TBLUSER
  add primary key (ID)
  using index
  tablespace USERS
  pctfree 10
  initrans 2
  maxtrans 255
  storage
  (
    initial 64K
    next 1M
    minextents 1
    maxextents unlimited
  );

--插入数据
insert into tbluser (ID, USERNAME, SEX, AGE, COMPANYADDRESS, HOMEADDRESS, PHONE, TEL, REMARK, USERCODE)
values (10003, '小明', '男', 24, '武汉xxx有限责任公司', '湖北省武汉市', '176xxxxxxx5', '027-001', null, 'XM001');

insert into tbluser (ID, USERNAME, SEX, AGE, COMPANYADDRESS, HOMEADDRESS, PHONE, TEL, REMARK, USERCODE)
values (10004, '小王', '男', 19, '武汉xxx有限责任公司', '湖北省武汉市', '176xxxxxxx5', '027-001', null, 'XW001');

insert into tbluser (ID, USERNAME, SEX, AGE, COMPANYADDRESS, HOMEADDRESS, PHONE, TEL, REMARK, USERCODE)
values (10005, '小红', '女', 20, '深圳xxx有限责任公司', '深圳市宝安区', '176xxxxxxx5', '075-001', null, 'XH001');

insert into tbluser (ID, USERNAME, SEX, AGE, COMPANYADDRESS, HOMEADDRESS, PHONE, TEL, REMARK, USERCODE)
values (10007, '小蓝', '男', 24, '武汉xxx有限责任公司', '湖北省武汉市', '176xxxxxxx5', '027-001', null, 'XL001');

insert into tbluser (ID, USERNAME, SEX, AGE, COMPANYADDRESS, HOMEADDRESS, PHONE, TEL, REMARK, USERCODE)
values (10009, '小芳', '女', 30, '长沙xxx有限责任公司', '湖南省长沙市', '123xxxxxxx5', '027-001', null, 'XF001');

insert into tbluser (ID, USERNAME, SEX, AGE, COMPANYADDRESS, HOMEADDRESS, PHONE, TEL, REMARK, USERCODE)
values (10011, '小黄', '男', 20, '武汉xxx有限责任公司', '湖北省武汉市', '176xxxxxxx5', '027-001', null, 'XH001');

insert into tbluser (ID, USERNAME, SEX, AGE, COMPANYADDRESS, HOMEADDRESS, PHONE, TEL, REMARK, USERCODE)
values (10013, '小琴', '男', 18, '北京xxx有限责任公司', '北京市西旗xxx', '176xxxxxxx5', '027-001', null, 'XQ001');

insert into tbluser (ID, USERNAME, SEX, AGE, COMPANYADDRESS, HOMEADDRESS, PHONE, TEL, REMARK, USERCODE)
values (10014, '小陈', '男', 19, '武汉xxx有限责任公司', '上海市xxx', '176xxxxxxx5', '027-001', null, 'XC001');
单张表的备份
--备份tbluser的数据到tbluser_bak中
create table tbluser_bak as select * from tbluser; --此处不加as也行
此处需要注意的是,此备份表通过对比SQL语句可以看出只备份了表的结构和数据,另外备份前,tbluser_bak不能在表中存在
--备份完后的tbluser_bakSQL语句
-- Create table
create table TBLUSER_BAK
(
  id             NUMBER(8),
  username       VARCHAR2(100) not null,
  sex            VARCHAR2(2),
  age            NUMBER(3),
  companyaddress VARCHAR2(1000),
  homeaddress    VARCHAR2(1000),
  phone          VARCHAR2(40),
  tel            VARCHAR2(40),
  remark         VARCHAR2(4000),
  usercode       VARCHAR2(40)
)
tablespace USERS
  pctfree 10
  initrans 1
  maxtrans 255
  storage
  (
    initial 64K
    next 1M
    minextents 1
    maxextents unlimited
  );
单张表数据恢复
方法一:此种方式是当原表结构存在,且新旧表的表结构一致的情况下,仅仅备份数据【同字段仅数据】
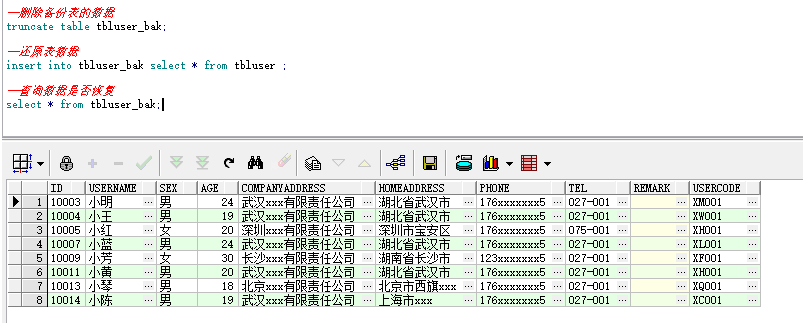
--删除备份表的数据
truncate table tbluser_bak;

--还原表数据
insert into tbluser_bak select * from tbluser ;

--查看数据是否恢复
select * from tbluser_bak;
查询结果如下
方法二:此种方式是当原表结构存在,但新旧表的字段不一致的情况下,仅仅备份指定字段的数据【不同的字段仅数据】
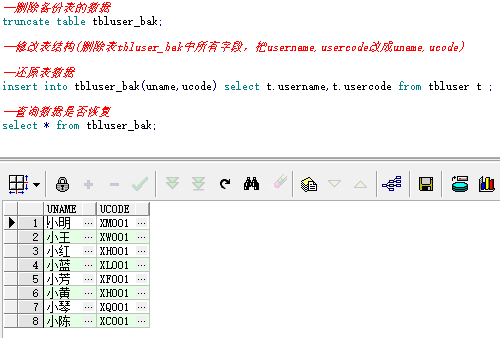
--删除备份表的数据
truncate table tbluser_bak;

--修改表结构(删除表tbluser_bak中所有字段,把username,usercode改成uname,ucode)

--还原表数据
insert into tbluser_bak(uname,ucode) select t.username,t.usercode from tbluser t ;

--查询数据是否恢复
select * from tbluser_bak;
查询结果如下
多张表的备份
创建测试表及数据:
-- Create table
create table TBLSTUDENT
(
  sno       VARCHAR2(3) not null,
  sname     VARCHAR2(4) not null,
  ssex      VARCHAR2(2) not null,
  sbirthday DATE,
  class     VARCHAR2(5)
)
tablespace USERS
  pctfree 10
  initrans 1
  maxtrans 255
  storage
  (
    initial 64K
    next 1M
    minextents 1
    maxextents unlimited
  );


--插入数据
insert into tblstudent (SNO, SNAME, SSEX, SBIRTHDAY, CLASS)
values ('108', '曾华', '男', to_date('24-02-2011', 'dd-mm-yyyy'), '95033');

insert into tblstudent (SNO, SNAME, SSEX, SBIRTHDAY, CLASS)
values ('105', '匡明', '男', to_date('02-10-1975', 'dd-mm-yyyy'), '95031');

insert into tblstudent (SNO, SNAME, SSEX, SBIRTHDAY, CLASS)
values ('107', '王丽', '女', to_date('23-01-1976', 'dd-mm-yyyy'), '95033');

insert into tblstudent (SNO, SNAME, SSEX, SBIRTHDAY, CLASS)
values ('101', '李军', '男', to_date('20-02-1976', 'dd-mm-yyyy'), '95033');

insert into tblstudent (SNO, SNAME, SSEX, SBIRTHDAY, CLASS)
values ('109', '王芳', '女', to_date('20-02-1976', 'dd-mm-yyyy'), '95031');

insert into tblstudent (SNO, SNAME, SSEX, SBIRTHDAY, CLASS)
values ('103', '陆君', '男', to_date('03-06-1974', 'dd-mm-yyyy'), '95031');
备份:多张表的备份可以用命令导出表(备份)到dmp文件中
操作方法:windows+r 在出现的运行窗口中直接输入以下命令进行备份
--exp [用户名]/[密码] tables=[表一],[表二] file=xxx	able.dmp
exp test/111111 tables=tbluser,tblstudent file=C:UsersHUANGDesktop	est20200221.dmp

--或者 exp test/test@orat file=C:UsersHUANGDesktop	est20200221.dmp tables=(tb1,tb2,tb3,...)
exp test/111111@orat file=C:UsersHUANGDesktop	est20200221.dmp tables=(tbluser,tblstudent)
其中:
“test/111111”是用户名和密码;“orat”是“网络服务名”。
file=c:xx.dmp:是保存到本地的全文件路径。
tables=(tb1,tb2,tb3,...):“(tb1,tb2,tb3,...)”是你选择需要备份的那些表的名称。
因为,备份的时候一般都写一个日志备份文档,以方便以后查找,所以,原语句可以改写成
exp test/111111@orat file=C:UsersHUANGDesktop est20200221.dmp tables=(tbluser,tblstudent) log=C:UsersHUANGDesktop est20200221.text
导出结果如图所示

还原:windows+r 在出现的运行窗口中直接输入以下命令进行还原
imp test/111111@orat grants=y commit=y full=y ignore=y file=C:UsersHUANGDesktop	est20200221.dmp log=C:UsersHUANGDesktop	est20200221.text
--log后面表示记录日志,也可以只导数据不记录
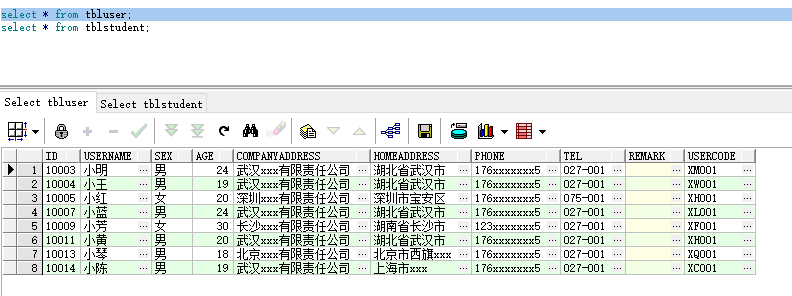
还原前数据:

还原后数据


20200221.txt日志文件如下
连接到: Oracle Database 11g Enterprise Edition Release 11.2.0.1.0 - 64bit Production
With the Partitioning, OLAP, Data Mining and Real Application Testing options

经由常规路径由 EXPORT:V11.02.00 创建的导出文件
已经完成 ZHS16GBK 字符集和 AL16UTF16 NCHAR 字符集中的导入
. 正在将 TEST 的对象导入到 TEST
. 正在将 TEST 的对象导入到 TEST
. . 正在导入表                       "TBLUSER"导入了           8 行
. . 正在导入表                    "TBLSTUDENT"导入了           6 行
成功终止导入, 没有出现警告。