JdbcTemplate介绍
为了使 JDBC 更加易于使用,Spring 在 JDBCAPI 上定义了一个抽象层,
以此建立一个JDBC存取框架,Spring Boot Spring Data-JPA。
作为 SpringJDBC 框架的核心, JDBC 模板的设计目的是为不同类型的JDBC操作提供模板方法.
每个模板方法都能控制整个过程,并允许覆盖过程中的特定任务。
通过这种方式,可以在尽可能保留灵活性的情况下,将数据库存取的工作量降到最低。
JdbcTemplate方法介绍
execute方法:
可以用于执行任何SQL语句,一般用于执行DDL语句;
update方法:
update方法用于执行新增、修改、删除等语句;
query方法:
用于执行查询相关语句;
call方法:
用于执行存储过程、函数相关语句。
注意:
使用JdbcTemplate完成对数据库的操作十分易用,可以和Spring框架做到非常完美的整合
JdbcTemplate仅仅只能支持简单的SQL操作,不支持关联映射和属性注入,所以在SQL方向的操作我们仍需使用MyBatis!
小例子(增删改查)
查:
步骤一:导入依赖
<!-- https://mvnrepository.com/artifact/org.springframework/spring-jdbc -->
    <dependency>
      <groupId>org.springframework</groupId>
      <artifactId>spring-jdbc</artifactId>
      <version>5.1.5.RELEASE</version>
    </dependency>
    <dependency>
      <groupId>mysql</groupId>
      <artifactId>mysql-connector-java</artifactId>
      <version>5.1.32</version>
    </dependency>
步骤二:创建实体类
public class Student {
    private Integer stuid;
    private String stuname;
    private Integer age;

    public Integer getStuid() {
        return stuid;
    }

    public void setStuid(Integer stuid) {
        this.stuid = stuid;
    }

    public String getStuname() {
        return stuname;
    }

    public void setStuname(String stuname) {
        this.stuname = stuname;
    }

    public Integer getAge() {
        return age;
    }

    public void setAge(Integer age) {
        this.age = age;
    }
步骤三:DAO层
public interface IStudentdao {
    //查询所有学生的方法
    public List<Student> allstu();
}
步骤四:DAO层实现类
public class IStudentdaoimpl extends JdbcDaoSupport implements IStudentdao {

    //查询
    @Override
    public List<Student> allstu() {
        //获取JDBC模板
        JdbcTemplate jdbcTemplate=getJdbcTemplate();
        String sql="select * from student";
       //执行查询操作
        List<Student> query = jdbcTemplate.query(sql, new RowMapper<Student>() {
            *//**
             *
             * @param rs        结果集
             * @param rowNum    当前行
             * @return          方法返回值
             * @throws SQLException
             *//*
            @Override
            public Student mapRow(ResultSet rs, int rowNum) throws SQLException {
                Student stu = new Student();
                stu.setStuid(rs.getInt("stuid"));
                stu.setStuname(rs.getString("stuname"));
                stu.setAge(rs.getInt("age"));
                return stu;
            }
      /*
      //自动映射(可省略上方的query方法)
      RowMapper<Student> rowMapper= new BeanPropertyRowMapper<>(Student.class);
      List<Student> query = jdbcTemplate.query(sql, rowMapper);
      */
    });
        return query;
    }
}
步骤五:Service层
public interface IStudentservice {
    //查询所有学生的方法
    public List<Student> allstu();
}
步骤六:Service实现层
public class IStudentserviceimpl implements IStudentservice {

    private IStudentdao iStudentdao;

    public IStudentdao getiStudentdao() {
        return iStudentdao;
    }

    public void setiStudentdao(IStudentdao iStudentdao) {
        this.iStudentdao = iStudentdao;
    }

    @Override
    public List<Student> allstu() {
        return iStudentdao.allstu();
    }

}
步骤七:大配置文件(jdbc四个配置)
jdbc.driver=com.mysql.jdbc.Driver
jdbc.url=jdbc:mysql://localhost:3306/student?useUniCode=true&characterEncoding=utf-8&zeroDateTimeBehavior=convertToNull
jdbc.username=root
jdbc.password=123
<?xml version="1.0" encoding="UTF-8"?>
    <beans xmlns="http://www.springframework.org/schema/beans"
           xmlns:xsi="http://www.w3.org/2001/XMLSchema-instance"
           xmlns:context="http://www.springframework.org/schema/context"
           xsi:schemaLocation="http://www.springframework.org/schema/beans
           http://www.springframework.org/schema/beans/spring-beans.xsd http://www.springframework.org/schema/context http://www.springframework.org/schema/context/spring-context.xsd">

        <!--加载配置文件-->
        <context:property-placeholder location="classpath:jdbc.properties"></context:property-placeholder>

        <!--DateSource模板
        DriverManagerDataSource:Spring默认的数据源
        数据源还有:c3p0   dbcp
        -->
        <bean id="dataSource" class="org.springframework.jdbc.datasource.DriverManagerDataSource">
            <property name="driverClassName" value="${jdbc.driver}"></property>
            <property name="url" value="${jdbc.url}"></property>
            <property name="username" value="${jdbc.username}"></property>
            <property name="password" value="${jdbc.password}"></property>
        </bean>


        <!--植入JdbcTemplate-->
        <bean id="jdbcTemplate" class="org.springframework.jdbc.core.JdbcTemplate">
            <property name="dataSource" ref="dataSource"></property>
        </bean>

        <!--植入DAO层-->
        <bean id="iStudentdao" class="com.JdbcTemplate.dao.impl.IStudentdaoimpl">
            <property name="jdbcTemplate" ref="jdbcTemplate"></property>

      <!--
        如果采用下面这条命令,可省略上面的植入JdbcTemplate的代码
      -->
           <!-- <property name="dataSource" ref="dataSource"></property>-->
        </bean>

        <!--植入Service-->
        <bean id="iStudentservice" class="com.JdbcTemplate.service.impl.IStudentserviceimpl">
            <property name="iStudentdao" ref="iStudentdao"></property>
        </bean>
</beans>
步骤八:测试
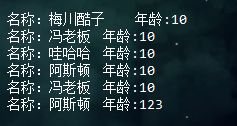
@Test
    public void Demo01(){
ApplicationContext atc=new ClassPathXmlApplicationContext("applicationContext.xml");
        IStudentservice stu = (IStudentservice)atc.getBean("iStudentservice");
        //查询stu
        List<Student> allstu = stu.allstu();
        for (Student atu:allstu){
            System.out.println("名称:"+atu.getStuname()+"	年龄:"+atu.getAge());
        }
    }

增(在这里,我们可以把读取大配置文件大代码提到外面)
public class stutest {
    ApplicationContext atc=new ClassPathXmlApplicationContext("applicationContext.xml");

}
步骤一:DAO层
public interface IStudentdao {
    //添加学生
    public int addstu(Student stu);
}
步骤二:
//添加学生
    @Override
    public int addstu(Student stu) {
        //获取JDBC模板
        JdbcTemplate jdbcTemplate=getJdbcTemplate();
        String sql="insert into student values(default,?,?)";
        Object [] obj={stu.getStuname(),stu.getAge()};
        int update = jdbcTemplate.update(sql, obj);
        System.out.println("返回值类型:"+update);
        return update;
    }
步骤三:Service层
public interface IStudentservice{
    //添加学生
    public int addstu(Student stu);
}
步骤四:Serviceimpl层
public class IStudentserviceimpl implements IStudentservice {


    private IStudentdao iStudentdao;

    public IStudentdao getiStudentdao() {
        return iStudentdao;
    }

    public void setiStudentdao(IStudentdao iStudentdao) {
        this.iStudentdao = iStudentdao;
    }

    @Override
    public int addstu(Student stu) {
        return iStudentdao.addstu(stu);
    }

}
步骤五:测试
@Test
    public void insert(){
        IStudentservice stu = (IStudentservice)atc.getBean("iStudentservice");
        //添加
        Student ss=new Student();
        ss.setStuname("阿斯顿");
        ss.setAge(123);
        int addstu = stu.addstu(ss);

 }
改
步骤一:DAO层
public interface IStudentdao {
    //修改学生
    public int updatestu(Student stu);
}
步骤二:DAOimpl层
public class IStudentdaoimpl extends JdbcDaoSupport implements IStudentdao {

    //修改学生
    @Override
    public int updatestu(Student stu) {
        //获取JDBC模板
        JdbcTemplate jdbcTemplate=getJdbcTemplate();
        Object [] obj={stu.getStuname(),stu.getAge(),stu.getStuid()};
        String sql="update student set stuname=?,age=? where stuid=?";
        int update = jdbcTemplate.update(sql, obj);
        System.out.println("返回值类型:"+update);
        return update;
    }


}
步骤三:Service层
public interface IStudentservice {
    //修改学生
    public int updatestu(Student stu);
}
步骤四:Serviceimpl
public class IStudentserviceimpl implements IStudentservice {


    private IStudentdao iStudentdao;

    public IStudentdao getiStudentdao() {
        return iStudentdao;
    }

    public void setiStudentdao(IStudentdao iStudentdao) {
        this.iStudentdao = iStudentdao;
    }

    @Override
    public int updatestu(Student stu) {
        return iStudentdao.updatestu(stu);
    }

}
步骤五:测试
@Test
    public void update(){
        IStudentservice stu = (IStudentservice)atc.getBean("iStudentservice");
        //修改
        Student sss=new Student();
        sss.setStuname("冯老板");
        sss.setAge(99);
        sss.setStuid(6);
int updatestu = stu.updatestu(sss);
    }

删:
步骤一:DAO层
public interface IStudentdao {

    //删除学生
    public int delstu(Student stu);
}
步骤二:DAOimpl层
public class IStudentdaoimpl extends JdbcDaoSupport implements IStudentdao {

    //删除
    @Override
    public int delstu(Student stu) {
        //获取JDBC模板
        JdbcTemplate jdbcTemplate=getJdbcTemplate();
        Object [] obj={stu.getStuid()};
        String sql="delete from Student where stuid=?";
        int update = jdbcTemplate.update(sql, obj);
        System.out.println("返回值类型:"+update);
        return update;
    }

}
步骤三:Service层
public interface IStudentservice {
    //删除学生
    public int delstu(Student stu);
}
步骤四:Serviceimpl层
public class IStudentserviceimpl implements IStudentservice {


    private IStudentdao iStudentdao;

    public IStudentdao getiStudentdao() {
        return iStudentdao;
    }

    public void setiStudentdao(IStudentdao iStudentdao) {
        this.iStudentdao = iStudentdao;
    }

    @Override
    public int delstu(Student stu) {
        return iStudentdao.delstu(stu);
    }
}
步骤五:测试
@Test
    public void del(){
        IStudentservice stu = (IStudentservice)atc.getBean("iStudentservice");
        //删除
        Student sss=new Student();
        sss.setStuid(6);
        int delstu = stu.delstu(sss);
    }

使用注释实现增删改(在这里只列举查询)
步骤一:大配置文件
<?xml version="1.0" encoding="UTF-8"?> <beans xmlns="http://www.springframework.org/schema/beans" xmlns:xsi="http://www.w3.org/2001/XMLSchema-instance" xmlns:context="http://www.springframework.org/schema/context" xsi:schemaLocation="http://www.springframework.org/schema/beans http://www.springframework.org/schema/beans/spring-beans.xsd http://www.springframework.org/schema/context http://www.springframework.org/schema/context/spring-context.xsd"> <!--扫描注解--> <context:component-scan base-package="com.JdbcTemplate"/> <!--记载配置文件--> <context:property-placeholder location="classpath:jdbc.properties"></context:property-placeholder> <!--DateSource模板 DriverManagerDataSource:Spring默认的数据源 数据源还有:c3p0 dbcp --> <bean id="dataSource" class="org.springframework.jdbc.datasource.DriverManagerDataSource"> <property name="driverClassName" value="${jdbc.driver}"></property> <property name="url" value="${jdbc.url}"></property> <property name="username" value="${jdbc.username}"></property> <property name="password" value="${jdbc.password}"></property> </bean> <!--植入JdbcTemplate--> <bean id="jdbcTemplate" class="org.springframework.jdbc.core.JdbcTemplate"> <property name="dataSource" ref="dataSource"></property> </bean> <!-- <!–植入DAO层–> <bean id="iStudentdao" class="com.JdbcTemplate.dao.impl.IStudentdaoimpl"> <!–<property name="jdbcTemplate" ref="jdbcTemplate"></property>–> <property name="dataSource" ref="dataSource"></property> </bean> <!–植入Service–> <bean id="iStudentservice" class="com.JdbcTemplate.service.impl.IStudentserviceimpl"> <property name="iStudentdao" ref="iStudentdao"></property> </bean> --> </beans>
步骤二:DAOimpl层
@Repository
public class IStudentdaoimpl implements IStudentdao {

    @Resource
    private JdbcTemplate jdbcTemplate;

    //查询
    @Override
    public List<Student> allstu() {
        //获取JDBC模板
        /*JdbcTemplate jdbcTemplate=getJdbcTemplate();*/
        String sql="select * from student";
        //查询
        /*List<Student> query = jdbcTemplate.query(sql, new RowMapper<Student>() {
            *//**
             *
             * @param rs     返回的结果集
             * @param i             记录行
             * @return 方法返回值
             * @throws SQLException
             *//*
            @Override
            public Student mapRow(ResultSet rs, int i) throws SQLException {
                Student stu = new Student();
                stu.setStuid(rs.getInt("stuid"));
                stu.setStuname(rs.getString("stuname"));
                stu.setAge(rs.getInt("age"));
                return stu;
            }
        });*/


        //自动映射
        RowMapper<Student> rowMapper= new BeanPropertyRowMapper<>(Student.class);
        List<Student> query = jdbcTemplate.query(sql, rowMapper);

        return query;
    }

}
步骤三:Serviceimpl层
@Service("iStudentservice")
public class IStudentserviceimpl implements IStudentservice {

    @Resource
    private IStudentdao iStudentdao;

    public IStudentdao getiStudentdao() {
        return iStudentdao;
    }

    public void setiStudentdao(IStudentdao iStudentdao) {
        this.iStudentdao = iStudentdao;
    }

    @Override
    public List<Student> allstu() {
        return iStudentdao.allstu();
    }
}
步骤四:测试
@Test
    public void Demo01(){
ApplicationContext atc=new ClassPathXmlApplicationContext("applicationContext.xml");
        IStudentservice stu = (IStudentservice)atc.getBean("iStudentservice");
        //查询stu
        List<Student> allstu = stu.allstu();
        for (Student atu:allstu){
            System.out.println("名称:"+atu.getStuname()+"	年龄:"+atu.getAge());
        }
    }
