参考《Sass入门篇》《侧栏工具条开发》强烈推荐后者,良心课程。
Sass 和 SCSS 其实是同一种东西,我们平时都称之为 Sass,两者之间不同之处有以下两点:
文件扩展名不同,Sass 是以“.sass”后缀为扩展名,而 SCSS 是以“.scss”后缀为扩展名 语法书写方式不同,Sass 是以严格的缩进式语法规则来书写,不带大括号({})和分号(;),而 SCSS 的语法书写和我们的 CSS 语法书写方式非常类似。
安装
安装ruby brew install ruby
安装 sass sudo gem install sass
更新 gem update sass
卸载 gem uninstall sass
编译 sass source.scss:target.css
实时编译 sass --watch source.scss:target.css
多文件编译 sass sourceDir/:targetDir/
输出风格:
嵌套输出方式 nested sass --watch test.scss:test.css --style nested
展开输出方式 expanded
紧凑输出方式 compact
压缩输出方式 compressed
语法
语法比较多 只写几条看起来常用的吧。
1. 注释
// 单行注释 在css中不可用 所以转换成css也不会显示这些注释

/*多行注释 在css中可用*/
2. 变量
// 声明 全局变量
$variableName: variableValue;

selector {
    // 局部变量 会覆盖全局变量
    $variableName: variableValue;
    // 使用变量
    label: $variableName;
}
// !default 如果这个变量被声明赋值了,那就用它声明的值,否则就用这个默认值。
$variableName: variableValue !default;
// 全局变量
$variableName: variableValue !global;

// 一般我们定义的变量都为属性值,可直接使用,但是如果变量作为属性或在某些特殊情况下等则必须要以 #{$variables}形式使用。
//应用于class和属性
.border-#{$borderDirection}{
  border-#{$borderDirection}:1px solid #ccc;
}
3. 嵌套
/* 选择器嵌套 */
nav a {
  color:red;
}

header nav a {
  color:green;
}
/** 用scss表示 */
nav {
  a {
    color: red;

    header & { // & 表示当前选择器
      color:green;
    }
  }
}

/* 属性嵌套 */
.box {
    border-top: 1px solid red;
    border-bottom: 1px solid green;
}
/** 在 Sass 中我们可以这样写:*/
.box {
  border: {
    top: 1px solid red;
    bottom: 1px solid green;
  }
}

/* 伪类/伪元素 嵌套 */
.clearfix{
  &:before,
  &:after {
      content:"";
      display: table;
  }
  &:after {
      clear:both;
      overflow: hidden;
  }
  &:hover {
     ...
  }
}
4. 混合宏 @mixin @include
用法和C语言的宏基本类似。可以带参数。
/* 定义宏 */
/* 不带参数 */
@mixin border-radius{
    -webkit-border-radius: 5px;
    border-radius: 5px;
}
/* 带参数 */
@mixin center($width,$height){
  width: $width;
  height: $height;
}
/* ...可以表示所有参数 */
/*当 $shadow 的参数数量值大于或等于“ 1 ”时,表示有多个阴影值,反之调用默认的参数值“ 0 0 4px rgba(0,0,0,.3) ”。*/
@mixin box-shadow($shadow...) {
  @if length($shadow) >= 1 {
    @include prefixer(box-shadow, $shadow);
  } @else{
    $shadow:0 0 4px rgba(0,0,0,.3);
    @include prefixer(box-shadow, $shadow);
  }
}
/* 调用宏 */
button {
    @include border-radius;
}
.box-center {
    @include center(500px,300px);
}
5. 继承 @include & 占位符 %
继承一个类的所有属性
.btn {
  border: 1px solid #ccc;
}
.btn-primary {
  background-color: #f36;
  color: #fff;
  @extend .btn;
  /* 相当于把btn的样式全部都挪过来 */
  /* 或者是其实是在.btn 选择器那里添加当前选择器 .btn ,.btn-primary */
}
/* 只有被@extend调用时才生效 */
%mt5 {
  margin-top: 5px;
}
%pt5 {
  padding-top: 5px;
}
.btn {
  @extend %mt5;
  @extend %pt5;
}
6. 数学运算
可以直接在属性值的地方使用数学运算符
$ 15px;
.button {
  width: $width;
  height: $width * 2;
}
7. 引入文件 @import
@import "foo.scss"; @import "foo"; // 两者都将引入 foo.scss 文件
可以在文件名前加下划线如 _colors.scss 防止生成.css文件,引入时通过 @import "colors"; 就可以引入,所以在同一个目录不能同时存在带下划线和不带下划线的同名文件。
如果文件的扩展名是 .css。 如果文件名以 http:// 开头。 如果文件名是 url()。 如果 @import 包含了任何媒体查询(media queries)。它会被编译成 CSS 的 @import 规则。
也可以通过一个 @import 引入多个文件。 @import "rounded-corners", "text-shadow";
实例
项目目录(https://github.com/G-lory/front-end-practice/tree/master/sass-toolbar)
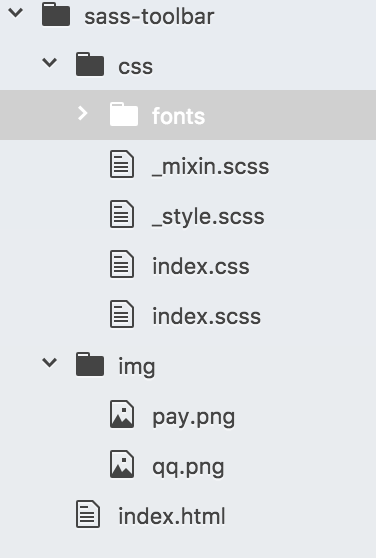
_style.scss,fonts是下载的字体文件(https://icomoon.io/app/#/select)
没想过写个CSS也要写这么多注释。。。
_mixin.scss
// 设置过渡的属性 时间
@mixin transition($transition) {
    -webkit-transition: $transition;
    -moz-transition: $transition;
    -ms-transition: $transition;
    -o-transition: $transition;
    transition: $transition;
}
// 设置转换时 以哪个点为基准点做变换
@mixin transform-origin($origin) {
    -webkit-transform-origin: $origin;
    -moz-transform-origin: $origin;
    -ms-transform-origin: $origin;
    -o-transform-origin: $origin;
    transform-origin: $origin;
}
// 设置缩放
@mixin scale($origin) {
    -webkit-transform: scale($origin);
    -moz-transform: scale($origin);
    -ms-transform: scale($origin);
    -o-transform: scale($origin);
    transform: scale($origin);
}
// 设置透明度
@mixin opacity($opcity) {
    opacity: $opcity;
    filter: alpha(opacity=$opcity * 100);
}
index.scss
@import "mixin";
@import "style";

$toolbar-size: 50px;
.toolbar {
    position: fixed;            // 固定定位
    right: 10px;
    bottom: 10px;
}
.toolbar-item {
    position: relative;         // 子代使用absulote定位 所以这里要设置relative定位
    display: block;             // 因为a标签是内联元素 默认不能设置宽高
    margin-top: 1px;            // 几个小方块的间距为1px
    width: $toolbar-size;
    height: $toolbar-size;

    &:after {
        content: '';
        position: absolute;
        right: $toolbar-size;
        bottom: 0;
        width: 300px;
        height: 300px;
        background-repeat: no-repeat;
        white-space: pre;
        @include opacity(0);
        @include scale(0.01);
        @include transition(all 1s);
        @include transform-origin(95% 95%);
    }

    &:hover {    // 当鼠标经过的时候 要向上移动显示文字说明
        .toolbar-btn {
            &:before {
                top: -$toolbar-size;
            }
            &:after {
                top: 0;
            }
        }
        &:after {
            @include opacity(1);    // 设置透明度变为完全不透明
            @include scale(1);      // 设置大小变为100%
        }
    }
}
.toolbar-item-qq {
    &:after {
        background-image: url(../img/qq.png);
        width: 180px;
        height: 180px;
    }

    .toolbar-btn {
        @extend .icon-qq;    // 继承字体样式 将 before 元素变为字体图标
        &:before {
            color: #26b8f2;
        }

        &:after {
            content: '加我AQQ'; // A 表示换行
        }
    }
}
.toolbar-item-pay {
    &:after {
        background-image: url(../img/pay.png);
    }

    .toolbar-btn {
        @extend .icon-paypal;    // 继承字体样式 将 before 元素变为字体图标
        &:before {
            color: #f3281b;
        }

        &:after {
            content: '为我A捐款'; // A 表示换行
        }
    }
}
.toolbar-item-wechat {
    &:after {
        content: "A不告A诉你";
        color: #fff;
        font-size: 20px;
        line-height: 1.2;
        text-align: center;
        background-color: #000;
        width: 100px;
        height: 100px;
    }

    .toolbar-btn {
        @extend .icon-wechat;    // 继承字体样式 将 before 元素变为字体图标
        &:before {
            color: #46b942;
        }

        &:after {
            content: '加我A微信'; // A 表示换行
        }
    }
}
.toolbar-item-cool {
    .toolbar-btn {
        @extend .icon-cool;    // 继承字体样式 将 before 元素变为字体图标
        &:before {
            color: #000;
        }

        &:after {
            content: '我最A可爱'; // A 表示换行
        }
    }
}
.toolbar-btn {
    &, &:before, &:after {
         $toolbar-size;
        height: $toolbar-size;
        position: absolute;
        left: 0;
    }

    top: 0;
    overflow: hidden;            // 让文字默认位于溢出位置 然后将溢出部分隐藏
    @extend [class^="icon-"];    // 继承字体的样式

    &:before, &:after {
        content: '';
        color: #fff;
        text-align: center;
        @include transition(top 1s);
    }

    &:before {                   // 默认的图标显示
        top: 0;
        background-color: #d0d6d9;
        font-size: 30px;
        line-height: $toolbar-size;
    }

    &:after {                    // 鼠标悬浮时的文字显示
        top: $toolbar-size;
        background-color: #98a1a6;
        font-size: 12px;
        padding-top: 12px;
        line-height: 1.2;
        white-space: pre;        // 为了实现文字换行
    }
}
index.html
<!DOCTYPE html>
<html>
    <head>
        <meta charset="utf-8">
        <title></title>
        <link rel="stylesheet" href="css/index.css">
    </head>
    <body>
        <div class="toolbar">
            <a href="javascript:;" class="toolbar-item toolbar-item-qq">
                <span class="toolbar-btn">
                    <!-- 用 before 元素表示默认显示 -->
                    <!-- 用 after 元素表示鼠标经过显示 -->
                </span>
            </a>
            <a href="javascript:;" class="toolbar-item toolbar-item-pay">
                <span class="toolbar-btn"></span>
            </a>
            <a href="javascript:;" class="toolbar-item toolbar-item-wechat">
                <span class="toolbar-btn"></span>
            </a>
            <a href="javascript:;" class="toolbar-item toolbar-item-cool">
                <span class="toolbar-btn"></span>
            </a>
        </div>
    </body>
</html>
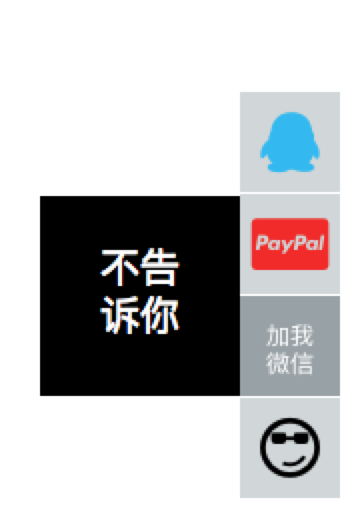
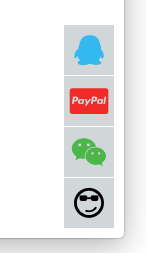
显示效果:
 鼠标悬浮-->