什么是CocoaPods?
CocoaPods is a dependency manager for Swift and Objective-C Cocoa projects. It has over ten thousand libraries and can help you scale your projects elegantly. - 摘录自CocoaPods.org
在CocoaPods出现之前,iOS项目中引用第三方库的方式是非常原始的,要么是把源代码拷贝到主工程中,要么是通过静态库引入.a文件,然后还要修改一系列的build settings。后续的第三方库的升级也是个枯燥乏味的事情,总之如果你的iOS项目目前还是这样管理第三方库,那么你们还处在石器时代。
CocoaPods通过集中式的管理,可以非常有效的管理第三方库,甚至可以用于大型项目的模块化管理,非常优雅高效的解决iOS项目中的依赖管理。
安装CocoaPods
CocoaPods是一个Ruby Gem,因为直接访问RubyGem速度非常慢,建议先替换成淘宝镜像
$ gem sources --remove https://rubygems.org/
$ gem sources -a https://ruby.taobao.org/
安装CocoaPods
$ sudo gem install cocoapods
管理第三方库
创建Podfile
在项目根目录下创建Podfile,下面是一个Podfile的例子 (详情可以参考http://guides.cocoapods.org/syntax/podfile.html#podfile):
platform :ios, '9.0'

target "MyApp" do
  pod 'ObjectiveSugar', '~> 0.5'

  target "MyAppTests" do
    pod 'OCMock', '~> 2.0.1'
  end
end
platform: 可以指定平台的信息和deployment target的版本
target: 可以根据不同的target来引入不同的pod
pod: 引入依赖库
pod 'SSZipArchive' -- 引入最新版本
pod 'Objection', '0.9' -- 引入特定的版本
pod 'Objection', '>0.9'> -- 任何大于0.9的版本
pod 'Objection', '>=0.9'> -- 任何大于等于0.9的版本
pod 'Objection', '<0.9'> -- 任何小于0.9的版本
pod 'Objection', '<=0.9'> -- 任何小于等于0.9的版本
pod 'Objection', '~>0.9'> -- 任何介于0.9到1.0的最新版本,不包含1.0
pod 'AFNetworking', :path => '~/Documents/AFNetworking' -- 使用本地路径引入
pod 'AFNetworking', :git => 'https://github.com/gowalla/AFNetworking.git', :tag => '0.7.0' -- 使用git库引入
pod 'JSONKit', :podspec => 'https://example.com/JSONKit.podspec' -- 使用外部的podspec来引入
安装Pods
安装pods
$ pod install
更新pods
$ pod update
install和update的区别:假如使用 pod 'SVProgressHUD',没有指定版本。使用pod install,如果Pods中存在SVProgressHUD,则直接使用。使用pod update,则会保证更新SVProgressHUD到最新版本。
install或update速度通常很慢,因为每次执行的时候都需要同步一下CocoaPods Specs,这个有几百兆的大小,同步一次非常耗时。所以如果你使用的第三方库并不是经常更新,则不用经常更新那个Specs库。可以使用以下命令:
$ pod install --verbose --no-repo-update
$ pod update --verbose --no-repo-update
执行完install或者update命令后,就可以使用.xcworkspace打开项目。
使用CocoaPods管理私有库
大型项目模块化管理
随着iOS APP越来越复杂,功能越来越多,对于iOS项目的工程化要求也越来越高了,对于复杂的APP一般都需要对项目进行模块化管理。
模块化有几个方式:
1. 目录结构管理:这是最原始的方式,仅仅通过目录结构实现代码层次的清晰化。但本质上并没有解决代码之间的依赖混乱的情况,模块化划分也非常不清晰。
2. 子工程:通过子工程可以实现代码依赖管理和模块化,但是需要引入复杂的设置,不利于管理。
3. 静态库:将依赖代码打包成为静态库.a,不过由于不能看到源码,调试不方便。
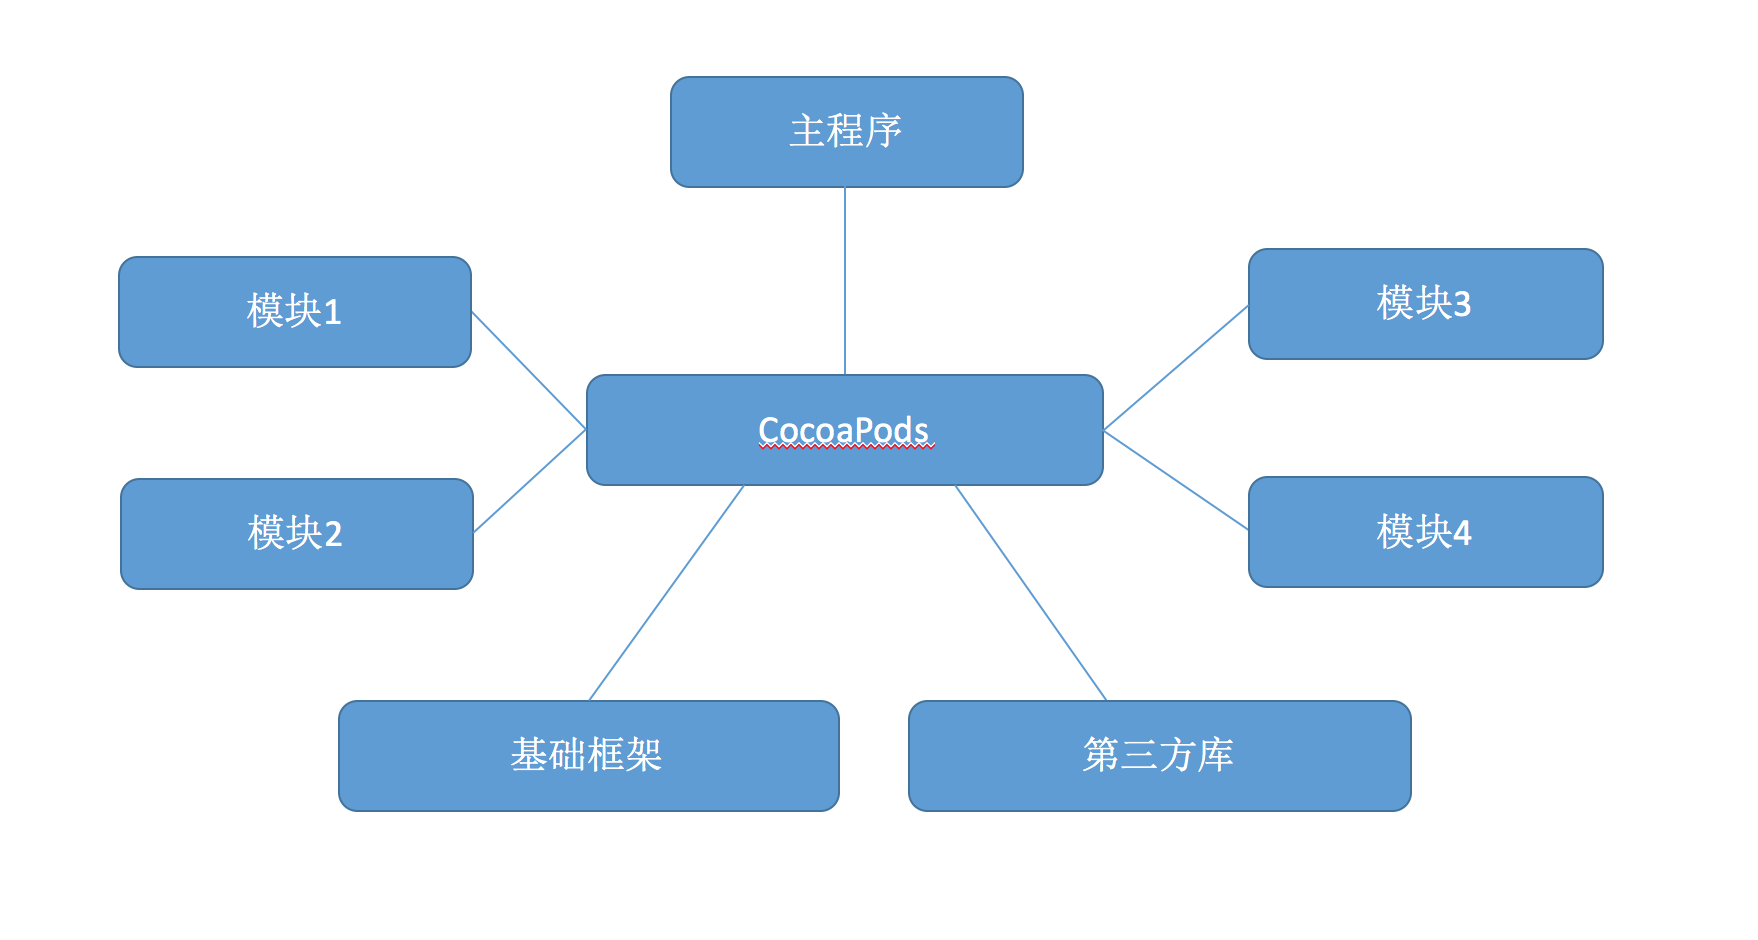
自从有了CocoaPods,可以使用它来管理私有库,从而实现了代码模块化管理。例如下图所示:

CocoaPods私有库
1. 创建私有的Specs git库
例如在github上面创建一个空的git库:https://github.com/xxx/MySpecs
将这个git库加入到CocoaPods库的列表中:
$ pod repo add MySpecs git@github.com:xxx/MySpecs.git
此时可以检查下本地的pod repo
$ pod repo list

MySpecs
- Type: git (master)

- URL: git@github.com:xxx/MySpecs.git
- Path: /Users/xxx/.cocoapods/repos/mySpecs
master
- Type: git (master)
- URL: git@github.com:CocoaPods/Specs.git
- Path: /Users/xxx/.cocoapods/repos/master
确定私有库的Specs已经加到本地pod repo中。
2. 在私有库项目中创建podspec文件
在私有库项目中的根目录,创建对应的podspec文件,里面会描述这个库的基本信息。
PodSpec规范可以查看:https://guides.cocoapods.org/syntax/podspec.html
#
#  Be sure to run `pod spec lint PodName.podspec' to ensure this is a
#  valid spec and to remove all comments including this before submitting the spec.
#  To learn more about Podspec attributes see http://docs.cocoapods.org/specification.html
#  To see working Podspecs in the CocoaPods repo see https://github.com/CocoaPods/Specs/
#
Pod::Spec.new do |s|
  s.name         = "PodName"
  s.version      = "0.0.1"
  s.summary      = "A short description of PodName."
  s.homepage     = "http://github.com/xxx/PodName"
  s.license      = { :type => "MIT", :text => <<-LICENSE
    Copyright © 2016年 xxx. All rights reserved.
    LICENSE
     }
  s.author       = { "" => "" }
  s.source       = { :git => "git@github.com:xxx/PodName.git", :tag => "0.0.1" }
  s.source_files = "**/*.{h,m,mm,c}"
  s.frameworks   = "Foundation", "QuartzCore", "UIKit", "WebKit"
  s.libraries    = "z"

  s.dependency 'AFNetworking'
  s.ios.deployment_target = '6.0'
end
resource: 可以指定资源文件,建议使用bundle以避免资源文件产生冲突。
frameworks: 指定这个pod依赖的系统framework
libraries: 指定这个pod依赖的系统动态库。注意使用的名字:比如需要引用"libz.dylib", 那么这里只需要写"z"
无论原始项目的目录结构或者group结构,默认的pod里面的代码都会平铺在根目录里面
如果需要增加目录层次结构,则需要使用subspec,详细使用规范:https://guides.cocoapods.org/syntax/podspec.html#subspec
注意:SubSpecs之间不能存在相互依赖关系,只能单向依赖
3. 验证私有库的合法性
$ pod lib lint --sources='git@github.com:xxx/MySpecs.git' --verbose --use-libraries --allow-warnings
sources参数可以指定私有库的Pod Specs库的地址。如果能够通过,说明代码编译没有问题。
4. 提交私有库的版本信息
$ git tag -m "first release" "0.0.1"
$ git push --tags     #推送tag到远端仓库
5. 向Spec Repo提交podspec
$ pod repo push MySpecs PodName.podspec --sources='git@github.com:xxx/MySpecs.git' --use-libraries --allow-warnings
这样就完成了一个CocoaPods的私有库的提交了,别人就可以在Podfile里面使用这个私有库了。
大家如果还有关于CocoaPods的用法,可以一起交流。大家玩的开心~
有兴趣同学可以关注微信公众号奶爸码农,不定期分享投资理财、IT相关内容:
