Prerequisites:
- Hyper-V Virtual machine
- CentOS7 iso image
Install CentOS on Hyper-V Virtual machine:
- Launch virtual machine k8s-master.
Highlight vitual machine k8s-master which we just created, then click on Start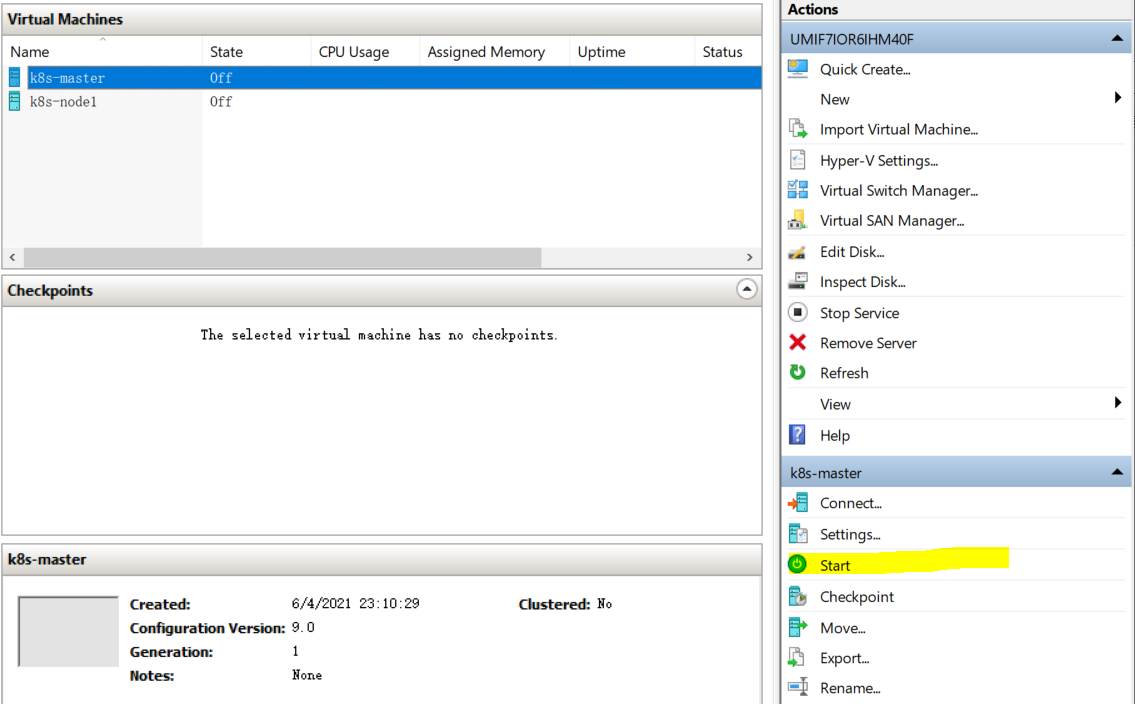
-
Once k8s-master started, then click on Connect, then we will get a new prompt window to start installation.
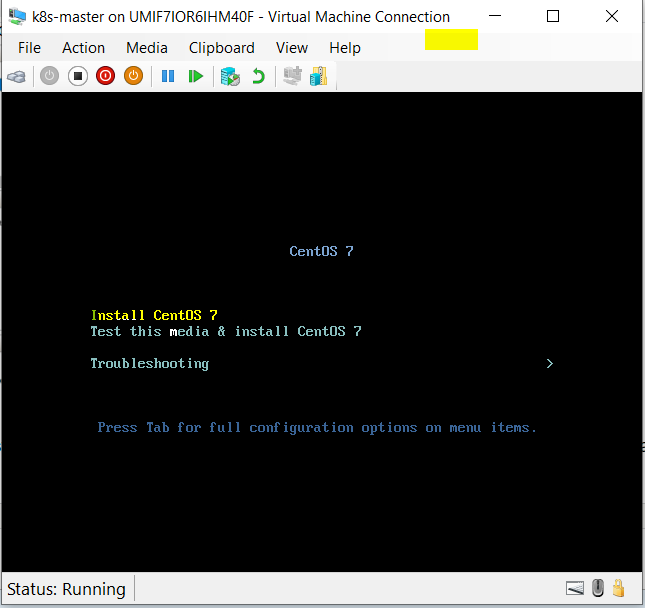
- Tap arrow key on keyboard to select first option Install CentOS 7, then Enter. After a few health check, we'll enter into Installation wizard.
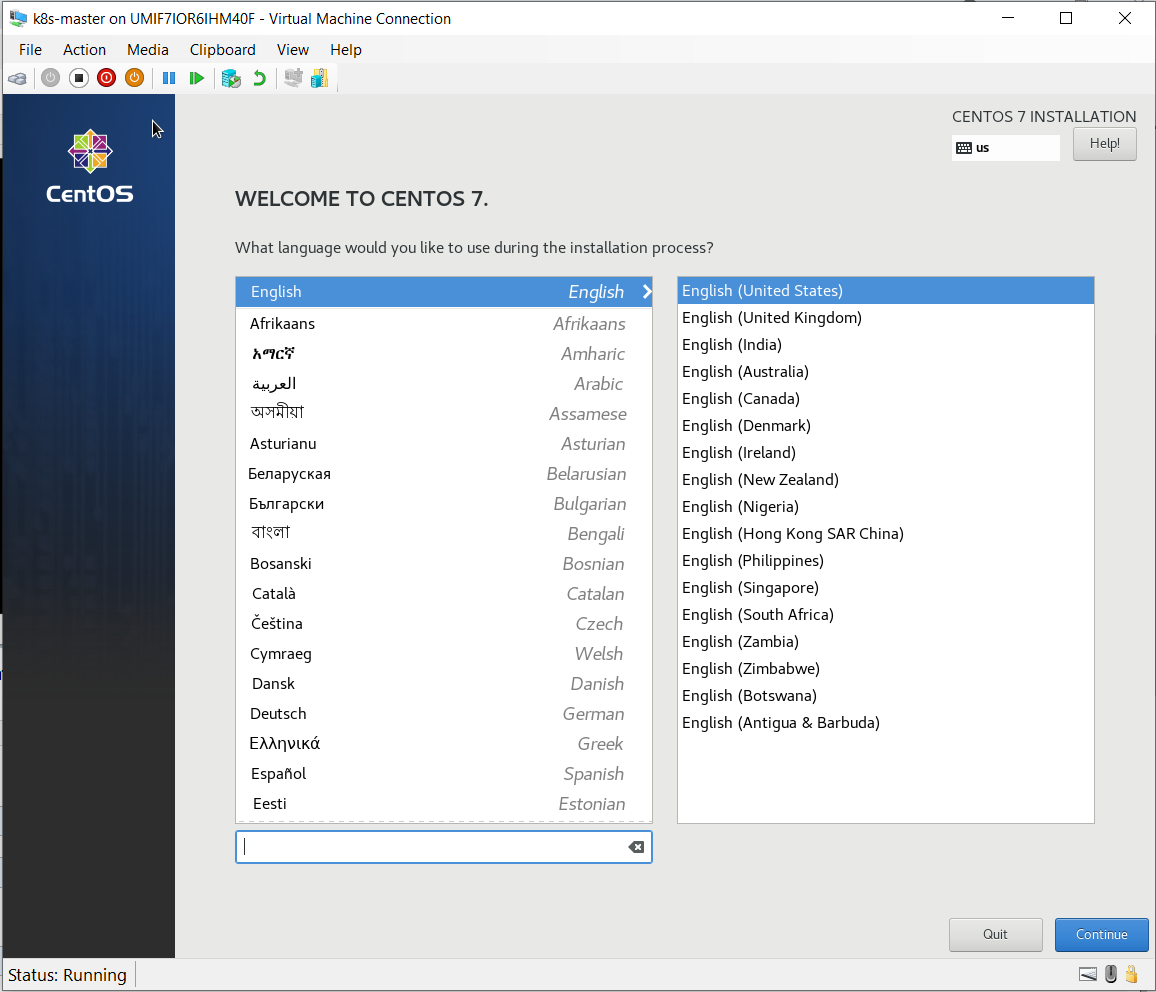
- Pick your favorite language or mother language, i will leave it as default English, then click on Continue.
Now we enter to am important screen, be careful to configure each options here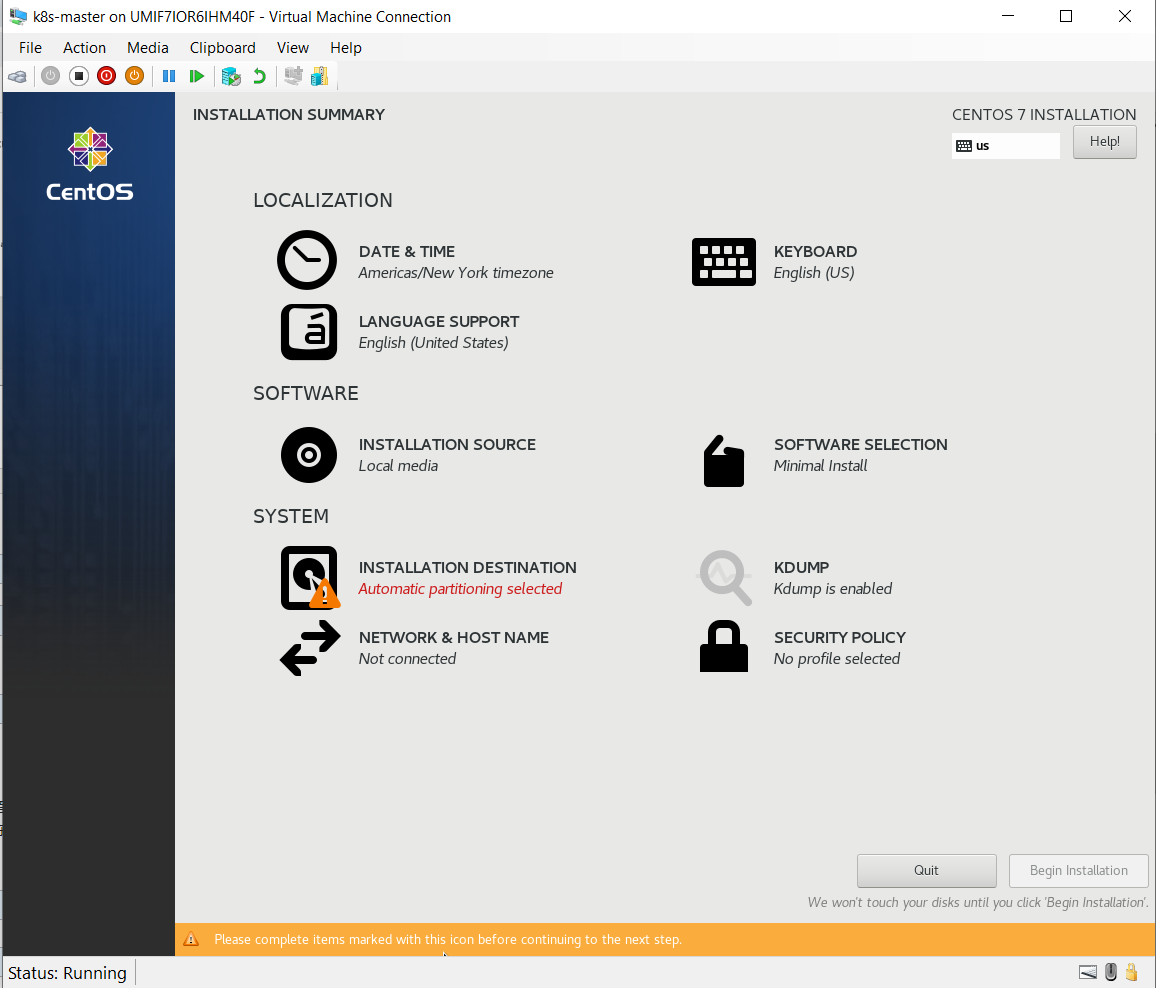
- Click on Date & Time, pick Asia, City for Shanghai
- Keyboard leave it as default
- LANGUAGE SUPPORT leave it as default
- INSTALLATION SOURCE leave it as default
- SOFTWARE SELECTION, as it's going to be a Linux Server, highly suggest do not choose GUI, try to survive with Command line.
We choose Minimal Install, and Add-Ons Compatibility Libraries, Development Tools
- INSTALLATION DESTINATION, we go with Automatic participation

- KDUMP, leave it as default
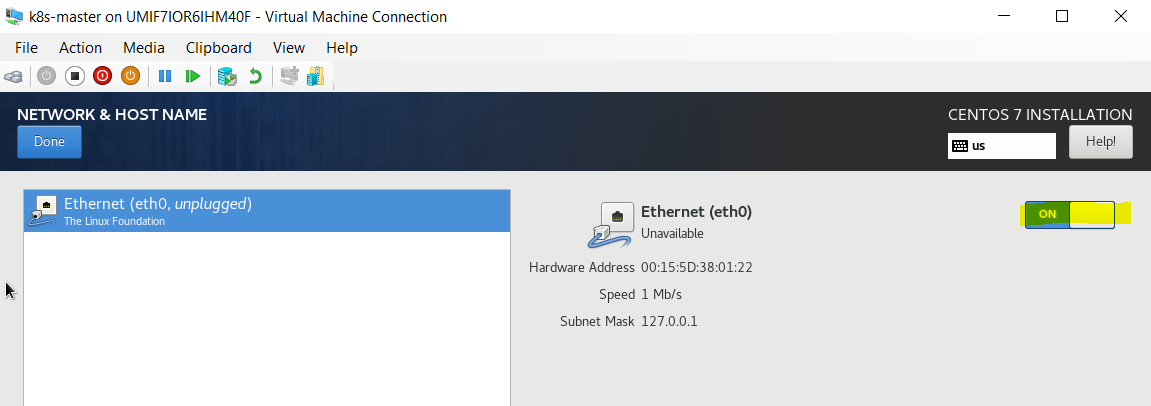
- NETWORK & HOST NAME, enable Ethernet (eth0)
- SECURITY POLICY, leave it as default. Then click on Begin Installation, went into system installation.

- Click on ROOT PASSWORD, change root password to what you like. Then wait installation to finished.

- Once installation finished, click on Reboot to restart CentOS

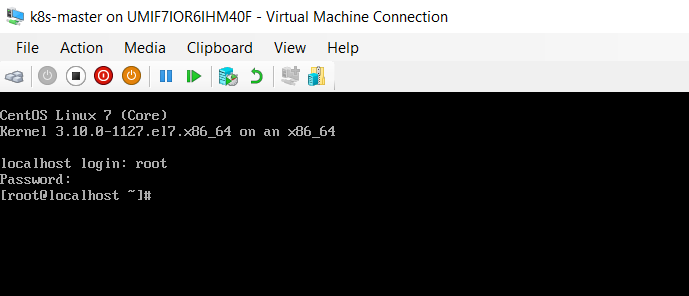
- After restart, we get CentOS install successfully ! you can login with root user, enter it's password you changed on step 14
- All done. Remember to repeat all above steps to install CentOS7 for virtual machine k8s-node1.
Next we will configure networks for virtual machine, setup Internal adapter let us connect to Virtual machine CentOS with xshell or MobaXterm, then setup External adapter to enable Virtual machine connect to Internet.