git commit message格式
- git每次提交代码,都必须写commit message(提交说明),用来说明本次提交的目的,否则不允许提交。
git commit -m "hello world"
上面代码的-m 参数,就是用来指定commit message的。
- commit message的写法规范有许多,本文介绍目前使用最广的,比较合理和系统化的一种规范:Angular 规范。
一、Commit message 格式
  <type>(<scope>): <subject>
  <空行>
  <body>
  <空行>
  <footer>
其中,Header 是必需的,Body 和 Footer 可以省略。
1.1 Header(第一部分)
Header部分只有一行,包括三个字段:type (必需)、scope(可选)、subject(必需)
- type
type 用于说明commit的类别,允许使用以下7个标识。
   feat:新功能(feature)
   fix:修补bug
   docs:文档(documentation)
   style: 格式(不影响代码运行的变动)
   refactor:重构(即不是新增功能,也不是修改bug的代码变动)
   test:增加测试
   chore:构建过程或辅助工具的变动
- scope
scope用于说明 commit 影响的范围,比如数据层、控制层、视图层等等,视项目不同而不同。
- subject
subject是 commit 目的的简短描述,不超过50个字符。
注意事项:
- 以动词开头,使用第一人称现在时,比如change,而不是changed或changes
- 第一个字母小写
- 结尾不加句号(.)
1.2 Body()第二部分
Body 部分是对本次 commit 的详细描述,可以分成多行。(换行用 )
1.3 Footer(第三部分)
Footer 部分只用于两种情况。
- 不兼容变动
如果当前代码与上一个版本不兼容,则 Footer 部分以BREAKING CHANGE开头,后面是对变动的描述、以及变动理由和迁移方法。
- 关闭Issue
如果当前 commit 针对某个issue,那么可以在 Footer 部分关闭这个 issue。
Closes #234
也可以一次关闭多个 issue 。
Closes #123, #245, #992
二、Commitizen
我们知道了提交规范,就需要通过工具生成和约束。通过借助工具commitizen/cz-cli的安装之后,就会产生规范性的提示语句,帮助我们形成规范的commit message。
Commitizen是一个撰写合格 Commit message 的工具。
全局安装,命令如下:
npm install -g commitizen cz-conventional-changelog
查看是否安装成功
npm ls -g -depth=0
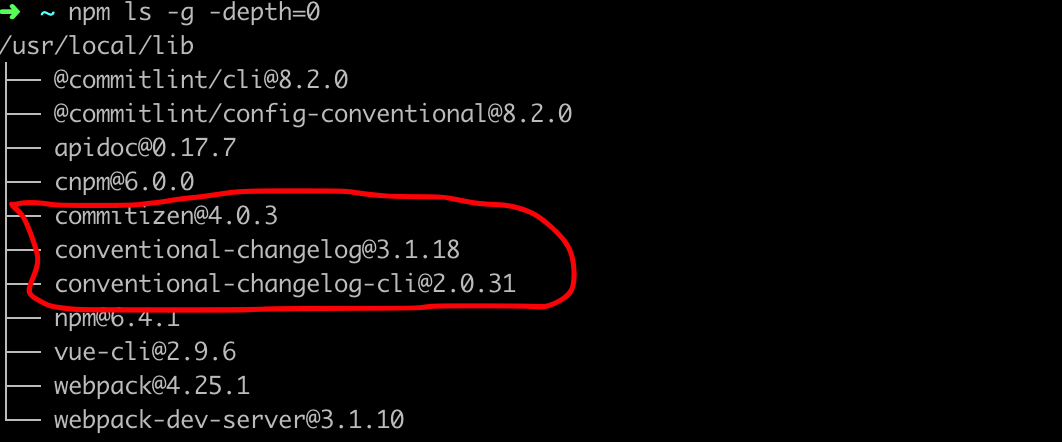
全局模式下, 需要 ~/.czrc 配置文件, 为 commitizen 指定 Adapter比如: cz-conventional-changelog (一个符合 Angular团队规范的 preset)。
echo '{ "path": "cz-conventional-changelog" }' > ~/.czrc
安装成功后,在对应的git项目中,凡是用到git commit命令,一律改为使用git cz.这时,就会出现选项,用来生成符合格式的 Commit message。

三、校验Commit message 是否符合规范
Commitlint
commitlint用于检查我们的commit message是否符合提交规范,如果不符合,则直接拒绝提交。
全局安装
npm install -g @commitlint/cli @commitlint/config-conventional
生成配置文件
echo "module.exports = {extends: ['@commitlint/config-conventional']}" > commitlint.config.js
你也可以在commitlint.config.js制定提交message规范
  "module.exports = {extends: ['@commitlint/config-conventional']}"

module.exports = {
  extends: ['@commitlint/config-conventional'],
  rules: {
    'type-enum': [2, 'always', [
      "feat", "fix", "docs", "style", "refactor", "test", "chore", "revert"
    ]],
    'subject-full-stop': [0, 'never'],
    'subject-case': [0, 'never']
  }
};
上面我们就完成了commitlint的安装与提交规范的制定。但检验commit message的最佳方式是结合git hook,所以需要配合Husky。
Husky
husky继承了Git下所有的钩子,在触发钩子的时候,husky可以阻止不合法的commit,push等等。
创建package.json文件
进入到git项目中,执行
npm init --yes
会生成项目对应项目的package.json
进入项目中,安装husky
npm install husky
安装成功后需要在项目的package.json中配置:
  "husky": {
    "hooks": {
      "commit-msg": "commitlint -e $GIT_PARAMS"
    }
  }
然后我们正常操作git
  git add .
  git commit -m "test"
上面message不符合提交规范,所以会报错如下:

起到了校验的作用。
四、生成Change Log
如果你的所有 Commit 都符合 Angular 格式,那么发布新版本时, Change log 就可以用脚本自动生成
生成的文档包括以下三个部分。
- New features
- Bug fixes
- Breaking changes
每个部分都会罗列相关的 commit ,并且有指向这些 commit 的链接。当然,生成的文档允许手动修改,所以发布前,你还可以添加其他内容。
conventional-changelog 就是生成 Change log 的工具。
安装changelog
  npm install -g conventional-changelog
  npm install -g conventional-changelog-cli
进入git项目目录下,执行命令:
conventional-changelog -p angular -i CHANGELOG.md -s
以上命令中参数-p angular用来指定使用的 commit message 标准为angular,参数-i CHANGELOG.md表示生成的 changelog输出到 CHANGELOG.md 文件中。
命令执行完会在项目中生成CHANGELOG.md 文件

注意:上面这条命令产生的 changelog 是基于上次 tag 版本(本地的tag版本)之后的变更(Feature、Fix、Breaking Changes等等)所产生的,如果你想生成之前所有 commit 信息产生的 changelog 则需要使用这条命令:
conventional-changelog -p angular -i CHANGELOG.md -w -r 0

由于命令过长,可以在package.json中配置scripts
{
  "scripts": {
    "changelog": "conventional-changelog -p angular -i CHANGELOG.md -s"
  }
}
以后,直接运行下面的命令即可。
npm run changelog
standard-version 也是生成 Change log 的工具。
正常情况下,版本发布流程如下:
- git pull origin master
- 根据 pacakage.json 中的 version 更新版本号,更新 changelog
- git add -A,然后git commit
- git tag打版本操作
- push版本tag和master分支到远程仓库
conventional-changelog工具需要在手动修改了pacakage.json版本号,生成了changelog之后,手动commit及打tag。但standard-version工具会自动完成2、3、4项的工作。如果再配合本地的shell脚本,则可以自动的完成一系列的版本发布工作。
安装(推荐全局安装)
npm i -g standard-version
在package.json中配置:
  "scirpt": {
    ...,
    "release": "standard-version"
}
使用:
npm run release
最终会在git项目中生成CHANGELOG.md文件
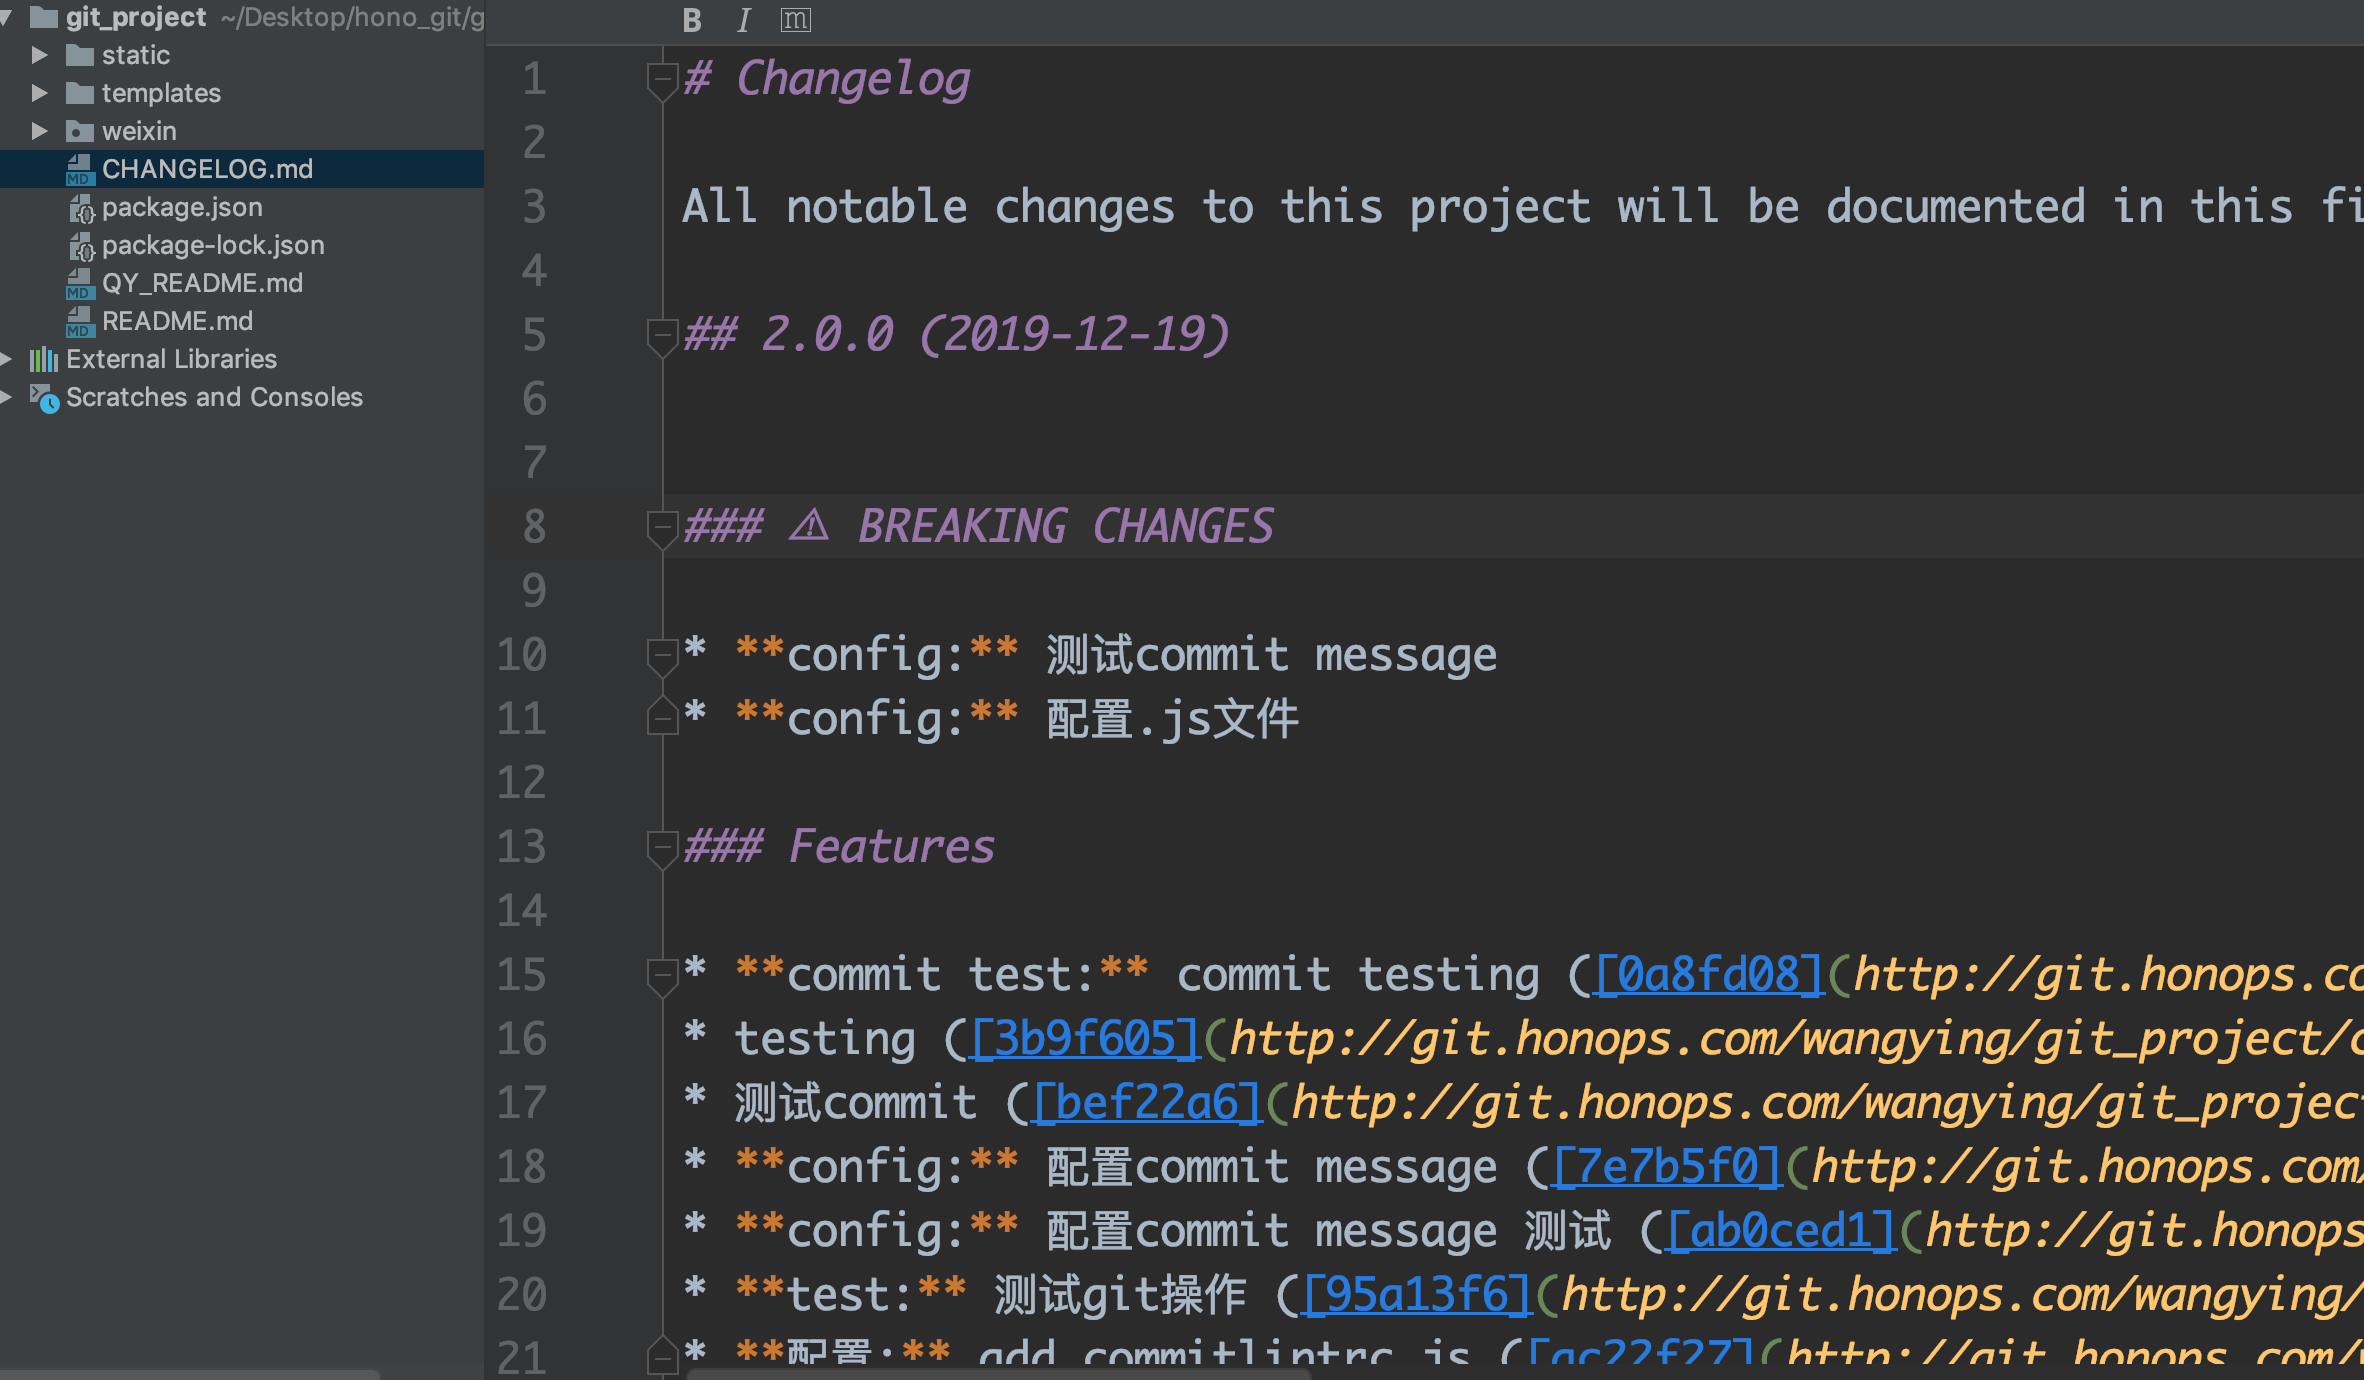
跟conventional-changelog生成的文件差不多。
更详细的用法:
--first-release, -f 第一次打版本
standard-version -f
生成与package.json中版本号一致的tag。本地不能存在一样版本号的tag。
--release-as, -r 指定版本号
默认情况下,工具会自动根据 主版本(major),次版本( minor) or 修订版(patch) 规则生成版本号,例如如果你package.json 中的version 为 4.3.1, 那么执行后版本号则是:4.4.0。
standard-version -r minor
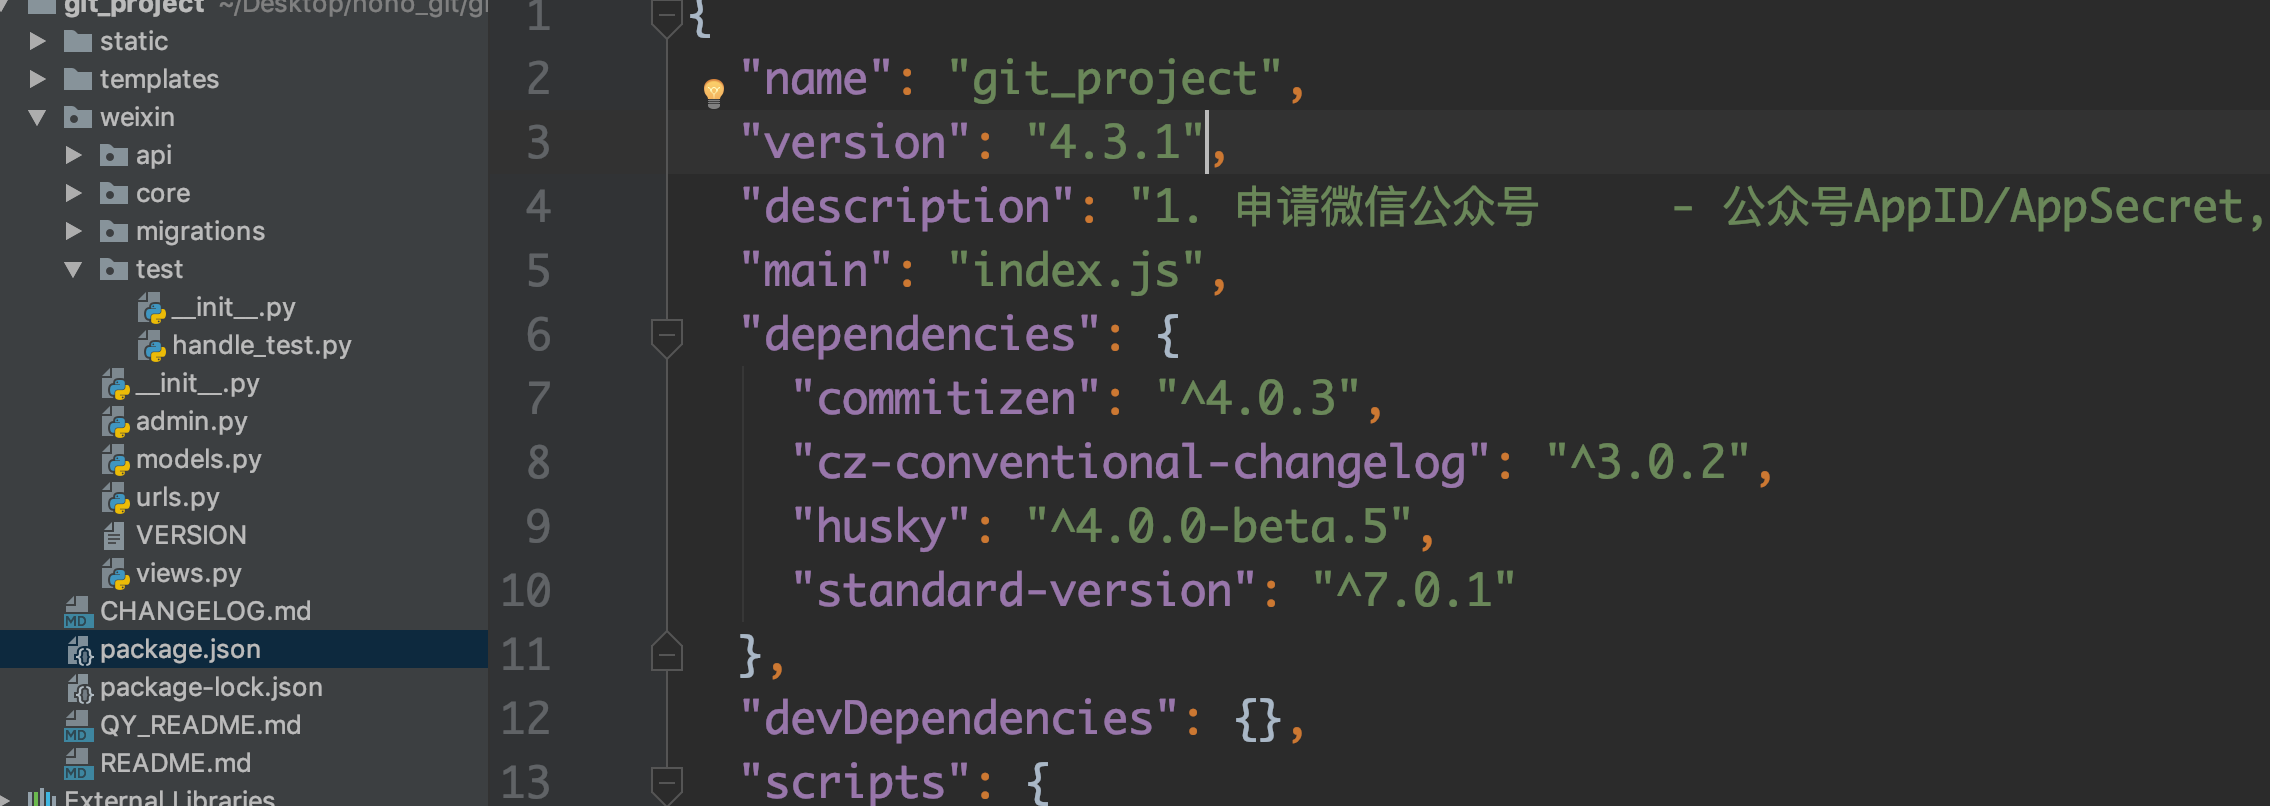
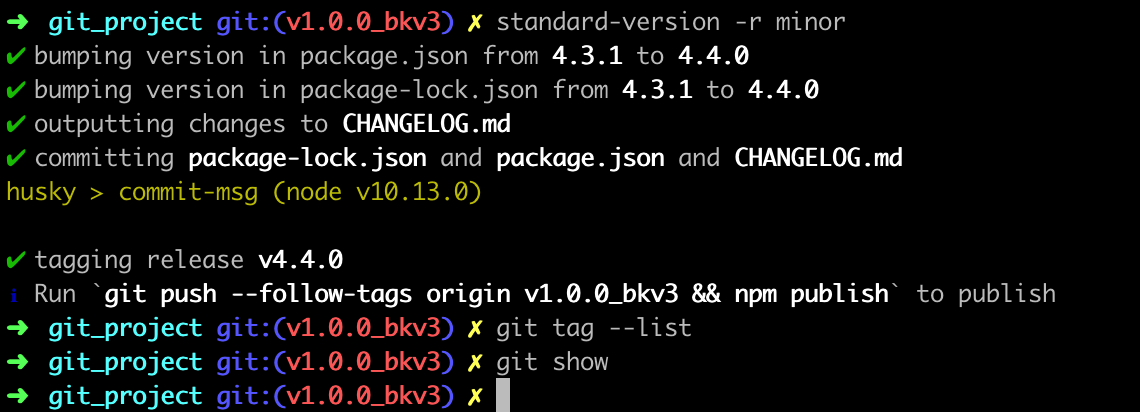
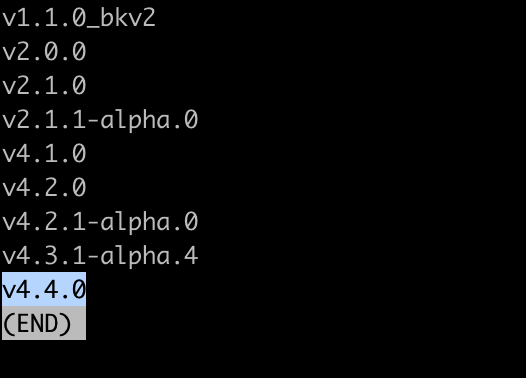
查看生成的tag:自动生成v4.4.0
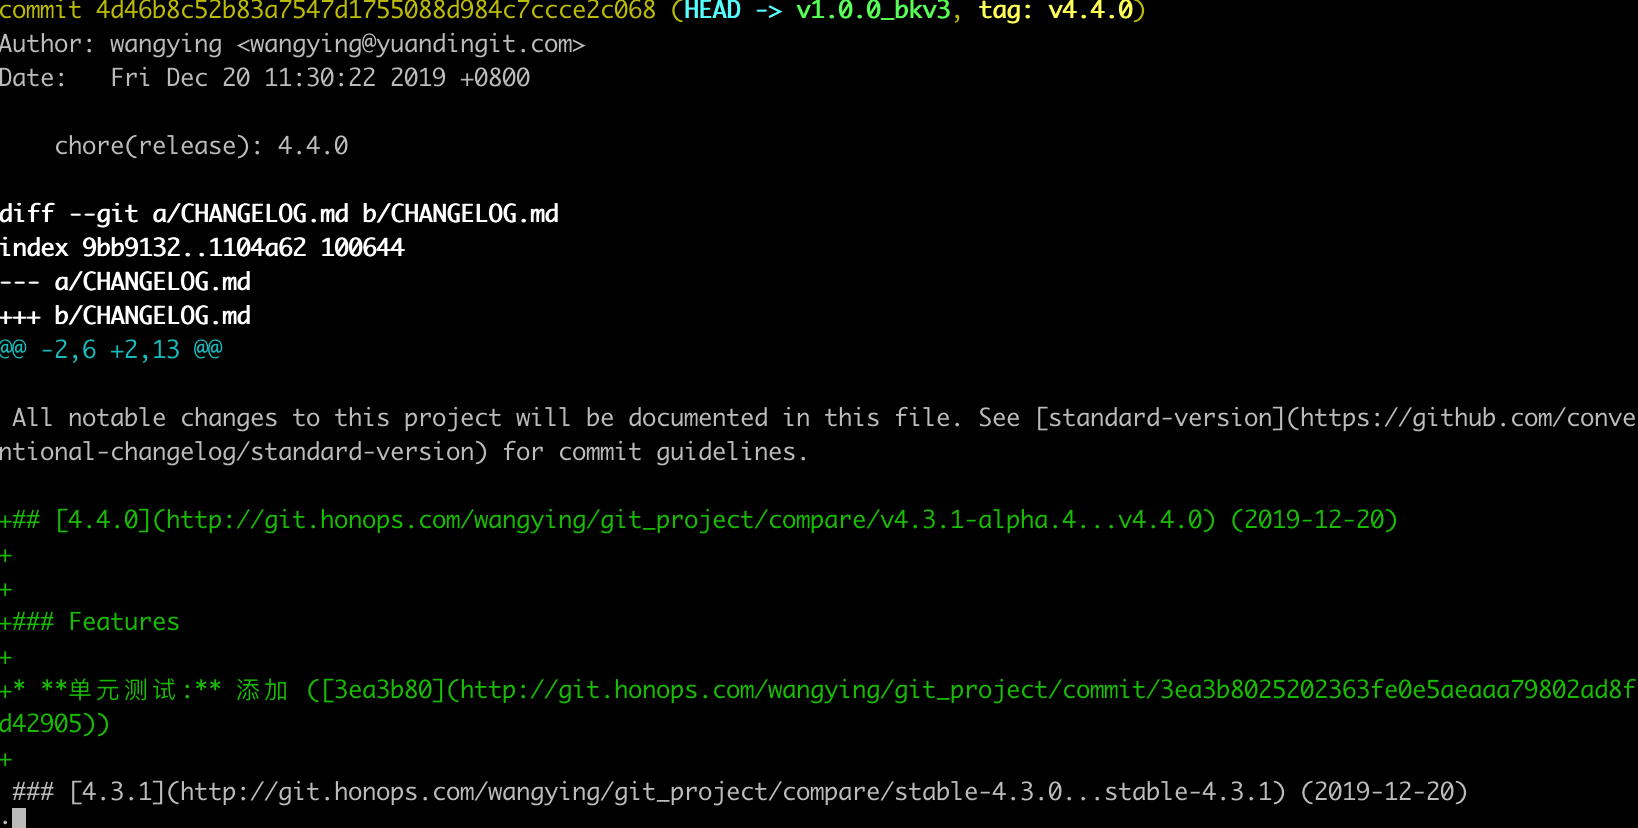
查看提交记录:修改已经自动提交
最后提交本地代码与tag
  git push origin master
  git push origin --tags
会在github上看到提交记录与tag。
也可以固定版本:
  standard-version -r 5.0.0
  standard-version -r 5.0.0-test
会生成v5.0.0和5.0.0-test版本
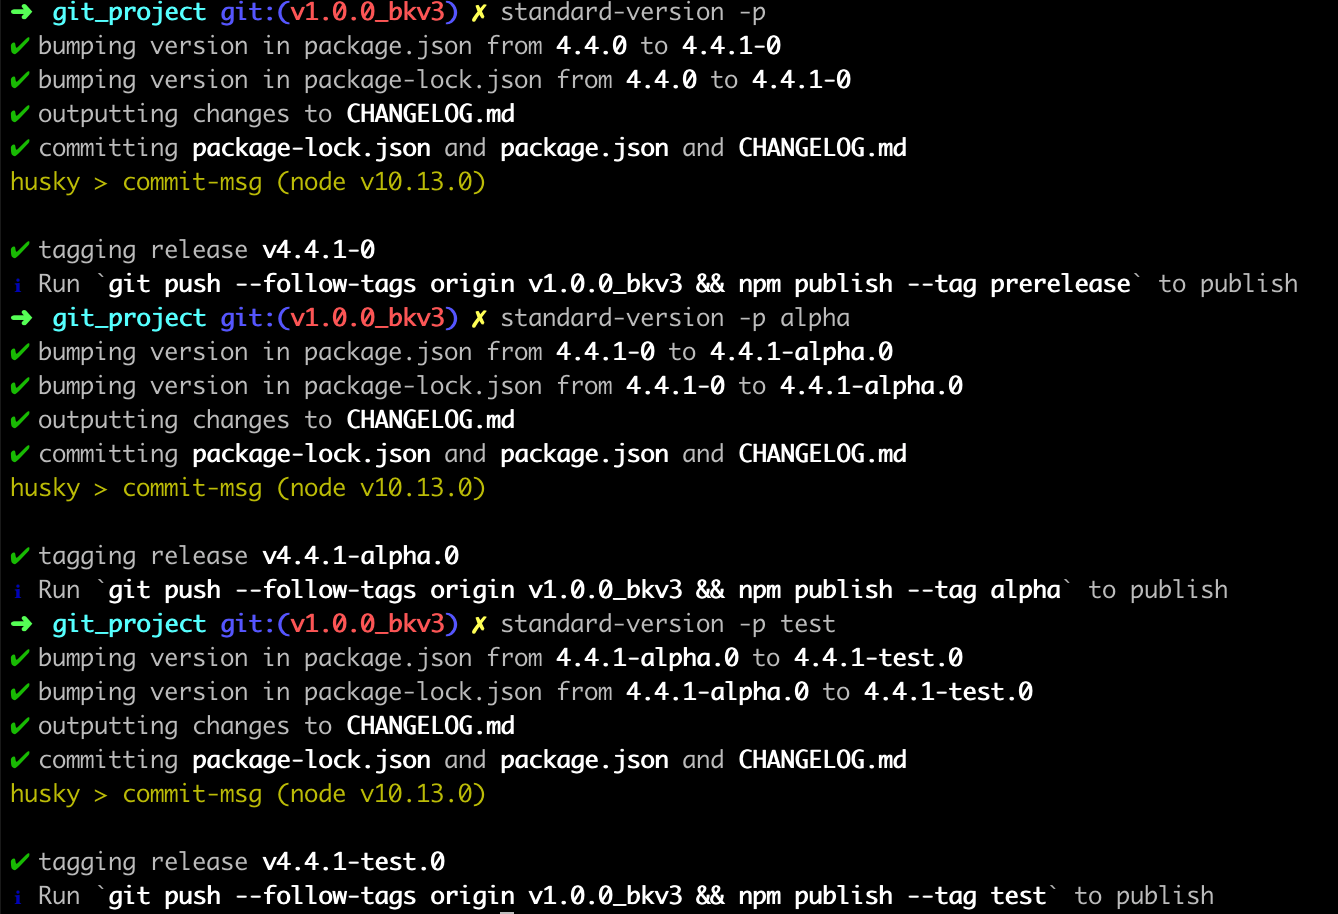
--prerelease, -p 预发版本命名
用来生成预发版本, 如果当期的版本号是 4.4.0,例如
  standard-version -p
  standard-version -p alpha
  standard-version -p test
会生成v4.4.1-0、v4.4.1-alpha.0、v4.4.1-test.0。其中alpha、test代表预发布版本的名称。
--tag-prefix, -t 版本 tag 前缀
默认有一个前缀v,如果不想有任何前缀,直接用-t即可。
当前版本4.4.1
  standard-version -t "stable-"
  standard-version -t "test-"
生成:test-5.0.0、stable-5.1.0,其中 test是第一次作为前缀使用,所以会生成一个主版本。
综合使用:
standard-version -t 'stable-' -r 6.1.0
生成 stable-6.1.0
--dry-run
standard-version --dry-run
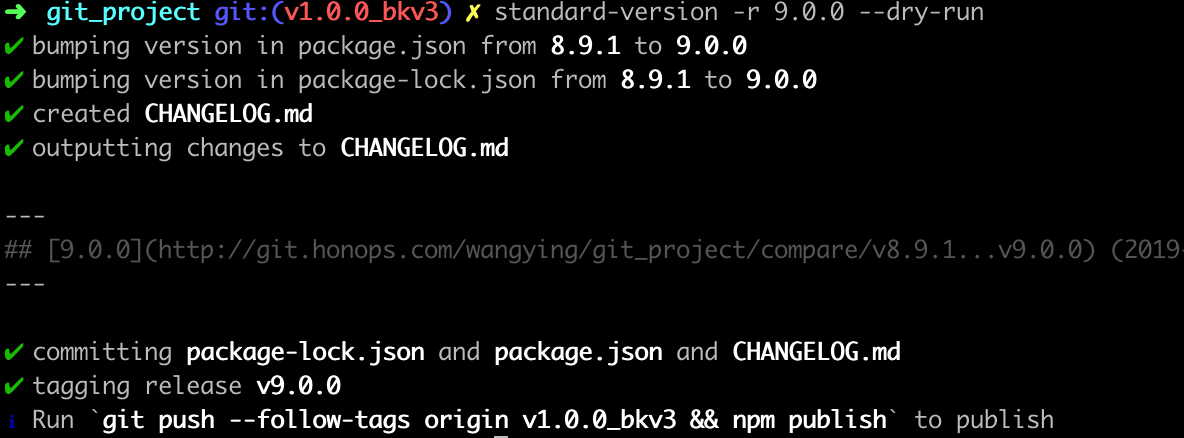
此命令会在允许你在后台查看将运行哪些步骤,不会修改package.json、changlog,也不会提交任何代码及生成tag。可以其他命令结合使用。
standard-version -r 9.0.0 --dry-run
可用于查看该命令是否满足你的需求。
Lifecycle scripts 生命周期脚本
standard-version支持生命周期脚本。这些脚本允许你在发布期间去执行自己的补充命令。以下为生命周期的钩子,并按照文档顺序执行:
prerelease: executed before anything happens. If the prerelease script returns a non-zero exit code, versioning will be aborted, but it has no other effect on the process.prebump/postbump: executed before and after the version is bumped. If the prebump script returns a version #, it will be used rather than the version calculated by standard-version.prechangelog/postchangelog: executes before and after the CHANGELOG is generated.precommit/postcommit: called before and after the commit step.pretag/posttag: called before and after the tagging step.
在package.json中配置lifecycle scripts:
  {
  "standard-version": {
    "scripts": {
      "prebump": "echo 1.2.0"
    }
  }
}
执行standard-version会生成v1.2.0的版本。
跳过生命周期步骤(Skipping lifecycle steps)
You can skip any of the lifecycle steps (bump, changelog, commit, tag), by adding the following to your package.json:
  {
  "standard-version": {
    "skip": {
      "changelog": true
    }
  }
}