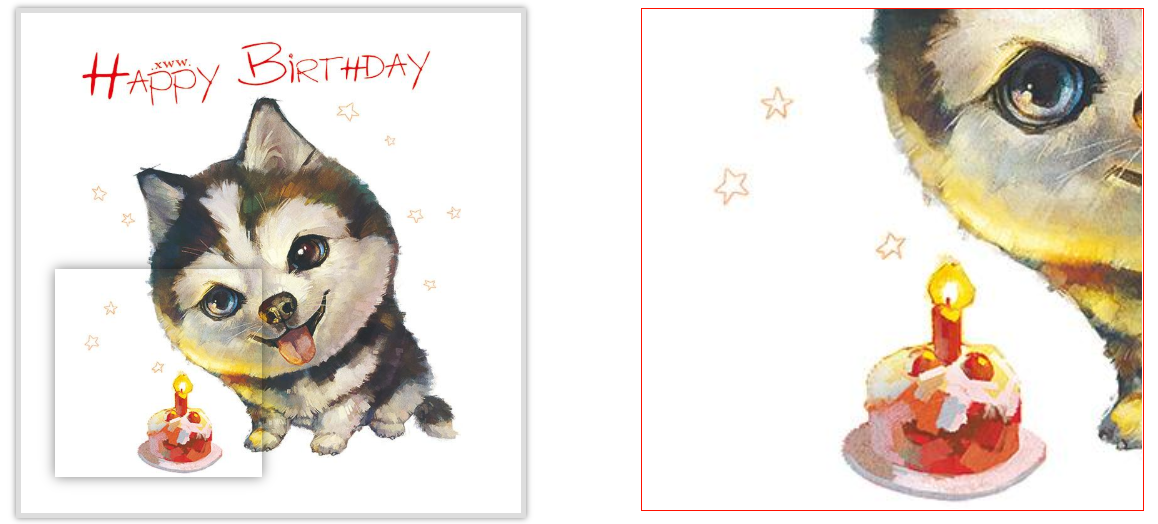
1.目标:实现放大镜效果
当鼠标放入图片时,放大图片。
2.示例:页面结构代码:
<!-- 小图 -->
<div class="small">
<img src="images/timg.jpg" alt="">
<!-- 小方块 要放大的区域 -->
<span class="grayBox"></span>
</div>
<!-- 大图 -->
<div class="big">
<img src="images/timg.jpg" alt="">
</div>
JS代码:(1)首先先进行分析:1.元素选择功能;2.事件驱动;3.元素的显示隐藏;4.小图移动,大图跟随。
(2)对页面进行设计:
function Magnifier() {
}
Magnifier.prototype = {
constructor : Magnifier ,
// 初始化功能;
init : function(){
}
// 事件绑定功能;
bindEvent : function(){
}
// 元素显示隐藏功能;
eleToggle : function(){
}
// 小图移动,大图跟随;
eleMove : function(){
}
}
(3) 面向对象编程
function Magnifier( options ) {
this.init( options );
}
Magnifier.prototype = {
constructor : Magnifier ,
// 初始化功能;
init : function( options ){
// 初始化元素;
for(var attr in options){
this[attr+"_ele"] = this.$(options[attr]);
}
// 为了节省性能,所以只获取一次offsetLeft;
this.small_box_offset = {
left : this.small_box_ele.offsetLeft,
top : this.small_box_ele.offsetTop
}
this.cutting_box_offset = {
width : parseInt( getComputedStyle(this.cutting_box_ele).width ),
height : parseInt( getComputedStyle(this.cutting_box_ele).height ),
}
this.bindEvent();
},
// 元素选择功能;
$ : function(selector){
return document.querySelector(selector);
},
// 事件绑定功能;
bindEvent : function(){
this.small_box_ele.addEventListener( "mouseover" , function(){
// 元素显示;
this.eleToggle("show");
}.bind(this));
this.small_box_ele.addEventListener( "mouseout" , function(){
// 元素隐藏;
this.eleToggle("hide");
}.bind(this));
// 元素运动;
this.small_box_ele.addEventListener("mousemove" , function( evt ){
var e = evt || event;
var x = e.clientX ;
var y = e.clientY ;
var res = this.factoryPosition( x , y )
this.eleMove( res.x , res.y );
}.bind(this))
},
// 元素显示隐藏功能;
eleToggle : function( type ){
this.cutting_box_ele.style.display = type === "show" ? "block" : "none";
this.big_box_ele.style.display = type === "show" ? "block" : "none";
},
// 小图移动,大图跟随;
eleMove : function( x , y ){
this.cutting_box_ele.style.left = x + "px";
this.cutting_box_ele.style.top = y + "px";
},

// 处理x和y;
factoryPosition : function( x , y ){
var _left = x - this.small_box_offset.left - this.cutting_box_offset.width / 2;
var _top = y - this.small_box_offset.top - this.cutting_box_offset.height / 2;
// 做边界监测 :
// 最小值边界监测;
_left = _left <= 0 ? 0 : _left;
_top = _top <= 0 ? 0 : _top
// 高频率调用函数;
return {
x : _left,
y : _top
}
}
}
补充:css样式代码:
*{
margin: 0;
padding: 0;
}
.small {
400px;
height: 400px;
position: relative;
margin-left: 200px;
margin-top: 100px;
border:4px solid #ddd;
box-shadow: 0 0 5px rgba(0,0,0,.5);
}
.small img{
100%;
height: 100%;
}
.small .grayBox{
display: none;
200px;
height: 200px;
background-size:400px 400px;
background-position: 0 0;
box-shadow: 0 0 10px rgba(0, 0, 0, 0.5);
position: absolute;
left: 0;
top: 0;
}
.big{
400px;
height: 400px;
position: absolute;
left: 700px;
top: 100px;
border:1px solid #f10;
display: none;
overflow: hidden;
}
.big img{
position: absolute;
}
整体效果图如下:

放大镜效果就分享这些啦。能坚持别人不能坚持的,才能拥有别人不能拥有的。【逆战】