1.solr 的全量更新
1.core/conf 目录下的 solrconfig.xml,新增如下配置
<!--添加如下配置 增加resultHandler配置  -->
<requestHandler name="/dataimport" class="org.apache.solr.handler.dataimport.DataImportHandler">
    <lst name="defaults">
    <str name="config">data-config.xml</str>
    </lst>
</requestHandler>
2 在core/conf 目录下的新建 data-config.xml 文件,新增如下配置
<?xml version="1.0" encoding="UTF-8" ?>
<dataConfig>
    <!--数据源-->
    <dataSource type="JdbcDataSource"
                driver="com.mysql.jdbc.Driver"
                url="jdbc:mysql://192.168.2.10:3306/xt"
                user="root"
                password=""/>
    <document>
        <entity name="solrTest"
        query="SELECT fid,ftime,fcontent,ftitle,flastupdatetime FROM solrTest">
            <!--查询的数据和数据库索引意义对应column 是查询的字段name 是solr索引对应的字段-->
            <field column="fid" name="fid"/>
            <field column="ftitle" name="ftitle"/>
            <field column="fcontent" name="fcontent"/>
            <field column="flastupdatetime" name="flastupdatetime"/>
            <field column="ftime" name="ftime"/>
        </entity>
    </document>
</dataConfig>

注:sqlserver 下载:sqljdbc42.jar 目录:/tomcat-8/webapps/solr/WEB-INF/lib/下
3.修改core/conf 目录下 managed-schema.xml 的文件,新增需要索引的列,示例:
    <field name="fid" type="string" indexed="true" stored="true" required="true" multiValued="false" />
    <field name="fpic" type="string" indexed="true" stored="true"  multiValued="false" />
    <field name="ftitle" type="string" indexed="true" stored="true" required="true" multiValued="false" />
    <field name="fauthor" type="string" indexed="true" stored="true"  multiValued="false" />
    <field name="ftime" type="string" indexed="true" stored="true"  multiValued="false" />
    <field name="fdesc" type="string" indexed="true" stored="true"  multiValued="false" />
    <field name="fcontent" type="string" indexed="true" stored="true"  multiValued="false" />
    <field name="flastupdatetime" type="text_general" indexed="true" stored="true" required="true" multiValued="false" />
4.进入solr 的后台管理,进行全量更新
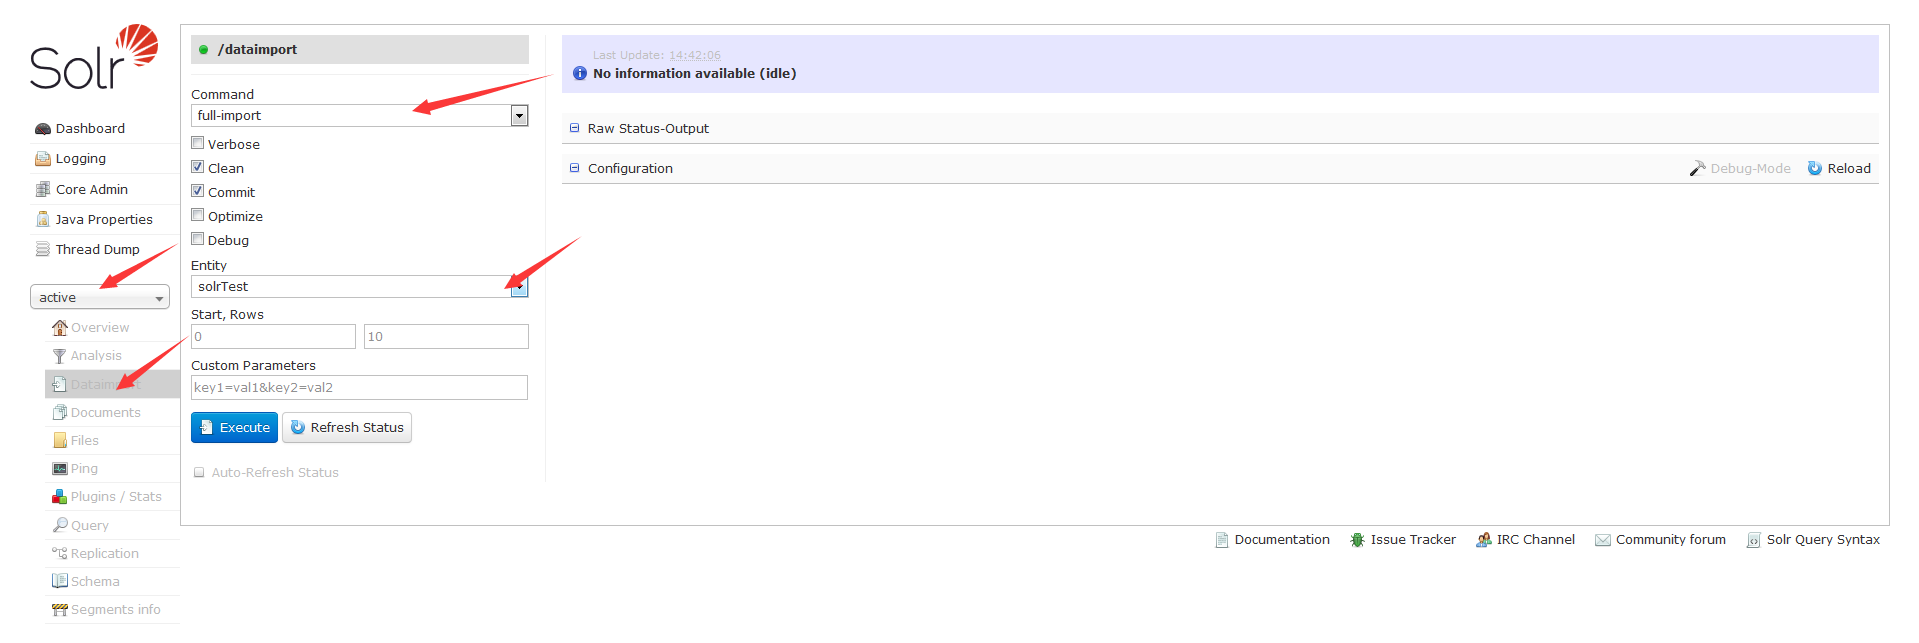
2. solr 的增量更新
1.首先要弄懂几个必要的属性,以及数据库建表事项,和dataimporter.properties 、data-config.xml里面的数据
<!-- transformer 格式转化:HTMLStripTransformer 索引中忽略HTML标签 --->
<!-- query:查询数据库表符合记录数据 --->
<!-- deltaQuery:增量索引查询主键ID ---> 注意这个只能返回ID字段
<!-- deltaImportQuery:增量索引查询导入数据 --->
<!-- deletedPkQuery:增量索引删除主键ID查询 ---> 注意这个只能返回ID字段
2.数据库配置注意事项
1.如果只涉及添加,与修改业务,那么数据库里只需额外有一个timpstamp字段
就可以了,默认值为当前系统时间,CURRENT_TIMESTAMP
2.如果还涉及删除业务,那么数据里就需额外再多添加一个字段isdelete,int类型的
用0,1来标识,此条记录是否被删除
3.dataimporter.properties
这个配置文件很重要,它是用来记录当前时间与上一次修改时间的,通过它能够找出,那些,新添加的,修改的,或删除的记录标识,此条记录是否被删除的记录
4.增量更新就是在全量更新的基础上加上一些配置,配置如下:
<?xml version="1.0" encoding="UTF-8" ?>
<dataConfig>
    <!--数据源-->
    <dataSource type="JdbcDataSource"
                driver="com.mysql.jdbc.Driver"
                url="jdbc:mysql://192.168.2.10:3306/xtjkqyfw"
                user="root"
                password="Biaopu8888"/>
    <document>

        <entity name="solrTest"
        query="SELECT fid,ftime,fcontent,ftitle,flastupdatetime FROM solrTest where flag = '0'"
        deltaImportQuery = "SELECT fid,ftime,fcontent,ftitle,flastupdatetime FROM solrTest where fid = '${dataimporter.delta.fid}'"
        deltaQuery = "SELECT fid FROM solrTest where flastupdatetime > '${dataimporter.last_index_time}' and flag = '0'"
        deletedPkQuery = "SELECT fid FROM solrTest where flag = '1'"
        >
            <!--查询的数据和数据库索引意义对应column 是查询的字段name 是solr索引对应的字段-->
            <field column="fid" name="fid"/>
            <field column="ftitle" name="ftitle"/>
            <field column="fcontent" name="fcontent"/>
            <field column="flastupdatetime" name="flastupdatetime"/>
            <field column="ftime" name="ftime"/>
        </entity>

    </document>
</dataConfig>
5.通过后台管理手动增量更新和通过浏览器手动更新

在浏览器直接输入网站 : http://localhost:8089/solr/active/dataimport?command=delta-import^&clean=false^&commit=true
3. solr 常见的自动更新方式
1. solr 自带的增量更新更新
1.下载jar包 apache-solr-dataimportscheduler.jar、solr-dataimporthandler-7.0.0.jar、solr-dataimporthandler-extras-7.0.0.jar到 solr 项目的WEB-INFlib 目录下
apache-solr-dataimportscheduler 的下载地址 链接:https://pan.baidu.com/s/1h4hDmc2KWtO4VPMnDGXSCg 提取码:qi7n
2. 修改web.xml文件配置监听,在servlet节点前增加:
   <listener>
          <listener-class>
                org.apache.solr.handler.dataimport.scheduler.ApplicationListener
          </listener-class>
    </listener>
3.在solrHome(存储solr数据的目录) 的目录下创建conf文件夹,创建 dataimport.properties 文件,内容根据实际情况修改,内容如下:
#################################################
#                                              #
#      dataimport scheduler properties        #
#                                              #
#################################################

#  tosync or not to sync
#  1- active; anything else - inactive
# 这里的配置不用修改
syncEnabled=1

# which cores to schedule
#  ina multi-core environment you can decide which cores you want syncronized
# leave empty or comment it out if using single-core deployment
#  修改成你所使用的core,我这里是我自定义的core:simple
syncCores=active

# solr server name or IP address
# [defaults to localhost if empty]
这个一般都是localhost不会变
server=localhost

# solr server port
# [defaults to 80 if empty]
#  安装solr的tomcat端口,如果你使用的是默认的端口,就不用改了,否则改成自己的端口就好了
port=8089

# application name/context
# [defaults to current ServletContextListener's context (app) name]
#  这里默认不改
webapp=solr

# URL params [mandatory]
# remainder of URL
#  这里改成下面的形式,solr同步数据时请求的链接
params=/dataimport?command=delta-import&clean=false&commit=true

# schedule interval
# number of minutes between two runs
# [defaults to 30 if empty]
#这里是设置定时任务的,单位是分钟,也就是多长时间你检测一次数据同步,根据项目需求修改
#  开始测试的时候为了方便看到效果,时间可以设置短一点
interval=1

#  重做索引的时间间隔,单位分钟,默认7200,即5天;
#  为空,为0,或者注释掉:表示永不重做索引
reBuildIndexInterval=7200

#  重做索引的参数
reBuildIndexParams=/select?qt=/dataimport&command=full-import&clean=true&commit=true

#  重做索引时间间隔的计时开始时间,第一次真正执行的时间=reBuildIndexBeginTime+reBuildIndexInterval*60*1000;
#  两种格式:2012-04-11 03:10:00 或者 03:10:00,后一种会自动补全日期部分为服务启动时的日期
reBuildIndexBeginTime=03:10:00
最后重启solr,在数据库中添加一条数据,静等一分钟,然后query。因为我们设置的是一分钟监听一次
2.使用windows 的计划任务进行增量更新
1.在windows开始那里搜索“计划任务”
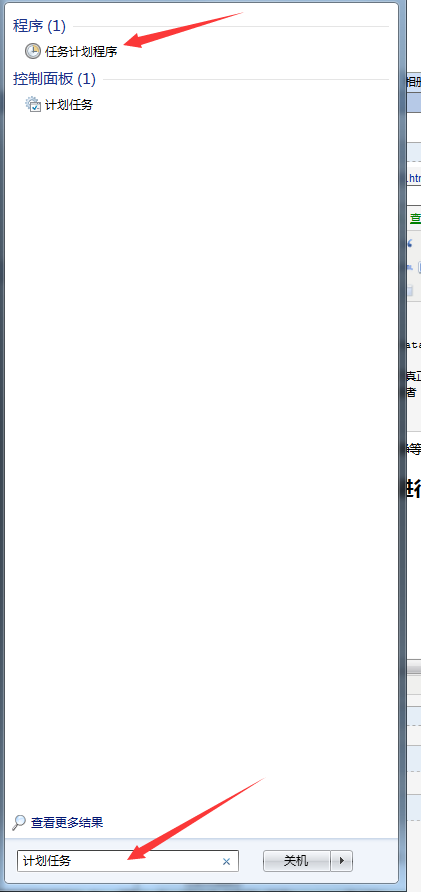
2.创建一个新的计划任务
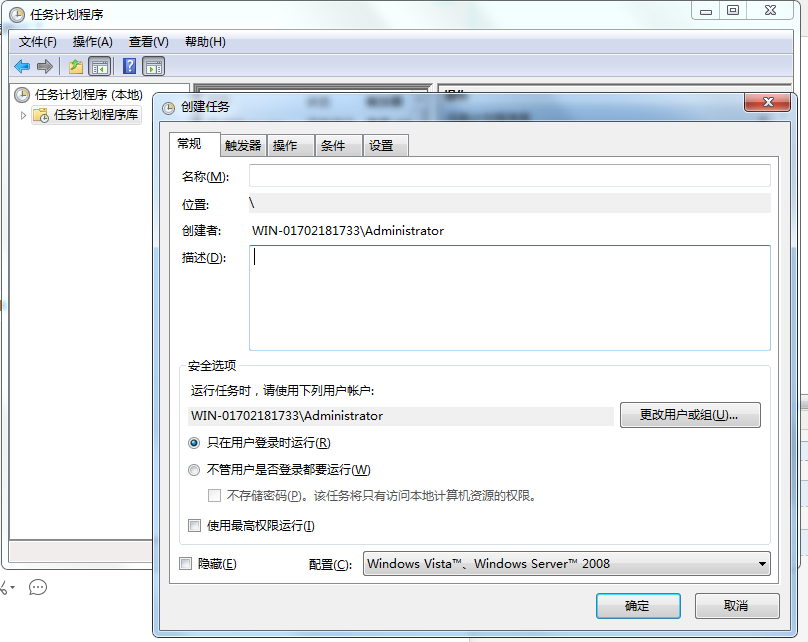
3.对计划任务的常规、触发器、操作 进行设置
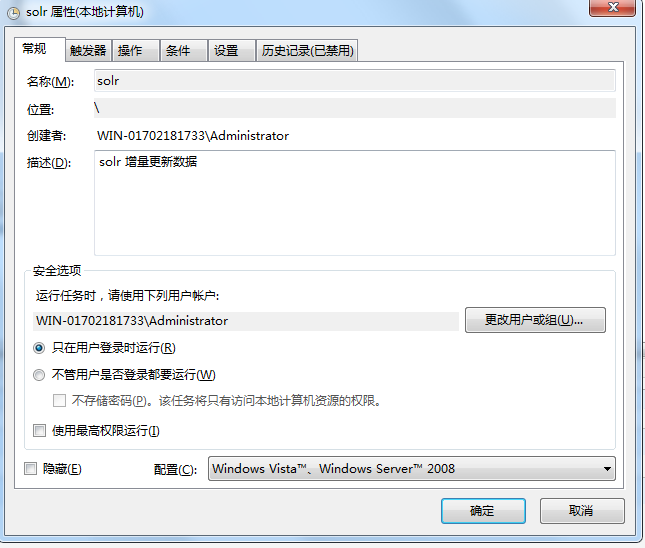

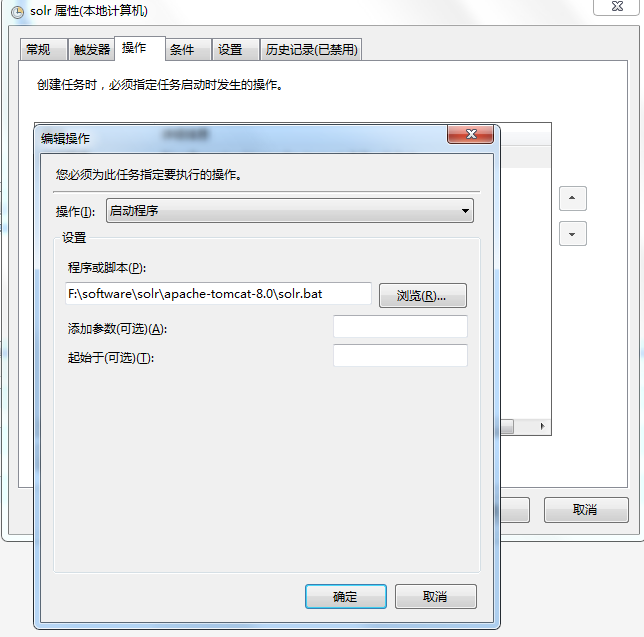
4. 启动计划任务
5.solr.bat 中的内容为(使用curl进行模拟请求,curl 需要下载):
curl http://localhost:8089/solr/active/dataimport?command=delta-import^&clean=false^&commit=true
6.windows 的curl 需要下载配置环境变量(和jdk的差不多),curl下载地址为:链接:https://pan.baidu.com/s/1Vvvz8QdQl1BPD5kdjRcsjg 提取码:t8mt (64位系统的,32位的可以去官网下载)
3.linux下使用 crontab实现增量更新
1.修改crontab的配置文件:vim /etc/crontab
crontab -e
*/5 * * * * curl http://localhost:8089/solr/active/dataimport?command=delta-import^&clean=false^&commit=true
