我们使用tensorflow实现类似于上图的简单深度网络,用于mnist数据集预测模型的实现。理论方面不再赘述。
实现如下:
import tensorflow as tf
import random
import matplotlib.pyplot as plt
from tensorflow.examples.tutorials.mnist import input_data
tf.set_random_seed(1)
mnist = input_data.read_data_sets("MNIST_data/", one_hot=True)
# define hyperparameters
learning_rate = 0.001
training_epoches = 15
batch_size = 100
# input place holders
X = tf.placeholder(tf.float32, [None, 784]) # 28*28 = 784
Y = tf.placeholder(tf.float32, [None, 10]) # 10 number of classes
# weight & bias for layers
W1 = tf.Variable(tf.random_normal([784, 256]))
b1 = tf.Variable(tf.random_normal([256]))
L1 = tf.nn.relu(tf.matmul(X, W1) + b1)
W2 = tf.Variable(tf.random_normal([256, 256]))
b2 = tf.Variable(tf.random_normal([256]))
L2 = tf.nn.relu(tf.matmul(L1, W2)+ b2)
W3 = tf.Variable(tf.random_normal([256, 10]))
b3 = tf.Variable(tf.random_normal([10]))
L3 = tf.matmul(L2, W3) + b3
# define loss & optimizer
cost = tf.reduce_mean(tf.nn.softmax_cross_entropy_with_logits_v2(logits=L3, labels=Y))
optimizer = tf.train.AdamOptimizer(learning_rate=learning_rate).minimize(cost)
with tf.Session() as sess:
# initialize global variable
sess.run(tf.global_variables_initializer())
#train the modal
for epoch in range(training_epoches):
avg_cost = 0
total_batch = int(mnist.train.num_examples / batch_size)
for i in range(total_batch):
batch_xs, batch_ys = mnist.train.next_batch(batch_size)
feed_dict = {X: batch_xs, Y: batch_ys}
c, _ = sess.run([cost, optimizer], feed_dict=feed_dict)
avg_cost += c / total_batch
print('Epoch:', '%04d' %(epoch + 1), 'cost=', '{:.9f}'.format(avg_cost))
print('Learning finished')
correct_prediction = tf.equal(tf.argmax(L3, 1), tf.argmax(Y, 1))
accuracy = tf.reduce_mean(tf.cast(correct_prediction, tf.float32))
print('Accuracy: ', sess.run(accuracy, feed_dict={X: mnist.test.images, Y: mnist.test.labels}))
# Choose one and predict
r = random.randint(0, mnist.test.num_examples - 1)
print("Actual label: ", sess.run(tf.argmax(mnist.test.labels[r: r+1], 1)))
print("Prediction: ", sess.run(tf.argmax(L3, 1), feed_dict={X: mnist.test.images[r: r+1]}))
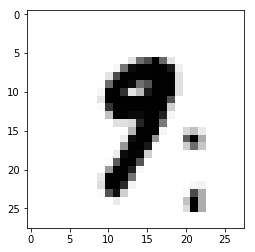
plt.imshow(mnist.test.images[r: r+1].reshape(28, 28), cmap='Greys', interpolation='nearest')
plt.show()
Extracting MNIST_data/train-images-idx3-ubyte.gz
Extracting MNIST_data/train-labels-idx1-ubyte.gz
Extracting MNIST_data/t10k-images-idx3-ubyte.gz
Extracting MNIST_data/t10k-labels-idx1-ubyte.gz
Epoch: 0001 cost= 150.137712487
Epoch: 0002 cost= 39.704215820
Epoch: 0003 cost= 25.038394092
Epoch: 0004 cost= 17.644208637
Epoch: 0005 cost= 12.640602860
Epoch: 0006 cost= 9.425256237
Epoch: 0007 cost= 6.992917965
Epoch: 0008 cost= 5.167070087
Epoch: 0009 cost= 3.878480178
Epoch: 0010 cost= 2.969947652
Epoch: 0011 cost= 2.171637326
Epoch: 0012 cost= 1.684254840
Epoch: 0013 cost= 1.305353469
Epoch: 0014 cost= 0.982698343
Epoch: 0015 cost= 0.853588527
Learning finished
Accuracy:  0.9444
Actual label:  [9]
Prediction:  [9]