1. 解压安装OpenDayLight控制器(本次实验统一使用Beryllium版本)
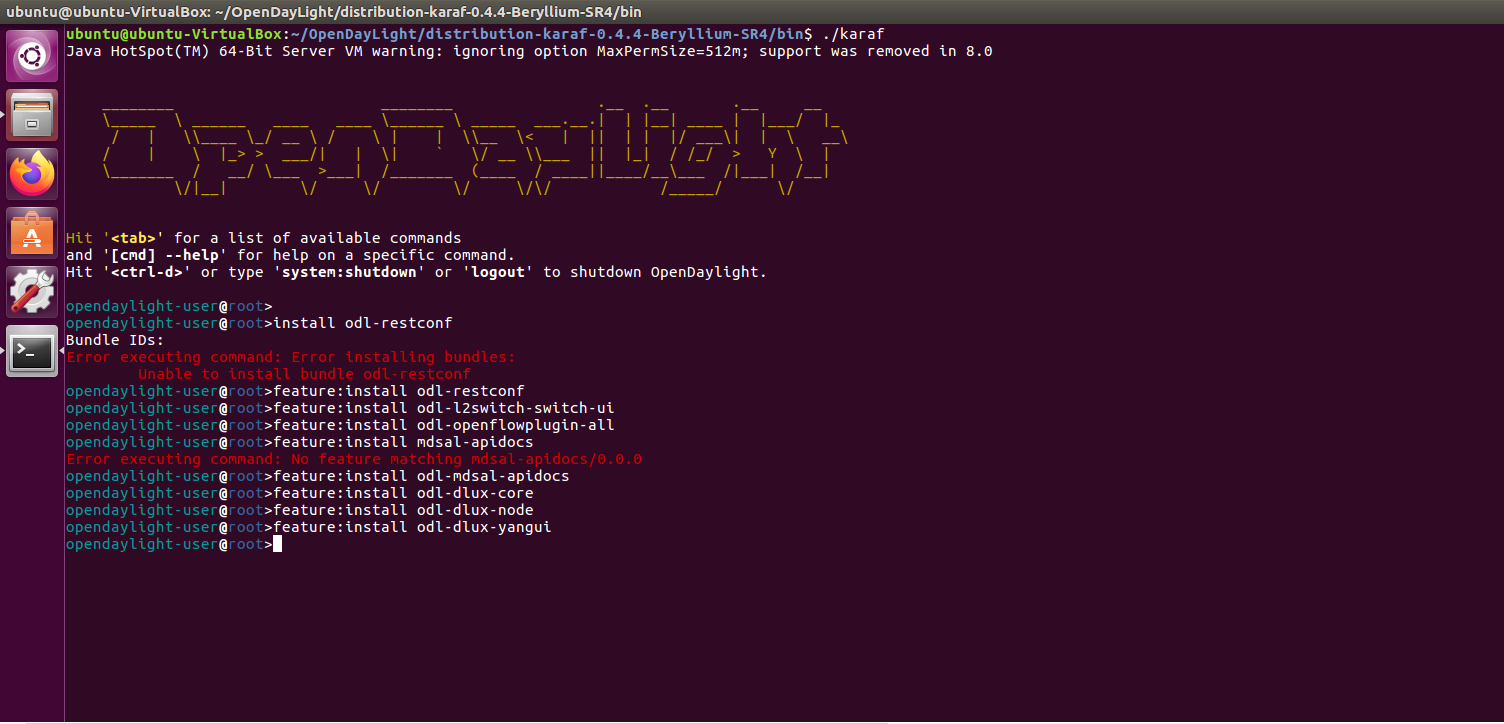
安装代码
opendaylight-user@root>feature:install odl-restconf
opendaylight-user@root>feature:install odl-l2switch-switch-ui
opendaylight-user@root>feature:install odl-openflowplugin-all
opendaylight-user@root>feature:install odl-mdsal-apidocs
opendaylight-user@root>feature:install odl-dlux-core
opendaylight-user@root>feature:install odl-dlux-node
opendaylight-user@root>feature:install odl-dlux-yangui
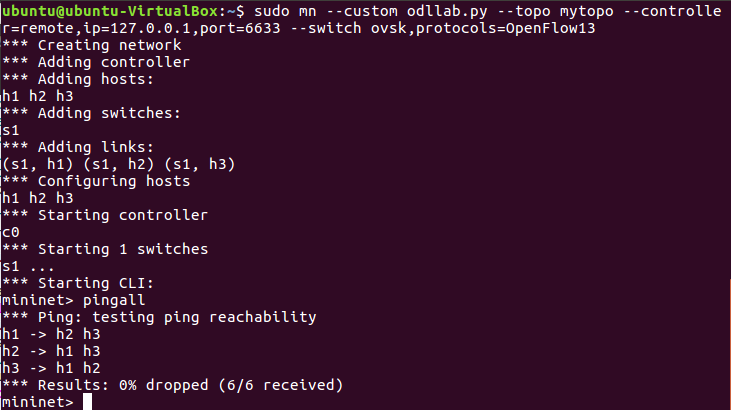
2. 用Python脚本搭建如下拓扑,连接OpenDayLight控制器
from mininet.topo import Topo
from mininet.net import Mininet
from mininet.node import RemoteController,CPULimitedHost
from mininet.link import TCLink
from mininet.util import dumpNodeConnections
class Mytopo(Topo):
    def __init__(self):
        Topo.__init__(self)
        s=[]
        for i in range(1):
            sw = self.addSwitch('s{}'.format(i+1))
            s.append(sw)
        count=1
        for i in range(3):
            host = self.addHost('h{}'.format(count))
            self.addLink(s[0],host)
            count += 1
topos = {'mytopo': (lambda:Mytopo())}
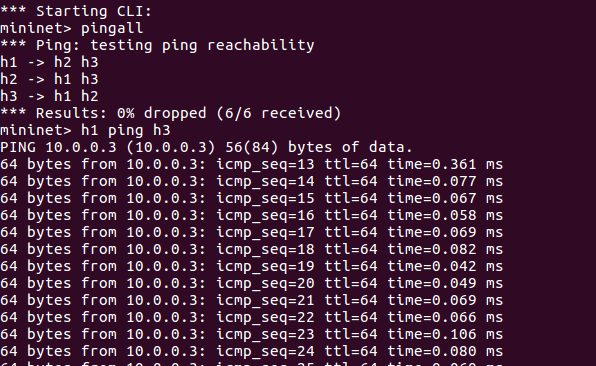
pingall结果
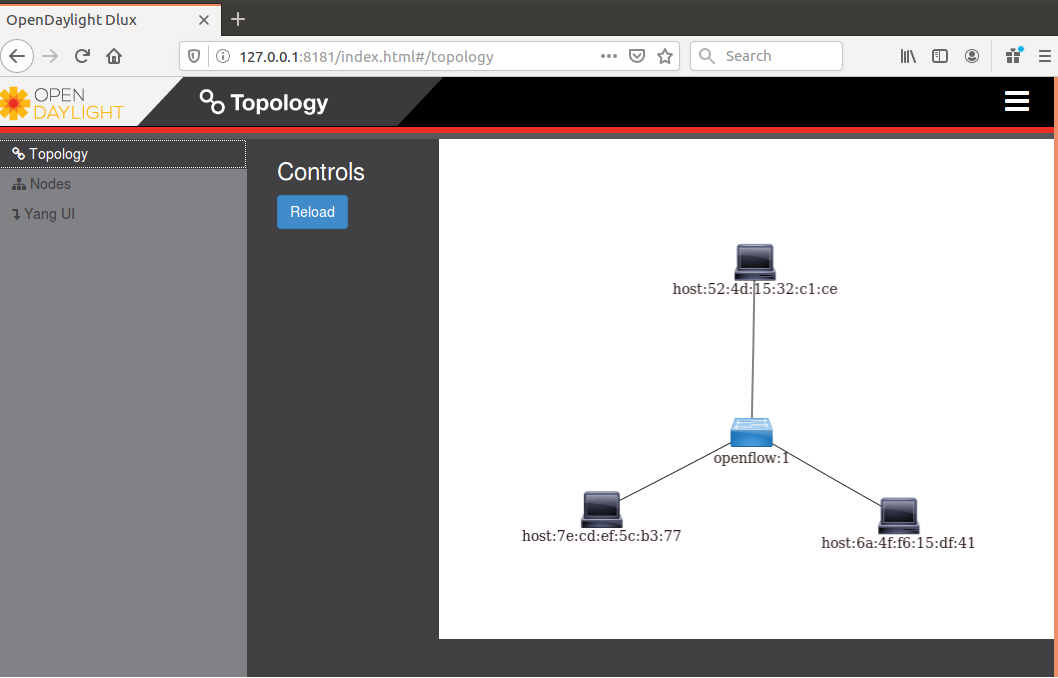
打开ODL,reload
3. 在控制器提供的WEB UI中下发流表使h2 20s内ping不通h3,20s后恢复
下发流表设置过程:


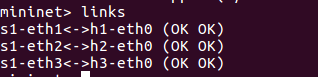
查询链路连接情况
h1 ping h3,发生延时。
4. 借助Postman通过OpenDayLight的北向接口下发流表,再利用OpenDayLight北向接口查看已下发的流表。
安装运行postman,下发流表json格式
http://127.0.0.1:8181/restconf/config/opendaylight-inventory:nodes/node/openflow:1/flow-node-inventory:table/0/flow/1

{
    "flow": [
        {
            "id": "1",
            "match": {
                "in-port": "1",
                "ethernet-match": {
                    "ethernet-type": {
                        "type": "0x0800"
                    }
                },
                "ipv4-destination": "10.0.0.3/32"
            },
            "priority": "65535",
            "hard-timeout": "25",
            "cookie": "2",
            "table_id": "0"
        }
    ]
}
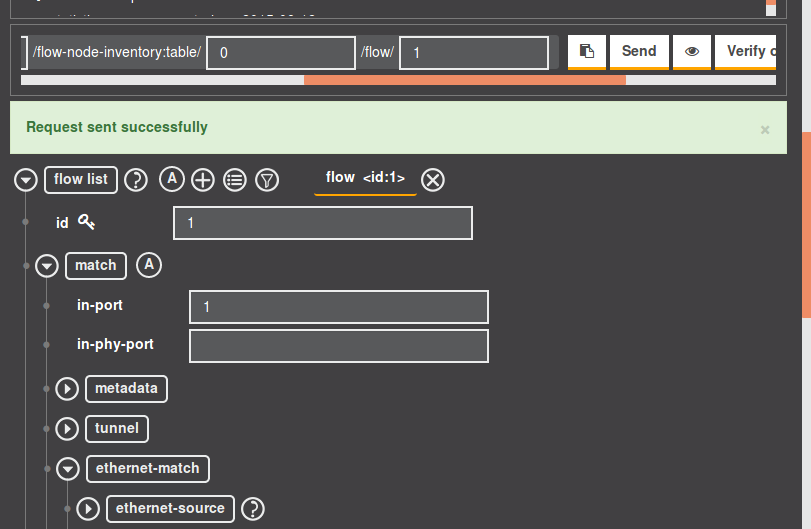
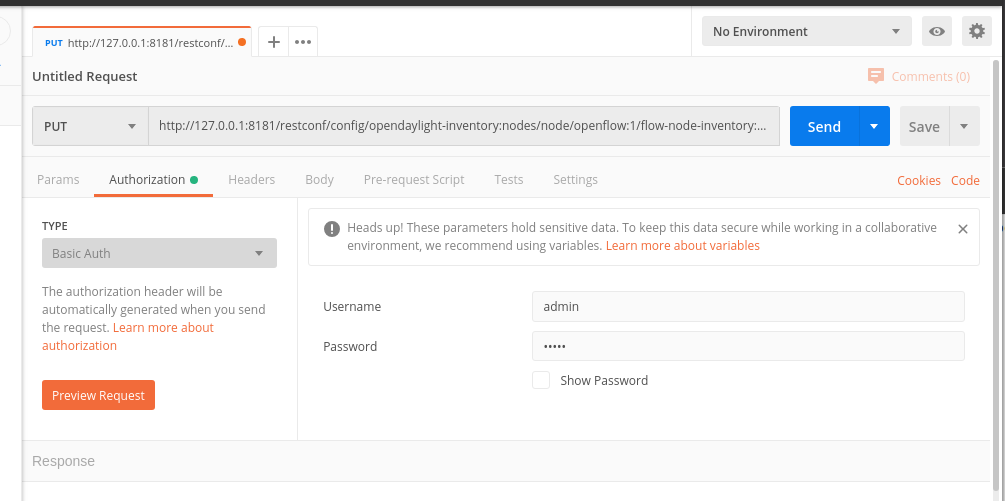
将preview的url复制到地址栏,输入odl的默认账号和密码admin
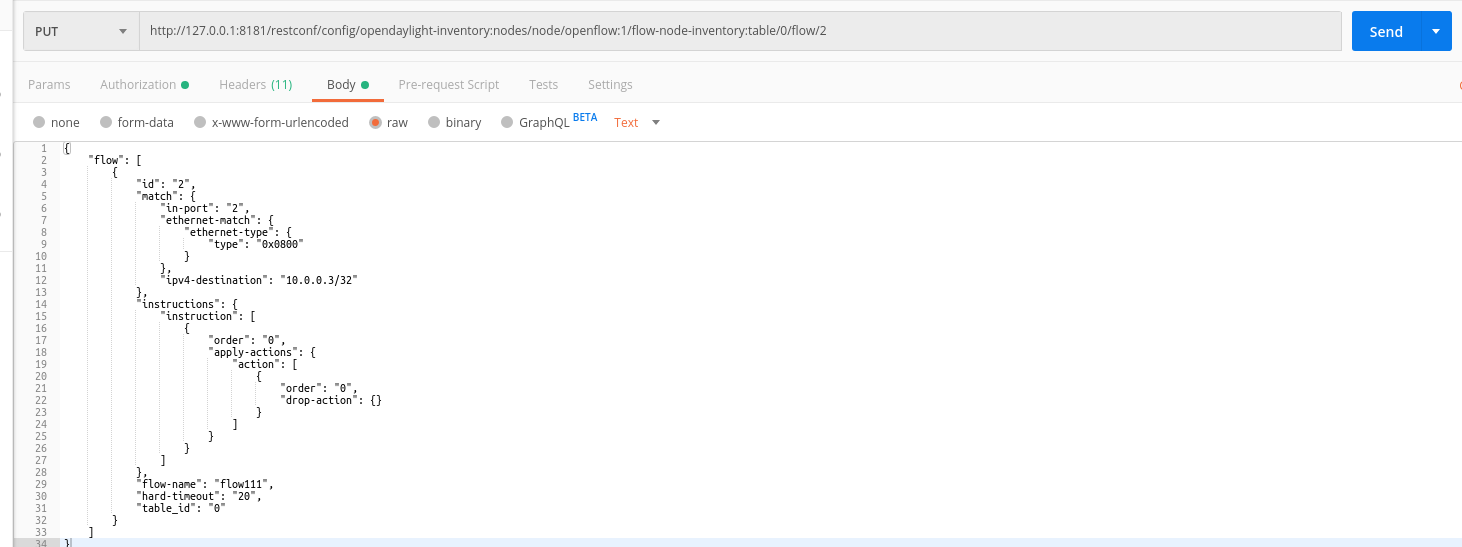
将preview的消息粘贴在文本框中,修改id和url里的flow为2,防止与之前的流表重合,点击send后下发成功,然后改为GET并send查看刚下发的流表,如下图
get查看下发流表
