Three.js: render real world terrain from heightmap using open data
Three.js is a great library for creating 3D objects and animations. In a couple of previous articles I explored this library a bit and in one of those examples I showed you how you can take GIS information (in geoJSON) format and use D3.js and three.js to convert it to a 3D mesh you can render in the browser using javascript. This is great for infographic, but it doesn't really show a real map, a real terrain. Three.js, luckily also has helper classes to render a terrain as you can see in this demo: http://mrdoob.github.com/three.js/examples/webgl_terrain_dynamic.html
This demo uses a noise generator to generate a random terrain, and adds a whole lot of extra functionality, but we can use this concept to also render maps of real terrain. In this article I'll show you how you can use freely available open geo data containing elevation info to render a simple 3D terrain using three.js. In this example we'll use elevation data that visualizes the data for the island of Corsica.
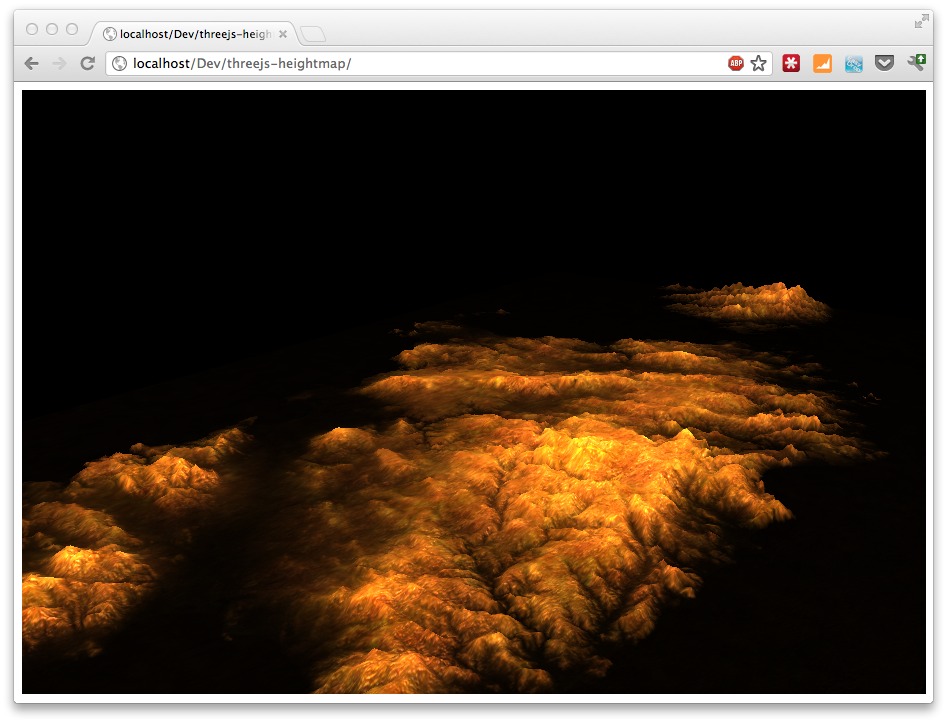
Or look at the live site here: http://www.smartjava.org/examples/heightmap
Where do we get the data?
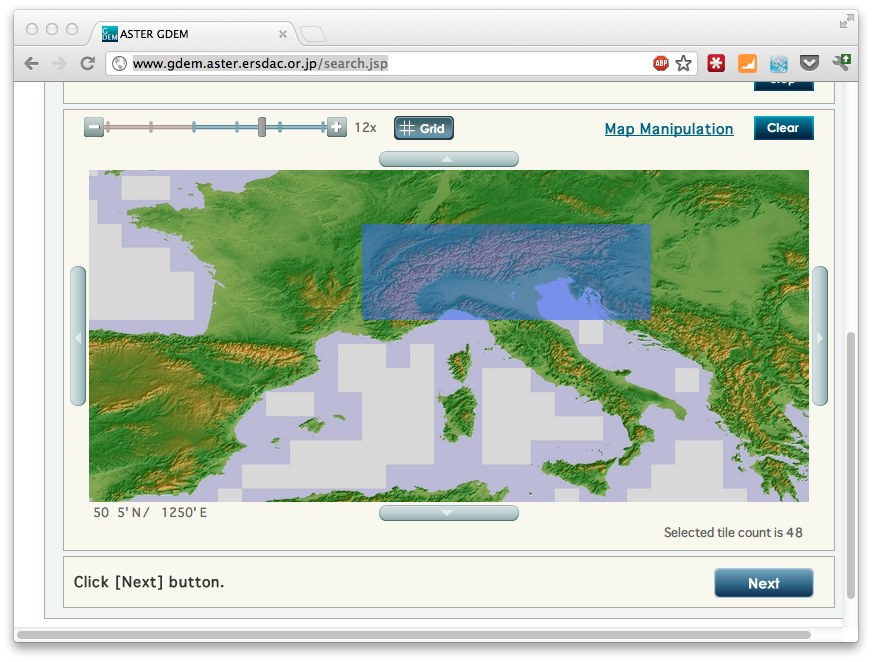
The open data that we'll use comes from ASTER/GDEM. Which is:
"The ASTER Global Digital Elevation Model (ASTER GDEM) is a joint product developed and made available to the public by the Ministry of Economy, Trade, and Industry (METI) of Japan and the United States National Aeronautics and Space Administration (NASA). It is generated from data collected from the Advanced Spaceborne Thermal Emission and Reflection Radiometer (ASTER), a spaceborne earth observing optical instrument."
This project offers us elevation data (geotagged) with a resolution of 30 meters. On this site you can download tiles for specific areas (after free registration):
The tiles you download from there are in GeoTIFF format (which I'll dive into in a future article). This format contains values for specific geo coordinates. Three.js, however, can't directly work with geotiff images (which are way to big anyways), so we need to convert them to either JPEG or PNG. For this we'll use GDAL. GDAL is a library and a set of utilities that can be used to perform a wide range of GIS related functions. If you're on a Mac you can install GDAL through macports:
sudo port install gdal

--->  Installing gdal @1.9.0_0+expat
--->  Activating gdal @1.9.0_0+expat
--->  Cleaning gdal
So download some tiles and make sure the form you download is a rectangle (see previous screenshot). Unzip the tiles and copy all the "*_dem.tif" files into a single directory. This isn't really necessary but will make processing easier. With GDAL now you can convert these downloaded tiles to PNGs. For this I use the following very basic bash script.
#!/bin/bash
for file in `ls -d *dem.tif` ; do
   gdal_translate -b 1 -outsize 400 400 -scale -20 2200 -of PNG "$file" ~/output/$file.png
done
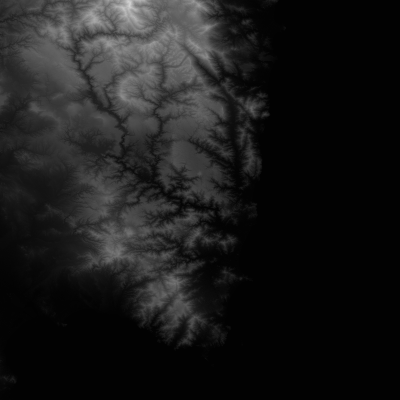
This will convert all the "dem.tif" tiles to a set of PNGs. Each tile is 400x400 pixels and we also define the range of the input to -20 until 2200. In other words the elevation from the input is from -20 tot 2200 meters Since the gray scale in a PNG can only be in a range of 256, this will be downsampled. (We can use other input formats, or use an RGB scale, but that would require some custom code, which is a bit out of scope for this article). For most maps though, this should be enough for a general impression of the landscape.
One of the tiles for Corsica looks like this:
So now we're stuck with a set of seperate PNGs. We need to combine those to a single PNG that we can use as a heightmap for Three.js. For this we'll use another open source library: imagemagick (also available through macports). In the example for Corsica we have 8 files, which are combined into a single png using the following batch file:
process="ASTGTM2_N41E008_dem.tif.png ASTGTM2_N41E009_dem.tif.png  ASTGTM2_N40E008_dem.tif.png ASTGTM2_N40E009_dem.tif.png  ASTGTM2_N39E008_dem.tif.png ASTGTM2_N39E009_dem.tif.png ASTGTM2_N38E008_dem.tif.png ASTGTM2_N38E009_dem.tif.png"
montage -tile 2x4 -border 0 -frame 0 -geometry '1x1+0+0<' $process combined.png
This results in a single PNG with the name "combined.png", which looks like this (scaled down):
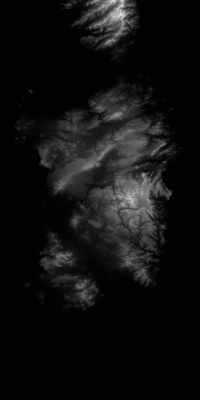
That's it for the preparation part. We've know got a heightmap in grayscale that we can use in Three.js (and in many other programs for that matter).
Create a map using Three.js
Once we got a heightmap we can use it in Three.js. The following code shows how you to do this:
<!DOCTYPE HTML PUBLIC "-//W3C//DTD HTML 4.01 Transitional//EN"
        "http://www.w3.org/TR/html4/loose.dtd">
<html>
<head>
    <title></title>
    <script type="text/javascript" src="js/Three.js"></script>
    <script type="text/javascript" src="js/ShaderTerrain.js"></script>
    <script type="text/javascript" src="js/jquery-1.7.2.js"></script>
</head>
<body>

<div id="main_map">

</div>

<script type="text/javascript">

    var CONS = {
        // THREE.JS CONSTANTS
        // set the scene size
        WIDTH:904,
        HEIGHT:604,

        // set some camera attributes
        VIEW_ANGLE:45,
        NEAR:0.1,
        FAR:10000,

        CAMERA_X:1000,
        CAMERA_Y:600,
        CAMERA_Z:1300
    }

    var scene = {};
    var renderer = {};
    var camera = {};
    var controls;


    var n = 0;
    initMap();

    // Wait until everything is loaded before continuing
    function loaded() {
        n++;
        console.log("loaded: " + n);

        if (n == 3) {
            terrain.visible = true;
            console.log('ff');
            render();
        }
    }

    function initMap() {

        // setup default three.js stuff
        renderer = new THREE.WebGLRenderer();
        renderer.setSize(CONS.WIDTH, CONS.HEIGHT);
        renderer.setClearColor(0x0000cc);
        $("#main_map").append(renderer.domElement);

        camera = new THREE.PerspectiveCamera(CONS.VIEW_ANGLE, CONS.WIDTH / CONS.HEIGHT, CONS.NEAR, CONS.FAR);
        scene = new THREE.Scene();
        scene.add(camera);

        camera.position.z = CONS.CAMERA_Z;
        camera.position.x = CONS.CAMERA_X;
        camera.position.y = CONS.CAMERA_Y;
        camera.lookAt(scene.position);

        // add a light
        pointLight = new THREE.PointLight(0xFFFFFF);
        scene.add(pointLight);
        pointLight.position.x = 1000;
        pointLight.position.y = 3000;
        pointLight.position.z = -1000;
        pointLight.intensity = 8.6;


        // load the heightmap we created as a texture
        var texture = THREE.ImageUtils.loadTexture('assets/combined.png', null, loaded);

        // load two other textures we'll use to make the map look more real
        var detailTexture = THREE.ImageUtils.loadTexture("assets/bg.jpg", null, loaded);

        // the following configuration defines how the terrain is rendered
        var terrainShader = THREE.ShaderTerrain[ "terrain" ];
        var uniformsTerrain = THREE.UniformsUtils.clone(terrainShader.uniforms);

        // how to treat abd scale the normal texture
        uniformsTerrain[ "tNormal" ].texture = detailTexture;
        uniformsTerrain[ "uNormalScale" ].value = 1;

        // the displacement determines the height of a vector, mapped to
        // the heightmap
        uniformsTerrain[ "tDisplacement" ].texture = texture;
        uniformsTerrain[ "uDisplacementScale" ].value = 100;

        // the following textures can be use to finetune how
        // the map is shown. These are good defaults for simple
        // rendering
        uniformsTerrain[ "tDiffuse1" ].texture = detailTexture;
        uniformsTerrain[ "tDetail" ].texture = detailTexture;
        uniformsTerrain[ "enableDiffuse1" ].value = true;
        uniformsTerrain[ "enableDiffuse2" ].value = true;
        uniformsTerrain[ "enableSpecular" ].value = true;

        // diffuse is based on the light reflection
        uniformsTerrain[ "uDiffuseColor" ].value.setHex(0xcccccc);
        uniformsTerrain[ "uSpecularColor" ].value.setHex(0xff0000);
        // is the base color of the terrain
        uniformsTerrain[ "uAmbientColor" ].value.setHex(0x0000cc);

        // how shiny is the terrain
        uniformsTerrain[ "uShininess" ].value = 3;

        // handles light reflection
        uniformsTerrain[ "uRepeatOverlay" ].value.set(3, 3);

        // configure the material that reflects our terrain
        var material = new THREE.ShaderMaterial({
            uniforms:uniformsTerrain,
            vertexShader:terrainShader.vertexShader,
            fragmentShader:terrainShader.fragmentShader,
            lights:true,
            fog:false
        });

        // we use a plain to render as terrain
        var geometryTerrain = new THREE.PlaneGeometry(2000, 4000, 256, 256);
        geometryTerrain.applyMatrix(new THREE.Matrix4().makeRotationX(Math.PI / 2));
        geometryTerrain.computeFaceNormals();
        geometryTerrain.computeVertexNormals();
        geometryTerrain.computeTangents();

        // create a 3D object to add
        terrain = new THREE.Mesh(geometryTerrain, material);
        terrain.position.set(0, -125, 0);
        terrain.rotation.x = -Math.PI / 2;

        // add the terrain
        scene.add(terrain);

        // tell everything is ready
        loaded();
    }

    // render the scene
    function render() {
        renderer.render(scene, camera);
    }
</script>
</body>
</html>
And that's all you need to do. Once you've got this basic setup working, you can easily add custom textures, fog or other extra objects. If you want to see this basic example in action look here: http://www.smartjava.org/examples/heightmap
欢迎大家来我的新家看一看 3wwang个人博客-记录走过的技术之路