前言: 本文为自己学习Spring记录所用, 文章内容包括Spring的概述已经简单开发, 主要涉及IOC相关知识, 希望能够对新入门Spring的同学有帮助, 也希望大家一起讨论相关的知识.
一. Spring概述
1.1,什么是Spring:
Spring是一个开源框架,Spring是于2003 年兴起的一个轻量级的Java 开发框架,由Rod Johnson 在其著作Expert One-On-One J2EE Development and Design中阐述的部分理念和原型衍生而来。它是为了解决企业应用开发的复杂性而创建的。框架的主要优势之一就是其分层架构,分层架构允许使用者选择使用哪一个组件,同时为 J2EE 应用程序开发提供集成的框架。Spring使用基本的JavaBean来完成以前只可能由EJB完成的事情。然而,Spring的用途不仅限于服务器端的开发。从简单性、可测试性和松耦合的角度而言,任何Java应用都可以从Spring中受益。Spring的核心是控制反转(IoC)和面向切面(AOP)。简单来说,Spring是一个分层的JavaSE/EE full-stack(一站式) 轻量级开源框架。
1.2, 为什么需要学习Spring
方便解耦,简化开发
Spring就是一个大工厂,可以将所有对象创建和依赖关系维护,交给Spring管理
AOP编程的支持
Spring提供面向切面编程,可以方便的实现对程序进行权限拦截、运行监控等功能
声明式事务的支持
只需要通过配置就可以完成对事务的管理,而无需手动编程
方便程序的测试
Spring对Junit4支持,可以通过注解方便的测试Spring程序
方便集成各种优秀框架
Spring不排斥各种优秀的开源框架,其内部提供了对各种优秀框架(如:Struts、Hibernate、MyBatis、Quartz等)的直接支持
降低JavaEE API的使用难度
Spring 对JavaEE开发中非常难用的一些API(JDBC、JavaMail、远程调用等),都提供了封装,使这些API应用难度大大降低
二, Spring IOC 的快速入门
上一篇文章: http://www.cnblogs.com/wang-meng/p/5597490.html 已经对于IOC 的概念有了深入的解析, 在这里就不再赘述了, 直接说IOC 的快速开发.
2,1 快速开发入门
步骤一: 下载Spring的开发包:
为了方便大家开发, 我已经将spring-framework-3.2.4.RELEASE-dist.zip 和 spring-framework-3.0.2.RELEASE-dependencies.zip上传至我的网盘. 地址如下:
链接:http://pan.baidu.com/s/1slqvOzb 密码:ikgn
步骤二: 了解Spring的目录结构:
docs        :Spring的开发文档
libs        :Spring的开发包.
schema      :约束文档.
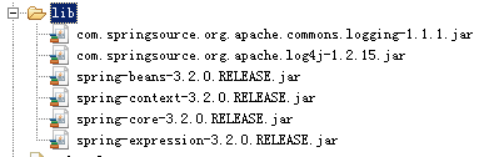
步骤三: 创建一个项目,引入jar包:
步骤四: 引入Spring的配置文件:
 1 在src下创建一个applicationContext.xml
 2 引入约束:
 3 <beans xmlns="http://www.springframework.org/schema/beans"
 4        xmlns:xsi="http://www.w3.org/2001/XMLSchema-instance"
 5        xsi:schemaLocation="http://www.springframework.org/schema/beans http://www.springframework.org/schema/beans/spring-beans.xsd">
 6
 7 </beans>
 8
 9 编写标签:
10 <bean id="customerService" class="cn.augmentum.spring.demo2.CustomerServiceImpl"></bean>
步骤五: 编写测试类:
1     @Test
2     public void demo1(){
3         // 创建Spring的工厂类:
4         ApplicationContext applicationContext = new ClassPathXmlApplicationContext("applicationContext.xml");
5         CustomerService customerService = (CustomerService) applicationContext
6                 .getBean("customerService");
7         customerService.sayHello();
8     }
2.2 IOC及DI
IOC: Inverse of Controller 控制反转.将Bean 创建反转给Spring容器.
DI: Dependency Injection 依赖注入.在Spring创建这个类的过程中,将这个类的依赖的属性注入进去.
2.3 Spring的工厂类
ApplicationContext
|----ClassPathXmlApplicationContext :解析类路径下的XML的.
|----FileSystemXmlApplicationContext :解析本地磁盘上的XML的.

BeanFactory和ApplicationContext都是Spring中的工厂:
BeanFactory是Spring老版本的工厂类:
* 第一次调用getBean方法的时候实例化类.
ApplicationContext是Spring新版本的工厂类:
* 在加载核心配置文件的时候,将所有的类实例化.
三, Spring的Bean管理(基于XML方式)
3.1 Spring实例化Bean的方式
无参数构造方式(最常用)
 1     <!-- 无参数构造方法方式 -->
 2     <bean id="bean1" class="cn.augmentum.spring.demo3.Bean1"></bean>
 3
 4     @Test
 5     /**
 6      * 无参数构造
 7      */
 8     public void demo1() {
 9         // 加载核心配置文件:
10         ApplicationContext applicationContext = new ClassPathXmlApplicationContext(
11                 "applicationContext.xml");
12         Bean1 bean1 = (Bean1) applicationContext.getBean("bean1");
13         System.out.println(bean1);
14     }
静态工厂实例化方式:
 1 Bean2的静态工厂:
 2 /**
 3  * Bean2的静态工厂
 4  * @author jiangtao
 5  *
 6  */
 7 public class Bean2Factory {
 8
 9     public static Bean2 getBean2(){
10         return new Bean2();
11     }
12 }
13
14 配置文件:
15     <!-- 静态工厂实例化方式 -->
16     <bean id="bean2" class="cn.augmentum.spring.demo3.Bean2Factory" factory-method="getBean2"/>
17
18 代码:
19     @Test
20     /**
21      * 静态工厂实例化
22      */
23     public void demo2() {
24         // 加载核心配置文件:
25         ApplicationContext applicationContext = new ClassPathXmlApplicationContext(
26                 "applicationContext.xml");
27         Bean2 bean2 = (Bean2) applicationContext.getBean("bean2");
28         System.out.println(bean2);
29     }
实例工厂实例化方式:
 1 实例工厂:
 2 public class Bean3Factory {
 3
 4     public Bean3 getBean3(){
 5         System.out.println("实例工厂执行了...");
 6         return new Bean3();
 7     }
 8 }
 9
10 配置文件:
11     <!-- 实例工厂实例化方式 -->
12     <bean id="bean3Factory" class="cn.itcast.spring.demo3.Bean3Factory"/>
13     <bean id="bean3" factory-bean="bean3Factory" factory-method="getBean3"/>
14
15 代码:
16     @Test
17     /**
18      * 实例工厂实例化
19      */
20     public void demo3() {
21         // 加载核心配置文件:
22         ApplicationContext applicationContext = new ClassPathXmlApplicationContext(
23                 "applicationContext.xml");
24         Bean3 bean3 = (Bean3) applicationContext.getBean("bean3");
25         System.out.println(bean3);
26     }
3.2, Spring的Bean的常用的配置:
<bean>标签的id和name属性:
id和name有什么区别?
id :使用XML约束中ID约束.不可以出现特殊字符.
name:出现特殊字符.如果使用了name没有id,那么name可以作为id使用.
Spring整合Struts1: <bean name=”/login” class=””/>
<bean>上的生命周期的配置:
 1     @Test
 2     /**
 3      * Bean的生命周期的相关配置:
 4      *     * init-method
 5      *     * destory-method :只能针对单例对象有效.必须在工厂关闭之后才会销毁对象.
 6      */
 7     public void demo1(){
 8         ClassPathXmlApplicationContext applicationContext = new ClassPathXmlApplicationContext("applicationContext.xml");
 9         EmployeeService employeeService = (EmployeeService) applicationContext
10                 .getBean("employeeService");
11         employeeService.save();
12         applicationContext.close();
13     }
<bean>上的作用范围的配置:|
scope属性:
* singleton :单例的.(默认)
* prototype :多例的.
* request :WEB项目中,创建一个对象,保存到request域中.
* session :WEB项目中,创建一个对象,保存到session域中.
* globalsession :WEB项目中,特殊环境.分布式开发环境.如果没有分布式环境,相当于session.
3.3 Bean的生命周期:
Spring实例化Bean的过程中总共完成11个步骤:
1.instantiate bean对象实例化
2.populate properties 封装属性
3.如果Bean实现BeanNameAware 执行 setBeanName
4.如果Bean实现BeanFactoryAware 或者 ApplicationContextAware 设置工厂 setBeanFactory 或者上下文对象 setApplicationContext
5.如果存在类实现 BeanPostProcessor(后处理Bean) ,执行postProcessBeforeInitialization
6.如果Bean实现InitializingBean 执行 afterPropertiesSet
7.调用<bean init-method="init"> 指定初始化方法 init
8.如果存在类实现 BeanPostProcessor(处理Bean) ,执行postProcessAfterInitialization
9.执行业务处理
10.如果Bean实现 DisposableBean 执行 destroy
11.调用<bean destroy-method="customerDestroy"> 指定销毁方法 customerDestroy
第三步和第四步:主要让生成Bean了解Spring容器.
第五步和第八步:允许客户在Bean的生成过程中对Bean的实例进行增强.
* BeanPostProcessor:工厂勾子.允许客户在生成类的过程中对类进行增强.
四, Spring的属性注入:
4.1 构造方法的属性注入:
1 <!-- 构造方法的注入 -->
2
3 <bean id="car" class="cn.augmentum.spring.demo6.Car">
5   <constructor-arg name="name" value="宝马"/>
7   <constructor-arg name="price" value="1000000"/>
9 </bean>
4.2 Set方法的属性注入:
1 <!-- set方法的属性注入 -->
2
3 <bean id="car2" class="cn.augmentum.spring.demo6.Car2">
5   <property name="name" value="奇瑞QQ"/>
7   <property name="price" value="30000"/>
9 </bean>
4.3 Spring的2.5支持p名称空间的注入:
P名称空间的语法:
|
语法: * 普通属性: p:name=”” * 对象类型属性: p:name-ref=”” |
P名称空间的使用:
 1 引入p名称空间:
 2
 3 <beans xmlns="http://www.springframework.org/schema/beans"
 4
 5    xmlns:p="http://www.springframework.org/schema/p"
 6
 7        xmlns:xsi="http://www.w3.org/2001/XMLSchema-instance"
 8
 9        xsi:schemaLocation="http://www.springframework.org/schema/beans http://www.springframework.org/schema/beans/spring-beans.xsd">
10
11
12
13 <!-- p名称空间的注入 -->
14
15 <bean id="car2" class="cn.augmentum.spring.demo6.Car2" p:name="长安奔奔" p:price="25000"/>
16
17 <bean id="employee" class="cn.augmentum.spring.demo6.Employee" p:name="马凤" p:car2-ref="car2"/>
4.4 Spring3.0的SpEL的属性注入(SpEL:Spring Expression Language)
SpEL的语法:
| 语法:#{SpEL} |
SpEL的用法:
1 <bean id="carInfo" class="cn.augmentum.spring.demo6.CarInfo">
2
3 </bean>
 1 <!-- SpEL的方式的属性注入 -->
 2
 3 <bean id="car2" class="cn.augmentum.spring.demo6.Car2">
 5   <property name="name" value="#{carInfo.carName}"/>
 7   <property name="price" value="#{carInfo.calculatorPrice()}"/>
 9 </bean>
10
11
12
13 <bean id="employee" class="cn.augmentum.spring.demo6.Employee">
15   <property name="name" value="涛哥"/>
17   <property name="car2" value="#{car2}"/>
19 </bean>
4.5 Spring中的数组或集合的属性的注入: 1 <!--数组属性的注入:-->
 2
 3 <property name="arrs">
 5   <list>
 7     <value>老马</value>
 9     <value>马凤</value>
11     <value>马如花</value>
13   </list>
15 </property>
16
17 <!--List集合的属性的注入:-->
19 <property name="list">
21   <list>
23     <value>马芙蓉</value>
25     <value>马大帅</value>
27     <value>马大彪</value>
29   </list>
31 </property>
32
33 <!--Set集合的属性的注入:-->
35 <property name="set">
37   <set>
39     <value>马云</value>
41     <value>马化腾</value>
43     <value>马大哈</value>
45   </set>
46
47 </property>
48
49 <!--Map集合的属性的注入:-->
51 <property name="map">
53   <map>
55     <entry key="aaa" value="刘能"/>
57     <entry key="bbb" value="赵四"/>
59     <entry key="ccc" value="王五"/>
61   </map>
63 </property>
64
65 <!--Properties的属性的注入:-->
67 <property name="properties">
69   <props>
71     <prop key="username">root</prop>
73     <prop key="password">123</prop>
75   </props>
77 </property>
4.6 Spring中的分配置文件进行开发:
加载配置文件的时候加载多个配置文件:
 1 @Test
 2
 3 /**
 4
 5  * 在加载配置文件的时候,加载多个配置文件
 6
 7  */
 8
 9 public void demo2() {
10
11     ApplicationContext applicationContext = new ClassPathXmlApplicationContext("applicationContext.xml", "applicationContext2.xml");
12
13     CollectionBean collectionBean = (CollectionBean) applicationContext.getBean("collectionBean");
14
15     System.out.println(collectionBean);
16
17 }
总配置文件中引入其他配置文件:
1 <import resource="applicationContext2.xml"/>
 1 @Test
 2
 3 /**
 4
 5  * 在一个配置文件中引入其他的配置文件
 6
 7  */
 8
 9 public void demo3() {
10
11   ApplicationContext applicationContext = new ClassPathXmlApplicationContext("applicationContext.xml");
14
15   CollectionBean collectionBean = (CollectionBean) applicationContext.getBean("collectionBean");
18
19   System.out.println(collectionBean);
20
21 }
五, Spring的Bean管理(基于注解方式)
5.1 Spring的注解的快速入门:
步骤一:创建项目,引入jar包:
步骤二:引入spring的配置文件:
如果使用Spring的注解的开发,需要引入context约束!!!
 1 <beans xmlns="http://www.springframework.org/schema/beans"
 2
 3        xmlns:xsi="http://www.w3.org/2001/XMLSchema-instance"
 4
 5        xmlns:context="http://www.springframework.org/schema/context"
 6
 7        xsi:schemaLocation="
 8
 9 http://www.springframework.org/schema/beans http://www.springframework.org/schema/beans/spring-beans.xsd
10
11 http://www.springframework.org/schema/context http://www.springframework.org/schema/context/spring-context.xsd">
步骤三:创建包和类:
* cn.augmentum.spring.demo1

* UserService

* UserServiceImpl
步骤四:在类上配置一个注解:
1 @Component(value="userService")
2
3 相当于:
4
5 <bean id=”userService” class=”…UserServiceImpl”/>
步骤五:在Spring中开启注解扫描:
1 <context:component-scan base-package="cn.augmentum.spring.demo1"/>
5.2 Spring的IOC的注解详解:
@Component:组件.
Spring提供了@Component的注解的一些衍生注解:
* @Controller :
* @Service :
* @Repository :
@Value:注入普通类型的属性.
@Value(value=”张三”)

private String name;
@Autowired
默认按类型完成属性的注入:
* 但是我们习惯采用按名称注入.
* 强制使用按名称的方式完成属性的注入:
* @Qulifer(value=”名称”)
@Resource:
@Resource注解相当于:
* @Autowired和@Qulifer一起使用完成按名称的属性注入.
5.3 Spring的IOC的其他的注解:
@PostConstruct:
相当于init-method
@PreDestory:
相当于destory-method
@Scope:
相当于scope属性:
* singleton
* prototype
* request
* session
* globalSession
5.4 Spring3.0基于JavaConfig为核心的注解
以JavaConfig为核心:使用Java类作为配置文件.
* 类的构造特别麻烦!!!
 1 @Configuration
 2 public class BeanConfig {
 3
 4     @Bean(name="car")
 5     public Car showCar(){
 6
 7         Car car = new Car();
 8
 9         car.setName("马自达");
10
11         car.setPrice(150000d);
12
13         return car;
14     }
15
16
17
18     @Bean(name="product")
19     public Product showProduct(){
20
21         Product product = new Product();
22
23         product.setName("空调");
24
25         product.setPrice(1200d);
26
27         return product;
28
29     }
30
31 }
5.5 XML和注解的比较:
XML:结构清晰.(Bean管理由Spring控制.)
注解:开发便捷.(属性注入:不需要提供set方法.)
企业中通常还有一种开发方式:XML和注解的整合开发.
* XML用于管理Bean.
* 注解用于属性注入.
需要在配置文件中开启注解配置:
<context:annotation-config/>
把Bean交给Spring进行管理.属性注入由注解完成.