创建spring boot工程,添加pom依赖


<dependency>
            <groupId>org.springframework.cloud</groupId>
            <artifactId>spring-cloud-starter-stream-rabbit</artifactId>
        </dependency>
添加消息接收SinkReceiver
import org.slf4j.Logger;
import org.slf4j.LoggerFactory;
import org.springframework.cloud.stream.annotation.EnableBinding;
import org.springframework.cloud.stream.annotation.StreamListener;
import org.springframework.cloud.stream.messaging.Sink;

@EnableBinding(Sink.class)
public class SinkReceiver {
    private static Logger logger= LoggerFactory.getLogger(SinkReceiver.class);
    @StreamListener(Sink.INPUT)
    public void receive(Object payload){
        logger.info("Received: "+payload);
    }
}
配置
spring.application.name=stream-hello

spring.rabbitmq.host=10.202.203.29
spring.rabbitmq.port=5672
spring.rabbitmq.username=springcloud
spring.rabbitmq.password=123456
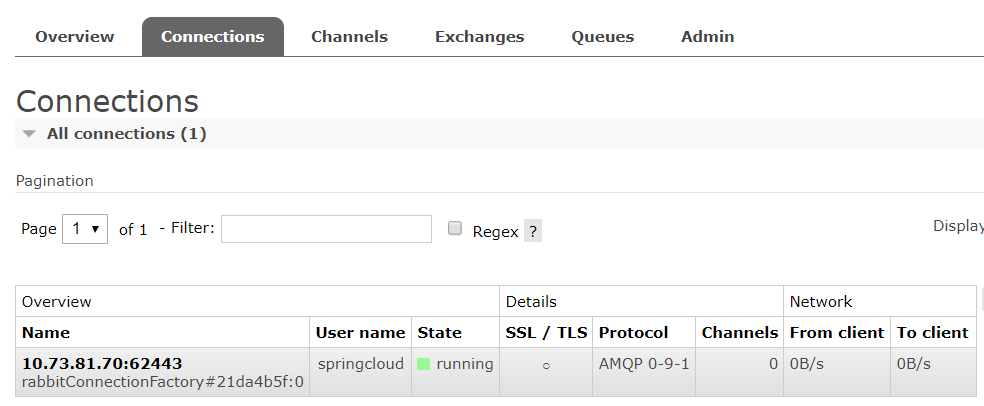
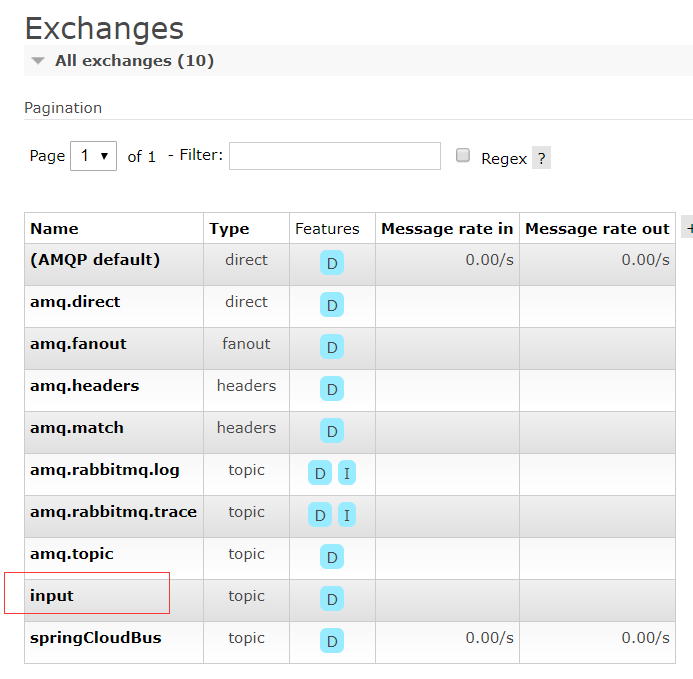
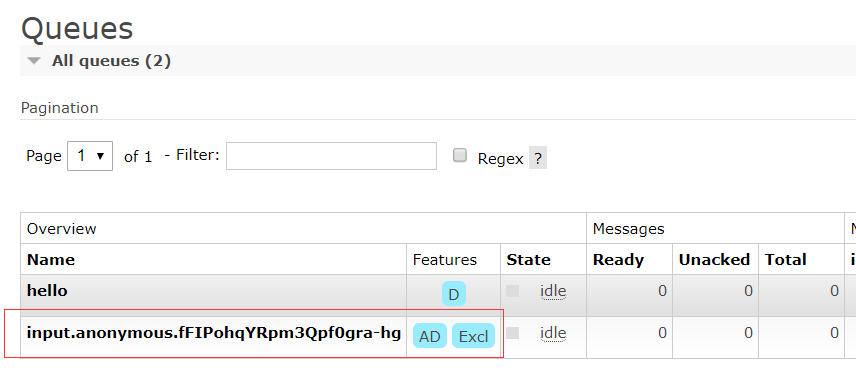
运行程序,打开rabbitmq监控界面,可以看到

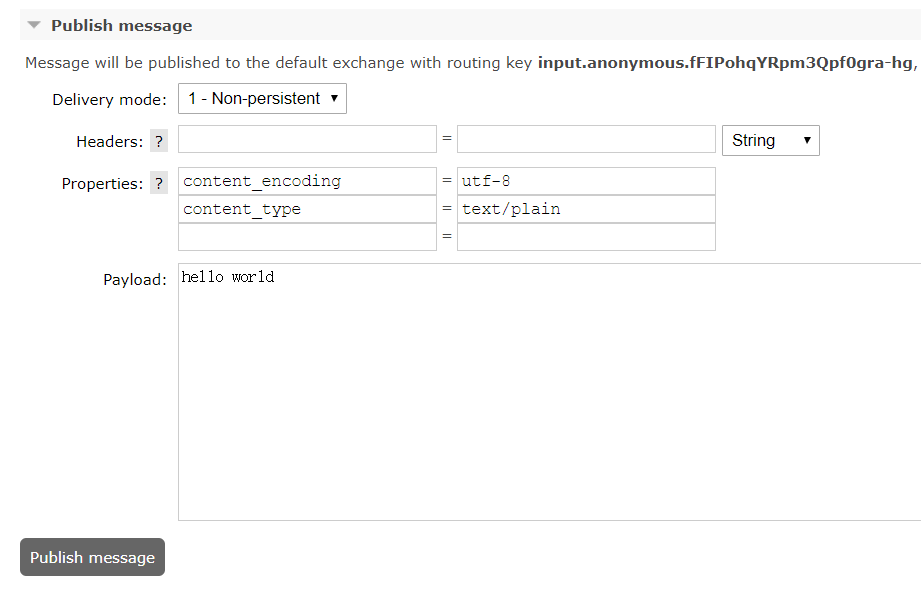
推送消息
在控制台查看结果

创建一个消息发送类SinkSender
import org.slf4j.Logger;
import org.slf4j.LoggerFactory;
import org.springframework.cloud.stream.annotation.EnableBinding;
import org.springframework.cloud.stream.messaging.Sink;
import org.springframework.context.annotation.Bean;
import org.springframework.integration.annotation.InboundChannelAdapter;
import org.springframework.integration.annotation.Poller;
import org.springframework.integration.core.MessageSource;
import org.springframework.messaging.support.GenericMessage;

import java.util.Date;

@EnableBinding(value = {Sink.class})
public class SinkSender {
    private static Logger logger= LoggerFactory.getLogger(SinkSender.class);
    @Bean
    @InboundChannelAdapter(value = Sink.INPUT,poller = @Poller(fixedDelay = "2000"))
    public MessageSource<Date> timerMessageSource(){
        return ()-> new GenericMessage<>(new Date());
    }
}
启动工程,可以在控制台看到每隔2秒收到信息

在SinkSender中添加日期转换
    @Transformer(inputChannel = Sink.INPUT,outputChannel = Sink.INPUT)
    public Object transform(Date message){
        return new SimpleDateFormat("yyyy-MM-dd HH:mm:ss").format(message);
    }
控制台查看消息

添加一个User类
public class User {
    private Integer id;
    private String name;
    private Integer age;

    public Integer getId() {
        return id;
    }

    public void setId(Integer id) {
        this.id = id;
    }

    public String getName() {
        return name;
    }

    public void setName(String name) {
        this.name = name;
    }

    public Integer getAge() {
        return age;
    }

    public void setAge(Integer age) {
        this.age = age;
    }
}
修改SinkSender
@Bean
    @InboundChannelAdapter(value = Sink.INPUT,poller = @Poller(fixedDelay = "2000"))
    public MessageSource<String> timerMessageSource(){
        return ()->new GenericMessage<>("{"id":1,"name":"tom","age":20}");
    }
修改SinkReceiver
@ServiceActivator(inputChannel = Sink.INPUT)
    public void receive(User user){
        logger.info("Received: "+user);
    }
    @Transformer(inputChannel = Sink.INPUT,outputChannel = Sink.INPUT)
    public User transform(String message) throws Exception {
        ObjectMapper objectMapper=new ObjectMapper();
        User user=objectMapper.readValue(message,User.class);
        return user;
    }
这里使用@ServiceActivator必须指定@Transformer来处理自定义对象
改成就无需自定义@Transformer
@StreamListener(Sink.INPUT)
    public void receive(User user){
        logger.info("Received: "+user);
    }

消息反馈
按上面项目再新建两个项目:App1和App2
App1
import org.slf4j.Logger;
import org.slf4j.LoggerFactory;
import org.springframework.cloud.stream.annotation.EnableBinding;
import org.springframework.cloud.stream.annotation.StreamListener;
import org.springframework.cloud.stream.messaging.Processor;
import org.springframework.messaging.handler.annotation.SendTo;

@EnableBinding(value = {Processor.class})
public class App1 {
    private static Logger logger= LoggerFactory.getLogger(App1.class);
    @StreamListener(Processor.INPUT)
    @SendTo(Processor.OUTPUT)
    public Object receiveFromInput(Object payload){
        logger.info("Received: "+payload);
        return "From Input Channel Return - "+payload;
    }
}
App2
import org.slf4j.Logger;
import org.slf4j.LoggerFactory;
import org.springframework.cloud.stream.annotation.EnableBinding;
import org.springframework.cloud.stream.annotation.StreamListener;
import org.springframework.cloud.stream.messaging.Processor;
import org.springframework.context.annotation.Bean;
import org.springframework.integration.annotation.InboundChannelAdapter;
import org.springframework.integration.annotation.Poller;
import org.springframework.integration.core.MessageSource;
import org.springframework.messaging.support.GenericMessage;

import java.util.Date;

@EnableBinding(value = {Processor.class})
public class App2 {
    private static Logger logger= LoggerFactory.getLogger(App2.class);
    @Bean
    @InboundChannelAdapter(value = Processor.OUTPUT,poller = @Poller(fixedDelay = "2000"))
    public MessageSource<Date> timeMessageSource(){
        return ()->new GenericMessage<>(new Date());
    }
    @StreamListener(Processor.INPUT)
    public void receiveFromOutput(Object payload){
        logger.info("Received: "+payload);
    }
}
App2的配置做个变更
spring.rabbitmq.host=10.202.203.29
spring.rabbitmq.port=5672
spring.rabbitmq.username=springcloud
spring.rabbitmq.password=123456

spring.cloud.stream.bindings.input.destination=output
spring.cloud.stream.bindings.output.destination=input

server.port=8001
启动两个项目


消费组
启动多个消费端App1和一个生产端App2,可以看到App2发送的消息被多个App1接收并处理
通过指定group可以然消息只被相应的group接收
App1-1
spring.cloud.stream.bindings.input.group=Service-A
App1-2
spring.cloud.stream.bindings.input.group=Service-A
App2
spring.cloud.stream.bindings.input.group=Service-A
这样App2发送的消息将被两个App1轮询处理
如果此时添加一个App1-3
spring.cloud.stream.bindings.input.group=Service-B
从rabbitmq管理界面查看
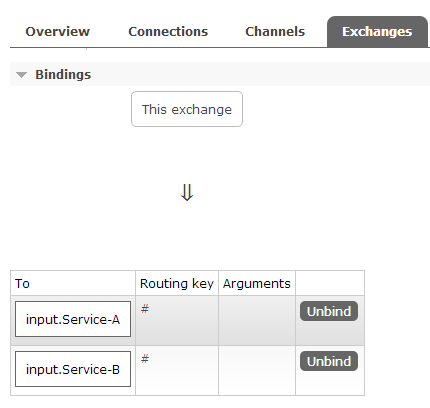
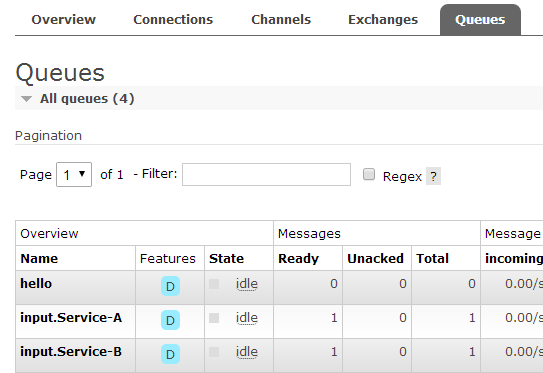
一个exchange绑定了两个queue,从exchange里推送一条消息,两个queue里都会有