1.引入Thymeleaf
<html xmlns:th="http://www.thymeleaf.org">
<img th:src="'images/' + ${aBook.picture}"/>
2.输出内容
使用th:text和th:utext将文本内容输出到所在标签的body中。假如在国际化资源文件messages_en_US.properties中有消息文本“test.myText=<strong>Test International Message</strong>”,那么在页面中可以使用如下两种方式获得消息文本:
<p th:text="#{test.myText}"></p>
<!-- 不识别HTML标签,即输出<strong>Test International Message</strong> -->
<p th:utext="#{test.myText}"></p>
<!– 识别HTML标签,即输出加粗的“Test International Message” -->
3.基本表达式
1)变量表达式:${...}
用于访问容器上下文环境中的变量,示例代码如下:
<span th:text="${information}">
2)选择变量表达式:*{...}
选择变量表达式计算的是选定的对象(th:object属性绑定的对象),示例代码如下:
<div th:object="${session.user}">
name: <span th: text="*{firstName}"></span><br>
<!-- firstName为user对象的属性-->
surname: <span th: text="*{lastName}"></span><br>
nationality: <span th: text="*{nationality}"></span><br>
</div>
3)信息表达式:#{...}
一般用于显示页面静态文本。将可能需要根据需求而整体变动的静态文本放在properties文件中以便维护(如国际化)。通常与th:text属性一起使用,示例代码如下:
<p th:text="#{test.myText}"></p>
4.引入URL
Thymeleaf模板通过@{...}表达式引入URL,示例代码如下:
<!-- 默认访问 src/main/resources/static下的css文件夹-->
<link rel="stylesheet" th:href="@{css/bootstrap.min.css}" />
<!--访问相对路径-->
<a th:href="@{/}">去看看</a>
<!--访问绝对路径-->
<a th:href="@{http://www.tup.tsinghua.edu.cn/index.html(param1='传参')}">去清华大学出版社</a>
<!-- 默认访问 src/main/resources/static下的'images文件夹-->
<img th:src="'images/' + ${aBook.picture}"/>
    5.访问WebContext对象中的属性
    Thymeleaf模板通过一些专门的表达式从模板的WebContext获取请求参数、请求、会话和应用程序中的属性,具体如下:
${xxx}将返回存储在Thymeleaf模板上下文中的变量xxx或请求request作用域中的属性xxx。
${param.xxx}将返回一个名为xxx的请求参数(可能是多个值)。
${session.xxx}将返回一个名为xxx的HttpSession作用域中的属性。
${application.xxx}将返回一个名为xxx的全局ServletContext上下文作用中的属性。
    与EL表达式一样,使用${xxx}获得变量值,使用${对象变量名.属性名}获取JavaBean属性值。但需要注意的是,${}表达式只能在th标签内部有效。
    6.运算符
    在Thymeleaf模板的表达式中可以使用+、-、*、/、%等各种算术运算符,也可以使用>、<、<=、>=、==、!=等各种逻辑运算符。示例代码如下:
    <tr th:class="(${row}== 'even')? 'even' : 'odd'">...</tr>
    7.条件判断
    1)if和unless
    标签只有在th:if条件成立时才显示,th:unless与th:if相反,只有条件不成立时,才显示标签内容。示例代码如下:
    <a href="success.html" th:if="${user != nul}">成功</a>
    <a href="success.html" th:unless="${user = nul}">成功</a>
    2)switch语句
    Thymeleaf模板也支持多路选择switch语句结构,默认属性default可用“*”表示。示例代码如下:
<div th:switch="${user.role}">
<p th:case="'admin'">User is an administrator</p>
<p th:case="'teacher'">User is a teacher</p>
<p th:case="*">User is a student </p>
</div>
    8.循环
    1)基本循环
    Thymeleaf模板使用th:each="obj,iterStat:${objList}"标签进行迭代循环,迭代对象可以是java.util.List、java.util.Map或数组等。示例代码如下:
<!-- 循环取出集合数据 -->
<div class="col-md-4 col-sm-6" th:each="book:${books}">
    <a href="">
        <img th:src="'images/' + ${book.picture}" alt="图书封面" style="height: 180px;  40%;"/>
    </a>
    <div class="caption">
        <h4 th:text="${book.bname}"></h4>
        <p th:text="${book.author}"></p>
        <p th:text="${book.isbn}"></p>
        <p th:text="${book.price}"></p>
        <p th:text="${book.publishing}"></p>
    </div>
</div>
    2)循环状态的使用
在th:each标签中可以使用循环状态变量,该变量有如下属性:
index:当前迭代对象的index(从0开始计数)。
count:当前迭代对象的index(从1开始计数)。
size:迭代对象的大小。
current:当前迭代变量。
even/odd:布尔值,当前循环是否是偶数/奇数(从0开始计数)。
first:布尔值,当前循环是否是第一个。
last:布尔值,当前循环是否是最后一个。
使用循环状态变量的示例代码如下:
<!-- 循环取出集合数据 -->
<div class="col-md-4 col-sm-6" th:each="book,bookStat:${books}">
    <a href="">
        <img th:src="'images/' + ${book.picture}" alt="图书封面" style="height: 180px;  40%;"/>
    </a>
    <div class="caption">
        <!--循环状态bookStat-->
        <h3 th:text="${bookStat.count}"></h3>
        <h4 th:text="${book.bname}"></h4>
        <p th:text="${book.author}"></p>
        <p th:text="${book.isbn}"></p>
        <p th:text="${book.price}"></p>
        <p th:text="${book.publishing}"></p>
    </div>
</div>
   9.内置对象
    在实际Web项目开发中,经常传递列表、日期等数据。所以,Thymeleaf模板提供了很多内置对象,可以通过#直接访问。这些内置对象一般都以s结尾,如dates、lists、numbers、strings等。Thymeleaf模板通过${#...}表达式访问内置对象,常见的内置对象如下:
#dates:日期格式化的内置对象,操作的方法是java.util.Date类的方法。
#calendars:类似于#dates,但操作的方法是java.util.Calendar类的方法。
#numbers:数字格式化的内置对象。
#strings:字符串格式化的内置对象,操作的方法参照java.lang.String。
#objects:参照java.lang.Object。
#bools:判断boolean类型的内置对象。
#arrays:数组操作的内置对象。
#lists:列表操作的内置对象,参照java.util.List。
#sets:Set操作的内置对象,参照java.util.Set。
#maps:Map操作的内置对象,参照java.util.Map。
#aggregates:创建数组或集合的聚合的内置对象。
#messages:在变量表达式内部获取外部消息的内置对象。
常用属性有:
1.th:action
定义后台控制器路径,类似<form>标签的action属性。示例代码如下:
<form th:action="@{/login}">...</form>
2.th:each
集合对象遍历,功能类似JSTL标签<c:forEach>。示例代码如下:
<div class="col-md-4 col-sm-6" th:each="gtype:${gtypes}">
    <div class="caption">
        <p th:text="${gtype.id}"></p>
        <p th:text="${gtype.typename}"></p>
    </div>
</div>
3.th:field
常用于表单参数绑定,通常与th:object一起使用。示例代码如下:
<form th:action="@{/login}" th:object="${user}">
<input type="text" value="" th:field="*{username}"></input>
<input type="text" value="" th:field="*{role}"></input>
</form>
4.th:href
定义超链接,类似<a>标签的href属性。value形式为@{/logout},示例代码如下:
<a th:href="@{/gogo}"></a>
5.th:id
div的id声明,类似html标签中的id属性,示例代码如下:
<div th:id ="stu+(${rowStat.index}+1)"></div>
6.th:if
条件判断。如果为否则标签不显示,示例代码如下:
<div th:if="${rowStat.index} == 0">... do something ...</div>
7.th:fragment
声明定义该属性的div为模板片段,常用于头文件、页尾文件的引入。常与th:include、th:replace一起使用。假如,在ch5_1的src/main/resources/templates目录下声明模板片段文件footer.html
<!-- 声明片段content -->
<div th:fragment="content" >
    主体内容
</div>
<!-- 声明片段copy -->
<div th:fragment="copy" >
    ©清华大学出版社
</div>
那么,我们可以在ch5_1的src/main/resources/templates/index.html文件中引入模板片段。
引入主体内容模板片段:
<div th:include="footer::content"></div>
引入版权所有模板片段:
<div th:replace="footer::copy" ></div>
8.th:object
用于表单数据对象绑定,将表单绑定到后台controller的一个JavaBean参数。常与th:field一起使用,进行表单数据绑定。
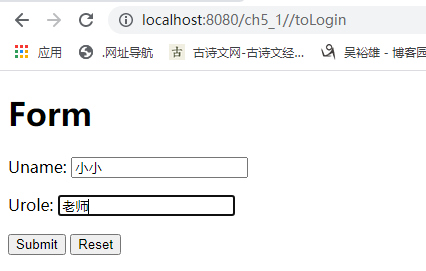
表单提交及数据绑定的实现过程。

 <form action="#" th:action="@{/login}" th:object="${loginBean}" method="post">
   <!--th:field="*{uname}"的uname与实体类的属性相同,即绑定loginBean对象  -->
        <p>Uname: <input type="text" th:field="*{uname}" th:placeholder="请输入用户名" /></p>
        <p>Urole: <input type="text" th:field="*{urole}" th:placeholder="请输入角色" /></p>
        <p><input type="submit" value="Submit" /> <input type="reset" value="Reset" /></p>
    </form>
9.th:src
用于外部资源引入,类似于<script>标签的src属性。示例代码如下:
<img th:src="'images/' + ${aBook.picture}" />
10.th:text
文本显示,将文本内容显示到所在标签的body中。示例代码如下:
<td th:text="${username}"></td>
11.th:value
用于标签赋值,类似标签的value属性。示例代码如下:
<option th:value="Adult">Adult</option>
<input type="hidden" th:value="${msg}" />
12.th:style
用于修改标签style,示例代码如下:
<span th:style="'display:' + @{(${sitrue} ? 'none' : 'inline-block')}"></span>
13.th:onclick
用于修改点击事件,示例代码如下:
<button th:onclick="'getCollect()'"></button>
package com.ch.ch5_1.model;

public class LoginBean {
    String uname;
    String urole;

    public String getUname() {
        return uname;
    }

    public void setUname(String uname) {
        this.uname = uname;
    }

    public String getUrole() {
        return urole;
    }

    public void setUrole(String urole) {
        this.urole = urole;
    }
}
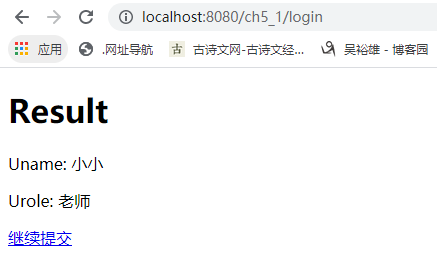
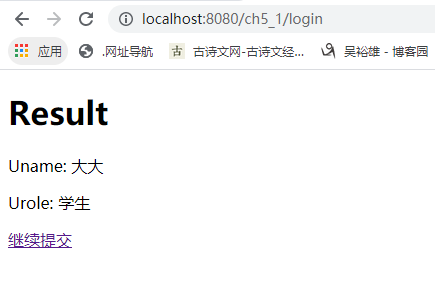
package com.ch.ch5_1.controller;

import org.springframework.stereotype.Controller;
import org.springframework.ui.Model;
import org.springframework.web.bind.annotation.ModelAttribute;
import org.springframework.web.bind.annotation.RequestMapping;

import com.ch.ch5_1.model.LoginBean;

@Controller
public class LoginController {
    @RequestMapping("/toLogin")
    public String toLogin(Model model) {
        model.addAttribute("loginBean", new LoginBean());
        return "login";
    }

    @RequestMapping("/login")
    public String greetingSubmit(@ModelAttribute LoginBean loginBean) {
        System.out.println("测试提交的数据:" + loginBean.getUname());
        return "result";
    }
}
package com.ch.ch5_1.controller;

import org.springframework.boot.SpringApplication;
import org.springframework.boot.autoconfigure.SpringBootApplication;

@SpringBootApplication
public class APP {
    public static void main(String[] args) {
        SpringApplication.run(APP.class);
    }
}