python-pynvml
简介
深度学习过程中经常需要和GPU打交道,需要在训练之前确定GPU工作状态。
Nvidia的显卡提供了 NVML(英伟达显卡管理库)以及构建在其上的 nvidia-smi 显卡系统管理界面),可以方便的查询显卡的信息和工作状况。在python中同样可以利用pynvml库来实现显卡信息的获取
官方指导文件
https://docs.nvidia.com/deploy/nvml-api/index.html
安装
pip install nvidia-ml-py

pip install nvidia-ml-py3  # python3
使用
import pynvml

pynvml.nvmlInit() # 初始化
... # 函数调用
pynvml.nvmlShutdown() # 最后要关闭管理工具
获取驱动版本号
#GPU驱动信息

pynvml.nvmlSystemGetDriverVersion()
=>
b'426.00' # 版本号426
获取显卡句柄
获得GPU数量
#获取Nvidia GPU块数
pynvml.nvmlDeviceGetCount()
-> 1
获得GPU名称
handle = pynvml.nvmlDeviceGetHandleByIndex(gpu_id)

name=pynvml.nvmlDeviceGetName(handle)

print(name)

->  b'GeForce GTX 1650 6GB'
获取GPU 0 内存信息
# 每MB包含的字节数
NUM_EXPAND = 1024 * 1024

gpu_id=0
handle = pynvml.nvmlDeviceGetHandleByIndex(gpu_id)
info = pynvml.nvmlDeviceGetMemoryInfo(handle)

gpu_Total = info.total   # 总显存
gpu_Free = info.free
gpu_Used = info.used

print(gpu_Total)  # 显卡总的显存大小,6442450944Bit
print(gpu_Free)  # 显存使用大小,4401950720Bit
print(gpu_Used)  # 显卡剩余显存大小,2040500224Bit

print(gpu_Total / NUM_EXPAND)
print(gpu_Free / NUM_EXPAND)
print(gpu_Used / NUM_EXPAND)

# meminfo.used / 1024 / 1024
#    4198 M
获得GPU 进程信息
获得运行下的进程,进程线程大小
#
gpu_id=0

handle = pynvml.nvmlDeviceGetHandleByIndex(gpu_id)
info_list = pynvml.nvmlDeviceGetComputeRunningProcesses(handle)

for each_pidinfo in info_list:

    print(type(each_pidinfo))
    print(each_pidinfo.__dict__)   # 打印pid的属性
    print(each_pidinfo.pid)


-> <class 'pynvml.nvml.nvmlFriendlyObject'>

-> {'pid': 31566, 'usedGpuMemory': 1259339776, 'gpuInstanceId': 4294967295, 'computeInstanceId': 4294967295}

-> 31566
案例
#简单使用
from pynvml import *
nvmlInit()     #初始化
print("Driver: "nvmlSystemGetDriverVersion())  #显示驱动信息
#>>> Driver: 384.xxx

#查看设备
deviceCount = nvmlDeviceGetCount()
for i in range(deviceCount):
    handle = nvmlDeviceGetHandleByIndex(i)
    print("GPU", i, ":", nvmlDeviceGetName(handle))
#>>>
#GPU 0 : b'GeForce GTX 1080 Ti'
#GPU 1 : b'GeForce GTX 1080 Ti'

#查看显存、温度、风扇、电源
handle = nvmlDeviceGetHandleByIndex(0)
info = nvmlDeviceGetMemoryInfo(handle)
print("Memory Total: ",info.total)
print("Memory Free: ",info.free)
print("Memory Used: ",info.used)

print("Temperature is %d C"%nvmlDeviceGetTemperature(handle,0))
print("Fan speed is "nvmlDeviceGetFanSpeed(handle))
print("Power ststus",nvmlDeviceGetPowerState(handle))


#最后要关闭管理工具
nvmlShutdown()


#nvmlDeviceXXX有一系列函数可以调用,包括了NVML的大多数函数。
#具体可以参考:https://docs.nvidia.com/deploy/nvml-api/group__nvmlDeviceQueries.html#group__nvmlDeviceQueries
其他方法
手动解析 nvidia-smi 命令
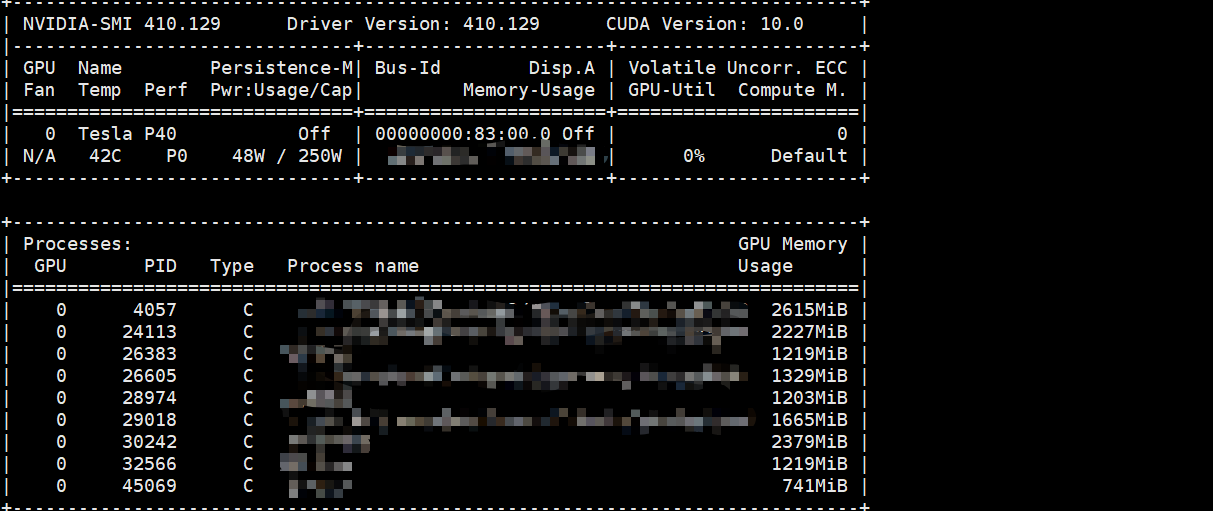
以下是GPU p40的命令解析
import subprocess
def get_p40_pid():
    shell_data = subprocess.check_output('nvidia-smi', shell=True)
    shell_data = str(shell_data)
    shell_data = \
        shell_data.split('|=============================================================================|')[-1]
    shell_data = \
        shell_data.split('+-----------------------------------------------------------------------------+')[0]
    shell_data = shell_data.split(r'\n')[1:-1]

    Pid_dicts = {}
    for text in shell_data:
        pidtext = text.split()

        pid_id = pidtext[2]
        pid_name = pidtext[4]
        pid_gpu_memory = pidtext[5][:-3]  # [:-3]去掉单位


        Pid_dicts[str(pid_id)] = {"pid_id": pid_id,
                                  "pid_name": pid_name,
                                  "pid_gpu_memory": pid_gpu_memory}
    return Pid_dicts