一、引入mybatis及mysql的jar包
可以从阿里云上面查找版本,db操作放在dao层所以打开该层的pom.xml文件,找到<dependencies>节点增加两个引入
<dependency>
    <groupId>org.mybatis</groupId>
    <artifactId>mybatis</artifactId>
    <version>3.4.5</version>
</dependency>
<dependency>
    <groupId>mysql</groupId>
    <artifactId>mysql-connector-java</artifactId>
    <version>5.1.45</version>
</dependency>
保存后系统会自动下载对应版本的jar包,我们开始编码
二、配置mybatis(手动创建)

1.在dao层的src/main下创建和java文件夹同级目录的resources文件夹,它默认会变换类型,如果不变则手动调整一下
2.在resources文件夹下创建mysql.properties文件
填入mysql数据库连接信息
jdbc.driver=com.mysql.jdbc.Driver
#数据库连接允许中文需要指明编码方式
jdbc.url=jdbc:mysql://10.11.12.237:3306/tyh_test?useUnicode=true&characterEncoding=utf8
jdbc.username=root
jdbc.password=root
3.在resources文件夹下创建mybatis_cfg.xml文件
填入mybatis配置信息
<?xml version="1.0" encoding="UTF-8"?>
<!DOCTYPE configuration PUBLIC "-//mybatis.org//DTD Config 3.0//EN" "http://mybatis.org/dtd/mybatis-3-config.dtd">
<configuration>
    <!-- 引入配置文件 -->
    <properties resource="mysql.properties"></properties>

    <!-- 为Java实体设置类别名 -->
    <typeAliases>
        <!-- 设置方式1,一个一个配置 type中放置的是类的全路径,alias中放置的是 类别名
        <typeAlias type="com.tyh.entity.UserEntity" alias="UserEntity"/> -->
        <!-- 设置方式2,自动扫描,将Java类的类名作为类的 类别名 -->
        <package name="com.tyh.entity"/>
    </typeAliases>

    <!-- 配置mybatis运行环境 -->
    <environments default="dev">
        <environment id="dev">

            <!-- 代表使用JDBC的提交和回滚来管理事务 -->
            <transactionManager type="JDBC"/>

            <!-- mybatis提供了3种数据源类型,分别是:POOLED,UNPOOLED,JNDI -->
            <!-- POOLED 表示支持JDBC数据源连接池 -->
            <!-- UNPOOLED 表示不支持数据源连接池 -->
            <!-- JNDI 表示支持外部数据源连接池 -->
            <dataSource type="POOLED">
                <!-- ${jdbc.driver}代表配置文件中的某一项的key -->
                <property name="driver" value="${jdbc.driver}"/>
                <property name="url" value="${jdbc.url}"/>
                <property name="username" value="${jdbc.username}"/>
                <property name="password" value="${jdbc.password}"/>
            </dataSource>
        </environment>
    </environments>

    <!-- 为mybatis的映射文件mapper.xml设置路径 -->
    <mappers>
        <!-- 映射方式1,一个一个设置
        <mapper resource="com.tyh.dao.mapper.UserMapper.xml"/> -->
        <!-- 映射方式2,自动扫描包内的Mapper接口与配置文件 -->
        <package name="com/tyh/dao/mapper"/>
    </mappers>

</configuration>
4.在src/main/java下创建各自的包,我这里是com.tyh.dao.mapper,在mapper文件夹下创建UserMapper的接口文件,用于编写DB操作函数
public interface UserMapper {
    /**
     * 添加用户
     * @param entity 实体
     * @return 添加id
     * @throws Exception
     */
    int add(UserEntity entity) throws Exception;
    int delete(int id) throws Exception;
    int update(UserEntity entity) throws Exception;
    UserEntity get(int id) throws Exception;
    List<UserEntity> list() throws Exception;
}
5.同样在mapper文件夹下创建UserMapper.xml文件,用于编写与接口函数对应的SQL脚本,此处切记节点属性不要写错,否则会报错
<?xml version="1.0" encoding="UTF-8"?>
<!DOCTYPE mapper PUBLIC "-//mybatis.org/DTD Mapper 3.0" "http://mybatis.org/dtd/mybatis-3-mapper.dtd">

<!--
cache 配置给定命名空间的缓存
cache-ref 从其他命名空间引用缓存配置
resultType 返回值类型
resultMap 描述如何从数据库结果集中装载你的对象
parameterType 参数类型
parameterMap 已过时
sql 可重用的SQL语句块
insert 插入语句
update 更新语句
delete 删除语句
select 查询语句
-->

<!-- 指明当前xml对应的Mapper -->
<mapper namespace="com.tyh.dao.mapper.UserMapper">
    <!-- 自定义返回结果集 如果实体属性名与列名一致则不需要此部分,若不一致则需要 -->
    <!--<resultMap id="userMap" type="UserBean">-->
    <!--<id property="id" column="id" javaType="java.lang.Integer"></id>-->
    <!--<result property="username" column="username" javaType="java.lang.String"></result>-->
    <!--<result property="password" column="password" javaType="java.lang.String"></result>-->
    <!--<result property="account" column="account" javaType="java.lang.Double"></result>-->
    <!--</resultMap>-->

    <!-- 各种标签中的id属性与mapper接口中的方法名一一对应,id属性必须唯一不能重复使用,parameterType属性指明查询时使用的参数类型,resultType属性指明查询返回的结果集类型 -->
    <!-- #{}中的内容,为占位符,当参数为某个Entity时,表示放置该Entity对象的属性值  -->

    <!-- useGeneratedKeys:(仅对insert有用)这会告诉MyBatis使用JDBC的getGeneratedKeys方法来取出由数据(比如:像 MySQL 和 SQLServer 这样的数据库管理系统的自动递增字段)内部生成的主键。默认值: false。 -->
    <!-- keyProperty:(仅对 insert有用)标记一个属性, MyBatis 会通过 getGeneratedKeys或者通过 insert 语句的 selectKey 子元素设置它的值。默认:不设置。 -->
    <insert id="add" useGeneratedKeys="true" keyProperty="id">
        insert into user (username, password, age) values (#{userName},#{password},#{age});
    </insert>
    <delete id="delete" parameterType="int">
        delete from user where id=#{id}
    </delete>
    <update id="update" >
        update user set username=#{username}, password=#{password}, age=#{age} where id=#{id};
    </update>
    <!-- select节点必须有resultType属性如果不是自定义结果集就可以直接写实体包名[要含包名的完整类名] -->
    <select id="get" resultType="com.tyh.entity.UserEntity">
        select * from user where id=#{id};
    </select>
    <select id="list" resultType="com.tyh.entity.UserEntity">
        select * from user;
    </select>
</mapper>
6.我们在文件夹内添加的xml及properties文件默认编译不会被复制过去,所以运行时会提示找不到文件,在配置中指明要一起打包文件即可
我这个项目有parent模块,所以在父模块中添加配置,子模块会自动继承,如果没有父模块则单独在demo-dao层的pom.xml文件添加也可
<!-- build节点普遍已经存在了,在其下增加resources等节点 -->
<build>
    <!-- 打包文件内容配置 -->
    <resources>
      <!-- 将src/main/java下的**/*.xml任意目录下的xml文件打包到对应的文件目录中 -->
      <resource>
        <directory>src/main/java</directory>
        <includes>
          <include>**/*.xml</include>
        </includes>
      </resource>
      <!-- 将src/main/resources下的**/*.*任意目录下的任意文件打包到对应的文件目录中 -->
      <resource>
        <directory>src/main/resources</directory>
        <includes>
          <include>**/*.*</include>
        </includes>
      </resource>
    </resources>
</build>
7.基础已经准备好了,下面创建数据库Mybatis操作对象,在com.tyh.dao下创建DBTools数据库工具类
public class DBTools {
    public static SqlSessionFactory sessionFactory;

    static {
        try {
            //使用MyBatis提供的Resources类加载mybatis的配置文件
            Reader reader = Resources.getResourceAsReader("mybatis_cfg.xml");
            //构建sqlSession的工厂
            sessionFactory = new SqlSessionFactoryBuilder().build(reader);
        } catch (Exception e) {
            e.printStackTrace();
        }
    }

    //创建能执行映射文件中sql的sqlSession
    public static SqlSession getSqlSession(){
        return sessionFactory.openSession();
    }
}
8.编写dao操作层,用于调用底层实现函数
public class UserDao {
    private SqlSession sqlSession;
    private UserMapper mapper;

    public UserDao() {
        sqlSession = DBTools.getSqlSession();
        mapper = sqlSession.getMapper(UserMapper.class);
    }

    public int add(UserEntity entity) throws Exception {
        //调用数据库操作函数后需要commit才会提交
        int result = mapper.add(entity);
        sqlSession.commit();
        return result;
    }

    public int delete(int id) throws Exception {
        int result = mapper.delete(id);
        sqlSession.commit();
        return result;
    }

    public int update(UserEntity entity) throws Exception {
        int result = mapper.update(entity);
        sqlSession.commit();
        return result;
    }

    public UserEntity get(int id) throws Exception {
        UserEntity result = mapper.get(id);
        sqlSession.commit();
        return result;
    }

    public List<UserEntity> list() throws Exception {
        List<UserEntity> result = mapper.list();
        sqlSession.commit();
        return result;
    }
}
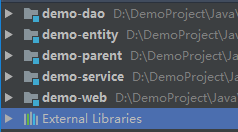
至此Dao层的DB操作已经完成,自己编写service和web调用即可,以下是我项目的结构。
注:数据库创建时也需要指明utf8格式编码,否则会出现中文乱码问题
create database test charset utf8;