mount挂载
环境准备
| 主机名 | 安装服务 | wan | lan |
|---|---|---|---|
| web01 | nfs客户端 | 10.0.0.7 | 172.16.1.7 |
| web02 | nfs客户端 | 10.0.0.8 | 172.16.1.8 |
| nfs | nfs服务端 | 10.0.0.9 | 172.16.1.9 |
流程分析
1.安装ansible
2.优化ansible
3.推送公钥
4.开启防火墙
5.开启80 443 873 nfs等端口和服务白名单
6.关闭selinux
7.创建同一的用户

	1.查看nfs客户端是否启动
	2.挂载
主机清单
[root@m01 ~]# vim /root/ansible/hosts
#[]标签名任意,但是最好不要用特殊符号(- | &)和大写字母,中文(不能是nginx)
#端口是22的时候可以省略
[web_group]
172.16.1.7 ansible_ssh_port=22 asible_ssh_user=root ansible_ssh_pass='1'
172.16.1.8 ansible_ssh_port=22 asible_ssh_user=root ansible_ssh_pass='1'
172.16.1.9 ansible_ssh_port=22 asible_ssh_user=root ansible_ssh_pass='1'

[db_group]
172.16.1.51 ansible_ssh_port=22 asible_ssh_user=root ansible_ssh_pass='1'
172.16.1.52 ansible_ssh_port=22 asible_ssh_user=root ansible_ssh_pass='1'
172.16.1.53 ansible_ssh_port=22 asible_ssh_user=root ansible_ssh_pass='1'
172.16.1.54 ansible_ssh_port=22 asible_ssh_user=root ansible_ssh_pass='1'

[nfs_group]
172.16.1.31 ansible_ssh_port=22 asible_ssh_user=root ansible_ssh_pass='1'

[redis_group]
172.16.1.81 ansible_ssh_port=22 asible_ssh_user=root ansible_ssh_pass='1'

[lb_group]
172.16.1.5 ansible_ssh_port=22 asible_ssh_user=root ansible_ssh_pass='1'
172.16.1.6 ansible_ssh_port=22 asible_ssh_user=root ansible_ssh_pass='1'

[backup_group]
172.16.1.41 ansible_ssh_port=22 asible_ssh_user=root ansible_ssh_pass='1'

[zabbix_group]
172.16.1.71 ansible_ssh_port=22 asible_ssh_user=root ansible_ssh_pass='1'

[m01_group]
172.16.1.61 ansible_ssh_port=22 asible_ssh_user=root ansible_ssh_pass='1'

[mtj_group]
172.16.1.202 ansible_ssh_port=22 asible_ssh_user=root ansible_ssh_pass='1'
########################被挂载点
创建角色
[root@m01 roles]# ansible-galaxy init mount_server
编辑tasks目录
1.检查nfs服务端
[root@m01 mount_server]# vim tasks/check.yml
- name: check server nfs
  shell: "ps -ef|grep [n]fs"
  ignore_errors: yes
  register: check_nfs

- name: start nfs
  service:
    name: nfs
    state: started
  when: {{ check_nfs }}.rc != 0
2.编辑include
[root@m01 mount_server]# vim tasks/main.yml
- include: check.yml
编辑入口文件
[root@m01 roles]# vim site.yml
- hosts: all
  roles:
    #- { role: base }
    #- { role: rsync_client,when: ansible_fqdn is match 'web*' }
    #- { role: rsync_client,when: ansible_fqdn is match 'nfs*' }
    #- { role: rsync_server,when: ansible_fqdn is match 'backup*' }
    #- { role: nfs_server,when: ansible_fqdn is match 'nfs*' }
    #- { role: nfs_client,when: ansible_fqdn is match 'web*' }
    - { role: mount_server,when: ansible_fqdn is match 'nfs*' }
执行
[root@m01 roles]# ansible-playbook site.yml
########################挂载点
创建角色
[root@m01 roles]# ansible-galaxy init mount_client
编辑tasks目录
1.检查
[root@m01 mount_client]# vim tasks/check.yml
- name: check server nfs
shell: "ps -ef|grep [n]fs"
ignore_errors: yes
register: check_nfs
- name: start nfs
service:
name: nfs
state: started
when: check_nfs.rc != 0
2.挂载
[root@m01 mount_client]# vim tasks/mount.yml
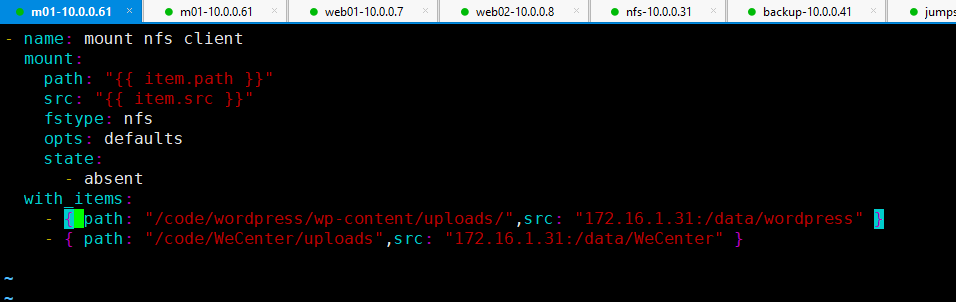
- name: mount nfs client
mount:
path: "{{ item.path }}"
src: "{{ item.src }}"
fstype: nfs
opts: defaults
state: absent
loop:
- { path: "mou",src: "moudir" }
- { path: "mou",src: "moudir" }
3.include
[root@m01 mount_client]# vim tasks/main.yml
- include: check.yml
- include: mount.yml
3.变量
#挂载谁
mou:
- "/code/wordpress/wp-content/uploads/"
- "/code/WeCenter/uploads"
#挂载到哪
mou_dir:
- "172.16.1.31:/data/wordpress"
- "172.16.1.31:/data/WeCenter"
编辑入口文件
[root@m01 roles]# vim site.yml
- hosts: all
  roles:
    #- { role: base }
    #- { role: rsync_client,when: ansible_fqdn is match 'web*' }
    #- { role: rsync_client,when: ansible_fqdn is match 'nfs*' }
    #- { role: rsync_server,when: ansible_fqdn is match 'backup*' }
    #- { role: nfs_server,when: ansible_fqdn is match 'nfs*' }
    #- { role: nfs_client,when: ansible_fqdn is match 'web*' }
    - { role: mount_server,when: ansible_fqdn is match 'nfs*' }
    - { role: mount_client,when: ansible_fqdn is match 'web*' }
执行
[root@m01 roles]# ansible-playbook site.yml
注意
1.mount模块不支持列表,一个动作对应多个值的时候可以考虑使用循环(with_items loop)
with_item中不支持变量。loop中可以再次使用变量