入手springBoot,搭建第一个springBoot项目。
看官方文档还是有点别扭。
https://docs.spring.io/spring-boot/docs/current-SNAPSHOT/reference/htmlsingle/#getting-started
================================================================================================================
1.创建一个新的maven项目
maven项目的创建:http://www.cnblogs.com/sxdcgaq8080/p/5586644.html

2.配置pom.xml文件
<project xmlns="http://maven.apache.org/POM/4.0.0" xmlns:xsi="http://www.w3.org/2001/XMLSchema-instance" xsi:schemaLocation="http://maven.apache.org/POM/4.0.0 http://maven.apache.org/xsd/maven-4.0.0.xsd">
  <modelVersion>4.0.0</modelVersion>
  <groupId>com.sxd.springBootExample</groupId>
  <artifactId>firstSpringBootExample</artifactId>
  <version>0.0.1-SNAPSHOT</version>
  <packaging>war</packaging>
  <build>
      <plugins>
          <plugin>
              <artifactId>maven-war-plugin</artifactId>
              <configuration>
                  <version>3.0</version>
              </configuration>
          </plugin>
      </plugins>
  </build>

    <!-- 引入parent项目,其实就是一个项目jar,版本自己在http://mvnrepository.com/search?q=spring-boot-starter-parent 选择即可 -->
    <parent>
        <groupId>org.springframework.boot</groupId>
        <artifactId>spring-boot-starter-parent</artifactId>
        <version>1.5.7.RELEASE</version>
    </parent>

      <!-- 要跑起来一个web项目,就引入这一个jar即可,版本不用写,parent中已经声明了的 -->
    <dependencies>
        <dependency>
            <groupId>org.springframework.boot</groupId>
            <artifactId>spring-boot-starter-web</artifactId>
        </dependency>
    </dependencies>

</project>
3.创建一个java文件,一个Controller,一个springBoot的主入口
@RequestMapping("/")
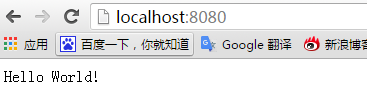
访问的地址:localhost:8080/ 即可。
如果想带上项目名,请在这里自行配置上即可。
package com.sxd.main;

import org.springframework.boot.*;
import org.springframework.boot.autoconfigure.*;
import org.springframework.web.bind.annotation.*;

@RestController
@EnableAutoConfiguration
public class Example {

    @RequestMapping("/")
    String home() {
        return "Hello World!";
    }

    public static void main(String[] args) throws Exception {
        SpringApplication.run(Example.class, args);
    }

}
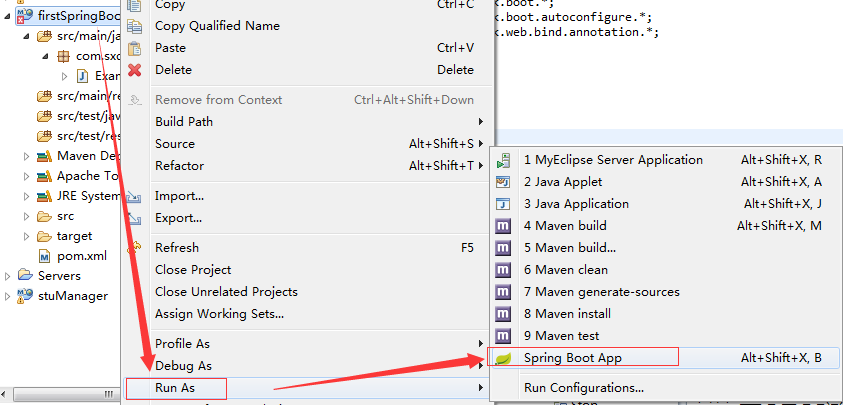
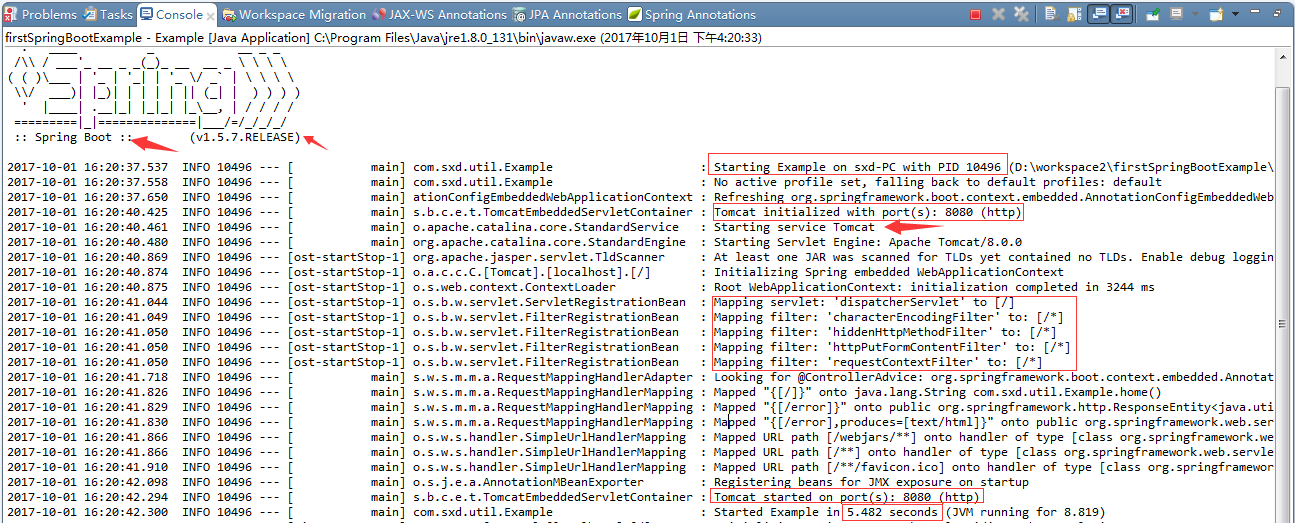
4.启动就好
现在不用把项目放入tomcat中,springBoot中嵌入了tomcat
5.查看效果
浏览器上访问: