前言:最近学习vue,就突发奇想,小菜鸟的我是时候锻炼锻炼自己。闲话不说,整起 <-_->
整体规划:先搭建前端,接下来后端,最后整合。
一、创建vue项目
1、安装nodejs( 傻瓜式安装即可) 官网: http://nodejs.cn/download/
检查安装是否成功
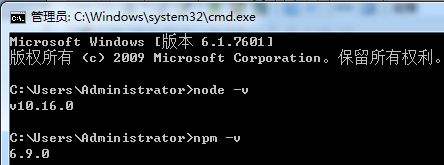
有问题可看 https://www.runoob.com/nodejs/nodejs-npm.html
2、安装淘宝镜像(由于npm在国外速度慢,直接用我们的)
cmd里直接运行 npm install -g cnpm --registry=https://registry.npm.taobao.org

3、使用cnpm安装vue
cmd里直接运行 cnpm install vue
4、全局安装vue脚手架工具
cmd里直接运行 cnpm install --global vue-cli
5、创建vue项目
cmd里直接运行 vue init webpack 项目


至此,vue项目创建完成。在你创建项目位置根目录运行:npm run dev

注意:如果在初始化创建项目时有错误,运行时 先 在你创建的 项目位置根目录 cnpm install,再 npm run dev

浏览器访问
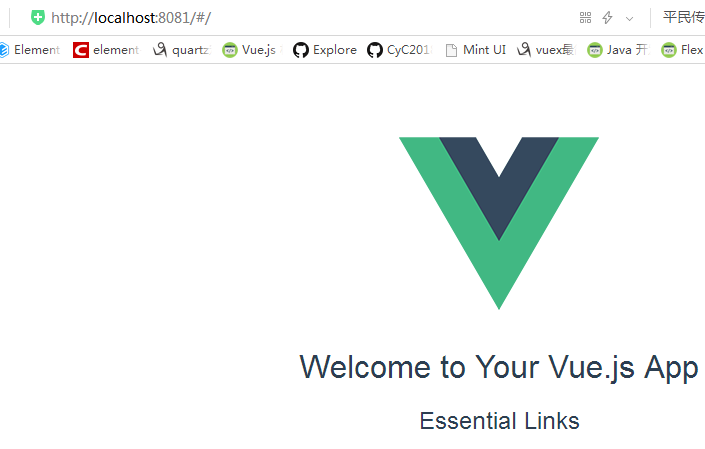
运行成功!!!! 接下来就可以写页面啦(这里我们用Element Ui) 教程:https://element.eleme.cn/#/zh-CN/component/layout
二、编写简单页面
1、cmd进入你的项目,安装Element Ui cnpm install element-ui -S
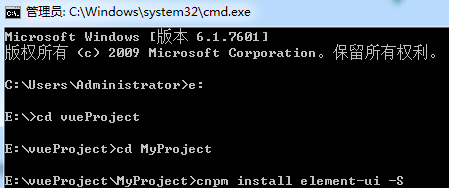
安装完成后,在router/index.js或者main.js里引入
import ElementUI from 'element-ui';
import 'element-ui/lib/theme-chalk/index.css';
Vue.use(ElementUI);
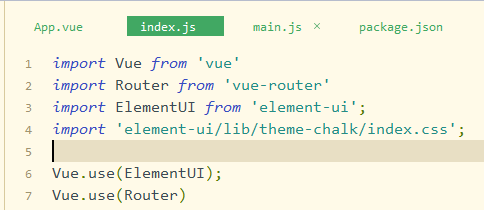
这时候就可以开心的使用Element Ui组件库了
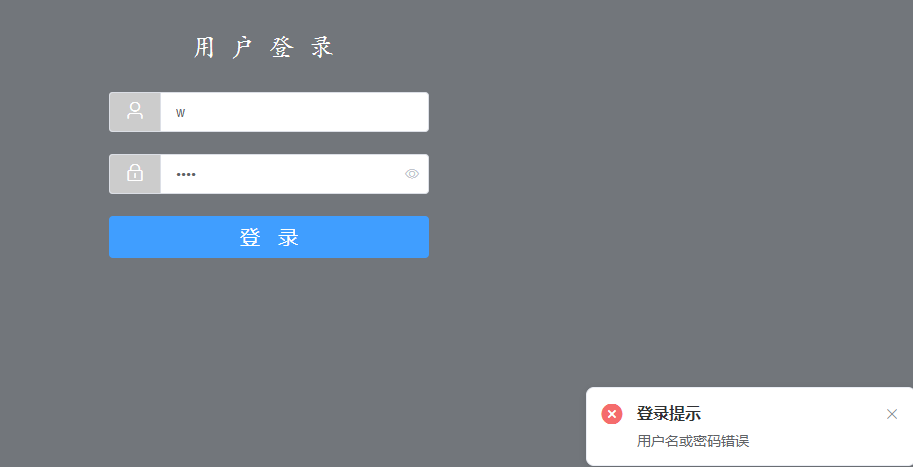
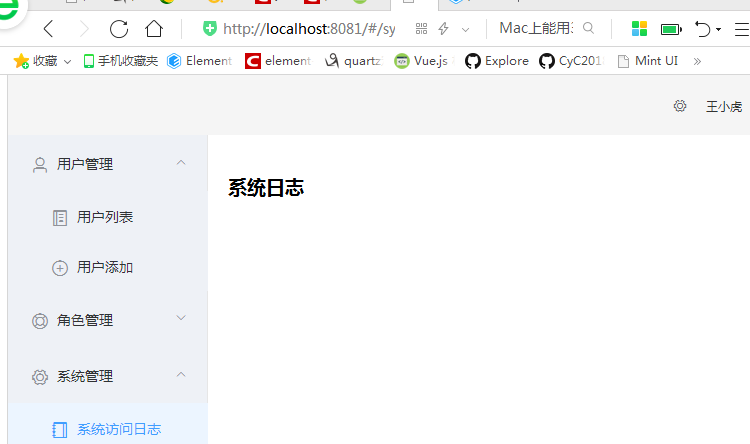
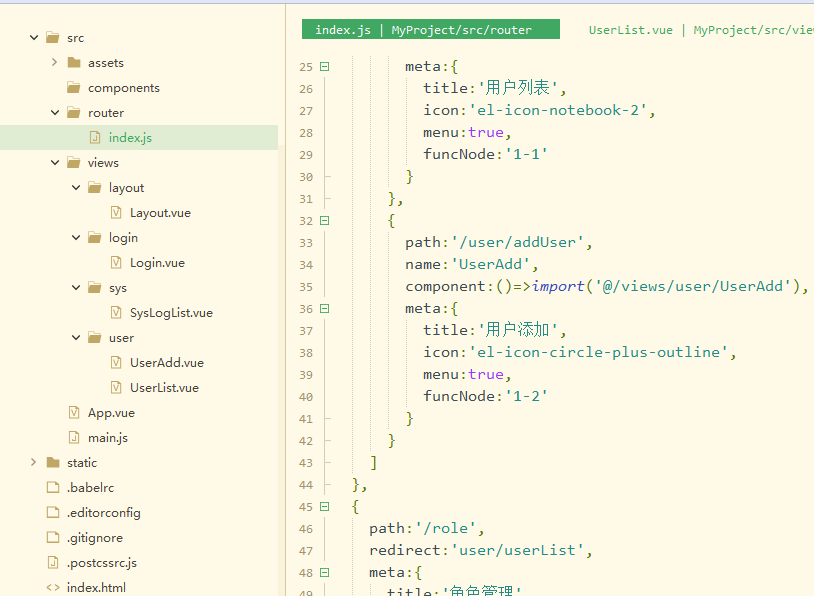
2、这里先模拟一个登陆功能(1.有表单校验,2、默认用户名wzz,密码521125,登陆成功跳到列表页,失败友情提示) 列表页旁边是代码结构图
效果如图
项目目录
3、代码介绍:
3.1、router/index.js (侧栏路由编码)

import Vue from 'vue'
import Router from 'vue-router'
import ElementUI from 'element-ui';
import 'element-ui/lib/theme-chalk/index.css';

Vue.use(ElementUI);
Vue.use(Router)

let menu=[
  {
    path:'/user',
    name:'layoutYHGL',
    component:()=>import('@/views/layout/Layout'),
    meta:{
      title:'用户管理',
      icon:'el-icon-user',
      menu:true,
      funcNode:'1'
    },
    children:[
      {
        path:'/user/userList',
        name:'UserList',
        component:()=>import('@/views/user/UserList'),
        meta:{
          title:'用户列表',
          icon:'el-icon-notebook-2',
          menu:true,
          funcNode:'1-1'
        }
      },
      {
        path:'/user/addUser',
        name:'UserAdd',
        component:()=>import('@/views/user/UserAdd'),
        meta:{
          title:'用户添加',
          icon:'el-icon-circle-plus-outline',
          menu:true,
          funcNode:'1-2'
        }
      }
    ]
  },
  {
    path:'/role',
    redirect:'user/userList',
    meta:{
      title:'角色管理',
      icon:'el-icon-help',
      menu:true
    }
  },
  {
    path:'/sys',
    name:'layoutXTGL',
    component:()=>import('@/views/layout/Layout'),
    meta:{
      title:'系统管理',
      icon:'el-icon-setting',
      menu:true,
      funcNode:'2'
    },
    children:[
      {
        path:'/sys/sysLogList',
        name:'SysLogList',
        component:()=>import('@/views/sys/SysLogList'),
        meta:{
          title:'系统访问日志',
          icon:'el-icon-notebook-1',
          menu:true,
          funcNode:'2-1'
        }
      }
    ]
  },
  {
    path:'',
    redirect:'login',
    meta:{
      menu:false
    }
  },
  {
    path:'/login',
    name:'Login',
    component:()=>import('@/views/login/Login'),
    meta:{
      menu:false
    }
  }
]

export default new Router({
  routes:menu,
})
3.2、layout/Layout.vue (对侧栏信息的布局,使用了v-for,v-on ,v-if)

 1 <template>
 2   <el-container style="height: 100%;">
 3     <!-- 头部 -->
 4     <el-header style="text-align: right; font-size: 12px;background-color: whitesmoke;">
 5       <el-dropdown>
 6         <i class="el-icon-setting" style="margin-right: 15px"></i>
 7         <el-dropdown-menu slot="dropdown">
 8           <el-dropdown-item>查看</el-dropdown-item>
 9           <el-dropdown-item>新增</el-dropdown-item>
10           <el-dropdown-item>删除</el-dropdown-item>
11         </el-dropdown-menu>
12       </el-dropdown>
13       <span>王小虎</span>
14     </el-header>
15     <el-container>
16       <!-- 左侧栏 -->
17       <el-aside width="200px">
18         <el-menu>
19           <!--如果菜单(menu)是true 循环侧栏路由列表  -->
20           <template v-for="item in menuData" v-if="item.meta.menu">
21             <!-- 这里必须设置index,相当唯一标识这个菜单标签,否则菜单列表点击后随意展开 -->
22             <el-submenu :index="item.meta.funcNode">
23               <template slot="title"><i :class="item.meta.icon"></i>{{item.meta.title}}</template>
24               <!-- 如果菜单有孩子菜单,则循环孩子菜单 -->
25               <template v-for="itemC in item.children" v-if="item.children">
26                 <el-menu-item :index="itemC.meta.funcNode" @click="clickMenu(itemC)"><i :class="itemC.meta.icon"></i>{{itemC.meta.title}}</el-menu-item>
27               </template>
28             </el-submenu>
29           </template>
30         </el-menu>
31       </el-aside>
32       <!-- 内容渲染 -->
33       <el-main style="background-color: white;">
34         <router-view/>
35       </el-main>
36     </el-container>
37   </el-container>
38 </template>
39
40 <script>
41   export default {
42     data() {
43       return {
44         /*
45          获取挂载的routes
46         ($router相当于一个全局的路由器对象,里面含有很多属性和子对象 )
47         (options是一个对象,有成员:1、data函数成员  2、methods对象成员  3、模板template    4、挂载元素el
48         5、生命周期钩子   6、props属性声明   7、computed计算成员    8、watch监视成员)
49         */
50         menuData: this.$router.options.routes
51       }
52     },
53     methods: {
54       clickMenu(item){
55         this.$router.push({path:item.path})     //跳转的路由对象
56         //this.$router.push({name:item.name})    通过name跳转
57       }
58     }
59   }
60 </script>
61
62 <style>
63   .el-header {
64     background-color: #B3C0D1;
65     color: #333;
66     line-height: 60px;
67   }
68
69   .el-aside,
70   .el-menu,
71   .el-submenu,
72   .el-menu-item {
73     background-color: rgb(238, 241, 246);
74   }
75
76   body {
77     margin: 0px;
78   }
79 </style>
3.3、App.vue

 1 <template>
 2   <div id="app">
 3     <router-view/>
 4   </div>
 5 </template>
 6
 7 <script>
 8 export default {
 9   name: 'App'
10 }
11 </script>
12
13 <style>
14 #app{}
15 </style>
3.4、index.html (主要是对html,body样式设置height:100%,为解决子模块设置height:100%无效)

 1 <!DOCTYPE html>
 2 <html>
 3   <head>
 4     <meta charset="utf-8">
 5     <meta name="viewport" content="width=device-width,initial-scale=1.0">
 6     <title>myproject</title>
 7   </head>
 8   <body>
 9     <div id="app"></div>
10     <!-- built files will be auto injected -->
11   </body>
12   <style>
13     html,body,#app{
14       height: 100%;
15     }
16   </style>
17 </html>
3.5、login/Login.vue

1 <template> 2 <div class="box"> 3 <div id="login" style=" 320px;height: 300px;text-align: center;"> 4 <el-form :model="loginForm" ref="loginForm" :rules="rules"> 5 <el-form-item> 6 <span style="color: white;font-family: 楷体;font-size: 26px;">用 户 登 录 </span> 7 </el-form-item> 8 <el-form-item prop="userName"> 9 <el-input type="text" v-model="loginForm.userName" placeholder="用户名"> 10 <template slot="prepend"><i class="el-icon-user" style="font-size: 20px; color: white;"></i></template> 11 </el-input> 12 </el-form-item> 13 <el-form-item prop="password"> 14 <el-input type="text" v-model="loginForm.password" placeholder="密码" show-password> 15 <template slot="prepend"><i class="el-icon-lock" style="font-size: 20px;color: white;"></i></template> 16 </el-input> 17 </el-form-item> 18 <el-form-item> 19 <el-button type="primary" size="medium" :loading="loading" style="font-size: 20px;font-family: 微软雅黑; 320px;" 20 @click="clickLogin">登 录</el-button> 21 </el-form-item> 22 </el-form> 23 </div> 24 </div> 25 </template> 26 27 <script> 28 export default { 29 data() { 30 var validateUserName = (rule, value, callback) => { 31 if (value.length === 0) { 32 return callback(new Error('请输入用户名')) 33 } else { 34 callback() 35 } 36 } 37 var validatePassword = (rule, value, callback) => { 38 if (value.length === 0) { 39 callback(new Error('请输入密码')) 40 } else if (value.length < 3) { 41 callback(new Error('密码不能小于3位')) 42 } else { 43 callback() 44 } 45 } 46 return { 47 loginForm: { 48 userName: '', 49 password: '' 50 }, 51 loading: false, //登陆加载效果 52 rules: { 53 userName: [{ 54 required: true, 55 trigger: 'blur', 56 validator: validateUserName 57 }], 58 password: [{ 59 required: true, 60 trigger: 'blur', 61 validator: validatePassword 62 }] 63 } 64 } 65 }, 66 methods: { 67 clickLogin() { 68 this.$refs.loginForm.validate(valid => { 69 if (valid) { 70 this.loading = true 71 setTimeout(() => { 72 if (this.loginForm.userName === 'wzz' && this.loginForm.password === '521125') { 73 this.$router.push({ 74 name: 'layoutYHGL' 75 }); 76 } else { 77 this.$notify({ 78 title: '登录提示', 79 message: '用户名或密码错误', 80 position: 'bottom-right', 81 type: 'error' 82 }); 83 this.loading=false; 84 } 85 }, 3000); 86 } else { 87 return false; 88 } 89 }) 90 91 } 92 } 93 } 94 </script> 95 96 <style scoped="scoped"> 97 .box { 98 display: flex; 99 height: 100%; 100 justify-content: center; 101 align-items: center; 102 } 103 </style> 104 <style> 105 .el-input-group__prepend { 106 padding: 0px 15px; 107 background-color: #CCCCCC; 108 border: 1 solid #72767B; 109 } 110 111 body { 112 background-color: #72767B; 113 margin: 0px; 114 } 115 </style>
3.6、sys/SysLogList.vue,user/UserAdd.vue,user/UserList.vue (这几个就是加了一个各自的<h3></h3>标签) 如下

1 <template>
2   <div><h3>用户添加</h3></div>
3 </template>
4
5 <script>
6 </script>
7
8 <style>
9 </style>
至此,前端暂时结束。有不足之处,请广大网友指正,谢谢<-_->

