JSON-Server主要的作用是搭建一台JSON服务器,测试一些业务逻辑(我之前都是采用读取文件的方式尴尬)。
一、安装
npm install --save json-server
前提是已经安装好了node环境,并且初始化好了项目。
二、提供json数据文件。
在项目根目录下,新建一个 JSON 文件db.json。
三、配置json-server
在buildwebpack.dev.conf.js下配置,如果是用旧版本的手脚架工具初始化的项目,是在build/dev-server.js下配置。
/*----------------jsonServer---------*/
/*引入json-server*/
const jsonServer = require('json-server')
/*搭建一个server*/
const apiServer = jsonServer.create()
/*将db.json关联到server*/
const apiRouter = jsonServer.router('db.json')
const middlewares = jsonServer.defaults()
apiServer.use(middlewares)
apiServer.use(apiRouter)
/*监听端口*/
apiServer.listen(3000, () => {
  console.log('JSON Server is running')
})
四、访问数据
配置完成后,要npm dev run 重启项目,然后再地址栏输入http://localhost:3000 就可以访问到数据。
五、设置代理
最后做一下浏览器代理设置,在 config/index.js中:
/*代理配置表,在这里可以配置特定的请求代理到对应的API接口*/
/* 下面的例子将代理请求 /api/getNewsList  到 http://localhost:3000/getNewsList*/
proxyTable: {
  '/api': {
    changeOrigin: true,// 如果接口跨域,需要进行这个参数配置
    target: 'http://localhost:3000',// 接口的域名
    pathRewrite: {
      '^/api': ''//后面可以使重写的新路径,一般不做更改
    }
  }
具体设置代理的方法,参见:Vue-接口跨域请求调试proxyTable
六、最后验证一下代理是否成功
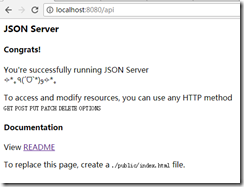
在浏览器输入地址:http://localhost:8080/api。
七、使用
使用vue-resouce发送Ajax获取数据。
    this.$http.get('/api/getNewsList')//代替http://localhost:3000/getNewsList
      .then((res) => {
        this.newsList = res.data
      }, (err) => {
        console.log(err)
      })
