一、配置文件系统
任意节点用ISCSI的共享磁盘创建LVM
node1
pvcreate /dev/sdb

vgcreate my_vg /dev/sdb

lvcreate -L 1G -n web_lv my_vg

lvscan

mkfs.xfs /dev/my_vg/web_lv
所有节点
#开启lvm高可用服务

lvmconf --enable-halvm --services --startstopservices

#启动后,node2上会自动同步node1上的集群卷组

vim /etc/lvm/lvm.conf

添加

  volume_list = [ "centos" ] #centos为所有非集群使用的VG,可用VGS查看

#重新生成initramfs(initram file system)
dracut -H -f /boot/initramfs-$(uname -r).img $(uname -r)
#重启
reboot
#查看lv是否正常工作
lvscan
psc status
node1、node2
注意apache不能开机启动
#安装apache
yum -y install httpd wget
#修改配置文件,末尾添加,实现打开状态功能,主要为了对apache进行健康监测
vim /etc/httpd/conf/httpd.conf
<Location /server-status>
#SetHandler server-status
#Order deny,allow
#Deny from all
#Allow from 127.0.0.1
#以上为2.4版本以前的配置,新的apache只需配置
    Require local
</Location>
添加LVM和文件系统资源
#自定义resource name,LVM为类型,之后定义一个resource group

pcs resouce create web_lvm LVM

> volgrpname=my_vg

> exclusive=true

> --group apachegroup

pcs resource show
pcs status

lvscan #这时inactive变为active

#创建文件系统资源
格式话文件系统

pcs resource create web_fs Filesystem
> device="/dev/my_vg/web_lv"
> directory="/var/www/html" #挂载目录
> fstype="xfs"
> --group apachegroup

pcs resource show
添加VIP资源
pcs resource create web-vip IPaddr2 、
>ip=192.168.0.220
>cidr_netmask=24
>--group apachegroup
>op monitor interval=30s

pcs resource show
添加Apache资源
pcs resource create apache apache
>configfile="/etc/httpd/conf/httpd.conf"
>statusurl="http://127.0.0.1/server-status"
>--group apachegroup

pcs resource show
测试调整资源
#node1设置为备机(主机),资源会漂移到node2
pcs cluster standby(unstandby) node1.描述


#pcs对集群进行操作可以在任意一个节点上操作
#资源的启动是有顺序的,文件系统、IP、脚本、可以用order进行调整
资源错误排除
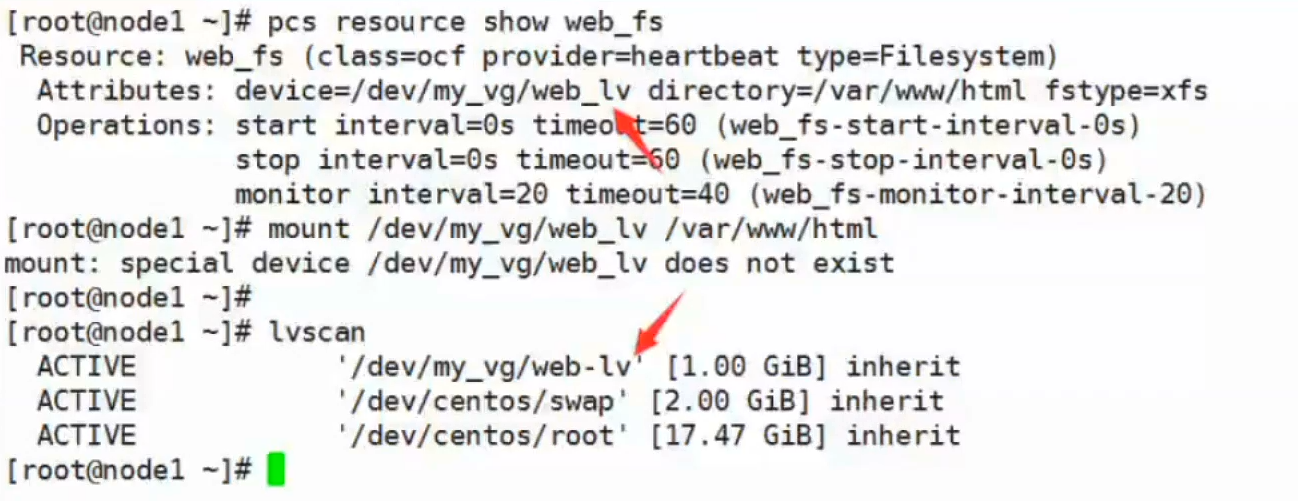
遇到资源名错误等情况,如下,可以用update更新修改
pcs resource update web_fs device=/dev/my_vg/web-lv
#man pcs 可以查看pcs配置说明
