最近在研究jenkins的集成,然后想把自己写的python工具也用jenkins集成一下
废话少说,来看结构
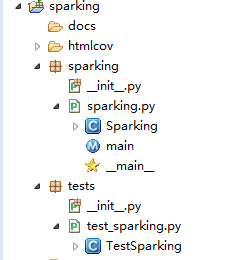
sparking.py
'''
@author: lianying
'''
class Sparking:
    @staticmethod
    def get_num_of_zero(bits_num, key):
        cnt = 0
        while key:
            cnt += 1
            key &= key -1
        return bits_num - cnt
    @staticmethod
    def get_num_of_one(bits_num, key):
        cnt = 0
        while key:
            cnt += 1
            key &= key -1
        return cnt

def main():
    s = Sparking()
    s.get_num_of_zero(32, 5)

if __name__ == '__main__':
    main()
test_sparking.py
'''
@author: allen
'''
import pytest
from sparking.sparking import Sparking

class TestSparking(object):
    @pytest.mark.parametrize("bits_num, key, expected",[
        (8,5,2),
        (16,5,2),
        (32,5,2),
        (64,5,2)
        ])
    def test_get_num_of_one(self, bits_num, key, expected):
        assert Sparking.get_num_of_one(bits_num, key) == expected

    @pytest.mark.parametrize("bits_num, key, expected",[
        (8,5,6),
        (16,5,14),
        (32,5,30),
        (64,5,62)
        ])
    def test_get_num_of_zero(self, bits_num, key, expected):
        assert Sparking.get_num_of_zero(bits_num, key) == expected
代码上次svn,然后配置jenkins;jenkins的安装就不介绍了,网上一搜一大片;jenkins里先安装好Cobertura Plugin插件,用来显示代码覆盖率的
1、创建job
2、配置svn

3、设置触发器

4、构建 (前提需要安装pytest-cov)

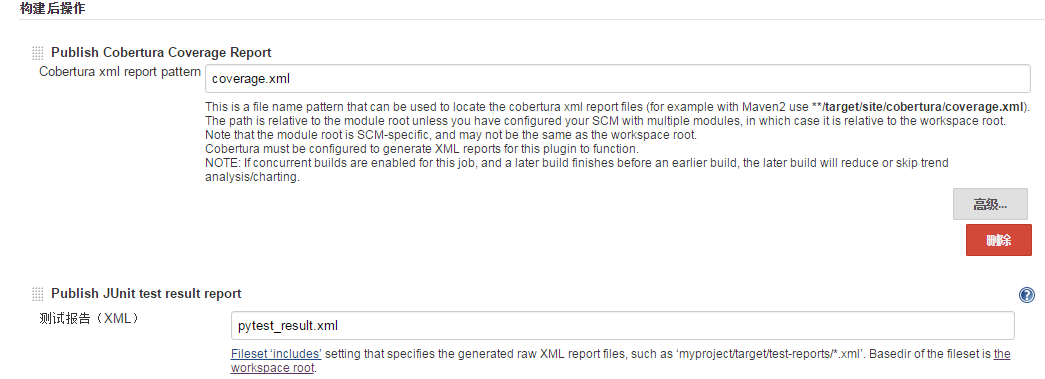
5、构建后展示report
6、保存、应用即可
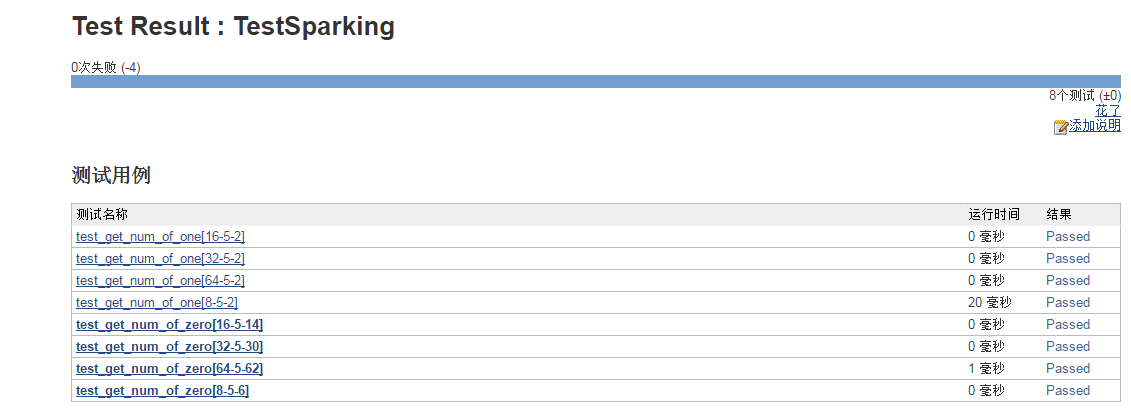
7、执行结果和报告
console :
Started by user anonymous
Building on master in workspace C:Userslianying.jenkinsjobs	est_djangoworkspace
Updating svn://10.134.28.113/project/sparking at revision '2016-06-08T13:54:59.004 +0800'
U         tests	est_sparking.py
At revision 28
[workspace] $ cmd /c call D:Dev	omcat	emphudson4704689285977025139.bat

C:Userslianying.jenkinsjobs	est_djangoworkspace>py.test tests	est_sparking.py --junitxml=pytest_result.xml --cov=sparking --cov-report=xml
============================= test session starts =============================
platform win32 -- Python 2.7.0, pytest-2.9.2, py-1.4.31, pluggy-0.3.1
rootdir: C:Userslianying.jenkinsjobs	est_djangoworkspace, inifile:
plugins: cov-2.2.1, html-1.8.1
collected 8 items

tests	est_sparking.py ........

 generated xml file: C:Userslianying.jenkinsjobs	est_djangoworkspacepytest_result.xml
--------------- coverage: platform win32, python 2.7.0-final-0 ----------------
Coverage XML written to file coverage.xml
========================== 8 passed in 0.11 seconds ===========================

C:Userslianying.jenkinsjobs	est_djangoworkspace>exit 0
[Cobertura] Publishing Cobertura coverage report...
Publishing Cobertura coverage results...
Cobertura coverage report found.
Recording test results
Finished: SUCCESS
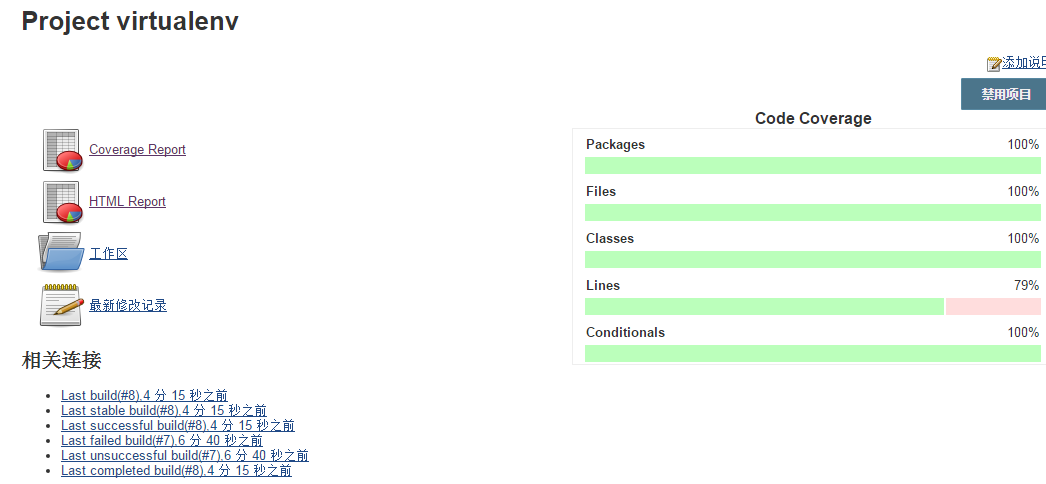
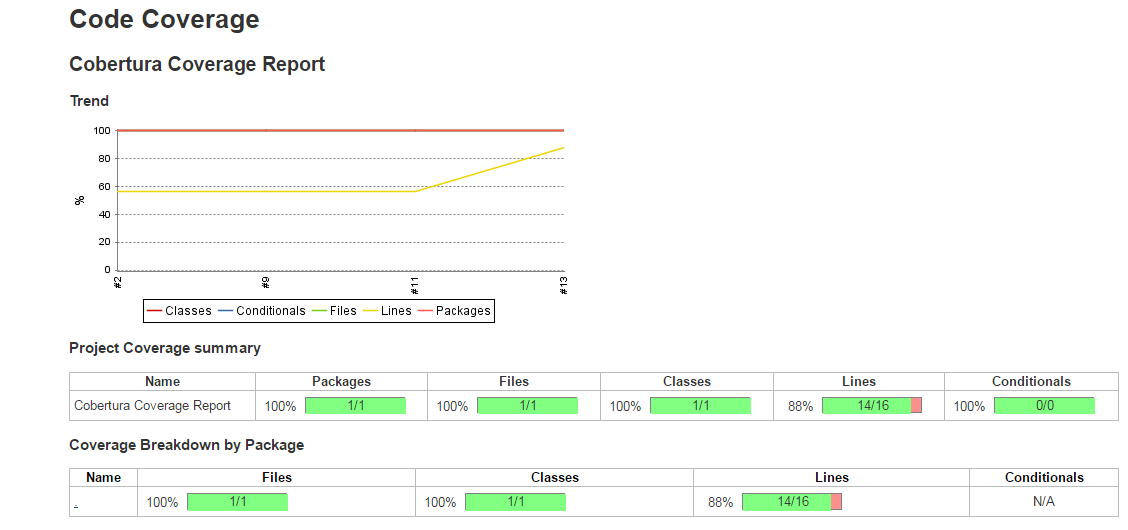
报告截图:
PS:补充下在virtualenv下的执行
从第4步开始
4、构建 这里需要先安装pytest-html 和pytest-cov ,然后添加SHELL
pip freeze > ./requirements.txt
if [ ! -d "venv" ]; then
    virtualenv -p /usr/bin/python venv
fi

. venv/bin/activate
pip install -r requirements.txt
cd sparking
py.test tests/test_sparking.py --html=pytest_result.html --cov=sparking --cov-report=xml
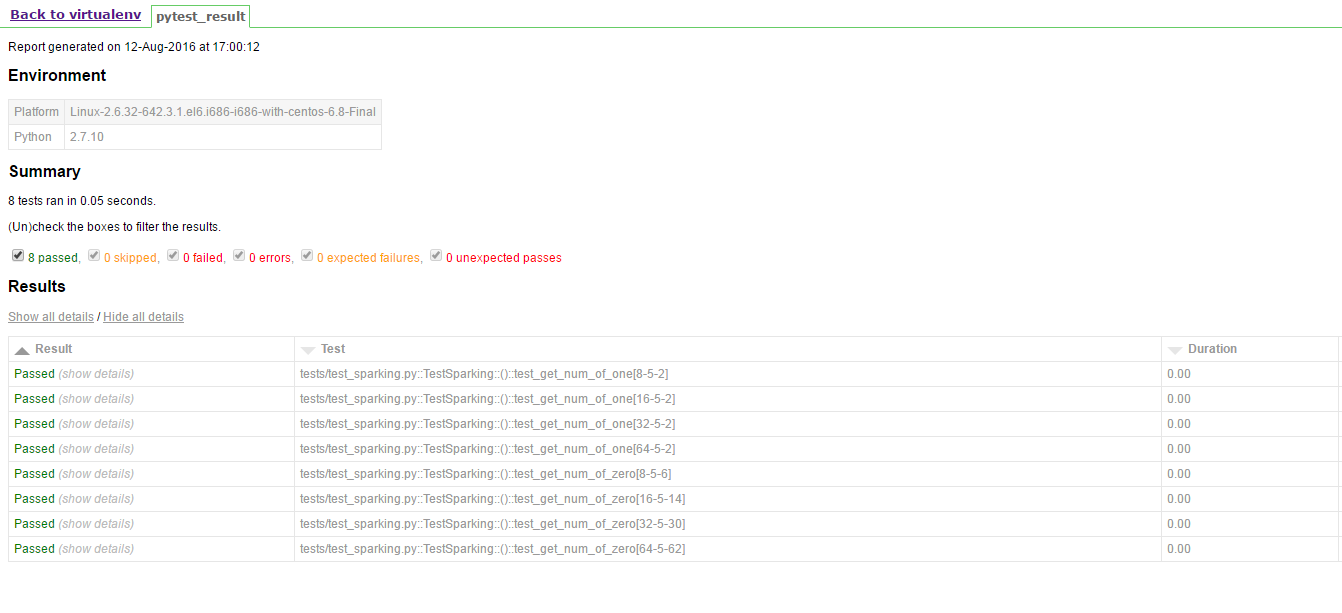
这里使用了pytest-html生成的报告更好看一些

后面基本一致,注意生成报告的路径要配置正确,看下结果: