简介:
前端选用VUE是因为它比较简单,容易上手,对于不熟悉前端的小伙伴很适合。对于软件发展来说,后端技术已趋于成熟和稳定,在功能已稳定的情况下,客户会把要求更多的放在页面的美观和合理排版布局上,学习一下前端,特别是自己设计一个页面,有助于对前端的了解和对美观设计的培养。
一、搭建VUE项目
1.搭建VUE基础框架
1.1 安装node.js
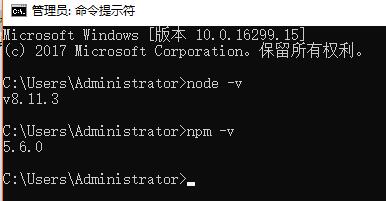
安装过程中记得勾选Add to path,安装完成后再cmd命令行输入:node -v 和 npm -v 如果分别显示版本号则安装成功。
1.2 安装vue脚手架vue-cli
输入以下命令:npm install -g vue-cli (其中-g表示全局安装)
1.3 初始化一个项目
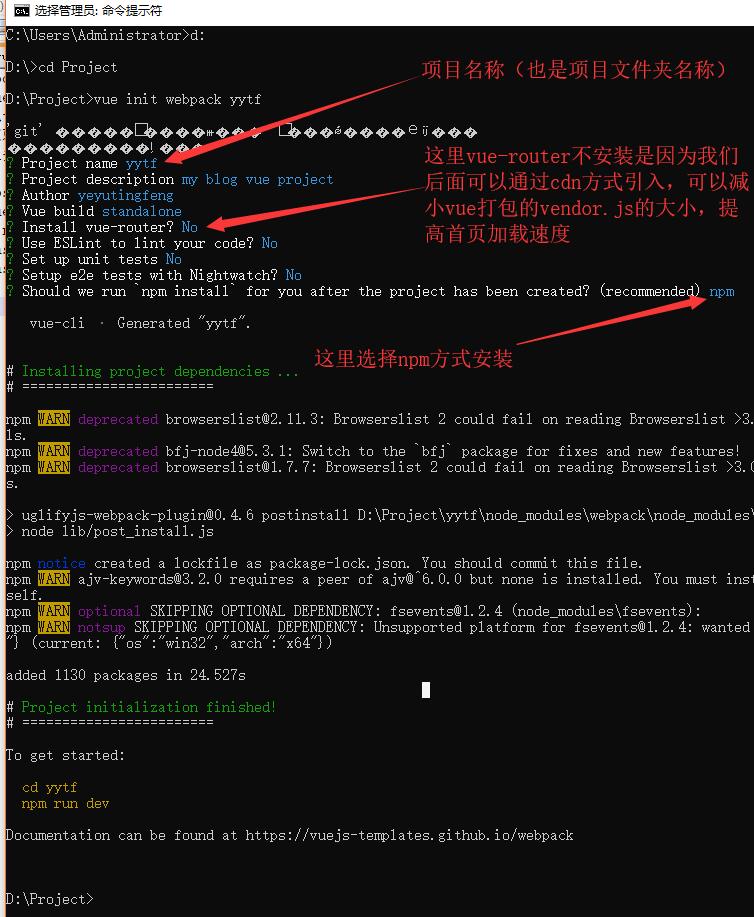
在cmd命令行进入要安装项目的文件夹,输入以下命令:vue init webpack projectName (其中projectName填写你的项目名称)比如下图,进入Project文件夹,按着问号?后的提示操作,没有用红字写备注的都是默认或者选NO的,最后提示 Project initialization finished 代表成功。
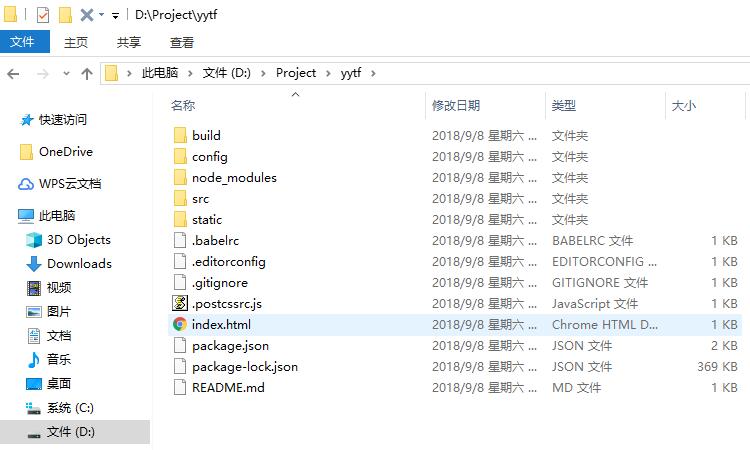
然后我们可以看到在d:project下生成的项目文件夹:
1.4 安装依赖组件
通常我们安装组件方法是先进入项目目录下(比如这里是命令行进入yytf文件夹):输入命令: npm install xxx (比如安装jquery:xxx就填jquery),但我们这里尽量不要通过这种方式安装,还是那个问题,为了减小webpack打包后vendor.js的大小,我们通过cdn方式引入,比如index.html中引入:<script src="https://cdn.bootcss.com/jquery/3.3.1/jquery.min.js"></script>
1.5 启动服务
通过命令: npm run dev 如果没有报错,就可以通过提示的链接在浏览器登录,看到“Welcome to Your Vue.js App”表示登录成功

2.路由模块
2.1 index.html
引入:<script src="https://cdn.bootcss.com/vue-router/3.0.1/vue-router.min.js"></script>
2.2 webpack.base.conf.js
在module.exports = {}中最后加上
externals: {
    'vue': 'Vue',
    'vue-router': 'VueRouter',
    'axios': 'axios',
  'vue-resource': 'VueResource'
}
2.3 routes.js
两种引入方式:
//>普通路由引入方式(所有的vue模块的js文件都打包进vendor.js和app.js中)
//import Articles from './components/Articles'
//import Topics from './components/Topics'
//import AboutMe from './components/AboutMe'
//import TimeLine from './components/TimeLine'
//import Pictures from './components/Pictures'

//>按需加载路由引入方式(各个vue模块的js文件分别打包进0.xxx.js、1.xxx.js、2.xxx.....)
const Articles = r => require.ensure([], () => r(require('./components/Articles')));
const Topics = r => require.ensure([], () => r(require('./components/Topics')));
const AboutMe = r => require.ensure([], () => r(require('./components/AboutMe')));
const TimeLine = r => require.ensure([], () => r(require('./components/TimeLine')));
const Pictures = r => require.ensure([], () => r(require('./components/Pictures')));

//构建vue-router实例(这里的VueRouter要和2.2中的名字对应):
export default new VueRouter({
  mode:"history",
  routes: [
    {path: '/',name: 'Articles',component: Articles},
    {path: '/topics',name: 'Topics',component: Topics},
    {path: '/aboutMe',name: 'AboutMe',component: AboutMe},
    {path: '/timeLine',name: 'TimeLine',component: TimeLine},
    {path: '/pictures',name: 'Pictures',component: Pictures}
  ]
})
这里有个坑,如果我们不加mode:"history",那么浏览器的路径会出现#不美观,如果我们加上mode:"history"后,在本地环境下一切都是正常的,但部署到服务器的nginx上跳转后如果刷新页面就会出现404了,这是因为那是因为在history模式下,只是动态的通过js操作window.history来改变浏览器地址栏里的路径,并没有发起http请求,但是当我直接在浏览器里输入这个地址的时候,就一定要对服务器发起http请求,但是这个目标在服务器上又不存在,所以会返回404而本地开发时用的服务器为node,Dev环境中自然已配置好了。所以要在nginx.conf里面做一些配置:
location / {
  root   html;
  index  index.html;
    if (!-e $request_filename){
        rewrite ^/(.*) /index.html last;
        break;
  }
}
2.4 使用路由
2.4.1在main.js中引入之前的routes.js(./routes这个相对路径视情况而定):import router from './routes'
2.4.2在main.js中把路由挂载到vue实例上(注意vue对象中左边的router不能随便更换名称):
new Vue({
  el: '#app',
  axios,
  router:router,
  components: { App },
  template: '<App/>'
})
2.4.3在app,vue中使用router-view标签:
<template>
    <page-header></page-header>
    <router-view></router-view>
</template>
2.4.4在PageHeader.vue中使用导航标签做跳转
<div class="nav">
    <ul class="wow pulse navul">
    <li>
          <router-link to="/" exact>技术文章</router-link>
          <router-link to="/topics" exact>随笔杂谈</router-link>
          <router-link to="/timeLine" exact>时光轴</router-link>
          <router-link to="/aboutMe" exact>关于我</router-link>
          <router-link to="/pictures" exact>图集</router-link>
       </li>
    </ul>
</div>
2.5 路由跳转前的权限校验(需要在routes.js中加meta:{requireAuth: true})
router.beforeEach((to, from, next) => {
  if (to.meta.requireAuth) { //该路由需要登录权限
      if (window.localStorage.getItem('token')) {//进入后台
        next();
      }else {//返回前台
          next({
              path: '/',
              query: {redirect: to.fullPath}  //将跳转的路由path作为参数,登录成功后跳转到该路由
          })
      }
  }
  else {//该路由不需要登录权限
      next();
  }
})
3.axios模块
3.1 简介:
Axios是一个基于promise的HTTP库,可以用在浏览器和node.js中:
>从浏览器中创建 XMLHttpRequests
>支持Promise API
>从node.js 创建 http 请求
>拦截请求和响应
>转换请求数据和响应数据
3.2 配置:
3.2.1 index.html:引入<script src="https://cdn.bootcss.com/axios/0.18.0/axios.min.js"></script>
3.2.2 webpack.base.conf.js 在module.exports = {}中最后加上
externals: {
    'vue': 'Vue',
    'vue-router': 'VueRouter',
    'axios': 'axios',
    'vue-resource': 'VueResource'
}
3.2.3 main.js
设置为Vue的内置对象: Vue.prototype.$axios = axios;
设置请求默认前缀: axios.defaults.baseURL = 'http://localhost:8080/blog/';
这里也可以利用上面方法设置请求的header信息,具体可以百度
3.3 使用
getArticles: function() {
var _this = this;
this.$axios.post("article/list", {
      title: _this.xxx
    })
    .then(function(result) {
      var response = result.data;
      if (response.statusCode == "200") {} else {}
})
});
3.4 前端后台管理对请求拦截:
在main.js同级目录新建http.js:
import router from './routes'
// axios 配置
axios.defaults.timeout = 5000
axios.defaults.baseURL = process.env.BASE_API

// http request 拦截器
axios.interceptors.request.use(
    config => {
      if (window.localStorage.getItem('token')) {
        config.headers.Authorization = window.localStorage.getItem('token');
      }
      return config
    },
    err => {
      return Promise.reject(err)
    }
)
// http response 拦截器
axios.interceptors.response.use(
    response => {
        return response;
    },
    error => {
        if (error.response) {
            switch (error.response.status) {
                case 401:
                    // 返回 401 清除token信息并跳转到登录页面
                    window.localStorage.setItem('token', null)
                    router.replace({
                        path: '/',
                        query: {redirect: router.currentRoute.fullPath}
                    })
            }
        }
        return Promise.reject(error.response.data)   //返回接口返回的错误信息
    }
);
export default axios
在main.js中:
import Axios from './http'
Vue.prototype.$axios = Axios;
axios.defaults.baseURL = 'http://localhost:8080/blog/';
new Vue({
  el: '#app',
  axios,
  router,
  components: { App },
  template: '<App/>'
})
到这里我们已经在前端做了路由跳转拦截和后台请求拦截,因为不懂前端,所以感觉上安全性应该能得到保障,但到底真的安不安全还真不知道,以后会慢慢多了解一下。
4.富文本模块
4.1 wangeditor(因为这个比较简单,功能一般,所以我放在评论和留言里用):
<div id="editorMneuElem"></div>
<div id="editorElem" style="text-align:left;height: 150px;"></div>
mounted: function() {
  //wangEditor配置,根据自己情况配置,图片也可以使用相对路径或cdn方式
  this.editor = new E('#editorMneuElem','#editorElem')
  this.editor.customConfig.menus = ['head','foreColor','emoticon','code'];
  this.editor.customConfig.colors = ['#FF0000','#0000FF','#00FF00','#FF6EB4','#FFA500','#A020F0','#00FF7F'];
  this.editor.customConfig.onchange = (html) => {this.editorContent = html}
  var icon = new Array();
  var def = new Array();
  for(var i=1;i<=20;i++){
    icon[i-1] = {src:'http://xxx.com/images/emoji/'+(i-1)+'.gif'};
  }
  for(var i=1;i<=10;i++){
    def[i-1] = {src:'http://xxx.com/images/huaji/'+(i-1)+'.png'};
  }
  this.editor.customConfig.emotions = [
    {title: "默认",type: "image",content: icon},
    {title: "滑稽",type: "image",content: def}
  ];
  this.editor.create();
}
4.2 tinymce(这个功能比较强大,可以直接从word拖拽图片或有格式的文档,所以我放在添加文章里使用,界面也比较漂亮,可惜官方文档是英文):
这里可以参考网上的大神的配置,贴一下我填完坑的代码(红色部分是上传图片后回显在编辑器里的图片路径,这个使用相对路径时很容易错,推荐使用绝对路径的cdn,曾经搞这个tinymce的图片上传堵了我好久):
<template>
  <div><textarea :id= "id"></textarea></div>
</template>
<script>
import tinymce from "../../static/tinymce/tinymce.min.js";
import "../../static/tinymce/themes/modern/theme.min.js";
import "../../static/tinymce/plugins/autosave/plugin.min.js";
import "../../static/tinymce/plugins/colorpicker/plugin.min.js";
import "../../static/tinymce/plugins/codesample/plugin.min.js";
import "../../static/tinymce/plugins/contextmenu/plugin.min.js";
import "../../static/tinymce/plugins/emoticons/plugin.js";
import "../../static/tinymce/plugins/insertdatetime/plugin.min.js";
import "../../static/tinymce/plugins/image/plugin.min.js";
import "../../static/tinymce/plugins/imagetools/plugin.min.js";
import "../../static/tinymce/plugins/lists/plugin.min.js";
import "../../static/tinymce/plugins/link/plugin.min.js";
import "../../static/tinymce/plugins/paste/plugin.min.js";
import "../../static/tinymce/plugins/fullpage/plugin.min.js";
import "../../static/tinymce/plugins/fullscreen/plugin.min.js";
import "../../static/tinymce/plugins/preview/plugin.min.js";
import "../../static/tinymce/plugins/media/plugin.min.js";
import "../../static/tinymce/plugins/table/plugin.min.js";
import "../../static/tinymce/plugins/textcolor/plugin.min.js";
import "../../static/tinymce/plugins/textpattern/plugin.min.js";
import "../../static/tinymce/plugins/wordcount/plugin.min.js";
import "../../static/tinymce/plugins/toc/plugin.min.js";

import "../../static/tinymce/langs/zh_CN.js";

const INIT = 0;
const CHANGED = 2;
var EDITOR = null;

export default {
  data() {
    return {status: INIT,  id: "editor-" + new Date().getMilliseconds()};
  },
  props: {
    value: {default: "",type: String},
    url: {default: "http:",type: String},
    accept: {default: "image/jpg, image/jpeg, image/png, image/gif",type: String},
    maxSize: {default: 2097152,type: Number}
  },
  watch: {
    value: function(val) {
      if (this.status === INIT || tinymce.activeEditor.getContent() !== val) {tinymce.activeEditor.setContent(val);}
      this.status = CHANGED;
    }
  },
  mounted: function() {
    console.log("editor");
    window.tinymce.baseURL = '/static/tinymce';
    const self = this;
    const setting = {
      selector: "#" + self.id,
      language: "zh_CN",
      language_url: "../../static/tinymce/langs/zh_CN.js",
      init_instance_callback: function(editor) {
        EDITOR = editor;
        console.log("Editor: " + editor.id + " is now initialized.");
        editor.on("input change undo redo", () => {var content = editor.getContent();self.$emit("input", content);});
      },
      plugins: [],
      images_upload_handler: function(blobInfo, success, failure) {
        if (blobInfo.blob().size > self.maxSize) {failure("文件体积过大");}
        if (self.accept.indexOf(blobInfo.blob().type) > 0) {uploadPic();} else {failure("图片格式错误");}
        function uploadPic() {
          const xhr = new XMLHttpRequest();
          const formData = new FormData();
          xhr.open("POST", self.url, true);
          xhr.withCredentials = true;//允许带认证信息的配置.解决跨域问题前端需要的配置
          formData.append("file", blobInfo.blob());
          xhr.send(formData);
          xhr.onload = function() {
            if (xhr.status !== 200) {self.$emit("on-upload-fail"); failure("上传失败: " + xhr.status); return;}// 抛出 'on-upload-fail' 钩子
            const json = JSON.parse(xhr.responseText);
            self.$emit("on-upload-complete", [json, success, failure]);// 抛出 'on-upload-complete' 钩子
            success(json.data.file.filePath);
          };

        }
      },
      setup: (editor) => {
        // 抛出 'on-ready' 事件钩子
        editor.on('init', () => {self.loading = false; self.$emit('on-ready'); editor.setContent(self.value);})
        // 抛出 'input' 事件钩子,同步value数据
        editor.on('input change undo redo', () => {self.$emit('input', editor.getContent())})
      },
      height: 500,
        theme: 'modern',
        menubar: true,
        toolbar: `styleselect | fontselect | formatselect | fontsizeselect | forecolor backcolor | bold italic underline strikethrough hr | table | alignleft aligncenter alignright alignjustify | outdent indent | numlist bullist | media preview removeformat code  link fullscreen | undo redo | image emoticons codesample`,
        plugins: `paste importcss image code codesample table advlist fullscreen link media lists textcolor colorpicker hr preview emoticons`,
        codesample_languages: [
          {text: 'HTML/XML', value: 'markup'},{text: 'JavaScript', value: 'javascript'},{text: 'CSS', value: 'css'},{text: 'PHP', value: 'php'},{text: 'Python', value: 'python'},{text: 'Java', value: 'java'},{text: 'C', value: 'c'},{text: 'C++', value: 'cpp'}
        ],
        // codesample_content_css:"../../static/common/css/prism.css",
        // CONFIG
        forced_root_block: 'p',
        force_p_newlines: true,
        importcss_append: true,
        // CONFIG: ContentStyle 这块很重要, 在最后呈现的页面也要写入这个基本样式保证前后一致, `table`和`img`的问题基本就靠这个来填坑了
        content_style: `
          *                         { padding:0; margin:0; }
          html, body                { height:100%; }
          img                       { max-100%; display:block;height:auto; }
          a                         { text-decoration: none; }
          iframe                    {  100%; }
          p                         { line-height:1.6; margin: 0px; }
          table                     { word-wrap:break-word; word-break:break-all; max-100%; border:none; border-color:#999; }
          .mce-object-iframe        { 100%; box-sizing:border-box; margin:0; padding:0; }
          ul,ol                     { list-style-position:inside; }
        `,
        insert_button_items: 'image link | inserttable',
        // CONFIG: Paste
        paste_retain_style_properties: 'all',
        paste_word_valid_elements: '*[*]',        // word需要它
        paste_data_images: true,                  // 粘贴的同时能把内容里的图片自动上传,非常强力的功能
        paste_convert_word_fake_lists: false,     // 插入word文档需要该属性
        paste_webkit_styles: 'all',
        paste_merge_formats: true,
        nonbreaking_force_tab: false,
        paste_auto_cleanup_on_paste: false,
        // CONFIG: Font
        fontsize_formats: '10px 11px 12px 14px 16px 18px 20px 24px 26px 28px 32px',
        // CONFIG: StyleSelect
        style_formats: [
          {title: '首行缩进',block: 'p',styles: { 'text-indent': '2em' }},
          {title: '行高',items: [{title: '1', styles: { 'line-height': '1' }, inline: 'span'},{title: '1.5', styles: { 'line-height': '1.5' }, inline: 'span'},{title: '2', styles: { 'line-height': '2' }, inline: 'span'},{title: '2.5', styles: { 'line-height': '2.5' }, inline: 'span'},{title: '3', styles: { 'line-height': '3' }, inline: 'span'}]}
        ],
        // FontSelect
        font_formats: `微软雅黑=微软雅黑;宋体=宋体;黑体=黑体;仿宋=仿宋;楷体=楷体;隶书=隶书;幼圆=幼圆;Andale Mono=andale mono,times;Arial=arial, helvetica,sans-serif;
          Arial Black=arial black, avant garde;Book Antiqua=book antiqua,palatino;Comic Sans MS=comic sans ms,sans-serif;Courier New=courier new,courier;
          Georgia=georgia,palatino;Helvetica=helvetica;Impact=impact,chicago;Symbol=symbol;Tahoma=tahoma,arial,helvetica,sans-serif;Terminal=terminal,monaco;
          Times New Roman=times new roman,times;Trebuchet MS=trebuchet ms,geneva;Verdana=verdana,geneva;Webdings=webdings;Wingdings=wingdings,zapf dingbats`,
        // Tab
        tabfocus_elements: ':prev,:next',
        object_resizing: true,
        // Image
        imagetools_toolbar: 'rotateleft rotateright | flipv fliph | editimage imageoptions'
    };
    tinymce.init(setting);
  },
  beforeDestroy: function() {
    tinymce.get(this.id).destroy();
  }
};
</script>
5.点击特效
这个也是搬运的,JS博大精深,研究了一下,其实也就是使用了一下animate.css的消退特效,在main.js中:
/* 鼠标点击特效 -start*/
var getColor = function() {
    var randomColor=['#0000FF','#FFA500','#FF0000','#A020F0','#00F5FF','#008B00','#FF6A6A','#FF00FF','#00FF00','#FFB90F'];var colorIndex = parseInt(Math.random()*10);return randomColor[colorIndex];};
    var fnTextPopup = function(arr, options) {if (!arr || !arr.length) {return;}var index = 0;document.documentElement.addEventListener("click", function(event) {var x = event.pageX,y = event.pageY;
    var eleText = document.createElement("span");eleText.className = "text-popup";this.appendChild(eleText);if (arr[index]) {eleText.innerHTML = arr[index];} else {index = 0;eleText.innerHTML = arr[0];}
    eleText.addEventListener("animationend", function() {eleText.parentNode.removeChild(eleText);});eleText.style.left = x - eleText.clientWidth / 2 + "px";eleText.style.top = y - eleText.clientHeight + "px";
    index++;var textPopupElement = document.getElementsByClassName("text-popup")[0];textPopupElement.style.color = getColor();});
};
fnTextPopup(["富强","民主","文明","和谐","自由","平等","公正","法治","爱国","敬业","诚信","友善"]);

/* css */
.text-popup {
    animation: textPopup 800ms;
    user-select: none;
    white-space: nowrap;
    position: absolute;
    z-index: 999;
    font-size: 24px;
}
@keyframes textPopup {
    0%,
    100% {
        opacity: 0;
    }
    5% {
        opacity: 1;
    }
    100% {
        transform: translateY(-50px);
    }
}
/* 鼠标点击特效 -end*/
二、项目优化
由于刚做完项目,然后上线后,第一次打开首页用了18s+,吓到我了,然后花了很长时间在寻找页面优化的方法,最后效果也是刚刚的:
1.静态资源尽量使用CDN
比如index.html中引入 <script src="https://cdn.bootcss.com/vue/2.5.17-beta.0/vue.min.js"></script> 替换掉使用 npm install vue 这种方式
2.VUE懒加载
在上面介绍路由中已详细讲解了,贴张使用全部加载和按需加载的张图,可以看到上面的这种方式举个栗子:打开首页只会加载0.xxx.js,当打开第二个页面再加载1.xxx.js,当代码量和引用资源比较多时,可以极大减轻首页的加载压力

3.开启GZIP打包
在config/index.js的官方注释里说了开启gzip前要先安装 compression-webpack-plugin
所以先运行:npm install --save-dev compression-webpack-plugin
再在index.js中设置 productionGzip: true
4.JS和CSS压缩成min版
一般vue打包的js自带压缩功能,如果你像我一样把css都提取到common.css中,你可以使用网上的css在线压缩工具,放到common.min.css中做生产环境的css包
5.抽取出VUE中的重复代码作公共模块
这个自己视情况而定。
6.还有很多优化的方法可以百度一下
貌似其它都是些无关紧要的东西,也没什么说的了,就这样吧!下篇开始搭建后台项目,最近心情很差,也不想说什么话,只想一个人安静的听着歌,做着自己的事。