1. Elementui tabs组件内添加组件
1.1. 需求
-
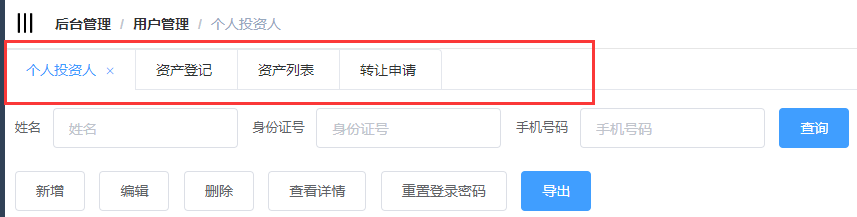
今天的一个需求是在后台框架的基础上添加tab页,结果页面如下
-
原本上述红框内的内容是不存在的,直接点击左侧菜单栏进行页面跳转,现加了tab标签栏,实现快速的跳转
1.2. 实现
- 具体要根据自己的route实现类进行筛选,核心vue如下
<template>
  <div>
    <el-tabs v-model="TabsValue" type="card" closable @tab-remove="removeTab">
      <el-tab-pane style="border-radius: 3px" v-for="(item, index) in Tabs" :key="item.name" :label="item.title" :name="item.name">
        <tab-component style="border-radius: 3px;margin: -15px 10px 0px 10px;" :index="index" :name="index"></tab-component>
      </el-tab-pane>
    </el-tabs>
  </div>
</template>
<script>
  import Vue from 'vue'
  export default {
    name: 'TabBar',
    data(){
      return {
        uniqueOpened: true,
        TabsValue: '',
        Tabs: [],
        index:0,
        tabComponent:{}
      }
    },
    methods: {
      addOneTab(menu) {
        var exist = false;
        for (var i = 0; i < this.Tabs.length; i++) {
          if (menu.name === this.Tabs[i].name) {
            exist = true;
            break
          }
        }
        if (exist === true) {
          this.TabsValue = menu.name;
          return
        }
        this.Tabs.push({
          title: menu.name,
          name: menu.name,
          content: menu.component
        });
        var _this = this;
        this.tabComponent = Vue.component('tab-component', {
          render: function (h) {
            var comp = _this.Tabs[this.index].content;
            return h(comp)
          },
          props: {
            index: {
              type: Number,
              required: true
            }
          }
        });
        this.TabsValue = menu.name
      },
      addTab(e) {
        let first = "/"+e.split("/")[1];
        let two = e.split("/")[2];
        let tempRoutes = this.$router.options.routes;
        for (let i = 0; i < tempRoutes.length; i++) {
          let temp = tempRoutes[i];
          if (temp.path === first) {
            for (let j = 0; j < temp.children.length; j++) {
              let child = temp.children[j];
              if (child.path === two) {
                let menu = {};
                menu.name = child.meta.title;
                menu.component = child.component;
                this.addOneTab(menu);
              }
            }
          }
        }
      },
      removeTab(targetName) {
        let tabs = this.Tabs;
        let activeName = this.TabsValue;
        if (activeName === targetName) {
          tabs.forEach((tab, index) => {
            if (tab.name === targetName) {
              let nextTab = tabs[index + 1] || tabs[index - 1];
              if (nextTab) {
                activeName = nextTab.name;
              }
            }
          });
        }
        this.TabsValue = activeName;
        this.Tabs = tabs.filter(tab => tab.name !== targetName);
      }
    }
  }
</script>
- 上述是tab的实现,再就是菜单选择调用tab的addTab方法
<el-menu @select="addTab" mode="vertical" unique-opened :default-active="$route.path" :collapse="isCollapse"
         background-color="#304156" text-color="#fff" active-text-color="#409EFF">
  <sidebar-item :routes="routes"></sidebar-item>
</el-menu>


addTab(e) {
  this.$refs.tabBar.addTab(e);
}
- 上面代码会看着有点奇怪,因为
SideBar,也就是上述的el-menu所在组件和tab是平级的,如下
<template>
  <div class="app-wrapper" :class="{hideSidebar:!sidebar.opened}">
    <sidebar ref="sidebar" @addTab="addTab" class="sidebar-container"></sidebar>
    <div class="main-container">
      <navbar></navbar>
      <tab-bar ref="tabBar"></tab-bar>
      <app-main></app-main>
    </div>
  </div>
</template>
siderBar和tab-bar在同一个组件内,所以要实现参数传递,需要先emit提交事件,再在父组件传递给另一个子组件,这样链路就完整了,没看懂我的看下面的参考吧,我也是参考它的结合自己的代码实现
1.3. 参考
- 参考自该问答陶通的回答