Hive安装配置及基本操作
1. Hive安装及配置
(1). 上传文件到Hadoop102节点,解压到/opt/moudle

[simon@hadoop102 conf]$ cp hive-env.sh.template hive-env.sh
(3). 配置hive-env.sh文件
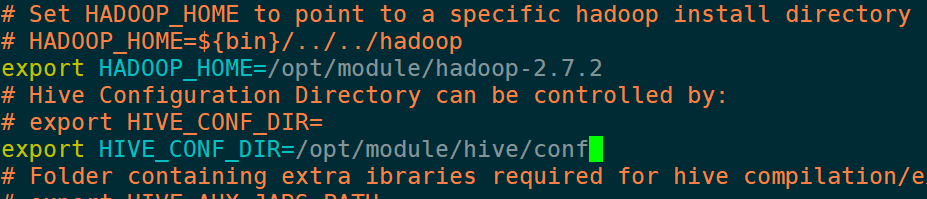
(a). 配置HADOOP_HOME路径 :
export HADOOP_HOME=/opt/module/hadoop-2.7.2
(b).配置HIVE_CONF_DIR路径 :
export HIVE_CONF_DIR=/opt/module/hive/conf
2. Hadoop集群的配置
(1)必须启动HDFS和YARN
[simon@hadoop102 conf]$ start-dfs.sh
[simon@hadoop103 module]$ start-yarn.sh
[simon@hadoop104 hadoop-2.7.2]$ mr-jobhistory-daemon.sh start historyserver
(2)在HDFS上创建/tmp和/user/hive/warehouse两个目录并修改他们的同组权限可写
[simon@hadoop102 hadoop-2.7.2]$ hadoop fs -mkdir /tmp
[simon@hadoop102 hadoop-2.7.2]$ hadoop fs -mkdir -p /user/hive/warehouse

[simon@hadoop102 hadoop-2.7.2]$ hadoop fs -chmod g+w /tmp
[simon@hadoop102 hadoop-2.7.2]$ hadoop fs -chmod g+w /user/hive/warehouse
3. Hive基本操作
(1)启动hive
[simon@hadoop102 hive]$ bin/hive
(2)查看数据库
hive> show databases;
(3)打开默认数据库
hive> use default;
(4)显示default数据库中的表
hive> show tables;
(5)创建一张表
hive> create table student(id int,name string);
(6)显示数据库中有几张表
hive> show tables;
(7)查看表的结构
hive> desc student;
OK
id                  	int
name                	string
Time taken: 0.413 seconds, Fetched: 2 row(s)
(8)向表中插入数据
hive> insert into student values(1000,"simon");
(9)查询表中数据
hive> select * from student;
(10)退出hive
hive> quit;
4. 将本地文件导入Hive案例
需求:
将本地/opt/module/datas/student.txt这个目录下的数据导入到hive的student(id int, name string)表 中。
hive> create table student(id int, name string) ROW FORMAT DELIMITED FIELDS TERMINATED
 BY '	';
--导入本地数据
hive> load data local inpath '/opt/module/datas/student.txt' into table student;
查看是否插入成功:
hive> select * from student;
OK
1001	zhangshan
1002	lishi
1003	zhaoliu
Time taken: 0.266 seconds, Fetched: 3 row(s)
再打开一个客户端窗口启动hive,会产生java.sql.SQLException异常:
Exception in thread "main" java.lang.RuntimeException: java.lang.RuntimeException:
 Unable to instantiate
 org.apache.hadoop.hive.ql.metadata.SessionHiveMetaStoreClient
        at org.apache.hadoop.hive.ql.session.SessionState.start(SessionState.java:522)
        at org.apache.hadoop.hive.cli.CliDriver.run(CliDriver.java:677)
        at org.apache.hadoop.hive.cli.CliDriver.main(CliDriver.java:621)
        at sun.reflect.NativeMethodAccessorImpl.invoke0(Native Method)
        at sun.reflect.NativeMethodAccessorImpl.invoke(NativeMethodAccessorImpl.java:57)
        at sun.reflect.DelegatingMethodAccessorImpl.invoke(DelegatingMethodAccessorImpl.java:43)
        at java.lang.reflect.Method.invoke(Method.java:606)
        at org.apache.hadoop.util.RunJar.run(RunJar.java:221)
        at org.apache.hadoop.util.RunJar.main(RunJar.java:136)
Caused by: java.lang.RuntimeException: Unable to instantiate org.apache.hadoop.hive.ql.metadata.SessionHiveMetaStoreClient
        at org.apache.hadoop.hive.metastore.MetaStoreUtils.newInstance(MetaStoreUtils.java:1523)
        at org.apache.hadoop.hive.metastore.RetryingMetaStoreClient.<init>(RetryingMetaStoreClient.java:86)
        at org.apache.hadoop.hive.metastore.RetryingMetaStoreClient.getProxy(RetryingMetaStoreClient.java:132)
        at org.apache.hadoop.hive.metastore.RetryingMetaStoreClient.getProxy(RetryingMetaStoreClient.java:104)
        at org.apache.hadoop.hive.ql.metadata.Hive.createMetaStoreClient(Hive.java:3005)
        at org.apache.hadoop.hive.ql.metadata.Hive.getMSC(Hive.java:3024)
        at org.apache.hadoop.hive.ql.session.SessionState.start(SessionState.java:503)
原因是,Metastore默认存储在自带的derby数据库中,推荐使用MySQL存储Metastore;
5. 安装Mysql及配置Hive的元数据存放位置
5.1.查看mysql是否安装,如果安装了,卸载mysql
(1). 查看是否安装了Mysql:
[root@hadoop102 桌面]# rpm -qa|grep mysql
mysql-libs-5.1.73-7.el6.x86_64
(2). 卸载掉已安装的Mysql:
[root@hadoop102 桌面]# rpm -e --nodeps mysql-libs-5.1.73-7.el6.x86_64
(3). 解压mysql-libs.zip 文件到当前目录
[root@hadoop102 software]# unzip mysql-libs.zip
[root@hadoop102 software]# ls
mysql-libs.zip
mysql-libs
(4). 进入到mysql-libs文件夹下
[root@hadoop102 mysql-libs]# ll
总用量 76048
-rw-r--r--. 1 root root 18509960 3月  26 2015 MySQL-client-5.6.24-1.el6.x86_64.rpm
-rw-r--r--. 1 root root  3575135 12月  1 2013 mysql-connector-java-5.1.27.tar.gz
-rw-r--r--. 1 root root 55782196 3月  26 2015 MySQL-server-5.6.24-1.el6.x86_64.rpm
5.2 安装Mysql服务器
(1).安装mysql服务端
[root@hadoop102 mysql-libs]# rpm -ivh MySQL-server-5.6.24-1.el6.x86_64.rpm
(2).查看产生的随机密码
[root@hadoop102 mysql-libs]# cat /root/.mysql_secret
# The random password set for the root user at Sat Nov  2 21:44:35 2019 (local time): sMUtG2RWFg3XUr4M
(3).查看mysql的状态
[root@hadoop102 mysql-libs]# service mysql staus
Usage: mysql  {start|stop|restart|reload|force-reload|status}  [ MySQL server options ]
(4).启动mysql
[root@hadoop102 mysql-libs]# service mysql start
Starting MySQL..                                           [确定]
5.3 安装mysql客户端
(1).解压客户端安装包
[root@hadoop102 mysql-libs]# rpm -ivh MySQL-client-5.6.24-1.el6.x86_64.rpm
(2). 连接mysql
[root@hadoop102 mysql-libs]# mysql -uroot -psMUtG2RWFg3XUr4M
(3).修改密码:
mysql> SET PASSWORD=PASSWORD('zxc147');
(4).退出mysql
mysql> quit
5.4 mysql的user表中主机配置
配置只要是root用户+密码,在任何主机上都能登录MySQL数据库。
(1).进入mysql
[root@hadoop102 mysql-libs]# mysql -uroot -pzxc147
(2).显示数据库
mysql> show databases;
(3).使用msql数据库
mysql> use mysql;
(4).展示mysql数据库中的所有数据表
mysql>show tables;
(5).使用user表
mysql>use user;
(6). 描述表的结构
mysql>desc User;
(7). 查询user表
mysql> select Host, User,Password from user;
+-----------+------+-------------------------------------------+
| Host      | User | Password                                  |
+-----------+------+-------------------------------------------+
| localhost | root | *3114DECCB22104A2045E0132C007737A52C7E11D |
| hadoop102 | root | *9178AE26D29780ECED756CA0AABE2442BF1CAA41 |
| 127.0.0.1 | root | *9178AE26D29780ECED756CA0AABE2442BF1CAA41 |
| ::1       | root | *9178AE26D29780ECED756CA0AABE2442BF1CAA41 |
+-----------+------+-------------------------------------------+
(8).修改user表,把Host改成%
mysql> update user set host='%' where host = 'localhost';
(9).删除root用户其他host
mysql> delete from user where host <>'%';
(10).刷新权限信息
mysql> flush privileges;
(11).退出
mysql>quit;
5.5 配置Metastore到MySql
(1).在/opt/module/hive/conf目录下创建一个文件hive-site.xml
根据官方文档配置参数,拷贝数据到hive-site.xml文件中
<?xml version="1.0"?>
<?xml-stylesheet type="text/xsl" href="configuration.xsl"?>
<configuration>
	<property>
	  <name>javax.jdo.option.ConnectionURL</name>
	  <value>jdbc:mysql://hadoop102:3306/metastore?createDatabaseIfNotExist=true</value>
	  <description>JDBC connect string for a JDBC metastore</description>
	</property>

	<property>
	  <name>javax.jdo.option.ConnectionDriverName</name>
	  <value>com.mysql.jdbc.Driver</value>
	  <description>Driver class name for a JDBC metastore</description>
	</property>

	<property>
	  <name>javax.jdo.option.ConnectionUserName</name>
	  <value>root</value>
	  <description>username to use against metastore database</description>
	</property>

	<property>
	  <name>javax.jdo.option.ConnectionPassword</name>
	  <value>zxc147</value>
	  <description>password to use against metastore database</description>
	</property>
</configuration>
(2). 将/opt/software/mysql-libs目录下解压mysql-connector-java-5.1.27.tar.gz驱动包,
拷贝mysql-connector-java-5.1.27-bin.jar到/opt/module/hive/lib/
[root@hadoop102 mysql-libs]# tar -zxf mysql-connector-java-5.1.27.tar.gz -C /opt/module/hive/lib/
(3). 配置完毕后,如果启动hive异常,可以重新启动虚拟机。(重启后,别忘了启动hadoop集群)
6. 多窗口启动Hive测试
(1). 首先启动mysql
[root@hadoop102 mysql-libs]# mysql -uroot -pzxc147
(2). 查看有几个数据库
mysql> show databases;
+--------------------+
| Database           |
+--------------------+
| information_schema |
| mysql              |
| performance_schema |
| test               |
+--------------------+
4 rows in set (0.00 sec)
(2). 再打开多个窗口,分别启动hive
[simon@hadoop102 hive]$ bin/hive
(3). 启动hive后,回到MySQL窗口查看数据库,显示增加了metastore数据库
mysql> show databases;

+--------------------+
| Database           |
+--------------------+
| information_schema |
| metastore          |
| mysql              |
| performance_schema |
| test               |
+--------------------+
7. HiveJDBC访问
hive的访问:终端访问 远程访问
终端访问:安装hive,利用shell脚本访问 不可并发访问
远程访问:通过JDBC连接数据仓库 支持并发访问
(1). 启动hiveserver2服务
[simon@hadoop102 hive]$ bin/hiveserver2
(2). 启动beeline
[simon@hadoop102 hive]$ bin/beeline
Beeline version 1.2.1 by Apache Hive
beeline>
(3). 连接hiveserver2
beeline> !connect jdbc:hive2://hadoop102:10000  #(回车)
Connecting to jdbc:hive2://hadoop102:10000
Enter username for jdbc:hive2://hadoop102:10000: simon  #(输入用户名回车)
Enter password for jdbc:hive2://hadoop102:10000:       #(直接回车)
Connected to: Apache Hive (version 1.2.1)
Driver: Hive JDBC (version 1.2.1)
Transaction isolation: TRANSACTION_REPEATABLE_READ
(4). 使用测试
0: jdbc:hive2://hadoop102:10000> show databases;
+----------------+--+
| database_name  |
+----------------+--+
| default        |
+----------------+--+
1 row selected (1.083 seconds)
8. Hive的常用交互命令
[simon@hadoop102 hive]$ bin/hive -help
usage: hive
 -d,--define <key=value>          Variable subsitution to apply to hive
                                  commands. e.g. -d A=B or --define A=B
    --database <databasename>     Specify the database to use
 -e <quoted-query-string>         SQL from command line
 -f <filename>                    SQL from files
 -H,--help                        Print help information
    --hiveconf <property=value>   Use value for given property
    --hivevar <key=value>         Variable subsitution to apply to hive
                                  commands. e.g. --hivevar A=B
 -i <filename>                    Initialization SQL file
 -S,--silent                      Silent mode in interactive shell
 -v,--verbose                     Verbose mode (echo executed SQL to the console)
(1). “-e”不进入hive的交互窗口执行sql语句
[simon@hadoop102 hive]$ bin/hive -e "select id from student;"
(2).“-f”执行脚本中sql语句
(a). 编写脚本文件:在/opt/module/datas目录下创建hivef.sql文件
[simon@hadoop102 datas]$ touch hivef.sql
(b). 文件中写入正确的sql语句
select *from student;
(c). 执行文件中的sql语句
[simon@hadoop102 hive]$ bin/hive -f /opt/module/datas/hivef.sql
(d) .执行文件中的sql语句并将结果写入文件中
[simon@hadoop102 hive]$ bin/hive -f /opt/module/datas/hivef.sql > /opt/module/datas/hive_result.txt
9.Hive其他命令操作
(1). 退出hive窗口:
hive(default)>exit;

hive(default)>quit;
在新版的hive中没区别了,在以前的版本是有的:
exit:先隐性提交数据,再退出;
quit:不提交数据,退出;
(2).在hive cli命令窗口中如何查看hdfs文件系统
hive(default)>dfs -ls /;
(3). 在hive cli命令窗口中如何查看本地文件系统
hive(default)>! ls /opt/module/datas;
(4). 查看在hive中输入的所有历史命令
(1)进入到当前用户的根目录/root或/home/simon
(2)查看. hivehistory文件
[simon@hadoop102 ~]$ cat .hivehistory