PS:源码已上传Github, 欢迎指教。https://github.com/shileishmily/spring-cloud-x.git
一、介绍
Apollo(阿波罗)[参考附录1]是携程框架部研发并开源的一款生产级的配置中心产品,它能够集中管理应用在不同环境、不同集群的配置,配置修改后能够实时推送到应用端,并且具备规范的权限、流程治理等特性,适用于微服务配置管理场景。
Apollo目前在国内开发者社区比较热,在Github上有超过5k颗星,在国内众多互联网公司有落地案例,可以说Apollo是目前配置中心产品领域Number1的产品,其成熟度和企业级特性要远远强于Spring Cloud体系中的Spring Cloud Config产品。
二、架构和模块

下面是Apollo的七个模块,其中四个模块是和功能相关的核心模块,另外三个模块是辅助服务发现的模块:
四个核心模块及其主要功能
-
ConfigService
-
提供配置获取接口
-
提供配置推送接口
-
服务于Apollo客户端
-
AdminService
-
提供配置管理接口
-
提供配置修改发布接口
-
服务于管理界面Portal
-
Client
-
为应用获取配置,支持实时更新
-
通过MetaServer获取ConfigService的服务列表
-
使用客户端软负载SLB方式调用ConfigService
-
Portal
-
配置管理界面
-
通过MetaServer获取AdminService的服务列表
-
使用客户端软负载SLB方式调用AdminService
三个辅助服务发现模块
-
Eureka
-
用于服务发现和注册
-
Config/AdminService注册实例并定期报心跳
-
和ConfigService住在一起部署
-
MetaServer
-
Portal通过域名访问MetaServer获取AdminService的地址列表
-
Client通过域名访问MetaServer获取ConfigService的地址列表
-
相当于一个Eureka Proxy
-
逻辑角色,和ConfigService住在一起部署
-
NginxLB
-
和域名系统配合,协助Portal访问MetaServer获取AdminService地址列表
-
和域名系统配合,协助Client访问MetaServer获取ConfigService地址列表
-
和域名系统配合,协助用户访问Portal进行配置管理
更多关于apollo的介绍请参考:https://github.com/ctripcorp/apollo
三、Apollo配置中心搭建
apollo环境搭建搭建可以参考:https://ctripcorp.github.io/apollo/#/zh/deployment/quick-start,我是通过网盘链接下载的安装包。但是下载安装后,遇到一个问题,就是apollo自身集成了eureka注册中心,而且eureka默认的启动端口是8080。
但是我们之前已经搭建了自己独立的eureka服务,http://localhost:8761/eureka/,http://localhost:8762/eureka/,http://localhost:8763/eureka/。
下面主要说一下如何让apollo使用我们自己的注册中心。在网上一番搜索后,发现相关帖子太多了,而且大家的版本号都不相同(我搭建的apollo版本号是v1.8.0),走了很多弯路。
一顿操作后,在官方的readme下发现了这么一句话:
#### 1. 配置Config Service不启动内置Eureka Server

##### 1.1 1.5.0及以上版本

为apollo-configservice配置`apollo.eureka.server.enabled=false`即可,通过bootstrap.yml或-D参数等方式皆可。

##### 1.2 1.5.0之前的版本

修改[com.ctrip.framework.apollo.configservice.ConfigServiceApplication](https://github.com/ctripcorp/apollo/blob/master/apollo-configservice/src/main/java/com/ctrip/framework/apollo/configservice/ConfigServiceApplication.java),把`@EnableEurekaServer`改为`@EnableEurekaClient`

```java
@EnableEurekaClient
@EnableAspectJAutoProxy
@EnableAutoConfiguration // (exclude = EurekaClientConfigBean.class)
@Configuration
@EnableTransactionManagement
@PropertySource(value = {"classpath:configservice.properties"})
@ComponentScan(basePackageClasses = {ApolloCommonConfig.class,
    ApolloBizConfig.class,
    ConfigServiceApplication.class,
    ApolloMetaServiceConfig.class})
public class ConfigServiceApplication {
  ...
}
```

#### 2. 修改ApolloConfigDB.ServerConfig表中的`eureka.service.url`,指向自己的Eureka地址

比如自己的Eureka服务地址是1.1.1.1:8761和2.2.2.2:8761,那么就将ApolloConfigDB.ServerConfig表中设置eureka.service.url为:

```
http://1.1.1.1:8761/eureka/,http://2.2.2.2:8761/eureka/
```

需要注意的是更改Eureka地址只需要改ApolloConfigDB.ServerConfig表中的`eureka.service.url`即可,不需要修改meta server地址。

> 默认情况下,meta service和config service是部署在同一个JVM进程,所以meta service的地址就是config service的地址,修改Eureka地址时不需要修改meta server地址。
说白了就是如果安装1.8.0版本的apollo,如果用独立eureka服务,需要修改两个地方
1、apollo.eureka.server.enabled改成false
2、ApolloConfigDB.ServerConfig表中的`eureka.service.url`改成http://localhost:8671/eureka/
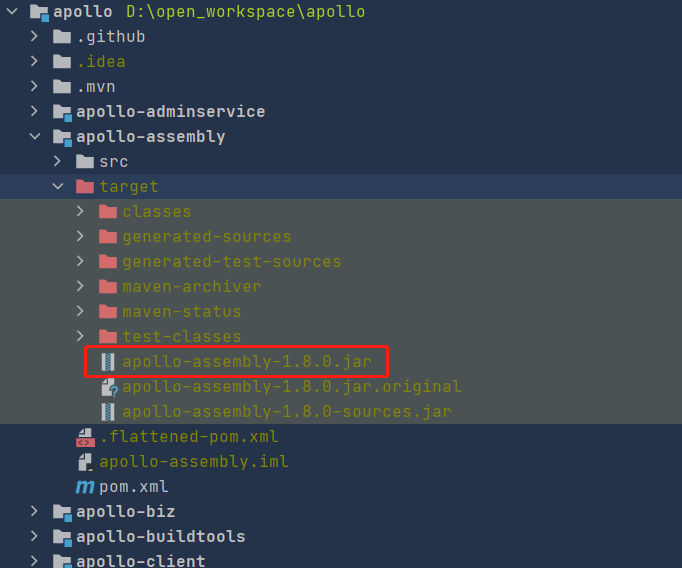
3、打包命令:mvn clean package -pl apollo-assembly -am -DskipTests=true
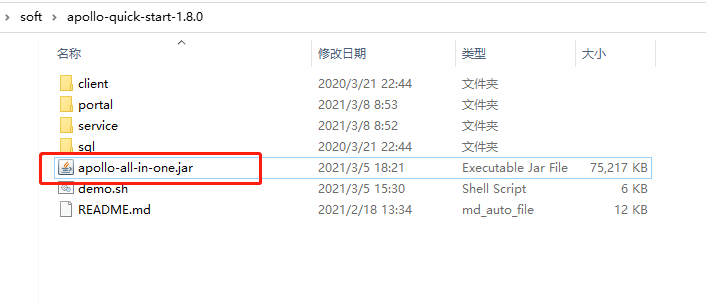
4、打包之后将apollo-assembly-1.8.0.jar拷贝到D:softapollo-quick-start-1.8.0目录,然后重命名为apollo-all-in-one.jar


四、Apollo Client获取配置演示Demo
4.1 新建一个名称为spring-cloud-config-client的模块
4.2 build.gradle依赖
dependencies {
    compile("org.springframework.cloud:spring-cloud-starter-netflix-eureka-client")
    compile("com.ctrip.framework.apollo:apollo-client:1.8.0")
}
4.3 创建启动类
/**
 * @author Leo
 */
@SpringBootApplication
@EnableApolloConfig
public class ApolloConfigClientApplication {
    public static void main(String[] args) {
        SpringApplication.run(ApolloConfigClientApplication.class, args);
    }

}
4.4 新建测试Controller
/**
 * @author Leo
 */
@RestController
public class ConfigClientController {

    @Value("${pay.url}")
    private String payUrl;

    @Value("${pay.name}")
    private String payName;

    @GetMapping("/getConfig")
    public String getConfig() {
        return "从apollo获取配置:payUrl=" + payUrl + ", payName=" + payName;
    }
}
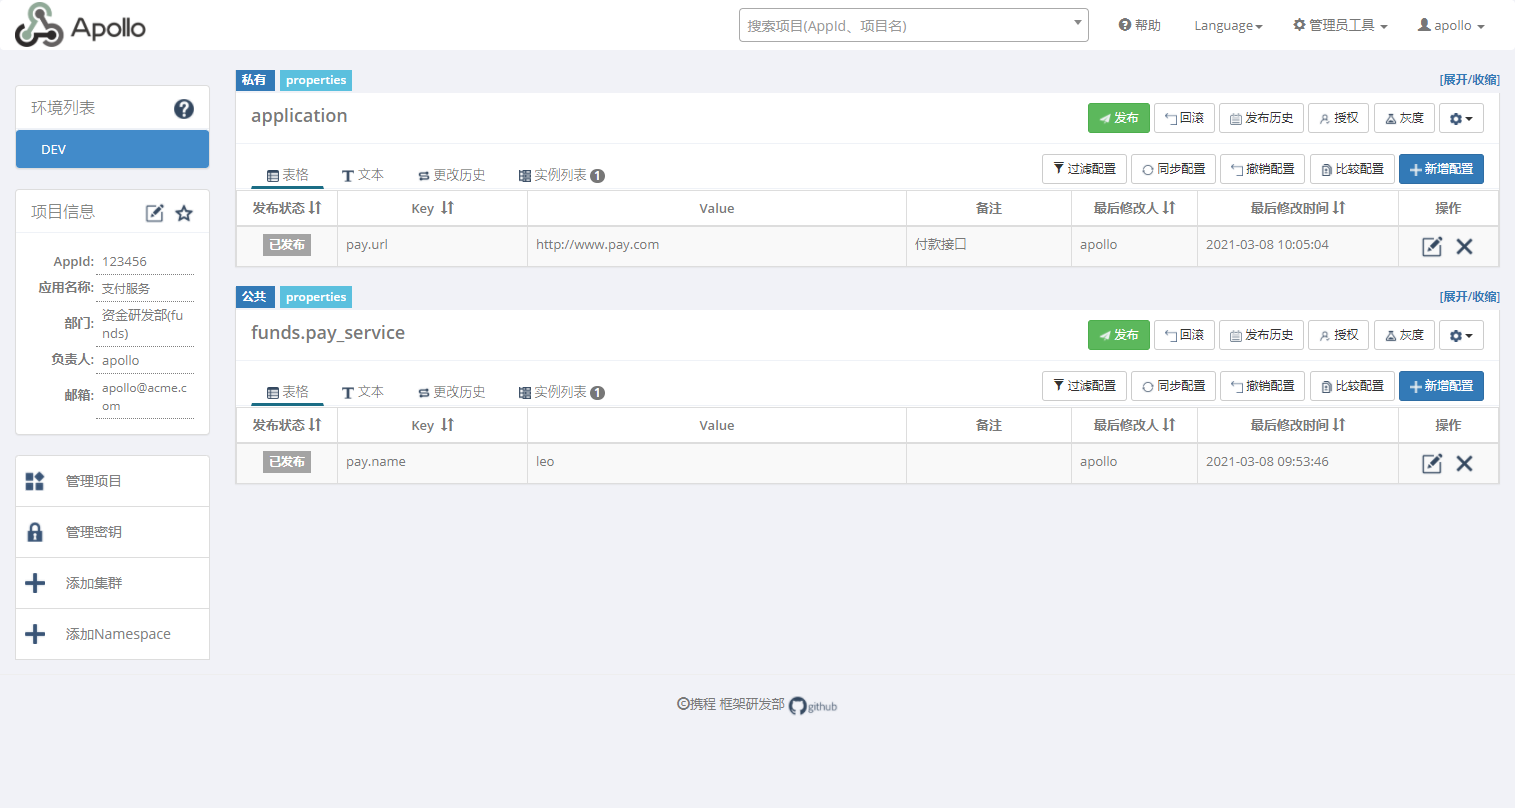
4.5 配置中心截图

4.6 依次启动spring-cloud-x,apollo相关服务,spring-cloud-config-client
在浏览器输入:http://localhost:18888/getConfig,返回:

4.7 修改配置中心pay.url为http://www.qrpay.com,同时观察spring-cloud-config-client后台日志输出
2021-03-08 11:26:42.510 INFO 2624 --- [Apollo-Config-2] c.f.a.s.p.AutoUpdateConfigChangeListener : Auto update apollo changed value successfully, new value: http://www.qrpay.com, key: pay.url, beanName: configClientController, field: com.x.demo.config.client.controller.ConfigClientController.payUrl
可以看到配置中心修改后(记得点发布),Client实时刷新了配置。
再次调用:http://localhost:18888/getConfig
