2021年双十一我买了三年的阿里云服务器,主要用途是练习搭网站、建博客、写微信小程序,写Python爬虫,运行一些挂机脚本。因为近些年我一直在用Archlinux,已经熟悉这个发行版,所以首先就想把ECS上的镜像系统换成Archlinux。网上相关的资料很零散,我在这里集中整理一下。
一、下载安装ISO,引导至liveCD。我为ECS选择的初始系统镜像是Ubuntu,其他的如Centos系统中都没分别,下载iso文件到根目录。
#wget -o /arch.iso https://mirrors.tuna.tsinghua.edu.cn/archlinux/iso/latest/archlinux-2021.11.01-x86_64.iso
vi /boot/grub/grub.cfg 在第一个menuentry前添加下面的内容:
set timeout=3

menuentry "Archlinux Live (x86_64)" {
insmod iso9660
set isofile=/arch.iso
loopback lo0 $isofile
linux (lo0,msdos2)/arch/boot/x86_64/vmlinuz-linux archisolabel=ARCH_202111 img_dev=/dev/vda1 img_loop=$isofile
initrd (lo0,msdos2)/arch/boot/x86_64/initramfs-linux.img
}
需要 lsblk 确认目标硬盘设备路径,我的是/dev/vda1
保存后重启,再通过云服务器管理控制台的远程连接以VNC方式登录实例,可能会启动失败,显示报错信息。没关系,再次重启后在grub菜单选择第一项按C键进入命令行。
grub > ls
grub > set isofile=/arch.iso
grub > loopback lo0 $isofile
grub > ls (lo0)
确认挂载ISO的分区名是不是(lo0,msdos2),并继续输入linux ……和initrd……两行命令。注意上面的路径如果不正确可以先用ls找到实际的路径。最后运行
grub > boot
引导进入liveCD系统后挂载硬盘:# mount -o rw,remount /dev/vda1
# cd /run/archiso/img_dev
# ls
# rm -rf bin boot dev etc ... 删除Ubuntu系统的所有目录,只保留arch.iso
二、按官方安装教程执行基本安装步骤。
# ls /sys/firmware/efi/efivars # 不必期待阿里云会提供EFI分区,引导方式必然是BIOS
# timedatectl set-ntp true
# mount /dev/vda1 /mnt
# vim /etc/pacman.d/mirrorlist
Server = http://mirrors.tuna.tsinghua.edu.cn/archlinux/$repo/os/$arch
Server = https://mirrors.tuna.tsinghua.edu.cn/archlinux/$repo/os/$arch
# pacstrap /mnt base linux linux-firmware base-devel
# genfstab -L /mnt >> /mnt/etc/fstab
# arch-chroot /mnt
# ln -sf /usr/share/zoneinfo/Asia/Chongqing /etc/localtime
# hwclock --systohcvi /etc/locale.gen and uncomment en_US.UTF-8 UTF-8 以及简体中文后 # locale-gen 生成语言环境。
vi /etc/locale.conf
LANG=en_US.UTF-8
# pacman -S grub vim dhcpcd
# 编辑/etc/hostname填入主机名字
# 编辑/etc/hosts修改hosts文件
127.0.0.1 localhost
::1 localhost
127.0.1.1 hostname.localdomain hostname
140.82.112.3 github.com
# grub-install --target=i386-pc /dev/vda
# 安装GRUB到硬盘
# grub-mkconfig -o /boot/grub/grub.cfg
# passwd # 一定要给root设置密码
# exit   # 退出chroot环境
# reboot       重启后仍然从VNC登入实例
# systemctl start systemd-networkd
# systemctl enable systemd-networkd
# systemctl enable dhcpcd     并且start
一般此时网络就可用了,其他设置——例如 ip link set ens3 up 以及 编辑/etc/resolv.conf 都是没必要的。
三、个性化配置
# useradd -m -g users -G wheel,ftp,http -s /bin/bash 新的用户
# passwd 新的用户
# pacman -S archlinux-keyring archlinuxcn-keyring axel openssh
编辑 /etc/pacman.conf 添加 XferCommand = /usr/bin/axel -o %o %u 以及
[archlinuxcn]
Server = https://mirrors.tuna.tsinghua.edu.cn/archlinuxcn/$arch
# pacman -Syy
# pacman -S yay
# yay --aururl "https://aur.tuna.tsinghua.edu.cn" --save      (此镜像已停)
# yay -S xorg-server xorg-xinit net-tools i3-gaps alacritty rofi xf86-video-mesa adobe-source-han-sans-cn-fonts adobe-source-han-serif-cn-fonts
# fc-cache -fv
$ cp /etc/X11/xinit/xinitrc ~/.xinitrc
在~/.xinitrc文件尾部添加
export.UTF-8 export LANGUAGE=zh_CN:en_US
export GTK_IM_MODULE=fcitx
export QT_IM_MODULE=fcitx
export XMODIFIERS="@im=fcitx"
exec i3
- 中文字体相关:Localization (简体中文)
$ cp /usr/share/doc/alacritty/example/alacritty.yml $HOME/.config/alacritty/alacritty.yml
修改 font 为Source Code Pro
- 基于Chromium,保护个人隐私的轻量化浏览器
wget http://www.srware.net/downloads/iron-linux-64.tar.gz
解压后执行 ./iron-linux-64.sh 即可安装
sudo mv iron-linux-64 /opt/
执行程序是 /opt/iron-linux-64/chrome,将其绑定到i3的快捷键
bindsym $mod+Ctrl+G exec --no-startup-id /opt/iron-linux-64/chrome
yay -S brave-bin
执行程序是 /usr/bin/brave,将其绑定到i3的快捷键
bindsym $mod+Ctrl+G exec --no-startup-id /usr/bin/brave
- 编辑hosts文件实现屏蔽广告 http://winhelp2002.mvps.org/hosts.htm
Blocks them on all software on your computer at the OS level.
The only inconvenient is that you need to do it manually, but you can subscribe to their newsletter and they tell you when a new version is released.
- 系统备份与还原:https://wiki.archlinux.org/title/Full_system_backup_with_tar
- 挂机脚本:https://github.com/wudongdefeng/jd-base/wiki/Linux
内核开启TCP优化BBR算法:
1) 使用命令 modinfo tcp_bbr 查看内核模块是否存在。
2) sudo modprobe tcp_bbr
3) 下次随系统启动自动开启
echo "tcp_bbr" > /etc/modules-load.d/80-bbr.conf
echo "net.ipv4.tcp_congestion_control=bbr" >> /etc/sysctl.d/80-bbr.conf
echo "net.core.default_qdisc=fq" >> /etc/sysctl.d/80-bbr.conf
立即加载 sysctl -p
检查是否成功 sysctl net.ipv4.tcp_congestion_control
四、配置sshd服务和远程桌面
1.编辑/etc/ssh/sshd_config 后 # sshd -t 无误再启动sshd.service
首先修改 Port,然后将所有HostKey开头的行取消注释。
添加 AllowUsers 登录账户
PermitRootLogin no
PubkeyAuthentication yes
AuthorizedKeysFile /home/登录账户/.ssh/authorized_keys
PasswordAuthentication no
AuthenticationMethods publickey
PrintMotd yes # 可以在/etc/motd 中写入欢迎界面的字符,例如:
    ___              __    ___
   /   |  __________/ /_  / (_)___  __  ___  __
  / /| | / ___/ ___/ __ \/ / / __ \/ / / / |/_/
 / ___ |/ /  / /__/ / / / / / / / / /_/ />  <
/_/  |_/_/   \___/_/ /_/_/_/_/ /_/\__,_/_/|_|
在客户端sshkeygen生成公钥后拷贝到~/.ssh/authorized_keys 可以拷贝多个,每个公钥是一行。客户端保存私钥文件,每次登录时使用私钥即可。
在云服务器管理控制台为实例配置安全组规则,仅允许指定IP通过自定义TCP访问上述Port。
由于我用的宽带IP地址不固定,所以有必要每次ssh登录后显示本地IP地址,在~/.bashrc中添加如下代码即可。
if [ "$SSH_CONNECTION" != '' -a "$TERM" != 'linux' ]; then
    echo "Current User's IP: `echo $SSH_CONNECTION | awk '{print $1}'`"
fi
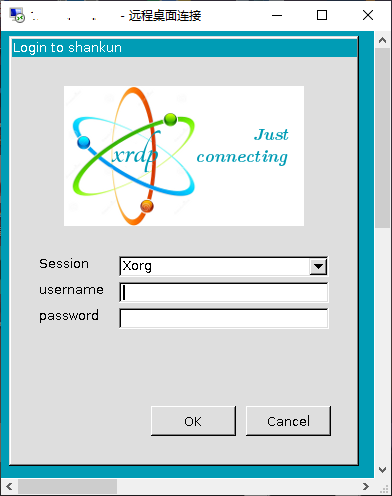
2.通过xrdp协议远程桌面连接服务器
注意:不用安装lightdm等任何DM,仅安装 xrdp 和 xorgxrdp
Add allowed_users=anybody to /etc/X11/Xwrapper.config to allow anybody to start an X server.
Enable xrdp.service 并为3389端口配置安全组规则。在Windows客户端使用远程桌面连接即可进入XRDP的登录框,选择Xorg登录即可进入桌面。
最近在Windows10 的WSL2中安装了Archlinux,发现不支持systemd,使用图形界面还是有点麻烦,可以用以上的xrdp+mstsc方式。
https://zhuanlan.zhihu.com/p/51270874
五、i3wm配置
待完善。