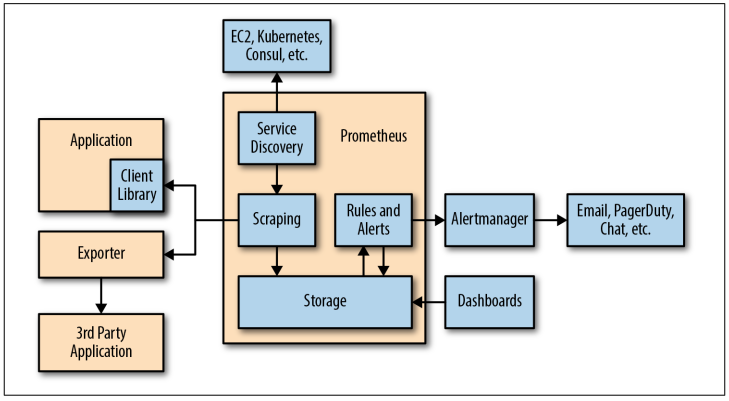
Prometheus是一个开源的,基于metrics(度量)的一个开源监控系统,它有一个简单而强大的数据模型和查询语言,让我们分析应用程序。Prometheus诞生于2012年主要是使用go语言编写的,并在Apache2.0许可下获得许可,目前有大量的组织正在使用Prometheus在生产。2016年,Prometheus成为云计算组织(CNCF)第二个成员。
Prometheus部署
创建 prometheus用户
下载对应平台的安装包解压的目录
hostname$ tar xf prometheus-2.10.0.linux-amd64.tar.gz
hostname$ mv prometheus-2.10.0.linux-amd64 /opt/
启动脚本

hostname$ sudo vim  /usr/lib/systemd/system/prometheus.service
[Unit]
Description=Prometheus instance
Wants=network-online.target
After=network-online.target
After=postgresql.service mariadb.service mysql.service

[Service]
User=prometheus
Group=prometheus
Type=simple
Restart=on-failure
WorkingDirectory=/opt/prometheus/
RuntimeDirectory=prometheus
RuntimeDirectoryMode=0750
ExecStart=/opt/prometheus/prometheus
--storage.tsdb.retention=15d
--config.file=/opt/prometheus/prometheus.yml
--web.max-connections=512
--web.read-timeout=5m
--storage.tsdb.path="/opt/data/prometheus"
--query.timeout=2m
 --query.max-concurrency=200
LimitNOFILE=10000
TimeoutStopSec=20

[Install]
WantedBy=multi-user.target
启动参数说明
- --web.read-timeout=5m 请求连接的最大等待时间, 防止太多的空闲链接,占用资源
- --web.max-connections=512 最大链接数
- --storage.tsdb.retention=15d prometheus开始采集监控数据后会存在内存中和硬盘中, 太长的话,硬盘和内存都吃不消,太短的话,历史数据就没有了,设置15天为宜
- --storage.tsdb.path="/opt/data/prometheus 存储数据路径,这个很重要,不要随便放在一个地方,会把/根目录塞满
- --query.timeout=2m --query.max-concurrency=200 防止太多的用户同时查询,也防止单个用户执行过大的查询而一直不退出
配置文件

# my global config
global:
  scrape_interval:     15s #设置采集数据的频率,默认是1分钟.
  evaluation_interval: 15s #每15秒评估一次规则。默认值是每1分钟一次
  # scrape_timeout is set to the global default (10s).

# Alertmanager configuration
alerting:
  alertmanagers:
  - static_configs:
    - targets:
      # - alertmanager:9093

# Load rules once and periodically evaluate them according to the global 'evaluation_interval'.
rule_files:
  # - "first_rules.yml"
  # - "second_rules.yml"

scrape_configs:
  # The job name is added as a label `job=<job_name>` to any timeseries scraped from this config.
  - job_name: 'prometheus'

    static_configs:
    - targets: ['192.168.48.130:9090']  # 设置本机的ip
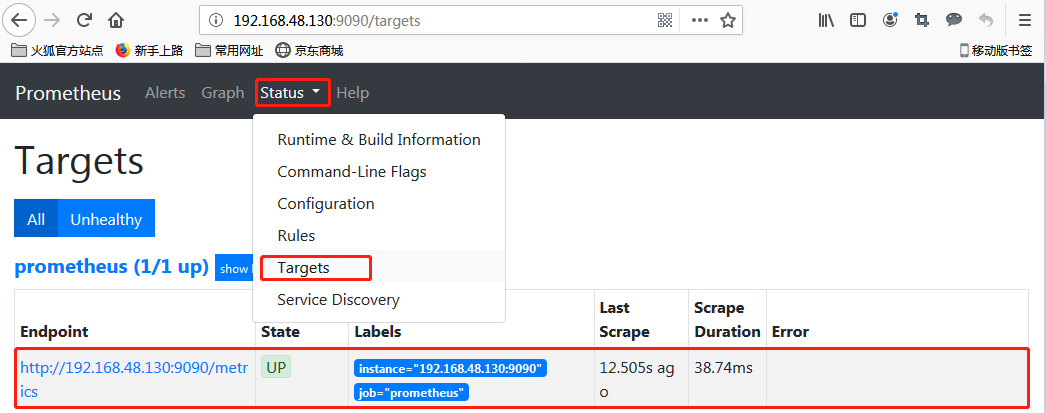
浏览器访问9090端口,Prometheus已经正常运行了
Node_exporter部署
Prometheus社区为我们提供了 node_exporter程序来采集被监控端的系统信息,下载在c1.heboan.com 节点上进行部署
创建 prometheus用户
下载对应平台的安装包解压的目录
hostname$ tar xf node_exporter-0.18.1.linux-amd64.tar.gz
hostname$ mv node_exporter-0.18.1.linux-amd64 /opt/node_exporter

hostname$ sudo vim /usr/lib/systemd/system/node_exporter.service
[Unit]
Description=node_exporter
Documentation=https://prometheus.io/
After=network.target

[Service]
Type=simple
User=prometheus
ExecStart=/opt/node_exporter/node_exporter
Restart=on-failure

[Install]
WantedBy=multi-user.target
node_exporter默认监听9100端口提供http服务
$ curl http://c1.heboan.com:9100/metrics
....
# HELP node_memory_MemFree_bytes Memory information field MemFree_bytes.   #这行表示说明监控项的意思
# TYPE node_memory_MemFree_bytes gauge  #这行说明监控的是数据类型是gauuge
node_memory_MemFree_bytes 1.619521536e+09   #这行是监控项 k/v


node_export搜集了很多监控项,每个监控项都有这三行
node-exporter配置好了以后,我们就需要把它接入到 prometheus 中去,修改prometheus.yml,然后重启prometheus
scrape_configs:
  ...
  - job_name: 'aliyun'
    static_configs:
    - targets: ['c1.heboan.com:9100']   #这里可以写多个node_export地址
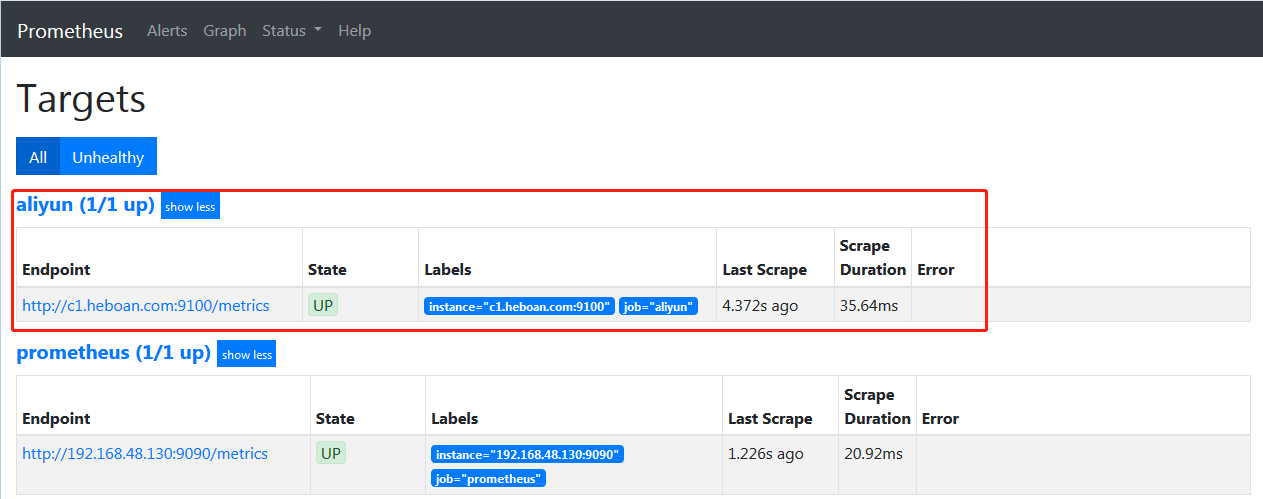
然后访问prometheus web界面,可以看到c1.heboan.com的已经被监控上了
按以上步骤把 c2.heboan.com也监控上
查看监控数据
上面我们已经把c1.heboan.com机器部署了node_export来采集系统信息,并且接入到了prometheus , 现在我们可以在prometheus web 界面通过查询语言来获取我们想要的监控项数据
举个栗子: 获取被监控端5分钟内cpu使用率
计算公式: (1-5分钟空闲增量 / 5分钟总增量) * 100
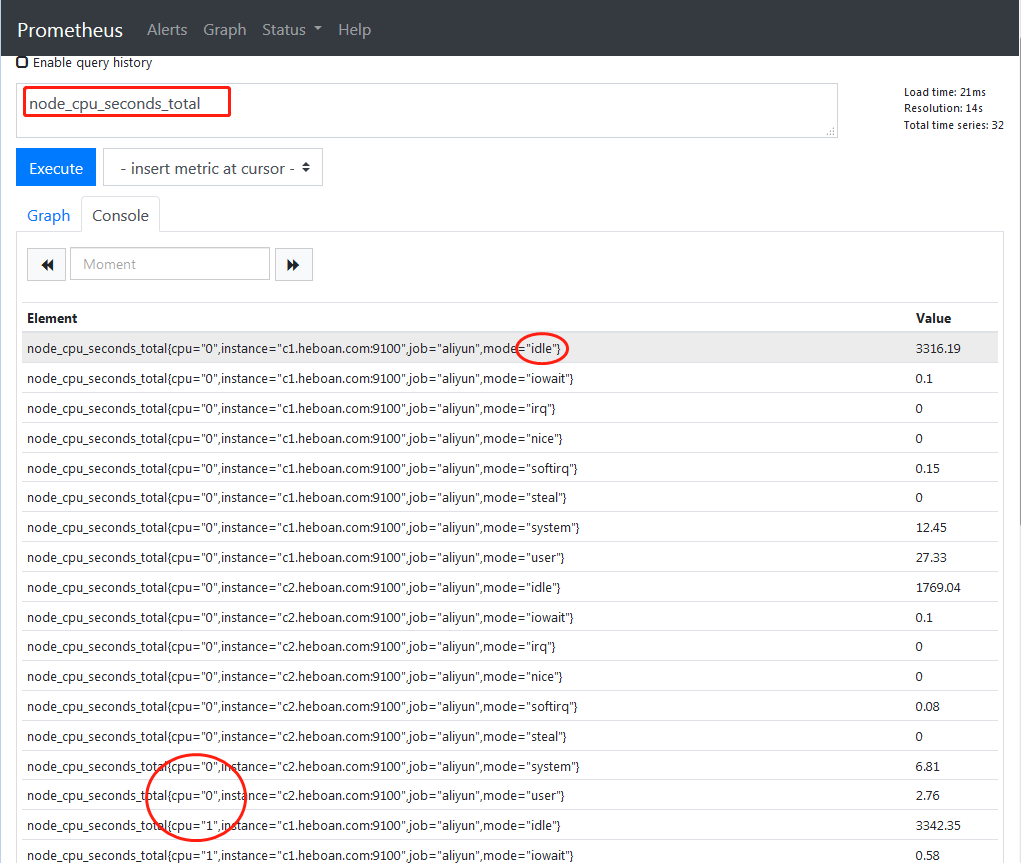
首先查出cpu工作运行的所有时间, cpu是分了system、iowait、irq、user、idle...这些加起来的时间就是运行的总时间, 而且我们看到这些是按每核来计算的
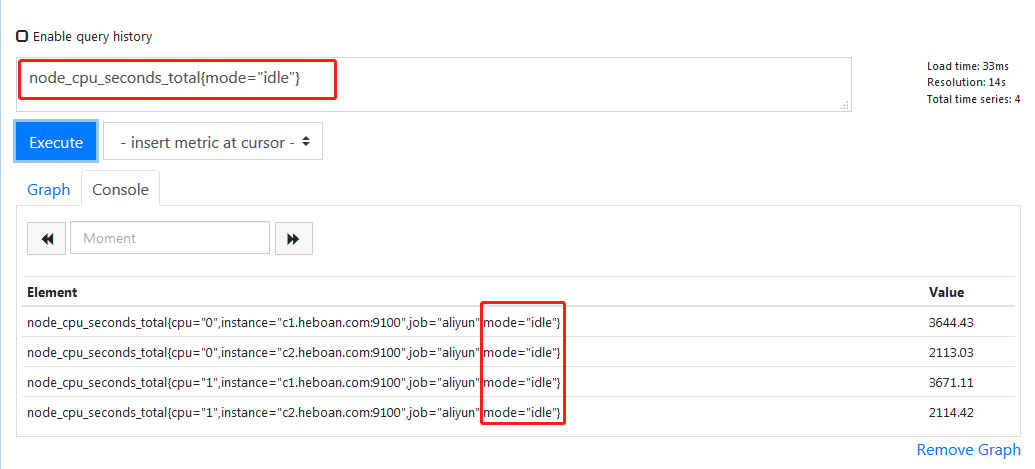
根据label过滤出idle(空闲时间)
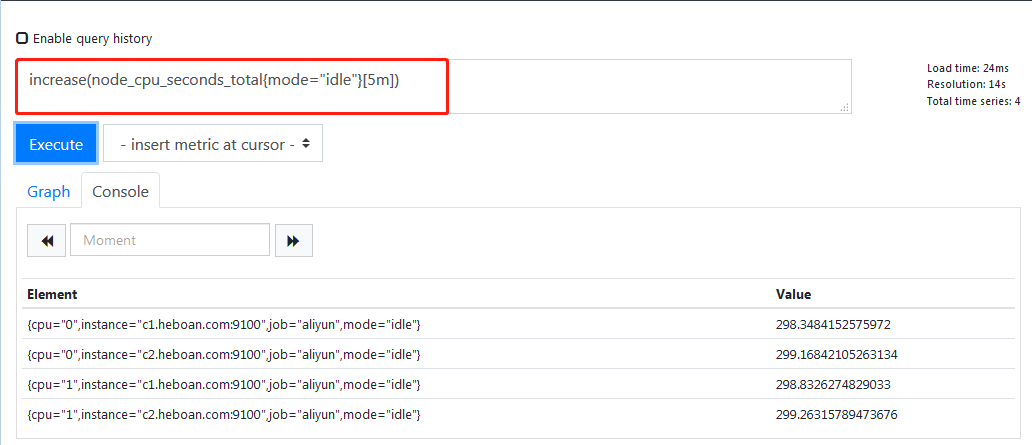
计算出5分钟内的增量
因为这是分开多核计算,所以我们需要把它用sum加起来

虽然加起来了,但是这是把所有机器的所有核加起来了,而我们需要时把属于一台机器的所有核心加起来,因此我们需要用到by()

上面已经算出了5 分钟内idle(CPU空闲)的增量,那cpu总的时间增量就是
#不加过滤条件
sum(increase(node_cpu_seconds_total[5m])) by (instance)
再根据公式计算即可

可以点击Graph查看图标走势

这里的图表都是零时的,我们要向保存想下,随时想看,就可以用Grafana
Grafana部署使用
安装Grafana
# 官网下载安装包, 例如: grafana-6.2.5-1.x86_64.rpm
# 然后本地安装
yum localinstall grafana-6.2.5-1.x86_64.rpm

# 启动
systemctl start grafana-server
Grafana监听端口是3000,我们访问web 界面, 默认的账号密码是admin/admin, 登录后会要求修改密码,自行修改即可, 登录进入之后点击 "Add data source" 添加数据源, 选择"prometheus"
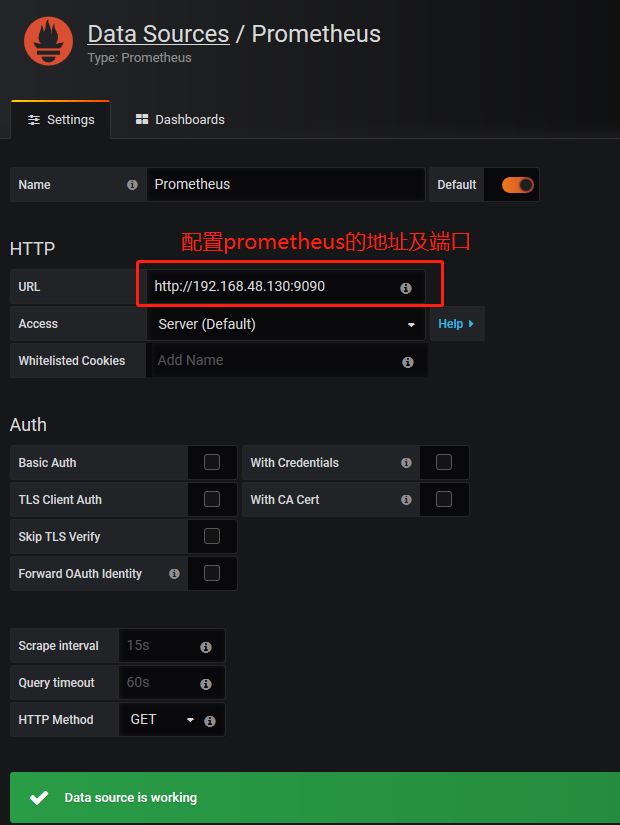
添加一个dashboard , 回到Home Dashboard 点击"New dashboard"---"Add Query"

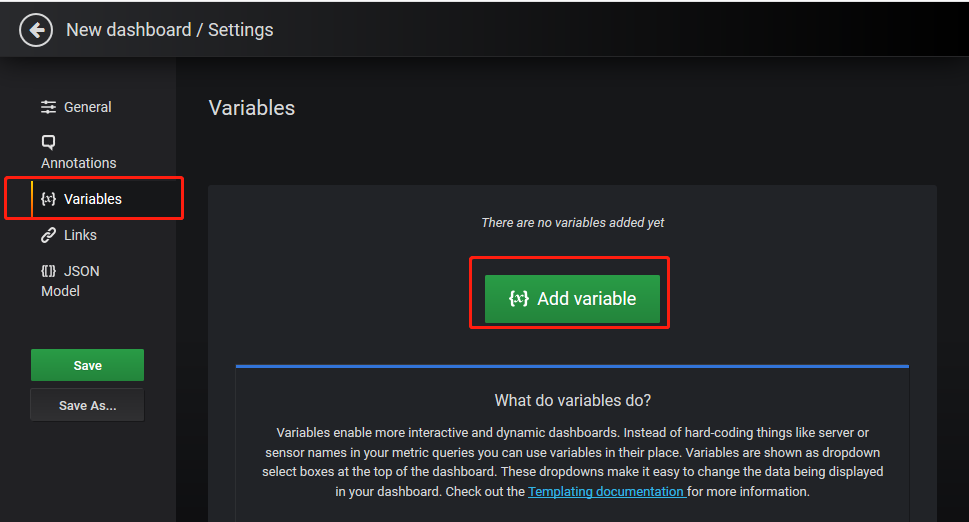
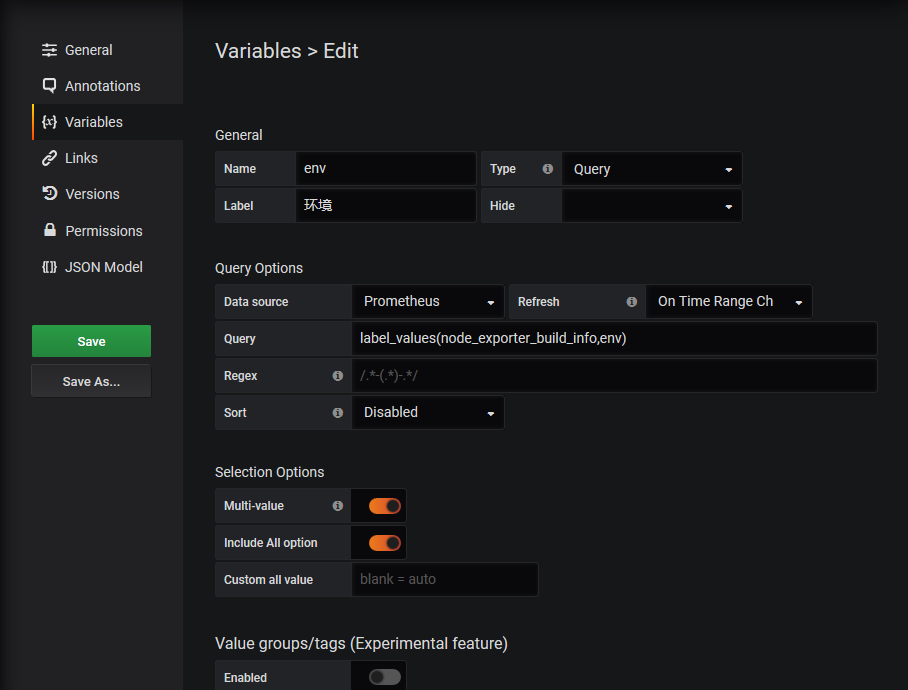
点击齿轮图标,进入面板设置,来添加变量
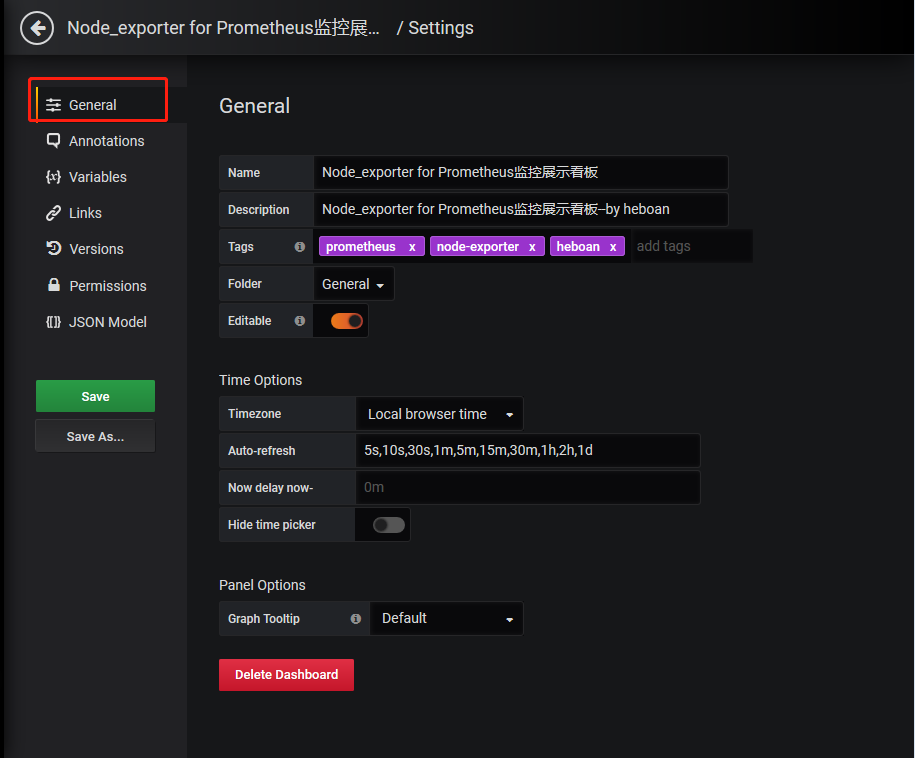
General
设置几个变量
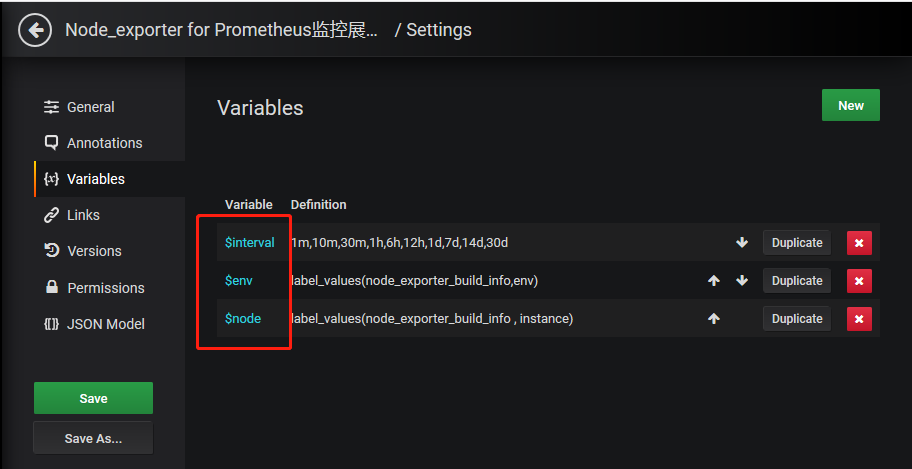
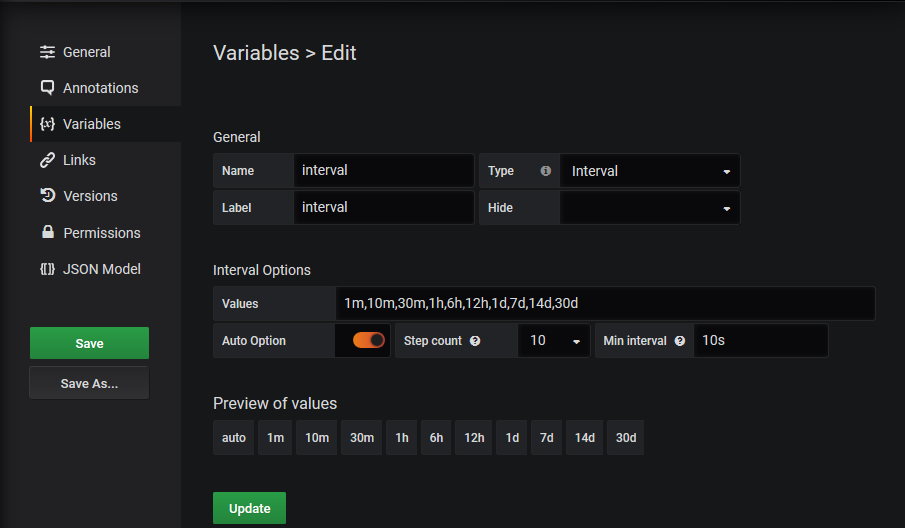
$interval
$env
$node

保存面板后查看,效果如下

现在我们来画图,cpu的使用率, 点击 add_panel图标--选择 "Choose Visualization"
数据源选择prometheus,之前我们配置的数据源, query语句如下
 (1- sum(increase(node_cpu_seconds_total{mode="idle", instance=~"$node"}[5m]))/ sum(increase(node_cpu_seconds_total{instance=~"$node"}[5m]))) * 100

#$node是我们之前配置的变量,来匹配每个节点

Visualization
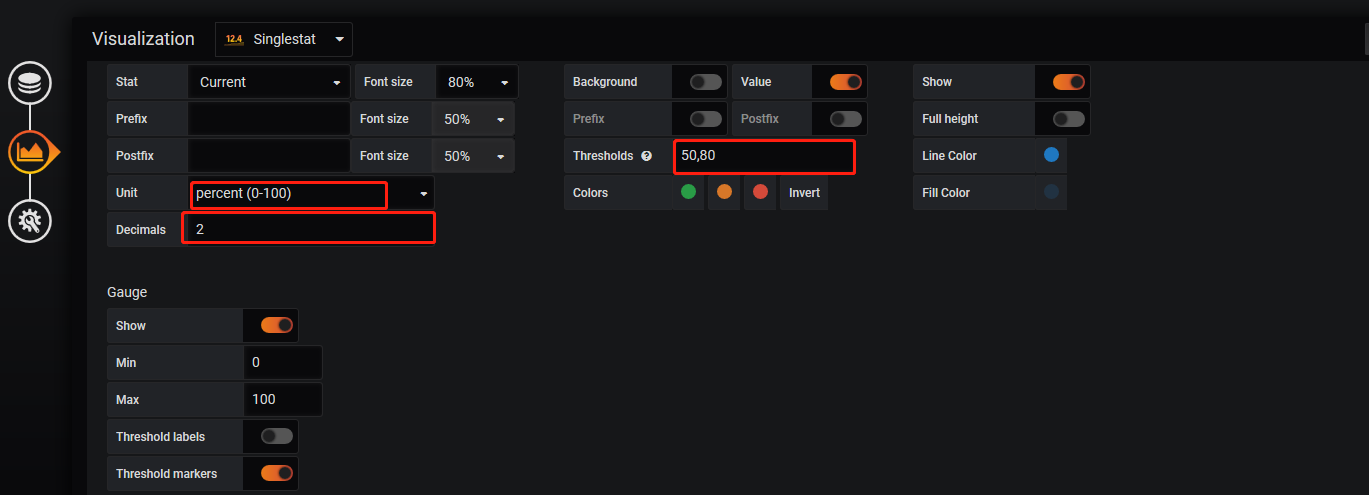
General

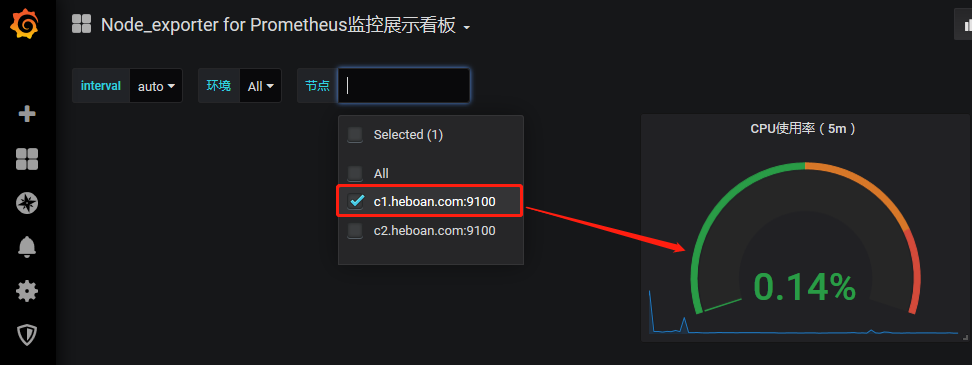
最后查看效果如下
Alertmanager告警
有了监控项后,还不够,当监控项出现问题后还需要发出告警通知, 这个功能需要Alertmanager角色来处理
prometheus是由我们决定什么情况下该报警,然后prometheus发出警报,被发送给Alermanager, Alertmanager接受到警报后将警报进行分组节流进行通知

首先我们先在prometheus server 上配置警报规则

...
rule_files:
  - "first_rules.yml"

...
/opt/prometheus/prometheus.yml
groups:
- name: hostStatsAlert
  rules:
  - alert: hostCpuUsageAlert
    expr:  1 - sum(increase(node_cpu_seconds_total{mode="idle"}[5m])) by (instance) / sum(increase(node_cpu_seconds_total[5m])) by (instance) > 0.8
    for: 1m


#当5分钟内cpu使用率大于80%并且持续1分钟出发警报
进行cpu压测,因为是双核的,所以打开2个c1.heboan.com的终端,执行以下命令压测
time echo "scale=50000; 4*a(1)" | bc -l -q
查看下图标
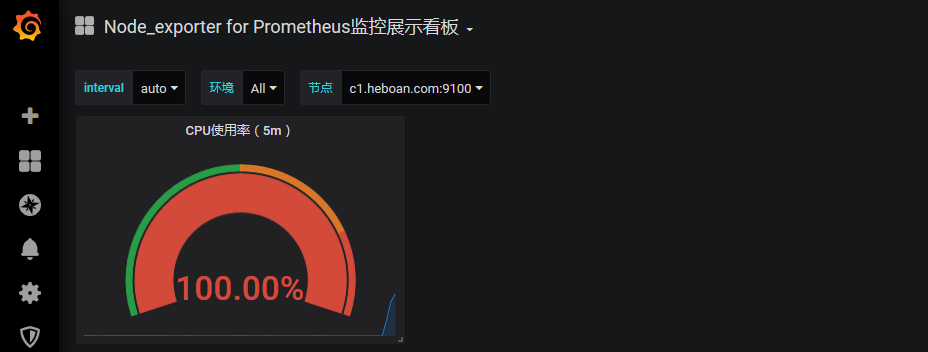
看下prometheus web界面已经出发警报了
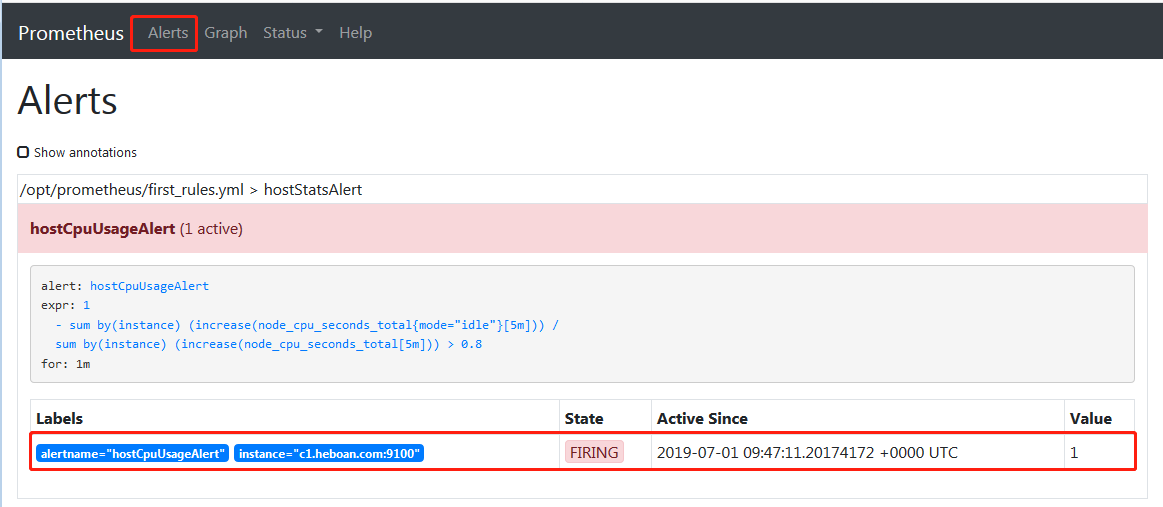
要想进行告警通知,比如邮件,我们就要用到Alertmanager了。我在prometheus那台服务器上安装Alertmanager, 实际上它可以安装在任何其他地方,主要网络OK就行
hostname$ tar xf alertmanager-0.17.0.linux-amd64.tar.gz
hostname$ mv  alertmanager-0.17.0 /opt/ alertmanager
/opt/alertmanager/alertmanager.yml
global:
  resolve_timeout: 5m
  smtp_smarthost: 'smtp.qq.com:25'
  smtp_from: 'sellsa@qq.com'
  smtp_auth_username: 'sellsa@qq.com'
  smtp_auth_password: '邮箱授权码'

route:
  group_by: ['alertname']
  group_wait: 10s
  group_interval: 10s
  repeat_interval: 1h
  receiver: 'email'


receivers:
- name: 'email'
  email_configs:
  - to: 'heboan@qq.com'
启动Alertmanage, 它监听9093端口
cd /opt/alertmanager
./alertmanager --config.file="alertmanager.yml"
prometheus.yml配置警报推送到那个Alertmanager
...
# Alertmanager configuration
alerting:
  alertmanagers:
  - static_configs:
    - targets: ['localhost:9093']

...
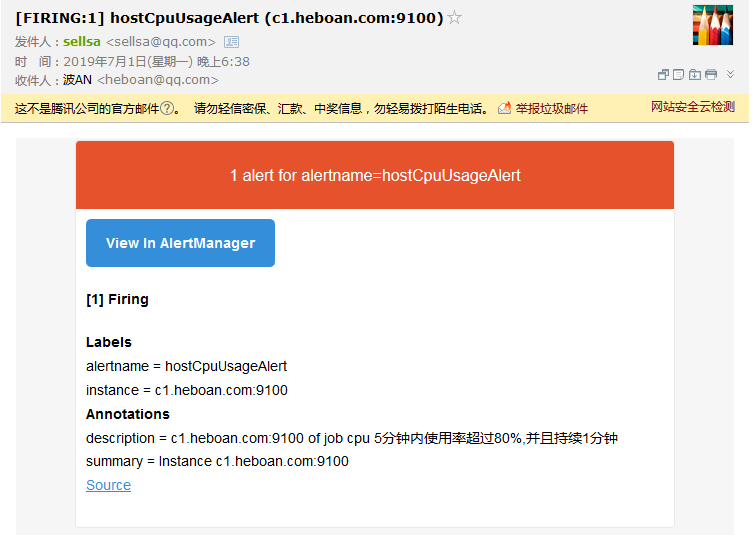
最后在进行cpu压测,我们就可以收到告警邮件了

这个告警信息貌似并不相信,没有具体的描述信息, 我们可以修改下first_rules.yml添加些信息
groups:
- name: hostStatsAlert
  rules:
  - alert: hostCpuUsageAlert
    expr:  1 - sum(increase(node_cpu_seconds_total{mode="idle"}[5m])) by (instance) / sum(increase(node_cpu_seconds_total[5m])) by (instance) > 0.8
    for: 1m
    annotations:
      description: '{{ $labels.instance }} of job {{ $labels.job }} cpu 5分钟内使用率超过80%,并且持续1分钟'
      summary: 'Instance {{ $labels.instance }}'
