今天结合之前做过的一些拖拽的例子来对这个方面进行一些总结,这里主要用两个例子来说明在WPF中如何使用拖拽进行操作,元素拖拽是一个常见的操作,第一个拖拽的例子是将ListBox中的子元素拖拽到ListView的某一个节点,从而将该子元素作为当前节点的子节点。第二个例子就是将ListView的某一项拖拽到另外一项上从而使两个子项位置互换,这两个例子的原理类似,实现细节上有所差别,下面就具体分析一下这些细节。
DEMO1
一 示例截图

图一 示例一截图
二 重点原理分析
2.1 前台代码分析
这一部分主要是主界面的分析,主要包括两个部分一个是左侧的ListBox另外一个就是右侧的TreeView,在Treeview上设置了两个事件,一个是DragDrop
.DragOver事件,另外一个是DragDrop.Drop事件,同时设置TreeView的AllowDrop属性为true,关于这两个事件后面再做重点分析。首先看看前台代码:
<Window x:Class="DragDrop.MainWindow"
        xmlns="http://schemas.microsoft.com/winfx/2006/xaml/presentation"
        xmlns:x="http://schemas.microsoft.com/winfx/2006/xaml"
        xmlns:d="http://schemas.microsoft.com/expression/blend/2008"
        xmlns:mc="http://schemas.openxmlformats.org/markup-compatibility/2006"
        xmlns:local="clr-namespace:DragDrop"
        mc:Ignorable="d"
        Title="MainWindow" Height="350" Width="525">
    <Window.Resources>
        <DataTemplate x:Key="listBoxTemplate" DataType="{x:Type local:DataItem}">
            <TextBlock Text="{Binding Header}"/>
        </DataTemplate>
        <HierarchicalDataTemplate x:Key="treeViewTemplate" DataType="{x:Type local:DataItem}" ItemsSource="{Binding Items}">
            <TextBlock Text="{Binding Header}"/>
        </HierarchicalDataTemplate>
    </Window.Resources>
    <Grid x:Name="mTopLevelGrid">
        <Grid.ColumnDefinitions>
            <ColumnDefinition Width="*"/>
            <ColumnDefinition Width="10"/>
            <ColumnDefinition Width="*"/>
        </Grid.ColumnDefinitions>
        <ListBox x:Name="mListBox" Grid.Column="0" ItemsSource="{Binding Source={x:Static local:Data.Instance}, Path=ListBoxItems}" ItemTemplate="{StaticResource listBoxTemplate}"/>
        <TreeView x:Name="mTreeView" Grid.Column="2" ItemsSource="{Binding Source={x:Static local:Data.Instance}, Path=TreeViewItems}" ItemTemplate="{StaticResource treeViewTemplate}"
                  AllowDrop="True" DragDrop.DragOver="OnDragOver" DragDrop.Drop="OnDrop"/>
    </Grid>
</Window>
2.2 后台代码分析
下面重点分析后台代码,在构造函数中我们首先为ListBox订阅了两个事件,一个是:PreviewMouseMove,另外一个是QueryContinueDrag,关于第一个事件就不做过多的说明,第二个事件是QueryContinueDrag:QueryContinueDrag在MSDN上的解释是在拖放操作期间键盘或鼠标按钮的状态改变时发生。这里在拖拽过程中由于鼠标的位置一直在移动,所以该函数会一直执行,那么我们来分析一下,这两个函数中到底做了些什么事情。
private void OnPreviewListBoxMouseMove(object sender, MouseEventArgs e)
        {
            if (Mouse.LeftButton != MouseButtonState.Pressed)
                return;

            Point pos = e.GetPosition(mListBox);
            HitTestResult result = VisualTreeHelper.HitTest(mListBox, pos);
            if (result == null)
                return;

            ListBoxItem listBoxItem = Utils.FindVisualParent<ListBoxItem>(result.VisualHit); // Find your actual visual you want to drag
            if (listBoxItem == null || listBoxItem.Content != mListBox.SelectedItem || !(mListBox.SelectedItem is DataItem))
                return;

            DragDropAdorner adorner = new DragDropAdorner(listBoxItem);
            mAdornerLayer = AdornerLayer.GetAdornerLayer(mTopLevelGrid); // Window class do not have AdornerLayer
            mAdornerLayer.Add(adorner);

            DataItem dataItem = listBoxItem.Content as DataItem;
            DataObject dataObject = new DataObject(dataItem.Clone());

            System.Windows.DragDrop.DoDragDrop(mListBox, dataObject, DragDropEffects.Copy);

            mStartHoverTime = DateTime.MinValue;
            mHoveredItem = null;
            mAdornerLayer.Remove(adorner);
            mAdornerLayer = null;
        }
这段代码是为ListBox订阅的PreviewMouseMove事件,首先要获取到将要拖拽的ListBoxItem对象,获取到这个对象之后我们需要为mTopLevelGrid的AdornerLayer添加一个Adorner对象从而在拖拽的时候显示当前对象。然后我们便启动拖拽操作了 System.Windows.DragDrop.DoDragDrop(mListBox, dataObject, DragDropEffects.Copy); 只有启动了拖拽操作,后面的TreeView才能够执行相应的DragOver和Drop事件,在完成整个拖拽操作后才能够执行这句代码后面的释放当前对象的一些操作,这个就是整个大体的流程。
在DragOver事件中我们只做了一件事就是当拖拽的对象移动到TreeViewItem的上面时,当前的TreeViewItem处于选中状态,而在Drop事件中我们需要将拖拽的对象作为子元素添加到当前的TreeViewItem的下一级,这两个过程最重要的都是通过VisualTreeHelper的HitTest(命中操作)来获取到当前的TreeViewItem对象。这个也是非常重要的一个部分,下面贴出具体的代码。
 private void OnDragOver(object sender, DragEventArgs e)
        {
            e.Effects = DragDropEffects.None;

            Point pos = e.GetPosition(mTreeView);
            HitTestResult result = VisualTreeHelper.HitTest(mTreeView, pos);
            if (result == null)
                return;

            TreeViewItem selectedItem = Utils.FindVisualParent<TreeViewItem>(result.VisualHit);
            if (selectedItem != null)
                selectedItem.IsSelected = true;

            e.Effects = DragDropEffects.Copy;
        }

        private void OnDrop(object sender, DragEventArgs e)
        {
            Point pos = e.GetPosition(mTreeView);
            HitTestResult result = VisualTreeHelper.HitTest(mTreeView, pos);
            if (result == null)
                return;

            TreeViewItem selectedItem = Utils.FindVisualParent<TreeViewItem>(result.VisualHit);
            if (selectedItem == null)
                return;

            DataItem parent = selectedItem.Header as DataItem;
            DataItem dataItem = e.Data.GetData(typeof(DataItem)) as DataItem;
            if (parent != null && dataItem != null)
                parent.Items.Add(dataItem);
        }
另外一个重要的部分就是在拖拽的过程中我们需要不断去更新当前Adorner更新位置,这里我们通过重写OnRender函数来实现这一个目标。
public class DragDropAdorner : Adorner
    {
        public DragDropAdorner(UIElement parent)
            : base(parent)
        {
            IsHitTestVisible = false; // Seems Adorner is hit test visible?
            mDraggedElement = parent as FrameworkElement;
        }

        protected override void OnRender(DrawingContext drawingContext)
        {
            base.OnRender(drawingContext);

            if (mDraggedElement != null)
            {
                Win32.POINT screenPos = new Win32.POINT();
                if (Win32.GetCursorPos(ref screenPos))
                {
                    Point pos =this.PointFromScreen(new Point(screenPos.X, screenPos.Y));
                    Rect rect = new Rect(pos.X, pos.Y, mDraggedElement.ActualWidth, mDraggedElement.ActualHeight);
                    drawingContext.PushOpacity(1.0);
                    Brush highlight = mDraggedElement.TryFindResource(SystemColors.HighlightBrushKey) as Brush;
                    if (highlight != null)
                        drawingContext.DrawRectangle(highlight, new Pen(Brushes.Transparent, 0), rect);
                    drawingContext.DrawRectangle(new VisualBrush(mDraggedElement),
                        new Pen(Brushes.Transparent, 0), rect);
                }
            }
        }

        FrameworkElement mDraggedElement = null;
    }
另外一点需要注意的是在ListBox订阅的OnQueryContinueDrag事件中必须不停执行刷新的操作,否则当前的拖拽对象是不能够实时进行更新操作的,这一点非常重要。
private void OnQueryContinueDrag(object sender, QueryContinueDragEventArgs e)
        {
           mAdornerLayer.Update();
           UpdateTreeViewExpandingState();
        }
这个示例就介绍到这里,关键是对整体的拖拽有一个概念性的理解,接着我会介绍下面的示例,介绍完毕之后会对两者之间进行一个对比,对比之后会进一步对整个拖拽过程进行总结。
DEMO2
这一部分是一个ListView里面的Item的拖拽操作,通过拖拽操作能够改变元素的位置,从而实现自定义排序的结果。
一 示例截图
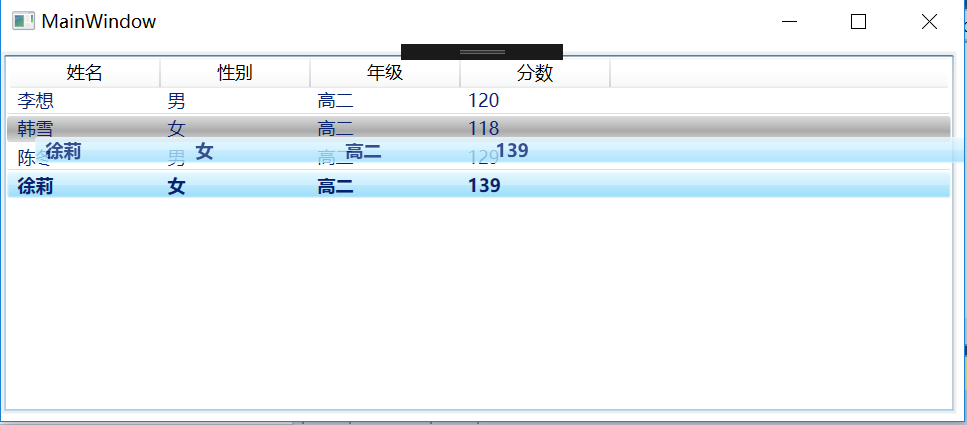
图二 示例二截图
二 重点原理分析
2.1 前台代码分析
这一部分的前台代码比较简单就是在ListView中嵌套GridView对象,然后为当前对象绑定数据源,这里比较简单不再赘述。
<Window x:Class="ListViewDragDemo.MainWindow"
        xmlns="http://schemas.microsoft.com/winfx/2006/xaml/presentation"
        xmlns:x="http://schemas.microsoft.com/winfx/2006/xaml"
        xmlns:d="http://schemas.microsoft.com/expression/blend/2008"
        xmlns:mc="http://schemas.openxmlformats.org/markup-compatibility/2006"
        xmlns:local="clr-namespace:ListViewDragDemo"
        xmlns:util="clr-namespace:ListViewDragDemo.Utils"
        mc:Ignorable="d"
        Title="MainWindow" Height="350" Width="525">
    <Window.Resources>
        <Style x:Key="ItemContStyle" TargetType="ListViewItem">
            <Style.Resources>
                <LinearGradientBrush x:Key="MouseOverBrush" StartPoint="0.5, 0" EndPoint="0.5, 1">
                    <GradientStop Color="#22000000" Offset="0" />
                    <GradientStop Color="#44000000" Offset="0.4" />
                    <GradientStop Color="#55000000" Offset="0.6" />
                    <GradientStop Color="#33000000" Offset="0.9" />
                    <GradientStop Color="#22000000" Offset="1" />
                </LinearGradientBrush>
            </Style.Resources>
            <Setter Property="Padding" Value="0,8" />
            <Setter Property="HorizontalContentAlignment" Value="Stretch" />
            <Setter Property="Border.BorderThickness" Value="0,0,0,0.5" />
            <Setter Property="Border.BorderBrush" Value="LightGray" />
            <Style.Triggers>
                <Trigger Property="util:ListViewItemDragState.IsBeingDragged" Value="True">
                    <Setter Property="FontWeight" Value="DemiBold" />
                </Trigger>
                <Trigger Property="util:ListViewItemDragState.IsUnderDragCursor" Value="True">
                    <Setter Property="Background" Value="{StaticResource MouseOverBrush}" />
                </Trigger>
            </Style.Triggers>
        </Style>
    </Window.Resources>
    <Grid>
        <Border Background="#eee" Padding="2" Margin="0 5 5 5">
            <DockPanel>
                <ListView x:Name="ListViewCtl" ItemsSource="{Binding Students}" ItemContainerStyle="{StaticResource ItemContStyle}" SelectionMode="Single">
                    <ListView.View>
                        <GridView>
                            <GridViewColumn Header="姓名" DisplayMemberBinding="{Binding Name}" Width="100"/>
                            <GridViewColumn Header="性别" DisplayMemberBinding="{Binding Sex}" Width="100"/>
                            <GridViewColumn Header="年级" DisplayMemberBinding="{Binding Grade}" Width="100" />
                            <GridViewColumn Header="分数" DisplayMemberBinding="{Binding Score}" Width="100"/>
                        </GridView>
                    </ListView.View>
                </ListView>
            </DockPanel>
        </Border>
    </Grid>
</Window>
2.1 后台代码分析
这一部分涉及到的内容比较多,所采用的方法也有所不同,需要进行比较,然后深化对知识的理解。
这一个示例与之前的示例的不同之处主要在于:1 不再使用QueryContinueDrag事件来更新当前的Adorner对象的位置,而在DragOver和DragEnter事件中去更新Adorner的位置。 2 获取当前ListViewItem的方式不再使用VisualTreeHelper.HitTest方法来进行获取。 3 Adorner对象中采用不同的重载方法来实现位置的更新操作。下面就这些区别来一一进行说明。
2.1.1 为当前的ListView订阅事件
     public ListView ListView
        {
            get { return listView; }
            set
            {
                if (this.IsDragInProgress)
                    throw new InvalidOperationException("Cannot set the ListView property during a drag operation.");

                if (this.listView != null)
                {
                    #region Unhook Events

                    this.listView.PreviewMouseLeftButtonDown -= listView_PreviewMouseLeftButtonDown;
                    this.listView.PreviewMouseMove -= listView_PreviewMouseMove;
                    this.listView.DragOver -= listView_DragOver;
                    this.listView.DragLeave -= listView_DragLeave;
                    this.listView.DragEnter -= listView_DragEnter;
                    this.listView.Drop -= listView_Drop;

                    #endregion // Unhook Events
                }

                this.listView = value;

                if (this.listView != null)
                {
                    if (!this.listView.AllowDrop)
                        this.listView.AllowDrop = true;

                    #region Hook Events

                    this.listView.PreviewMouseLeftButtonDown += listView_PreviewMouseLeftButtonDown;
                    this.listView.PreviewMouseMove += listView_PreviewMouseMove;
                    this.listView.DragOver += listView_DragOver;
                    this.listView.DragLeave += listView_DragLeave;
                    this.listView.DragEnter += listView_DragEnter;
                    this.listView.Drop += listView_Drop;

                    #endregion // Hook Events
                }
            }
        }
注意在订阅这些方法之前先取消订阅,避免重复进行事件的订阅,这个是非常好的一个习惯。
2.1.2 具体事件分析
首先我们看一看PreviewMouseLeftButtonDown这个事件,这个主要是进行一些初始化的操作。首先要获取到当前鼠标位置处的ListViewItem的序号Index,采取的方法时查看当前鼠标的位置是否在ListView的某一个Item的范围之内,这里使用了VisualTreeHelper.GetDescendantBounds这个方法来获取元素的边界位置然后再判断当前鼠标位置是否位于此边界之内,通过这种方式来获取当前拖动的Index值。
void listView_PreviewMouseLeftButtonDown(object sender, MouseButtonEventArgs e)
        {
            if (this.IsMouseOverScrollbar)
            {
                //Set the flag to false when cursor is over scrollbar.
                this.canInitiateDrag = false;
                return;
            }

            int index = this.IndexUnderDragCursor;
            Debug.WriteLine(string.Format("this.IndexUnderDragCursor:{0}", index.ToString()));
            this.canInitiateDrag = index > -1;

            if (this.canInitiateDrag)
            {
                // Remember the location and index of the ListViewItem the user clicked on for later.
                this.ptMouseDown = MouseUtilities.GetMousePosition(this.listView);
                this.indexToSelect = index;
            }
            else
            {
                this.ptMouseDown = new Point(-10000, -10000);
                this.indexToSelect = -1;
            }
        }

int IndexUnderDragCursor
        {
            get
            {
                int index = -1;
                for (int i = 0; i < this.listView.Items.Count; ++i)
                {
                    ListViewItem item = this.GetListViewItem(i);
                    if (this.IsMouseOver(item))
                    {
                        index = i;
                        break;
                    }
                }
                return index;
            }
        }

  bool IsMouseOver(Visual target)
        {
            // We need to use MouseUtilities to figure out the cursor
            // coordinates because, during a drag-drop operation, the WPF
            // mechanisms for getting the coordinates behave strangely.

            Rect bounds = VisualTreeHelper.GetDescendantBounds(target);
            Point mousePos = MouseUtilities.GetMousePosition(target);
            return bounds.Contains(mousePos);
        }
下一步就是在PreviewMouseMove事件中获取ListViewItem,添加Adorner,然后再启动拖放操作,这个过程和上面的示例中一样,初始化AdornerLayer的过程在InitializeAdornerLayer这个函数中进行,主要是在当前的ListView的的AdornerLayer层添加拖拽的Adorner对象。
AdornerLayer InitializeAdornerLayer(ListViewItem itemToDrag)
        {
            // Create a brush which will paint the ListViewItem onto
            // a visual in the adorner layer.
            VisualBrush brush = new VisualBrush(itemToDrag);

            // Create an element which displays the source item while it is dragged.
            this.dragAdorner = new DragAdorner(this.listView, itemToDrag.RenderSize, brush);

            // Set the drag adorner's opacity.
            this.dragAdorner.Opacity = this.DragAdornerOpacity;

            AdornerLayer layer = AdornerLayer.GetAdornerLayer(this.listView);
            layer.Add(dragAdorner);

            // Save the location of the cursor when the left mouse button was pressed.
            this.ptMouseDown = MouseUtilities.GetMousePosition(this.listView);

            return layer;
        }
这里面的重点是DragAdorner这个类,这个当前的拖拽的对象,我们也就此分析一下。
public class DragAdorner : Adorner
    {
        #region Data

        private Rectangle child = null;
        private double offsetLeft = 0;
        private double offsetTop = 0;
        #endregion // Data

        #region Constructor

        /// <summary>
        /// Initializes a new instance of DragVisualAdorner.
        /// </summary>
        /// <param name="adornedElement">The element being adorned.</param>
        /// <param name="size">The size of the adorner.</param>
        /// <param name="brush">A brush to with which to paint the adorner.</param>
        public DragAdorner(UIElement adornedElement, Size size, Brush brush)
            : base(adornedElement)
        {
            Rectangle rect = new Rectangle();
            rect.Fill = brush;
            rect.Width = size.Width;
            rect.Height = size.Height;
            rect.IsHitTestVisible = false;
            this.child = rect;
        }

        #endregion // Constructor

        #region Public Interface

        #region GetDesiredTransform

        /// <summary>
        /// Override.
        /// </summary>
        /// <param name="transform"></param>
        /// <returns></returns>
        public override GeneralTransform GetDesiredTransform(GeneralTransform transform)
        {
            GeneralTransformGroup result = new GeneralTransformGroup();
            result.Children.Add(base.GetDesiredTransform(transform));
            result.Children.Add(new TranslateTransform(this.offsetLeft, this.offsetTop));
            return result;
        }

        #endregion // GetDesiredTransform

        #region OffsetLeft

        /// <summary>
        /// Gets/sets the horizontal offset of the adorner.
        /// </summary>
        public double OffsetLeft
        {
            get { return this.offsetLeft; }
            set
            {
                this.offsetLeft = value;
                UpdateLocation();
            }
        }

        #endregion // OffsetLeft

        #region SetOffsets

        /// <summary>
        /// Updates the location of the adorner in one atomic operation.
        /// </summary>
        /// <param name="left"></param>
        /// <param name="top"></param>
        public void SetOffsets(double left, double top)
        {
            this.offsetLeft = left;
            this.offsetTop = top;
            this.UpdateLocation();
        }

        #endregion // SetOffsets

        #region OffsetTop

        /// <summary>
        /// Gets/sets the vertical offset of the adorner.
        /// </summary>
        public double OffsetTop
        {
            get { return this.offsetTop; }
            set
            {
                this.offsetTop = value;
                UpdateLocation();
            }
        }

        #endregion // OffsetTop

        #endregion // Public Interface

        #region Protected Overrides

        /// <summary>
        /// Override.
        /// </summary>
        /// <param name="constraint"></param>
        /// <returns></returns>
        protected override Size MeasureOverride(Size constraint)
        {
            this.child.Measure(constraint);
            return this.child.DesiredSize;
        }

        /// <summary>
        /// Override.
        /// </summary>
        /// <param name="finalSize"></param>
        /// <returns></returns>
        protected override Size ArrangeOverride(Size finalSize)
        {
            this.child.Arrange(new Rect(finalSize));
            return finalSize;
        }

        /// <summary>
        /// Override.
        /// </summary>
        /// <param name="index"></param>
        /// <returns></returns>
        protected override Visual GetVisualChild(int index)
        {
            return this.child;
        }

        /// <summary>
        /// Override.  Always returns 1.
        /// </summary>
        protected override int VisualChildrenCount
        {
            get { return 1; }
        }

        #endregion // Protected Overrides

        #region Private Helpers

        private void UpdateLocation()
        {
            AdornerLayer adornerLayer = this.Parent as AdornerLayer;
            if (adornerLayer != null)
                adornerLayer.Update(this.AdornedElement);
        }

        #endregion // Private Helpers
    }
在这里面我们不再是重写基类的OnRender这个函数而是采用重写GetDesiredTransform来实现当前的DragAdorner位置随着鼠标的变化而变化的,这里需要注意的是要重写基类的GetVisualChild(int index)这个方法和VisualChildrenCount这个属性,否则程序会无法执行。在解释了这一部分之后就重点来讲述DragEnter、DragOver、DragLeave和Drop这几个函数了,这几个是整个拖拽过程的重点。
首先是DragEnter,这个当鼠标移入进去的时候会触发此事件,主要是来更新当前DragAdorner的显示状态,DragLeave事件是当当前拖拽的对象移出整个ListView的时候会使DragAdorner不显示。DragOver是一个比较重要的事件,主要是进行两方面的工作,一个是在拖拽时更新当前Adorner的位置,另外就是获取新的鼠标位置处的ListViewItem对象,这个是最后执行Drop事件的最重要的准备工作,有了这些操作,那么最后一步就是调换拖拽的源和目标处的ListViewItem,从而最终完成拖拽操作。
其实对比两个示例的过程,很多地方都有相似的地方,关键是把整个过程弄清楚,这样无论是从一个控件拖拽到另外一个控件上还是从一个控件的一个项拖到这个控件的另外一个项上都可以实现。
最后请点击此处获得整个工程的源码!