第十三章:网络
网络
Qt 6自带丰富的C++ 网络工具类。有一些高级的类,如在HTTP协议层的请求响应模型的QNetworkRequest,QNetworkReply以及QNetworkAccessManager。也有一些底层的类,如在TCP/IP 和UDP协议层的QTcpSocket、QTcpServer以及QUdpSocket。还有一些管理协议,网络缓存以及系统网络配置的一些类。
本章不是关于C++ 网络,而是关于Qt Quick和网络的。那如何将用户界面直接连接网络服务?或如何通过网络服务来满足用户界面需求?有较好的书籍和教程函盖 Qt/C++ 的网络编程。那么阅读有关 C++ 集成的章节就仅是一种方式,以此来想出一个集成层来将数据提供给 Qt Quick 。
请务必搭建并运行相关示例代码,参照完整代码来理解本章,否则仅凭文章中列出的部分代码会难以完成本章的学习。同理也适用于其它章节。
通过HTTP服务为UI获取数据
通过HTTP加载一个简单的用户界面,需要一个web服务,由此服务提供出UI内容。从使用简单的python one-liner简单服务器开始。但首先我们需要有一个演示用户界面。为此,我们在多种文件夹中创建一个小文件RemoteComponent.qml,里面定义一个红色矩形框。
// RemoteComponent.qml
import QtQuick

Rectangle {
    width: 320
    height: 320
    color: '#ff0000'
}
执行一小段python脚本来启动服务,可以访问上面的文件。
cd <PROJECT>
python -m http.server 8080现在,文件可以通过http://localhost:8080/RemoteComponent.qml 来访问了。可以测试如下:
curl http://localhost:8080/RemoteComponent.qml可仅在浏览器中访问上面的地址。浏览器不懂QML也无法渲染文档。
幸好,Qt 6提供了一种以qml的形式的浏览器。可能通过以下方式直接加载远程QML文档。
qml http://localhost:8080/RemoteComponent.qml简单又贴心。
注意
如果qml命令没有在系统路径设置,可以在Qt的文件库中找到:<qt-install-path>/<qt-version>/<your-os>/bin/qml
另一种引入远程QML文档的方法是使用(本地)QML来动态加载。为此,我们使用Loader来为我们检索远程文档。
// LocalHostExample.qml
import QtQuick

Loader {
    id: root
    source: 'http://localhost:8080/RemoteComponent.qml'
    onLoaded: {
        root.width = root.item.width  // qmllint disable
        root.height = root.item.height  // qmllint disable
    }
}现在,我们就可以让qml命令来执行加载本地的LocalHostExample.qml,通过它再加载远程的文档。
qml LocalHostExample.qml注意
如果不想运行本地服务程序,也可以通过GitHub来使用gist服务。gist是一个类似在线剪切板的服务,就象Pastebin或其它同类服务。可以https://gist.github.com 来访问。我在下面https://gist.github.com/jryannel/7983492 创建了这个gist的小例子。它会显示一个绿色小框。因为gist的URL将会为浏览器提供HTML编码,所以需要在URL后面添加/raw来检索原始文件而不是HTML代码。
// GistExample.qml
import QtQuick

Loader {
    id: root
    source: 'https://gist.github.com/jryannel/7983492/raw'
    onLoaded: {
        root.width = root.item.width  // qmllint disable
        root.height = root.item.height  // qmllint disable
    }
}想从RemoteComponent.qml来通过网络加载另一个文件,需要在服务端的相同文件路径下创建一个专门的qmldir文件。完成后,就可以通过名称来引用组件了。
联网组件
一起来做个小实验。在服务端添加一个可重用的小按钮。
我们的文件结构如下:
./src/SimpleExample.qml
./src/remote/qmldir
./src/remote/Button.qml
./src/remote/RemoteComponent.qmlSimpleExample.qml文件与之前的main.qml例子一样:
import QtQuick

Loader {
    id: root
    anchors.fill: parent
    source: 'http://localhost:8080/RemoteComponent.qml'
    onLoaded: {
        root.width = root.item.width  // qmllint disable
        root.height = root.item.height  // qmllint disable
    }
}在Remote文件夹下,我们将修改RemoteComponent.qml,其会使用自定义的Button控件。
// remote/RemoteComponent.qml
import QtQuick

Rectangle {
    width: 320
    height: 320
    color: '#ff0000'

    Button {
        anchors.centerIn: parent
        text: qsTr('Click Me')
        onClicked: Qt.quit()
    }
}因为控件是远程部署,QML引擎需要知道哪些远程控件可用。这样,就远程文件夹qmldir内定义控件。
# qmldir
Button 1.0 Button.qml最后我们来定义一个虚拟的Button.qml文件。
// remote/Button.qml
import QtQuick.Controls

Button {

}现在可以浏览服务端(注意现在已经有一个remote子文件夹了):
cd src/serve-qml-networked-components/
python -m http.server --directory ./remote 8080
远程加载QML:
qml SimpleExample.qml引入QML组件路径
通过定义qmldir文件,也就能够直接从远程的库里导入一个组件了。可以导入一个类:
import QtQuick
import "http://localhost:8080" as Remote

Rectangle {
    width: 320
    height: 320
    color: 'blue'

    Remote.Button {
        anchors.centerIn: parent
        text: qsTr('Quit')
        onClicked: Qt.quit()
    }
}
注意
当使用本地文件的组件时,它们会被无延迟地立即创建。当通过网络远程加载组件时,它们是异步创建的。这种情况下创建的时间是不确定的,这会出现组件还没完全加载完成时,其它的内容已经完成了。当通过网络来加载组件时要考虑到这种情况的影响。
另外,本章中的例子及文件结构是基于Linux下的。Windows用户自行转换。
还有,如果在本地用python启动服务时提示‘No module named http’,将python替换为python3就可以了。
模板
做HTML项目时经常使用模板驱动开发。在服务器端用服务器使用模板机制生成的代码扩展一个小的HTML存根。例如,对于照片列表,列表标题将使用 HTML 编码,动态图像列表将使用模板机制动态生成。一般来说,使用 QML 也可以这样完成,但它存在一些问题。
首先,没有必要。HTML开发者这么做的原因是为了解决HTML后端的限制。在HTML里没有组件模型,所以使用这样的机制或客户端的JS脚本编程来实现动态的方面。很多JS框架(jQuery, dojo, backbone, angular, …)就是因此而诞生的,在浏览器客户端实现更多的逻辑以连接网络服务。客户端可以使用Web服务API (比如,提供 JSON 或 XML 数据)来与服务端交流。这(指访问服务端服务来获取数据)对于QML来说似乎也是更好的方法。
第二个问题是来自 QML 的组件缓存。当 QML 访问一个组件时,它会缓存渲染树并加载缓存的版本进行渲染。如果不重启客户端,本地或远程的修改后的模型将不会被发现。需要用点技巧来解决这个问题。可以使用URL参数段来加载URL(如 http://localhost:8080/main.qml#1234),这里的‘#1234’ 就是URL参数段。HTTP服务总提供相同的文档,但QML将会使用整个URL(包括参数段)来缓存文档。每次访问URL时,参数段需要重新生成,这样QML才不会取到缓存值。参数段可以是当前以毫秒格式时间或随机数。
Loader {
    source: 'http://localhost:8080/main.qml#' + new Date().getTime()
}
总的来说,模板可以使用,但真的不推荐,因其没有发挥QML的真正能力。较好的实现方式是使用提供JSON或XML格式数据的web服务。
HTTP请求
Qt中一个HTTP请求的典型流程是通过C++ 端的QNetworkRequest和QNetworkReply来发起,然后Qt中的C++ 部分将响应内容推给QML呈现。因此,我们尝试在这里稍微突破一下,以使用 Qt Quick 为我们提供的当前工具与网络端点进行通信。为此,使用一个工具类来实现HTTP的请求发起与响应接收。它以javascript 的XMLHttpRequest对象的形式来实现。
XMLHttpRequest对象允许用户注册一个响应处理函数和一个URL(来处理响应)。请求可以以HTTP动作(get, post, put, delete, …)来发出请求。当接收到响应时会触发处理函数调用。每次请求状态变化(比如请求头已到达或请求已完成),处理函数都被调用。
下面是个小例子:
function request() {
    var xhr = new XMLHttpRequest();
    xhr.onreadystatechange = function() {
        if (xhr.readyState === XMLHttpRequest.HEADERS_RECEIVED) {
            print('HEADERS_RECEIVED');
        } else if(xhr.readyState === XMLHttpRequest.DONE) {
            print('DONE');
        }
    }
    xhr.open("GET", "http://example.com");
    xhr.send();
}
对于响应,能够取得XML格式或原始文本格式。可以遍历XML结果,但当前更推荐使用原生的JSON格式的响应。JSON文档可以通过 JSON.parse(text) 被转换成JS对象。
/* ... */
} else if(xhr.readyState === XMLHttpRequest.DONE) {
    var object = JSON.parse(xhr.responseText.toString());
    print(JSON.stringify(object, null, 2));
}
在响应处理函数中,我们取得响应文本并转换成javascript对象。这时的JSON对象是有效的JS对象(javascript中的对象可以是一个object或是一个array)。
注意
看起来先做toString()转换会使得代码更稳定。不做这个显式的转换,我遇到过几次解析错误。不确定是什么导致的。
调用Flicker
Flickr 是雅虎旗下的图片分享网站。
一起来看下实际应用中的一个例子。典型的例子是使用Flicker服务来检索公众新上传的照片。实现这个需求,可以使用http://api.flickr.com/services/feeds/photos_public.gne URL。很不走运,它默认返回的是XML文本流,这在qml里可以通过很容易地XmlListModel来解析。对本例来说,我们想聚集于JSON格式数据。想要比较简洁的JSON格式数据,要求我们为请求附加几个参数:
http://api.flickr.com/services/feeds/photos_public.gne?format=json&nojsoncallback=1
这将返回JSON响应,而不用JSON回调。
注意
JSON回调在一个函数调用中包装了JSON响应。通过在script标记里来发起一个JSON请求,这在HTML编程中是较方便的做法。响应将触发由callback定义的本地函数。在QML里没有处理JSON回调的机制。
我们首先通过curl来检查响应:
curl "http://api.flickr.com/services/feeds/photos_public.gne?format=json&nojsoncallback=1&tags=munich"响应大概类似这样:
{
    "title": "Recent Uploads tagged munich",
    ...
    "items": [
        {
        "title": "Candle lit dinner in Munich",
        "media": {"m":"http://farm8.staticflickr.com/7313/11444882743_2f5f87169f_m.jpg"},
        ...
        },{
        "title": "Munich after sunset: a train full of \"must haves\" =",
        "media": {"m":"http://farm8.staticflickr.com/7394/11443414206_a462c80e83_m.jpg"},
        ...
        }
    ]
    ...
}返回的JSON文档有已定义好的结构。一个有title和一个items属性的对象,标题是字符串,而数据项是一个对象数组。当把这些文本转化为JSON文档后,就可以访问各自的入口,因为这已经是一个JS对象/数组的结构了。
// JS code
obj = JSON.parse(response);
print(obj.title) // => "Recent Uploads tagged munich"
for(var i=0; i<obj.items.length; i++) {
    // iterate of the items array entries
    print(obj.items[i].title) // title of picture
    print(obj.items[i].media.m) // url of thumbnail
}
一个有效的 JS 数组,在列表视图中也可以把它的obj.items当成模型来用。我们将试着完成它。首先,需要检索响应,并将其转换为有效的JS对象。然后将response.items属性赋值给列表视图的模型。
function request() {
    const xhr = new XMLHttpRequest()
    xhr.onreadystatechange = function() {
        if (xhr.readyState === XMLHttpRequest.HEADERS_RECEIVED) {
            print('HEADERS_RECEIVED')
        } else if(xhr.readyState === XMLHttpRequest.DONE) {
            print('DONE')
            const response = JSON.parse(xhr.responseText.toString())
            // Set JS object as model for listview
            view.model = response.items
        }
    }
    xhr.open("GET", "http://api.flickr.com/services/feeds/photos_public.gne?format=json&nojsoncallback=1&tags=munich")
    xhr.send()
}
以下是完整的代码,在这里完成组件加载并创建请求。请求的响应结果之后被用于我们简单列表视图的模型。
import QtQuick

Rectangle {
    id: root

    width: 320
    height: 480

    ListView {
        id: view
        anchors.fill: parent
        delegate: Thumbnail {
            required property var modelData
            width: view.width
            text: modelData.title
            iconSource: modelData.media.m
        }
    }

    function request() {
        const xhr = new XMLHttpRequest()
        xhr.onreadystatechange = function() {
            if (xhr.readyState === XMLHttpRequest.HEADERS_RECEIVED) {
                print('HEADERS_RECEIVED')
            } else if(xhr.readyState === XMLHttpRequest.DONE) {
                print('DONE')
                const response = JSON.parse(xhr.responseText.toString())
                // Set JS object as model for listview
                view.model = response.items
            }
        }
        xhr.open("GET", "http://api.flickr.com/services/feeds/photos_public.gne?format=json&nojsoncallback=1&tags=munich")
        xhr.send()
    }

    Component.onCompleted: {
        root.request()
    }
}当文档完成加载(Component.onCompleted),就从Flickr上下载到了最新的内容。收到数据后,检索JSON响应并将items数组赋值给视图的模型。列表视图有委托,它来负责显示缩略图和同处一行的标题。
另外的选项应该是有一个ListModel占位符,将每个项目添加到列表模型。要支持更大的模型,需要用到分页和延迟加载。
本地文件
也可以使用XMLHttpRequest来加载本地(XML/JSON)类型的文件。比如,本地的一个名为"colors.json"文件可以被这样加载:
xhr.open("GET", "colors.json")我们用它来加载一个颜色表并展示为表格。不能从Qt Quick里修改这个文件。想要将数据保存回去,需要一个基于HTTP服务的REST,或为文件访问所做的原生Qt Quick扩展。
import QtQuick

Rectangle {
    width: 360
    height: 360
    color: '#000'

    GridView {
        id: view
        anchors.fill: parent
        cellWidth: width / 4
        cellHeight: cellWidth
        delegate: Rectangle {
            required property var modelData
            width: view.cellWidth
            height: view.cellHeight
            color: modelData.value
        }
    }

    function request() {
        const xhr = new XMLHttpRequest()
        xhr.onreadystatechange = function() {
            if (xhr.readyState === XMLHttpRequest.HEADERS_RECEIVED) {
                print('HEADERS_RECEIVED')
            } else if(xhr.readyState === XMLHttpRequest.DONE) {
                print('DONE')
                const response = JSON.parse(xhr.responseText.toString())
                view.model = response.colors
            }
        }
        xhr.open("GET", "colors.json")
        xhr.send()
    }

    Component.onCompleted: {
        request()
    }
}
注意
QML引擎默认是不允许在一个本地文件上使用 GET的。为了解除这个限制,可以将环境变量QML_XHR_ALLOW_FILE_READ设置为1:
QML_XHR_ALLOW_FILE_READ=1 qml localfiles.qml问题是当允许 QML 应用程序通过
XMLHttpRequest读取本地文件时,XHR会因此打开整个文件系统进行读取,这是一个潜在的安全问题。
除了使用XMLHttpRequest,也可以使用XmlListModel来访问本地文件 。
import QtQuick
import QtQml.XmlListModel

Rectangle {
    width: 360
    height: 360
    color: '#000'

    GridView {
        id: view
        anchors.fill: parent
        cellWidth: width / 4
        cellHeight: cellWidth
        model: xmlModel
        delegate: Rectangle {
            id: delegate
            required property var model
            width: view.cellWidth
            height: view.cellHeight
            color: model.value
            Text {
                anchors.centerIn: parent
                text: delegate.model.name
            }
        }
    }

    XmlListModel {
        id: xmlModel
        source: "colors.xml"
        query: "/colors/color"
        XmlListModelRole { name: 'name'; elementName: 'name' }
        XmlListModelRole { name: 'value'; elementName: 'value' }
    }
}
XmlListModel 仅能读取XML文件而不能读JSON文件。
REST API
要使用web服务,首先需要创建一个。我们将使用Flask(https://flask.palletsprojects.com) ,一个基于pythonr的简单HTTP应用服务,来创建一个简单的颜色服务。你也可以使用其它服务来接收和返回JSON数据。思路是假定有一组可以通过web服务来进行管理的,已命名的颜色。这里,可管理意味着CRUD(create-read-update-delete)。
在Flask,简单的web服务可以写在一个文件里。我们先从server.py文件开始。这个文件里,我们创建代码来从外部JSON文件加载初始颜色。参见Flask快速开始文档。
from flask import Flask, jsonify, request
import json

with open('colors.json', 'r') as file:
    colors = json.load(file)

app = Flask(__name__)
# Services registration & implementation...if __name__ == '__main__':
app.run(debug = True)当运行此脚本,会在http://localhost:5000 创建web服务,但不提供啥有用的服务。
现在就要在我们的服务中加入CRUD (Create,Read,Update,Delete) 服务节点。
Read Request 读取请求
要从web服务中读取数据,需要所有颜色提供GET方法。
@app.route('/colors', methods = ['GET'])
def get_colors():
    return jsonify({ "data" : colors })
这将返回 ‘/colors’ 服务节点下的颜色。可以通过curl来创建一个HTTP请求来测试一下。
curl -i -GET http://localhost:5000/colors这将为我们返回JSON格式的颜色列表。
Read Entry 读取条目
要通过名称来读取单一的颜色,需要提供更详细的节点服务,这个节点将位于/colors/<name>。对节点来讲,名称是参数,由它来确定指定返回的颜色。
@app.route('/colors/<name>', methods = ['GET'])
def get_color(name):
    for color in colors:
        if color["name"] == name:
            return jsonify(color)
    return jsonify({ 'error' : True })
可以再次使用curl来测试一下。比如要获取红色的服务入口。
curl -i -GET http://localhost:5000/colors/red它将返回一个JSON格式的颜色条目数据。
Create Entry 新建条目
目前为止还只用到了 HTTP GET 方法 。在服务端新建一个条目,需要用到POST方法,并将颜色信息给到POST数据。服务节点地址跟获取所有颜色的地址一样,但这次是用POST请求。
@app.route('/colors', methods= ['POST'])
def create_color():
    print('create color')
    color = {
        'name': request.json['name'],
        'value': request.json['value']
    }
    colors.append(color)
    return jsonify(color), 201
curl方法已足够灵活,它允许将新的颜色条目信息以JSON的格式放在POST请求数据里。
curl -i -H "Content-Type: application/json" -X POST -d '{"name":"gray1","value":"#333"}' http://localhost:5000/colorsUpdate Entry 更新条目
要更新一个单独的条目需要用到HTTP 的 PUT 方法。服务节点地址与检索一个颜色的服务地址一样。当颜色更新成功后,我们返回这个已更新颜色的JSON格式数据。
@app.route('/colors/<name>', methods= ['PUT'])
def update_color(name):
    for color in colors:
        if color["name"] == name:
            color['value'] = request.json.get('value', color['value'])
            return jsonify(color)
    return jsonify({ 'error' : True })
在curl请求里,仅需要按照JSON格式提供要更新的数据,后面紧跟一个地址来指定要更新的具体颜色。
curl -i -H "Content-Type: application/json" -X PUT -d '{"value":"#666"}' http://localhost:5000/colors/redDelete Entry 删除条目
删除一个条目是通过使用HTTP 的 DELETE动作来完成的。它也是使用跟检索指定颜色的服务一样的节点地址,但这次是使用DELETE HTTP 动作。
@app.route('/colors/<name>', methods=['DELETE'])
def delete_color(name):
    for color in colors:
        if color["name"] == name:
            colors.remove(color)
            return jsonify(color)
    return jsonify({ 'error' : True })
这跟请求指定颜色的GET请求很相似。
curl -i -X DELETE http://localhost:5000/colors/redHTTP 动作
现在可以检索所有颜色,读取指定颜色,新建一个颜色,更新一个颜色和删除一个颜色。同时,也知道了HTTP的API节点。
# Read All
GET    http://localhost:5000/colors
# Create Entry
POST   http://localhost:5000/colors
# Read Entry
GET    http://localhost:5000/colors/${name}
# Update Entry
PUT    http://localhost:5000/colors/${name}
# Delete Entry
DELETE http://localhost:5000/colors/${name}
现在,REST服务器已经完成了,然后可以聚焦于QML及客户端了。创建简单易用的API需要将每个动作映射给一个单独的HTTP请求,并为用记提供简单的API。
Client REST 客户端的REST请求
为了演示一个REST客户端,我们写了一个小的颜色列表。这个列表展示了使用HTTP请求从服务端检索的颜色。我们的接口提供了以下命令:
- 获取颜色列表
- 新建颜色
- 读取末次颜色
- 更新末次颜色
- 删除最末的颜色
我们将API绑定到名为colorservice.js的JS文件中,并以Service导入UI。在服务模块(colorservice.js),我们创建一个函数来为我们生成HTTP请求:
function request(verb, endpoint, obj, cb) {
    print('request: ' + verb + ' ' + BASE + (endpoint ? '/' + endpoint : ''))
    var xhr = new XMLHttpRequest()
    xhr.onreadystatechange = function() {
        print('xhr: on ready state change: ' + xhr.readyState)
        if(xhr.readyState === XMLHttpRequest.DONE) {
            if(cb) {
                var res = JSON.parse(xhr.responseText.toString())
                cb(res)
            }
        }
    }
    xhr.open(verb, BASE + (endpoint ? '/' + endpoint : ''))
    xhr.setRequestHeader('Content-Type', 'application/json')
    xhr.setRequestHeader('Accept', 'application/json')
    var data = obj ? JSON.stringify(obj) : ''
    xhr.send(data)
}它接收4个参数。verb定义了请求的HTTP动作(GET, POST, PUT, DELETE)。第二个参数是相对于基地址后辍的节点地址 (e.g. ‘http://localhost:5000/colors ’)。第三个参数是可选的,是将传给服务的JSON数据。最末的参数定义了当返回响应时调用的回调函数。在发送请求前,要通过修改请求头来指明请求和接收JSON格式的数据。
使用这个请求帮助函数,可以实现我们之前定义的简单命令(create, read, update, delete)。以下是服务实现中的代码。
function getColors(cb) {
    // GET http://localhost:5000/colors
    request('GET', null, null, cb)
}

function createColor(entry, cb) {
    // POST http://localhost:5000/colors
    request('POST', null, entry, cb)
}

function getColor(name, cb) {
    // GET http://localhost:5000/colors/${name}
    request('GET', name, null, cb)
}

function updateColor(name, entry, cb) {
    // PUT http://localhost:5000/colors/${name}
    request('PUT', name, entry, cb)
}

function deleteColor(name, cb) {
    // DELETE http://localhost:5000/colors/${name}
    request('DELETE', name, null, cb)
}在UI里我们使用这个服务来实现命令。有一个id为gridModel的ListModel列表模型,为视图GridView来提供数据。使用UI元素Button来确认命令。
直接引入服务:
import "colorservice.js" as Service从服务端读取颜色列表:
Button {
    text: 'Read Colors'
    onClicked: {
        Service.getColors(function(response) {
            print('handle get colors response: ' + JSON.stringify(response))
            gridModel.clear()
            const entries = response.data
            for(let i=0; i<entries.length; i++) {
                gridModel.append(entries[i])
            }
        })
    }
}
在服务端新建一个颜色条目:
Button {
    text: 'Create New'
    onClicked: {
        const index = gridModel.count - 1
        const entry = {
            name: 'color-' + index,
            value: Qt.hsla(Math.random(), 0.5, 0.5, 1.0).toString()
        }
        Service.createColor(entry, function(response) {
            print('handle create color response: ' + JSON.stringify(response))
            gridModel.append(response)
        })
    }
}
以颜色名来请求一个颜色:
Button {
    text: 'Read Last Color'
    onClicked: {
        const index = gridModel.count - 1
        const name = gridModel.get(index).name
        Service.getColor(name, function(response) {
            print('handle get color response:' + JSON.stringify(response))
            message.text = response.value
        })
    }
}
在服务器上基于名称来更新颜色条目:
Button {
    text: 'Update Last Color'
    onClicked: {
        const index = gridModel.count - 1
        const name = gridModel.get(index).name
        const entry = {
            value: Qt.hsla(Math.random(), 0.5, 0.5, 1.0).toString()
        }
        Service.updateColor(name, entry, function(response) {
            print('handle update color response: ' + JSON.stringify(response))
            gridModel.setProperty(gridModel.count - 1, 'value', response.value)
        })
    }
}
通过颜色名称删除颜色:
Button {
    text: 'Delete Last Color'
    onClicked: {
        const index = gridModel.count - 1
        const name = gridModel.get(index).name
        Service.deleteColor(name)
        gridModel.remove(index, 1)
    }
}
使用REST API实现的CRUD (create, read, update, delete) 至此结束。还有其它方法来生成web服务API。可以是基于模块的,每个模块有一个服务节点。而API可以使用JSON RPC来定义(http://www.jsonrpc.org/) 。当然基于XML的API也是可以的,但JSON方式更有优势,因为JSON解析已经作为JavaScript的一部分内建到了QML/JS里。
使用OAuth进行身份验证
OAuth是一个允许安全认证的协议,该授权认证来自web、移动端和桌面应用程序的简单和标准的方法。OAuth用于针对常见的web服务(如Google, Facebook, and Twitter)进行客户端验证的。
注意
对于自定义的web服务,也可以使用标准的HTTP验证,比如在get方法中通过XMLHttpRequest请求用户名和密码(如,xhr.open(verb, url, true, username, password))
OAuth 目前还不是QML/JS API的一部分。所以你需要写一点C++ 代码,并导出来给QML/JS。另外一个问题是访问token的存储。
以下是一些有用的链接:
- http://oauth.net/
- http://hueniverse.com/oauth/
- https://github.com/pipacs/o2
- http://www.johanpaul.com/blog/2011/05/oauth2-explained-with-qt-quick/
集成案例
本节,将完成一个使用Spotify API集成OAuth的例子,这个例子混合使用了 C++ 类和QML/JS。关于更多集成细节,参考《Qt C++ 》一章。
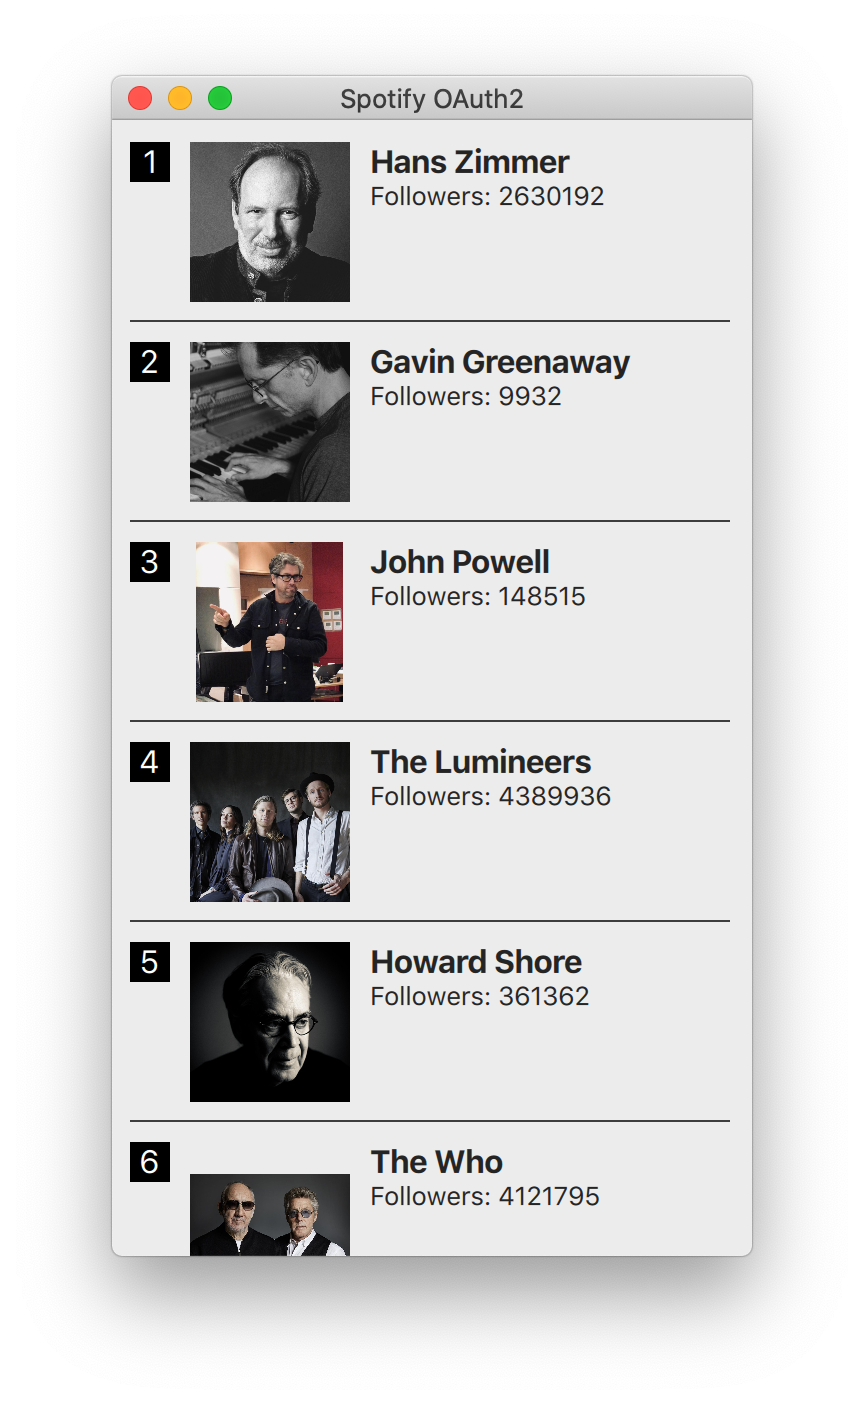
此应用程序的目标是向经过身份验证的用户展示检索最受欢迎的前十位艺术家。
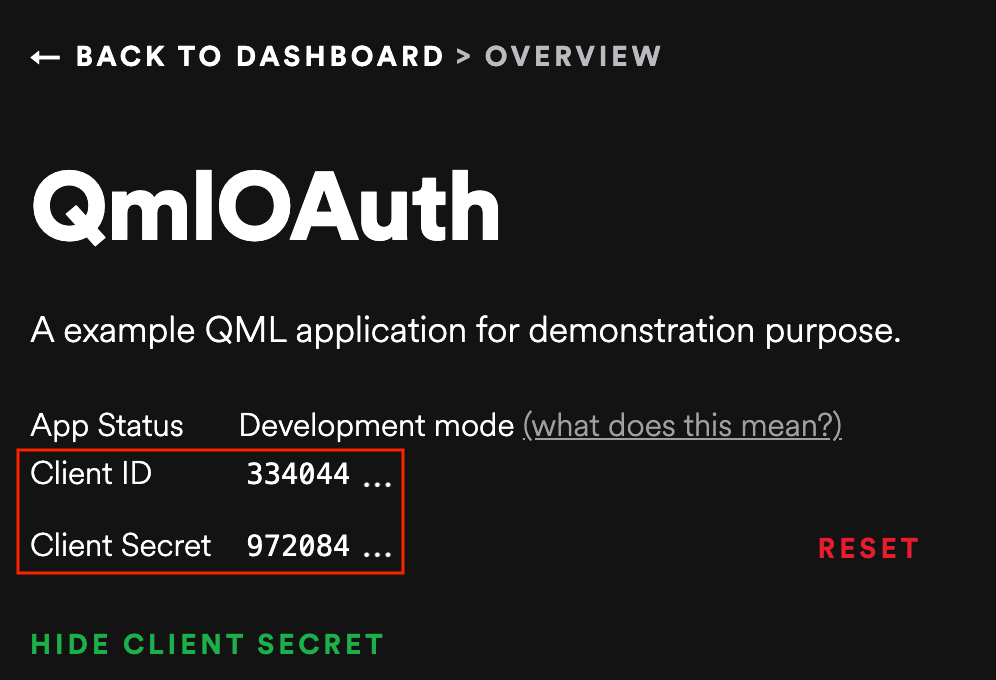
创建App
首先, 你要在Spotify Developer's portal创建一个专用的app。
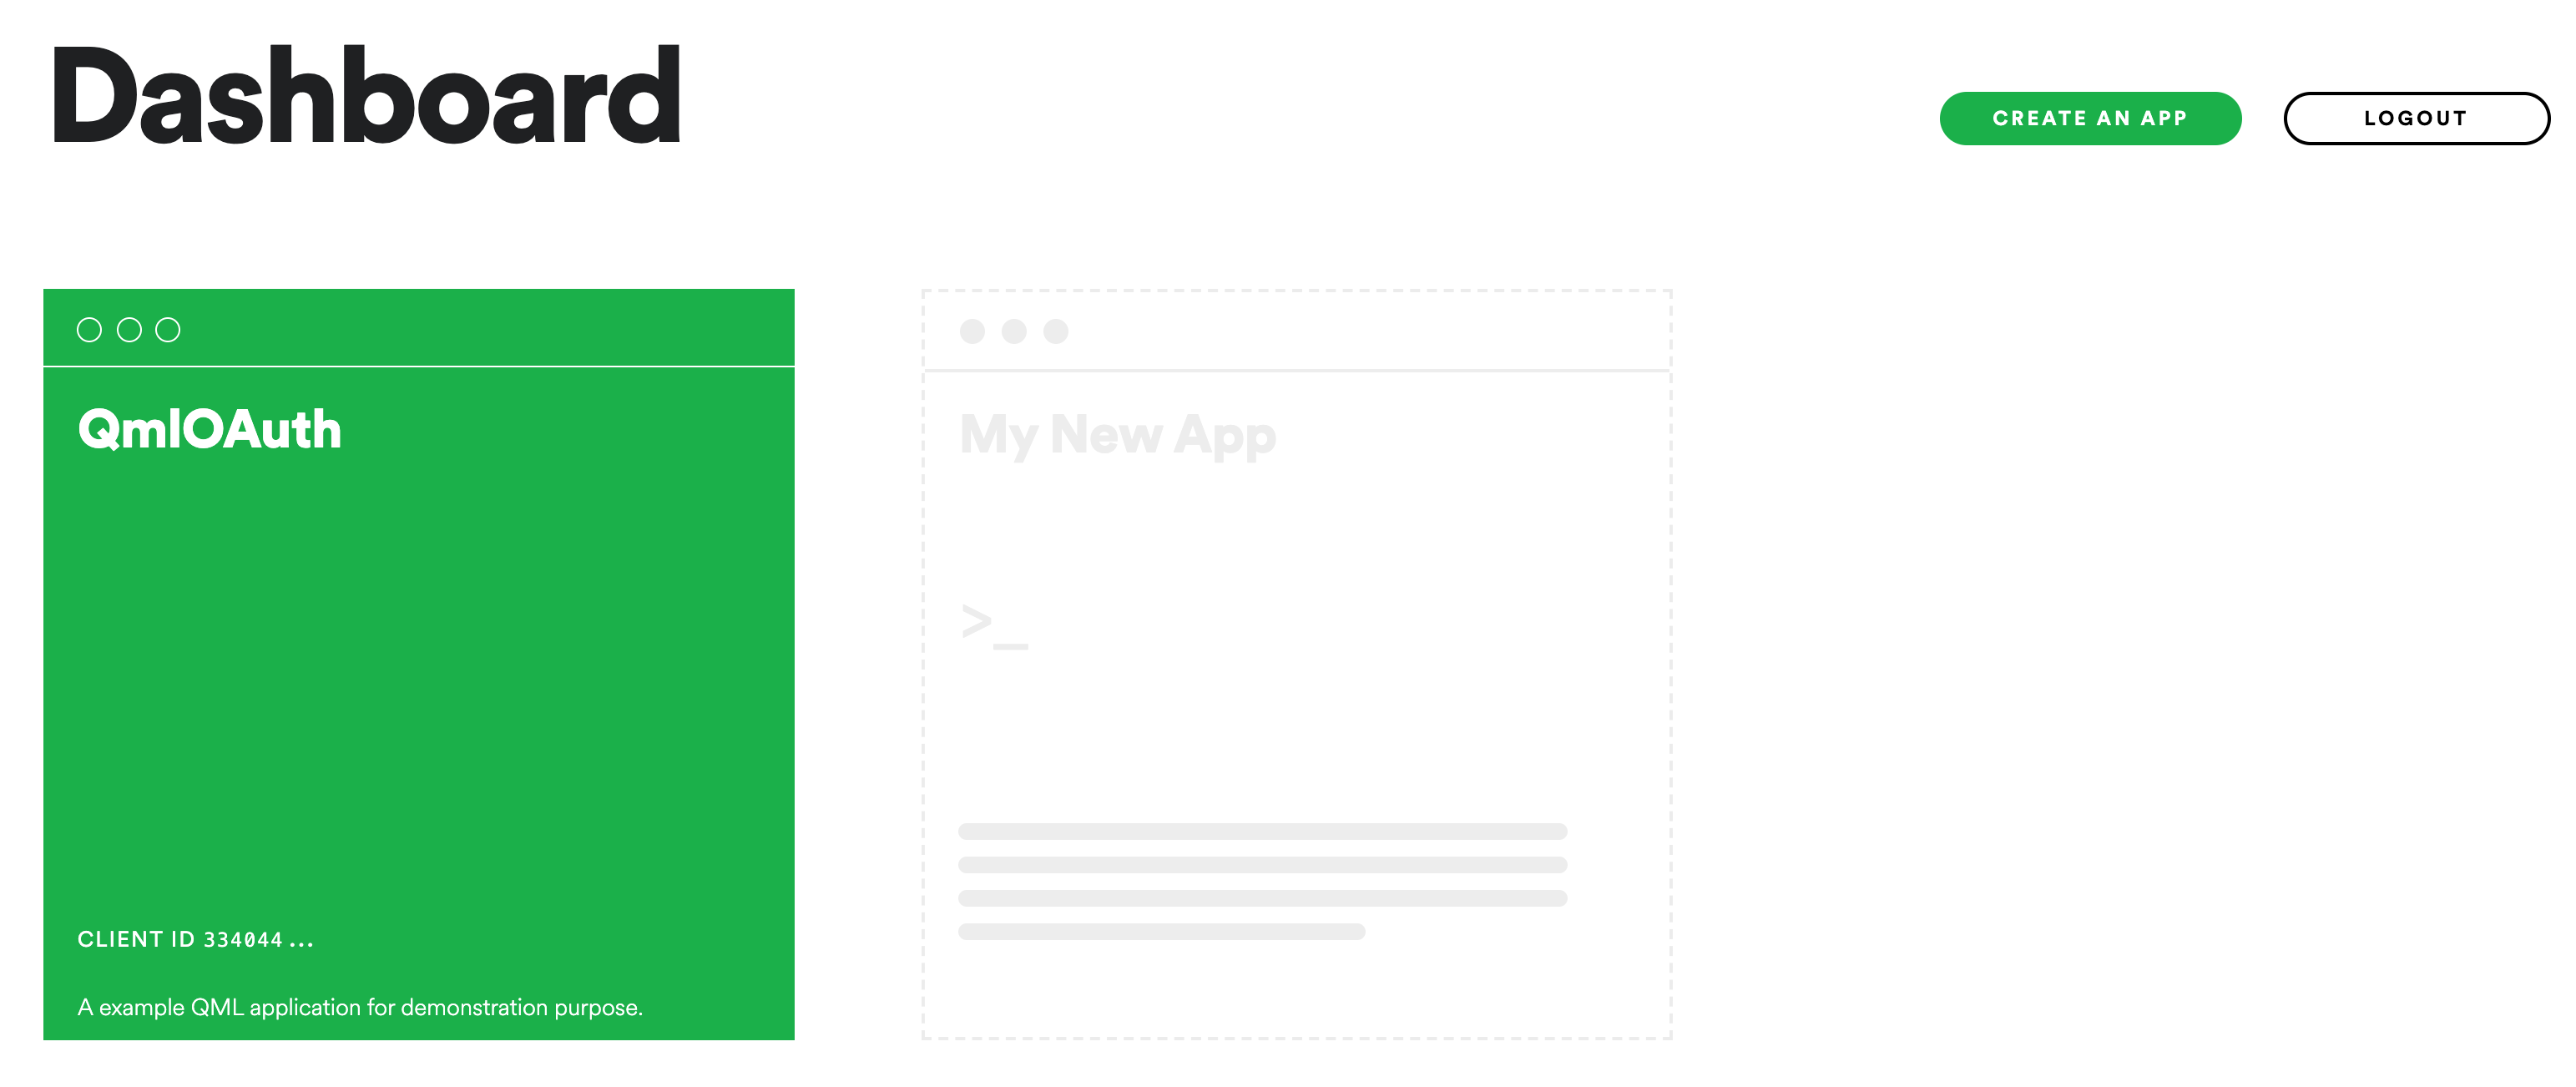
应用建好后,会收到两个关键字:一个client id和一个client secret。
QML 文件
这一过程分为两个阶段:
1、应用程序连接到 Spotify API,后者又请求用户对其进行授权
2、如查授权成功,应用程序显示用户最喜欢的前十位艺术家的列表。
应用授权
一起来实现第一步:
import QtQuick
import QtQuick.Window
import QtQuick.Controls

import Spotify应用启动时,首先导入客户库Spotify,它定义了SpotifyAPI组件(后面会用到)。这个组件接着被实例化:
ApplicationWindow {
    width: 320
    height: 568
    visible: true
    title: qsTr("Spotify OAuth2")

    BusyIndicator {
        visible: !spotifyApi.isAuthenticated
        anchors.centerIn: parent
    }

    SpotifyAPI {
        id: spotifyApi
        onIsAuthenticatedChanged: if(isAuthenticated) spotifyModel.update()
}一旦应用被加载,SpotifyAPI组件将会请求对Spotify一个授权:
Component.onCompleted: {
    spotifyApi.setCredentials("CLIENT_ID", "CLIENT_SECRET")
    spotifyApi.authorize()
}
一个忙着加载的图标会在应用的正中间显示,直到授权完成。
注意
请注意,安全起见,API 凭证永远不应直接放在QML文件中。
列出最受欢迎的艺术家
当被给予授权后,就会开始下一步。要显示艺术家列表,会用到模型/视图/委托模式:
SpotifyModel {
    id: spotifyModel
    spotifyApi: spotifyApi
}

ListView {
    visible: spotifyApi.isAuthenticated
    width: parent.width
    height: parent.height
    model: spotifyModel
    delegate: Pane {
        id: delegate
        required property var model
        topPadding: 0
        Column {
            width: 300
            spacing: 10

            Rectangle {
                height: 1
                width: parent.width
                color: delegate.model.index > 0 ? "#3d3d3d" : "transparent"
            }

            Row {
                spacing: 10

                Item {
                    width: 20
                    height: width

                    Rectangle {
                        width: 20
                        height: 20
                        anchors.top: parent.top
                        anchors.right: parent.right
                        color: "black"

                        Label {
                            anchors.centerIn: parent
                            font.pointSize: 16
                            text: delegate.model.index + 1
                            color: "white"
                        }
                    }
                }

                Image {
                    width: 80
                    height: width
                    source: delegate.model.imageURL
                    fillMode: Image.PreserveAspectFit
                }

                Column {
                    Label {
                        text: delegate.model.name
                        font.pointSize: 16
                        font.bold: true
                    }
                    Label { text: "Followers: " + delegate.model.followersCount }
                }
            }
        }
    }
}模型SpotifyModel在Spotify库中定义。要正常运行,需要SpotifyAPI。
列表视图显示艺术家的竖向列表。呈现的艺术家信息由名称、照片和粉丝数组成。
SpotifyAPI
现在一起深入身份验证流程。先聚焦于SpotifyAPI类,在C++ 端定义的一个QML_ELEMENT。
#ifndef SPOTIFYAPI_H
#define SPOTIFYAPI_H

#include <QtCore>
#include <QtNetwork>
#include <QtQml/qqml.h>

#include <QOAuth2AuthorizationCodeFlow>

class SpotifyAPI: public QObject
{
    Q_OBJECT
    QML_ELEMENT

    Q_PROPERTY(bool isAuthenticated READ isAuthenticated WRITE setAuthenticated NOTIFY isAuthenticatedChanged)

public:
    SpotifyAPI(QObject *parent = nullptr);

    void setAuthenticated(bool isAuthenticated) {
        if (m_isAuthenticated != isAuthenticated) {
            m_isAuthenticated = isAuthenticated;
            emit isAuthenticatedChanged();
        }
    }

    bool isAuthenticated() const {
        return m_isAuthenticated;
    }

    QNetworkReply* getTopArtists();

public slots:
    void setCredentials(const QString& clientId, const QString& clientSecret);
    void authorize();

signals:
    void isAuthenticatedChanged();

private:
    QOAuth2AuthorizationCodeFlow m_oauth2;
    bool m_isAuthenticated;
};

#endif // SPOTIFYAPI_H首先,引入<QOAuth2AuthorizationCodeFlow>类。本类是QtNetworkAuth模块的一部分,它包括OAuth的各种实现。
#include <QOAuth2AuthorizationCodeFlow>我们定义的类SpotifyAPI,会定义一个isAuthenticated属性:
Q_PROPERTY(bool isAuthenticated READ isAuthenticated WRITE setAuthenticated NOTIFY isAuthenticatedChanged)还有在QML文件中要用到的两个公有槽:
void setCredentials(const QString& clientId, const QString& clientSecret);
void authorize();
还有一个代表认证流的私有成员:
QOAuth2AuthorizationCodeFlow m_oauth2;在C++ 实现文件中,代码如下:
#include "spotifyapi.h"

#include <QtGui>
#include <QtCore>
#include <QtNetworkAuth>

SpotifyAPI::SpotifyAPI(QObject *parent): QObject(parent), m_isAuthenticated(false) {
    m_oauth2.setAuthorizationUrl(QUrl("https://accounts.spotify.com/authorize"));
    m_oauth2.setAccessTokenUrl(QUrl("https://accounts.spotify.com/api/token"));
    m_oauth2.setScope("user-top-read");

    m_oauth2.setReplyHandler(new QOAuthHttpServerReplyHandler(8000, this));
    m_oauth2.setModifyParametersFunction([&](QAbstractOAuth::Stage stage, QMultiMap<QString, QVariant> *parameters) {
        if(stage == QAbstractOAuth::Stage::RequestingAuthorization) {
            parameters->insert("duration", "permanent");
        }
    });

    connect(&m_oauth2, &QOAuth2AuthorizationCodeFlow::authorizeWithBrowser, &QDesktopServices::openUrl);
    connect(&m_oauth2, &QOAuth2AuthorizationCodeFlow::statusChanged, [=](QAbstractOAuth::Status status) {
        if (status == QAbstractOAuth::Status::Granted) {
            setAuthenticated(true);
        } else {
            setAuthenticated(false);
        }
    });
}

void SpotifyAPI::setCredentials(const QString& clientId, const QString& clientSecret) {
    m_oauth2.setClientIdentifier(clientId);
    m_oauth2.setClientIdentifierSharedKey(clientSecret);
}

void SpotifyAPI::authorize() {
    m_oauth2.grant();
}

QNetworkReply* SpotifyAPI::getTopArtists() {
    return m_oauth2.get(QUrl("https://api.spotify.com/v1/me/top/artists?limit=10"));
}
构造函数的主要任务是完成认证流的配置。首先,我们定义将用作身份验证器的 Spotify API 路由。
m_oauth2.setAuthorizationUrl(QUrl("https://accounts.spotify.com/authorize"));
m_oauth2.setAccessTokenUrl(QUrl("https://accounts.spotify.com/api/token"));
然后选择想要使用(Spotify 授权)的范围:
m_oauth2.setScope("user-top-read");既然OAuth是双路通讯进程,我们实例化一个专用的本地服务来处理响应:
m_oauth2.setReplyHandler(new QOAuthHttpServerReplyHandler(8000, this));最后,配置两个信号和槽。
connect(&m_oauth2, &QOAuth2AuthorizationCodeFlow::authorizeWithBrowser, &QDesktopServices::openUrl);
connect(&m_oauth2, &QOAuth2AuthorizationCodeFlow::statusChanged, [=](QAbstractOAuth::Status status) { /* ... */ })
第一个将授权配置为在 Web 浏览器中进行(通过 &QDesktopServices::openUrl),而第二个确保在授权过程完成时通知我们。
authorize()方法仅是接下来要调用的认证流中的grant()函数的占位符。这是触发认证流的函数。
void SpotifyAPI::authorize() {
    m_oauth2.grant();
}最后,getTopArtists()方法使用网络管理组件m_oauth2提供的授权上下文来调用web api。
QNetworkReply* SpotifyAPI::getTopArtists() {
    return m_oauth2.get(QUrl("https://api.spotify.com/v1/me/top/artists?limit=10"));
}
Spotify 模型
这个QML_ELEMENT类是QAbstractListModel的子类,代表了艺术家列表。经依赖于SpotifyAPI从远端服务节点收集的艺术家信息。
#ifndef SPOTIFYMODEL_H
#define SPOTIFYMODEL_H

#include <QtCore>

#include "spotifyapi.h"

QT_FORWARD_DECLARE_CLASS(QNetworkReply)

class SpotifyModel : public QAbstractListModel
{
    Q_OBJECT
    QML_ELEMENT

    Q_PROPERTY(SpotifyAPI* spotifyApi READ spotifyApi WRITE setSpotifyApi NOTIFY spotifyApiChanged)

public:
    SpotifyModel(QObject *parent = nullptr);

    void setSpotifyApi(SpotifyAPI* spotifyApi) {
        if (m_spotifyApi != spotifyApi) {
            m_spotifyApi = spotifyApi;
            emit spotifyApiChanged();
        }
    }

    SpotifyAPI* spotifyApi() const {
        return m_spotifyApi;
    }

    enum {
        NameRole = Qt::UserRole + 1,
        ImageURLRole,
        FollowersCountRole,
        HrefRole,
    };

    QHash<int, QByteArray> roleNames() const override;

    int rowCount(const QModelIndex &parent) const override;
    int columnCount(const QModelIndex &parent) const override;
    QVariant data(const QModelIndex &index, int role) const override;

signals:
    void spotifyApiChanged();
    void error(const QString &errorString);

public slots:
    void update();

private:
    QPointer<SpotifyAPI> m_spotifyApi;
    QList<QJsonObject> m_artists;
};

#endif // SPOTIFYMODEL_H这个类定义了spotifyApi属性:
Q_PROPERTY(SpotifyAPI* spotifyApi READ spotifyApi WRITE setSpotifyApi NOTIFY spotifyApiChanged)还定义了一个角色枚举(作为每个QAbstractListModel):
enum {
    NameRole = Qt::UserRole + 1,    // The artist's name
    ImageURLRole,                   // The artist's image
    FollowersCountRole,             // The artist's followers count
    HrefRole,                       // The link to the artist's page
};
一个槽来触发艺术家列表刷新:
public slots:
    void update();
当然还有一个艺术家列表,代表JSON对象:
private:
    QList<QJsonObject> m_artists;
类的实现部分,有如下代码:
#include "spotifymodel.h"

#include <QtCore>
#include <QtNetwork>

SpotifyModel::SpotifyModel(QObject *parent): QAbstractListModel(parent) {}

QHash<int, QByteArray> SpotifyModel::roleNames() const {
    static const QHash<int, QByteArray> names {
        { NameRole, "name" },
        { ImageURLRole, "imageURL" },
        { FollowersCountRole, "followersCount" },
        { HrefRole, "href" },
    };
    return names;
}

int SpotifyModel::rowCount(const QModelIndex &parent) const {
    Q_UNUSED(parent);
    return m_artists.size();
}

int SpotifyModel::columnCount(const QModelIndex &parent) const {
    Q_UNUSED(parent);
    return m_artists.size() ? 1 : 0;
}

QVariant SpotifyModel::data(const QModelIndex &index, int role) const {
    Q_UNUSED(role);
    if (!index.isValid())
        return QVariant();

    if (role == Qt::DisplayRole || role == NameRole) {
        return m_artists.at(index.row()).value("name").toString();
    }

    if (role == ImageURLRole) {
        const auto artistObject = m_artists.at(index.row());
        const auto imagesValue = artistObject.value("images");

        Q_ASSERT(imagesValue.isArray());
        const auto imagesArray = imagesValue.toArray();
        if (imagesArray.isEmpty())
            return "";

        const auto imageValue = imagesArray.at(0).toObject();
        return imageValue.value("url").toString();
    }

    if (role == FollowersCountRole) {
        const auto artistObject = m_artists.at(index.row());
        const auto followersValue = artistObject.value("followers").toObject();
        return followersValue.value("total").toInt();
    }

    if (role == HrefRole) {
        return m_artists.at(index.row()).value("href").toString();
    }

    return QVariant();
}

void SpotifyModel::update() {
    if (m_spotifyApi == nullptr) {
        emit error("SpotifyModel::error: SpotifyApi is not set.");
        return;
    }

    auto reply = m_spotifyApi->getTopArtists();

    connect(reply, &QNetworkReply::finished, [=]() {
        reply->deleteLater();
        if (reply->error() != QNetworkReply::NoError) {
            emit error(reply->errorString());
            return;
        }

        const auto json = reply->readAll();
        const auto document = QJsonDocument::fromJson(json);

        Q_ASSERT(document.isObject());
        const auto rootObject = document.object();
        const auto artistsValue = rootObject.value("items");

        Q_ASSERT(artistsValue.isArray());
        const auto artistsArray = artistsValue.toArray();
        if (artistsArray.isEmpty())
            return;

        beginResetModel();
        m_artists.clear();
        for (const auto artistValue : qAsConst(artistsArray)) {
            Q_ASSERT(artistValue.isObject());
            m_artists.append(artistValue.toObject());
        }
        endResetModel();
    });
}update()方法调用了getTopArtists()方法来处理响应,它从JSON文档中提取每个项,并刷新模型中的艺术家列表。
auto reply = m_spotifyApi->getTopArtists();

connect(reply, &QNetworkReply::finished, [=]() {
    reply->deleteLater();
    if (reply->error() != QNetworkReply::NoError) {
        emit error(reply->errorString());
        return;
    }

    const auto json = reply->readAll();
    const auto document = QJsonDocument::fromJson(json);

    Q_ASSERT(document.isObject());
    const auto rootObject = document.object();
    const auto artistsValue = rootObject.value("items");

    Q_ASSERT(artistsValue.isArray());
    const auto artistsArray = artistsValue.toArray();
    if (artistsArray.isEmpty())
        return;

    beginResetModel();
    m_artists.clear();
    for (const auto artistValue : qAsConst(artistsArray)) {
        Q_ASSERT(artistValue.isObject());
        m_artists.append(artistValue.toObject());
    }
    endResetModel();
});data()函数根据请求的模型角色,提取艺术家的相关属性并作为QVariant返回:
    if (role == Qt::DisplayRole || role == NameRole) {
        return m_artists.at(index.row()).value("name").toString();
    }

    if (role == ImageURLRole) {
        const auto artistObject = m_artists.at(index.row());
        const auto imagesValue = artistObject.value("images");

        Q_ASSERT(imagesValue.isArray());
        const auto imagesArray = imagesValue.toArray();
        if (imagesArray.isEmpty())
            return "";

        const auto imageValue = imagesArray.at(0).toObject();
        return imageValue.value("url").toString();
    }

    if (role == FollowersCountRole) {
        const auto artistObject = m_artists.at(index.row());
        const auto followersValue = artistObject.value("followers").toObject();
        return followersValue.value("total").toInt();
    }

    if (role == HrefRole) {
        return m_artists.at(index.row()).value("href").toString();
    }
Web Sockets
WebSockets 模块为 WebSockets 客户端和服务器提供了 WebSockets 协议的实现。它映射了 Qt CPP 模块。它允许通过全双式模式来发送字符和二进制数据。一个WebSocket一般先向服务器发起一个HTTP连接请求,服务端将连接升级为WebSocket连接,通过这种来建立起来的。
在Qt/QML也可以直接使用WebSocket和WebSocketServer对象来创建WebSocket连接。WebSocket协议使用 “ws” URL结构,对于安全连接使用“wss” 结构。
要使用web socket 的qml模块,要先做以下导入。
import QtWebSockets

WebSocket {
    id: socket
}
WS 服务
WS取自Web Socket的首字母。使用Qt WebSocket在C++ 端可以轻易创建自已的WS服务,也可以使用另外一种比较有意思的实现方式。有趣之处在于它允许将 QML 的惊人渲染质量与扩展的 Web 应用程序服务器连接起来。本例用到的基于Node JS的服务,它使用了ws模块的web socket 。首先要安装node js。然后,创建ws_server文件夹,然后使用包管理器(npm)安装ws包。
该代码将在 NodeJS 中创建一个简单的回显服务器,以将我们的消息回显到我们的 QML 客户端。
cd ws_server
npm install ws
npm工具在本地文件夹下载并安装ws包,以及其它相关依赖的包。
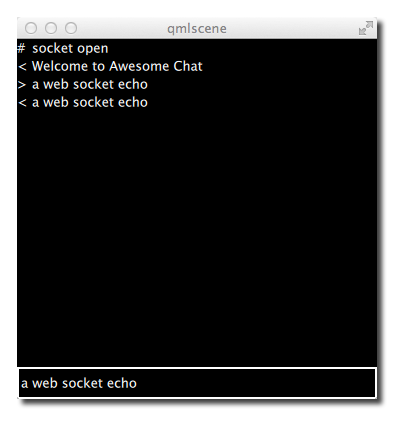
server.js文件将成我们的服务器端实现文件。服务端代码将在端口3000,创建一个web socket服务,并监听接入的请求。当一个连接接入时,它会发现一段致意,并等待客户端信息。通过socket发送的每个客户端信息将会被发回到客户端。
const WebSocketServer = require('ws').Server

const server = new WebSocketServer({ port : 3000 })

server.on('connection', function(socket) {
	console.log('client connected')
	socket.on('message', function(msg) {
		console.log('Message: %s', msg)
		socket.send(msg.toString())
	});
	socket.send('Welcome to Awesome Chat')
});

console.log('listening on port ' + server.options.port)
你要适应JavaScript的写法和回调函数。
WS Client
在客户端我们需要一个列表视图来显示消息,还需要一个TextInput来接收用户输入的聊天信息。
我们将在示例中使用白色标签。
// Label.qml
import QtQuick

Text {
    color: '#fff'
    horizontalAlignment: Text.AlignLeft
    verticalAlignment: Text.AlignVCenter
}聊天视图是个列表视图,文本信息会被添加到列表模型。每个信息条目将是行号前辍加上消息label。我们使用单元格宽度cw因子将with拆分为24列。
// ChatView.qml
import QtQuick

ListView {
    id: root
    width: 100
    height: 62

    model: ListModel {}

    function append(prefix, message) {
        model.append({prefix: prefix, message: message})
    }

    delegate: Row {
        id: delegate

        required property var model
        property real cw: width / 24

        width: root.width
        height: 18

        Label {
            width: delegate.cw * 1
            height: parent.height
            text: delegate.model.prefix
        }

        Label {
            width: delegate.cw * 23
            height: parent.height
            text: delegate.model.message
        }
    }
}
聊天输入框是在简单的文本框外围加上了颜色边框。
// ChatInput.qml
import QtQuick

FocusScope {
    id: root

    property alias text: input.text
    signal accepted(string text)

    width: 240
    height: 32

    Rectangle {
        anchors.fill: parent
        color: '#000'
        border.color: '#fff'
        border.width: 2
    }

    TextInput {
        id: input
        anchors.left: parent.left
        anchors.right: parent.right
        anchors.verticalCenter: parent.verticalCenter
        anchors.leftMargin: 4
        anchors.rightMargin: 4
        color: '#fff'
        focus: true
        onAccepted: function () {
            root.accepted(text)
        }
    }
}
当web socket接收到消息后,它将消息添加到聊天的视图列表。状态变更时也同样处理。此外,当用户输入聊天消息时,副本会附加到客户端的聊天视图中,并将消息发送到服务器。
// ws_client.qml
import QtQuick
import QtWebSockets

Rectangle {
    width: 360
    height: 360
    color: '#000'

    ChatView {
        id: box
        anchors.left: parent.left
        anchors.right: parent.right
        anchors.top: parent.top
        anchors.bottom: input.top
    }

    ChatInput {
        id: input
        anchors.left: parent.left
        anchors.right: parent.right
        anchors.bottom: parent.bottom
        focus: true

        onAccepted: function(text) {
            print('send message: ' + text)
            socket.sendTextMessage(text)
            box.append('>', text)
            text = ''
        }
    }

    WebSocket {
        id: socket

        url: "ws://localhost:3000"
        active: true

        onTextMessageReceived: function (message) {
            box.append('<', message)
        }

        onStatusChanged: {
            if (socket.status == WebSocket.Error) {
                box.append('#', 'socket error ' + socket.errorString)
            } else if (socket.status == WebSocket.Open) {
                box.append('#', 'socket open')
            } else if (socket.status == WebSocket.Closed) {
                box.append('#', 'socket closed')
            }
        }
    }
}
先要运行服务端再运行客户端。这个简例中没有重连机制。
运行服务端
cd ws_server
node server.js
运行客户端
cd ws_client
qml ws_client.qml
当输入文本并按下回车时,将会看到类似如下信息。
总结
关于QML网络的这一章到此结束。请记住,Qt在原生的部分相比QML这部分有更丰富的网络API。但本章的重点是放在QML网络,以及如何与云服务集成的部分。